Tubbutec 6equencer User manual

Tubbutec 6equencer
User manual

Features
•Step-based drum sequencer with 8 instruments
inspired by the TR-606.
•Compatible with analogue and midi-based systems
•16 patterns, chainable in song mode,
up to 32 patterns in a song
•Forward, backward, ping-pong and
random play for patterns and songs
•Mute instruments live
•Probability control of steps
•Record steps by tapping or via midi
•Clear steps while playing
•Pattern length can be set individually
•Copy, Paste and Clear patterns in song mode
•All features can be used while sequences are playing
•8 trigger outputs with adjustable trigger length, midi out
•Analogue or midi clock input with adjustable clock divider
•Multiple 6equencers can be chained to achieve longer
sequences or more instruments.
•Trigger and record via midi in, doubles as midi interface
•Trigger midi instruments via midi out
•Very compact, yet versatile: 3HE * 6HP
, or 1U Intellijel

This page intentionally left blank
(not really blank because this text is here)

Table of contents
Features ............................................................................2
Introduction ....................................................................... 6
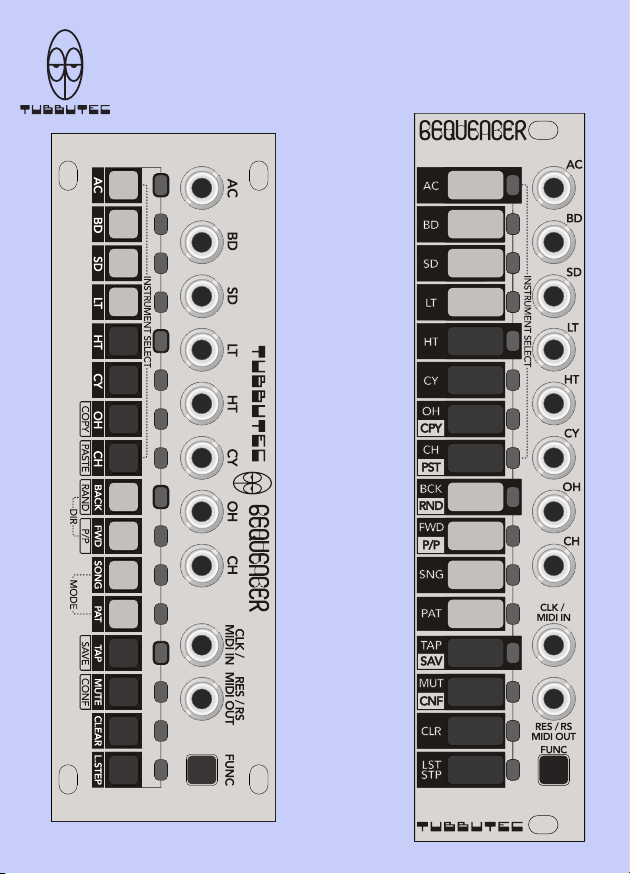
6equencer user interface ................................................... 8
Inputs, outputs and clock .................................................. 9
Pattern view ....................................................................10
Selecting the active instrument ........................................... 10
Programming a pattern ....................................................... 10
Dening the length of a pattern ........................................ 11
Copy and paste in pattern view......................................... 11
Editing and performance features in Pattern View .......... 12
Play directions ................................................................... 12
Recording steps live (TAP) ................................................. 13
CLEAR steps........................................................................ 14
MUTE instruments ............................................................... 14
Probability control ............................................................... 15
Song View.......................................................................16
Changing the current pattern ............................................ 16
Programming a new song.................................................. 17
Copy and paste patterns..................................................... 19
Clear patterns...................................................................... 19
Changing the direction a Song plays .................................. 19
Saving patterns and song................................................ 20
Using 6equencer as a Midi interface...............................20
Output modes and pulse lengths.................................... 21
Accented pulse length ........................................................ 21
LINKing multiple 6equencers .......................................... 22
Serial mode ....................................................................... 22
Parallel mode..................................................................... 23
Combining LINK modes...................................................... 23

Other uses of the LINK interface......................................... 23
Cong menu.................................................................... 24
Cong parameters............................................................. 25
Midi ................................................................................. 27
Midi TRS connectors.......................................................... 27
Midi In ............................................................................... 27
Midi Clock.......................................................................... 28
Midi out ............................................................................. 28
Midi CC ............................................................................. 29
Cheat sheet ..................................................................... 30
6equencer cong menu overview...................................32
1U Version ......................................................................... 32
3U Version ......................................................................... 32
Technical specications
Output trigger / gate voltage 5V
Clock and reset input voltage >= 3.5V
Midi TRS type A
Supply voltage +12V
Supply current 20-40mA
1U Intellijel / 24HP or 3U / 6HP
Printed aluminum panel, 2mm thickness
Depth (not including power connector) 20mm
Weight: 1U: 58g, 3U: 54g

Introduction
Tubbutec 6equencer (pronounced sequencer, sixquencer, or
whatever you prefer) is a TR-606 inspired step sequencer.
It is available in different Eurorack form factors (1U and 3U)
and despite being compact has many powerful features.
6equencer is optimized for live performance and allows
quick programming and editing of drum patterns.
Both analogue clock and triggers as well as midi input and
output are supported.
6equencer has eight instrument channels and is pattern
based. Each pattern can have up to 16 steps and 16 different
patterns can be programmed.
Multiple patterns can be chained to a ‘song’. Each song
consists of up to 32 patterns, a single pattern can occur
multiple times in a song.
Additionally, multiple 6equencer modules can be connected
to form patterns with more than 16 steps or used in parallel
to effectively get more instrument channels. Up to 4
6equencers can be connected for a maximum of 48 steps
per pattern or 32 instrument channels. The connection is
achieved via a ‘LINK’ connector on the back of the module.
Tubbutec 6equencer user manual – page 6

Many features exist to ease pattern programming and live
performance:
Multiple play directions can be selected including a musically
usable random mode.
The user can mute and un-mute instruments with the press
of a button.
The Low Tom and High Tom instruments can be used to
control the probability of other instruments playing.
Steps can be recorded by tapping or via midi input.
Similarly, steps can be cleared while playing.
You can record a new song while another is playing and start
the new song in sync. This allows very exible and intuitive
live performances.
Patterns can also be copied and pasted, allowing the quick
programming of variations.
Patterns and songs can be saved and will be available the
next time you power on the module.
More features are accessible via a cong menu. You can
dene midi channels, pulse lengths, clock mode and more.
This manual contains a detailed description of all features,
followed by a short ‘cheat sheet’.
Tubbutec 6equencer user manual – page 7

6equencer user interface
The 6equencer user interface features 16 buttons with LEDs
and a FUNC button. Each LED can be red, blue or purple.
Typically a blue LED will indicate a mode or setting, while a
red LED will indicate an active step or parameter. When
both, red and blue LEDs are turned on, the resulting color
will be purple. This means both are set (e.g. a step is set and
a parameter is selected).
So when this manual speaks of a red or blue led, it may look
purple depending on which function is selected.
In pattern view, each of the 16 buttons is a specic step, in
song view each is a specic pattern.
By pressing and holding the FUNC button, the other 16
buttons can be used to change modes and settings.
Throughout this document, we will refer to this method as
FUNC + button
Other functions are accessible by pressing FUNC and while
holding it, long-pressing another button (for about a
second).
Throughout this document, we will refer to this method as
FUNC + button (long-press)
Tubbutec 6equencer user manual – page 8

Inputs, outputs and clock
6equencer has 8 instrument outputs, a clock and midi input
and a reset (RES) or run-stop (RS) input or midi output.
The instrument outputs gates or trigger with specic lengths
depending on the settings in the cong menu (see Cong
Menu). They are labelled:
ACcent, BaseDrum, SnareDrum, LowTom
HighTom, CYmbal, OpenHihat and ClosedHihat
They can of course also be used to trigger any instrument or
event (like envelopes, an arpeggiator, or other sequencers).
The ACcent track behaves differently from the rest when
using midi input and output (see Midi). It can also be used to
alter the pulse lengths of other instruments.
6equencer can be clocked using an analogue clock or
trigger or alternatively using a midi clock. The clock source
and midi clock divider can be adjusted in the cong menu.
It is also possible to trigger the instruments via midi directly.
The sequencer can reset on the rising edge of a signal in
RESET mode. Alternatively it can be used in RUN-STOP
mode where the sequencer will only play as long as the
signal at the input is high. This socket also doubles as midi
out and can output instrument data to trigger a midi drum
machine.
Tubbutec 6equencer user manual – page 9

Pattern view
After power on, 6equencer defaults to pattern view. This is
indicated by the PAT led lit up in blue. Pattern view can be
used to program patterns and most live performance tools
are also available here.
Active steps are shown by the red being on.
For inactive steps the red led is off.
When the sequencer is running, the current position is
indicated by a short blink in red if the step is off, or
alternatively if a step is on, the red led briey turns off.
Selecting the active instrument
The currently active instrument is indicated by a blue led.
To change the instrument press FUNC and the instrument
button. Alternatively you can long-press an instrument to
make it active. Once an instrument is selected, the active
steps for that instrument are displayed in red.
Programming a pattern
To set or delete a step, just press the corresponding step.
When a step is activated, the red led lights up.
Tubbutec 6equencer user manual – page 10

Dening the length of a pattern
The length of a pattern can be changed using the last step
function. To access last step mode, press FUNC + LSTEP .
The LSTEP led lights up in blue and the last step of the
pattern is shown in red. Press any button to make it the last
step of the pattern. Press the FUNC button again to exit last
step mode.
Copy and paste in pattern view
It is possible to copy the steps of one instrument and paste
them into another instrument or into another pattern.
It is also possible to copy and paste whole patterns in Song
View (See chapter Song View)
To copy the currently visible steps press FUNC + COPY
(long-press). The COPY led will blink in blue as conrmation.
To paste the copied steps, change to another instrument
and press
FUNC + PASTE (long-press). The PASTE led will blink in
blue as conrmation. You can also switch to another pattern
(see Song View) and paste the steps there.
This can also be used as a performance tool: Copy an
instrument, modify it and later paste the original steps back
in place.
Tubbutec 6equencer user manual – page 11

Editing and performance features in Pattern
View
In Pattern View several performance-oriented features are
available. Some features also ease editing and pattern
programming.
Play directions
Four play directions are available: Forward, Backward, Ping-
Pong and Random.
In each case, the actual play position in a pattern is
memorized, so switching between these modes will not
cause the sequencer to become out of sync.
Pattern changes in song mode also use this underlying
position, so a pattern change always occurs correctly in sync.
Forward and Backward modes are self-explaining.
You can switch between them by pressing FUNC + FWD or
FUNC + BACK .
The Ping-Pong mode alternates between rst playing the
pattern forwards and then playing backwards. The rst and
last step of a pattern is played twice to maintain the correct
pattern length.
Ping-Pong mode can be accessed by pressing FUNC + P/P
(long-press). The P/P led will blink in blue to show Ping-
Pong mode and light up to show Forward mode.
Tubbutec 6equencer user manual – page 12

Random play can be activated by pressing FUNC + RND
(long-press). The led will blink in blue.
The Random play mode does not play the steps in
completely random order, but rather jump in the pattern
based on an algorithm that is optimized to produce
interesting and rhythmically usable results.
The four play directions act on all patterns and are not
saved.
Recording steps live (TAP)
While the sequencer is running, TAP mode can be used to
record steps live.
To enter TAP mode, press FUNC + TAP .
The instrument buttons can now be used to record steps.
When pressing the instrument button, the instrument plays
and the current step is turned on.
If several patterns are connected as a song, recording can be
performed over several patterns.
You can also send an instruments midi notes to 6equencer
when in TAP mode and they will be recorded the same way.
To exit TAP mode, press FUNC again.
Tubbutec 6equencer user manual – page 13

CLEAR steps
While the sequencer is running, press FUNC + CLEAR to
clear the current step of the currently selected instrument.
The mode is immediately deactivated when releasing the
FUNC button.
MUTE instruments
A handy performance tool is the mute mode. Here you can
activate and deactivate instruments while the sequencer is
playing and without modifying the patterns.
To enter MUTE mode, press FUNC + MUTE . The blue
MUTE led will light up.
In mute mode, the 8 instrument’s leds will light up in red
when active, or be off if the instrument is muted. Pressing
each of the instrument’s buttons will switch between the
muted and active states.
Whenever the instruments are triggered, the leds will shortly
ash as additional optical feedback.
The other eight, non-instrument buttons control the
probability (see Probability control).
To exit MUTE mode, press FUNC .
Mute acts on all patterns globally and is not saved.
Tubbutec 6equencer user manual – page 14

Probability control
The LT and HT instruments can be used to control the
probability of other instruments playing or not. You can
select which instruments are affected with the other eight,
non-instrument buttons in the MUTE menu.
Each of these buttons controls the instrument located eight
buttons to the left.
If the leds are off, the instrument’s probability is not altered
and acts normally. If a led is turned on, the instrument will
react to the LT and HT instruments in the following way:
LT HT Probability of the instrument playing
1.00 (100%)
X 0.75 (75%)
X 0.50 (50%)
X X 0.25 (25%)
Where X means a step is set
Probability acts on the LT and HT outputs as well.
The probability settings are saved when saving
via SAVE (long-press).
Tubbutec 6equencer user manual – page 15
MUTE
PROBABILITY

Song View
In Song View you can select patterns for playing and editing,
create songs by chaining patterns, copy and paste patterns
and change the playing direction of the song.
Some performance features are also available here and work
the same way as they do in Pattern View - these are:
TAP ,MUTE and LAST STEP .
In Song View each button/led visualizes one of 16 patterns.
Patterns which are part of the song will light up in red. The
current pattern is shown blinking in red and switching back
to Pattern View will show this pattern.
Changing the pattern that is playing
To instantly change the currently playing pattern, press the
pattern’s button in song mode and release the button again.
The pattern will change instantly while staying in sync.
This will replace any playing song with a song containing one
pattern.
Tubbutec 6equencer user manual – page 16

Programming a new song
There two ways to program new songs:
Song programming method 1
To record a song, select multiple patterns while holding
down at least one pattern button. Patterns will be added to
the song in the order you press them and you can add a
pattern multiple times.
Once you release all buttons the new song is programmed.
After the current pattern is nished playing, the new song
will start in sync.
The patterns used in the song are shown in red, and the
currently playing pattern’s led will be blinking.
Program: With at least one pattern button pressed at any
time:
→→ → → →PAT1 PAT2 PAT3 PAT2 PAT2 …..
Finish: Release all buttons
Tubbutec 6equencer user manual – page 17

Song programming method 2
An alternative song programming mode can be accessed by
pressing only one single pattern button for about a second
and then releasing it.
The SONG and PAT leds will light up in blue to indicate this
mode.
The long-pressed pattern is now the rst pattern of the new
song, and you can add more patterns by pressing their
buttons.
If you are nished recording the song, press FUNC to exit
song recording method 2.
After the current pattern is nished playing, the new song
will start in sync.
The patterns used in the song are shown in red, and the
currently playing pattern’s led will be blinking.
Programming another song
While a song is playing, you can simultaneously program
another one. When recording is nished, the the new song
starts when the current pattern nishes playing.
Songs will always play in a loop – when the last step of the
last pattern is played, the song starts again from the rst
step of the rst pattern.
Tubbutec 6equencer user manual – page 18

Copy and paste patterns
To copy a pattern press FUNC + COPY . COPY lights up in
blue and you can select the pattern you want to copy. By
pressing a pattern button the pattern is copied into memory
and the copy mode is exited. You can also exit copy mode
by pressing FUNC again.
To paste a previously copied pattern into another pattern
slot press FUNC + PASTE . PASTE lights up in blue and you
can paste the previously copied pattern into another pattern
by pressing that pattern’s button. You can continue to paste
the copied pattern into different patterns as long as PASTE
mode is active. Exit PASTE mode by pressing FUNC again.
Clear patterns
In order to clear complete patterns press FUNC + CLEAR
whilst in song mode. CLEAR will blink in blue to indicate
CLEAR mode is active.
To clear a pattern press its button. You can clear multiple
patterns while in CLEAR mode.
To exit CLEAR mode, press FUNC again.
Changing the direction a Song plays
Similar to the play directions in pattern mode, you can also
change the play direction of a song. The song can play
forward, backward ping-pong or randomly, while the pattern
play direction is completely independent and not changed.
Tubbutec 6equencer user manual – page 19

Saving patterns and song
If 6equencer is turned off, the currently programmed
patterns and song is lost unless you manually save it.
To do so, simply press FUNC + SAVE (long-press).
A progress bar in blue will show that the data is saved.
Data can be saved while the sequencer is playing without
performance issues.
When 6equencer is turned on, it will load the previously
saved conguration, patterns and song.
Using 6equencer as a Midi interface
6equencer can also be used as an 8-channel midi interface
to output triggers or gates.
This can simply be achieved by sending Note-On and Note-
Off messages for the instruments (see chapter Midi).
If the Pulse Length setting is set to “Gate”, 6equencer will
react to both Note-On and Note-Off messages, with the
gate staying open from Note-On and closing at Note-Off.
Otherwise it will only react to Note-On messages.
Sending a note with maximum velocity (127) will also trigger
the ACcent channel.
Note that “Clock Mode” must be set to Midi I/O to activate
the midi input.
Tubbutec 6equencer user manual – page 20
Table of contents
Other Tubbutec Synthesizer manuals