1. Leveling Mode: without any input, system automatically corrects the surface to keep airplane in level. When you input the max
control, system will lock the pitch and roll at 45 degree.
2. 3D Mode: accurate stabilization makes 3D maneuvers easier and more accurate
3. Altitude and attitude Mode: Airplane flies at fixed altitude and direction
4. Altitude Mode: Airplane flies at the altitude that you desired.
5. GPS Mode: Airplane flies back to the "Home" point that set at the current altitude. Please you need the keep the throttle on.
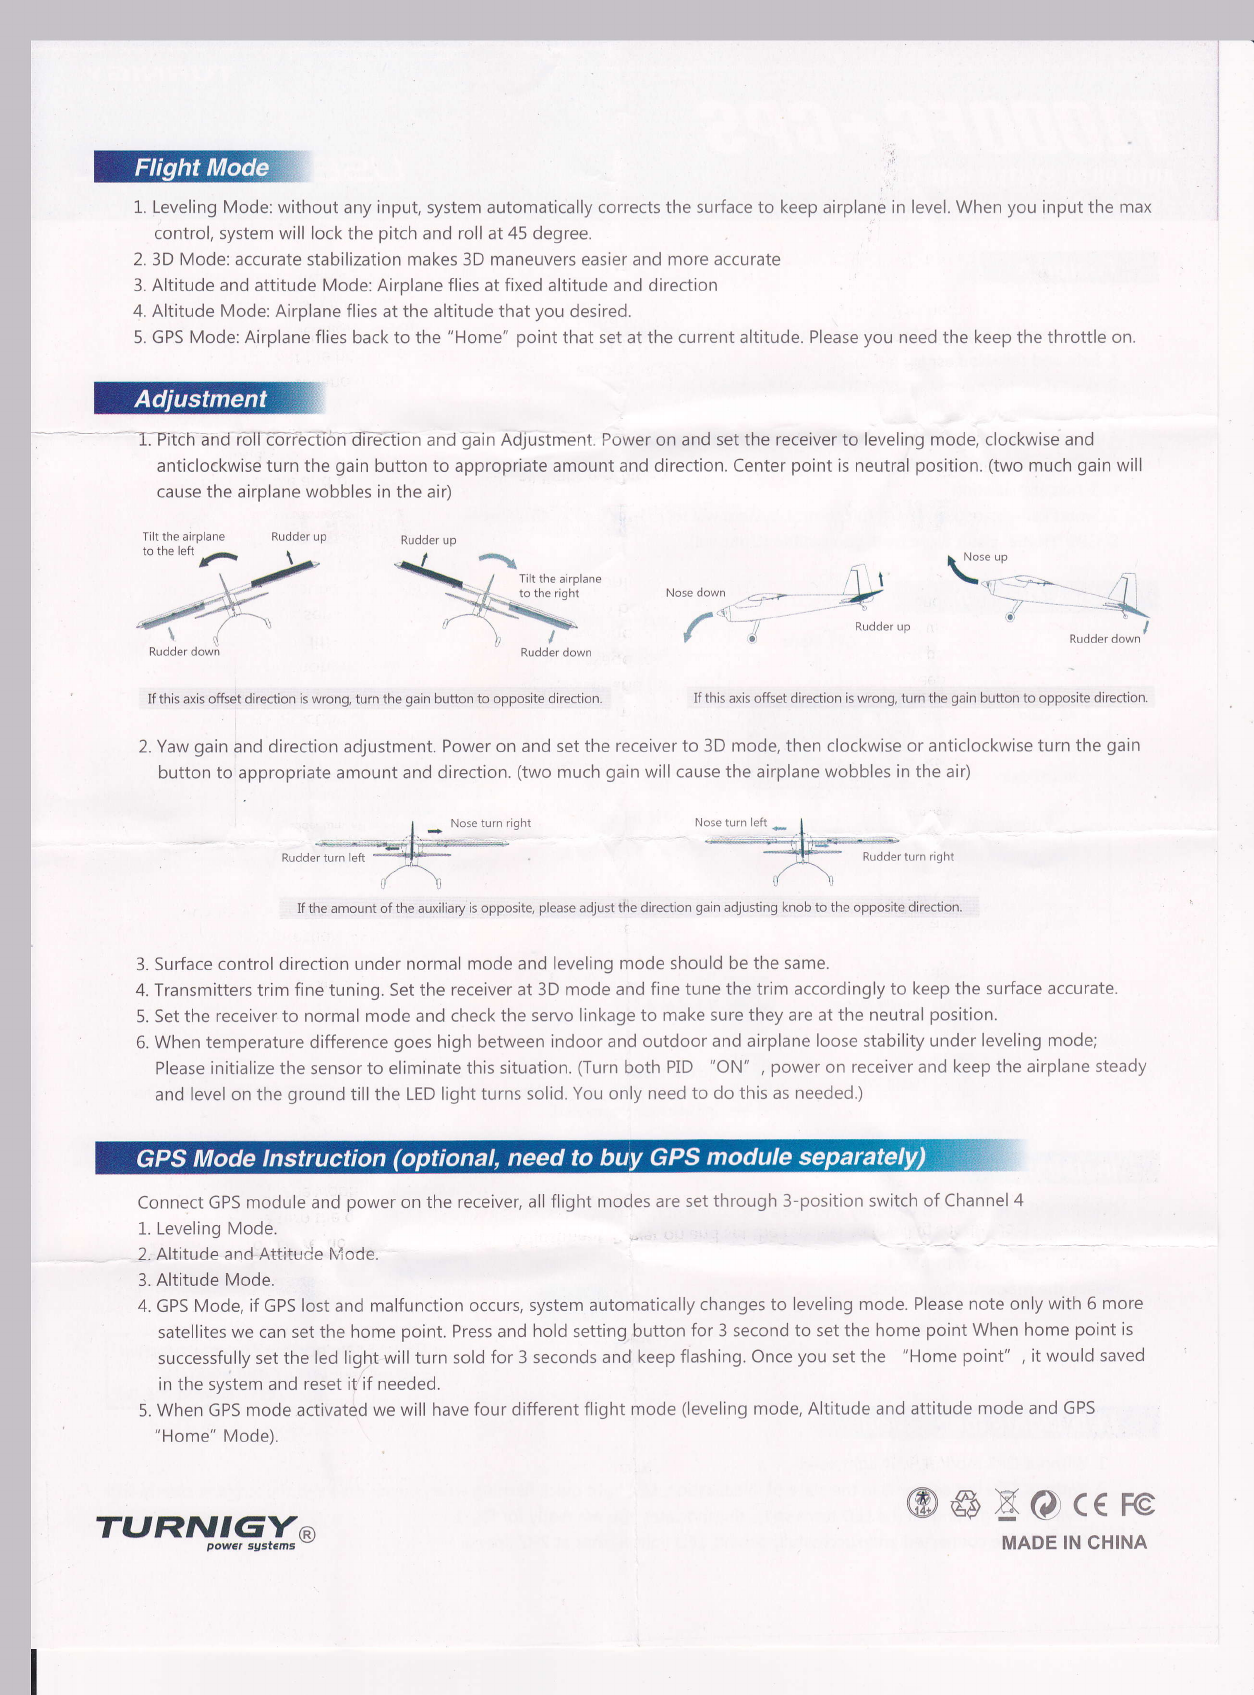
---- TPrtalTahd fdfeorfeeti5n"Afrddtion and Qbin AdJustment. Power on and set the receiver to leveling mode, clockwise and
anticlockwise turn the gain button to appropriate amount and direction. Center point is neutral position. (two much gain will
cause the airplane wobbles in the air)
Rudder up
Rudder up
If this axis offsdt direction is wrong, turn the gain button to opposite direction. If this axis offset direction is wrong, turn the gain button to opposite direction
2. Yaw gain bnd direction adjustment. Power on and set the receiver to 3D mode, then clockwise or anticlockwise turn the gain
button to appropriate amount and direction. (two much gain will cause the airplane wobbles in the air)
Rudder turn right
. If the amount of the,aLixiliary is opposite, please adjust the direction gain adjusting knob to the opposite,direction.
3. Surface control direction under normal mode and leveling mode should be the same.
4. Transmitters trim fine tuning. Set the receiver at 3D mode and fine tune the trim accordingly to keep the surface accurate.
5. Set the receiverto normal mode and check the servo linkage to make sure they are at the neutral position.
6. When temperature difference goes high between indoor and outdoor and airplane loose stability under leveling mode;
Please initialize the sensor to eliminate this situation. (Turn both PID "ON' , power on receiver and keep the airplane steady
and level on the ground till the LED light turns solid. You only need to do this as needed.)
Connect GPS module and power on the receiver, all flight modes are set through 3-position switch of Channel 4
1. Leveling Mode.
2. Aititude andAttituCe tUode.
3. Altitude Mode.
4. GPS Mode, if GPS lost and malfunction occurs, system automatically changes to leveling mode. Please note only with 6 more
satellites we can set the home point. Press and hold setting ,button for 3 second to set the home point When home point is
successfully set the led liOft,will turn sold for 3 seconds and keep flashing. Once you set the "Home point" , it would saved
in the system and reset it/if needed.
5. When GPS mode.activated we will have four different flight mode (leveling mode, Altitude and attitude mode and GPS
"Home" Mode).
@&E@c€F@
Tilt the airplane
to the left ,/e Rudder up
Tilt the airplane
to the right
fLtFfNIGYa
powar sgstans -MADE IN CHINA


