A/C Input- Connects the amplifi er to A/C power via the power cord supplied. Unless otherwise
specifi ed, your amplifi er is designed to operate on 120 volts A/C, 60 cycles, ONLY.
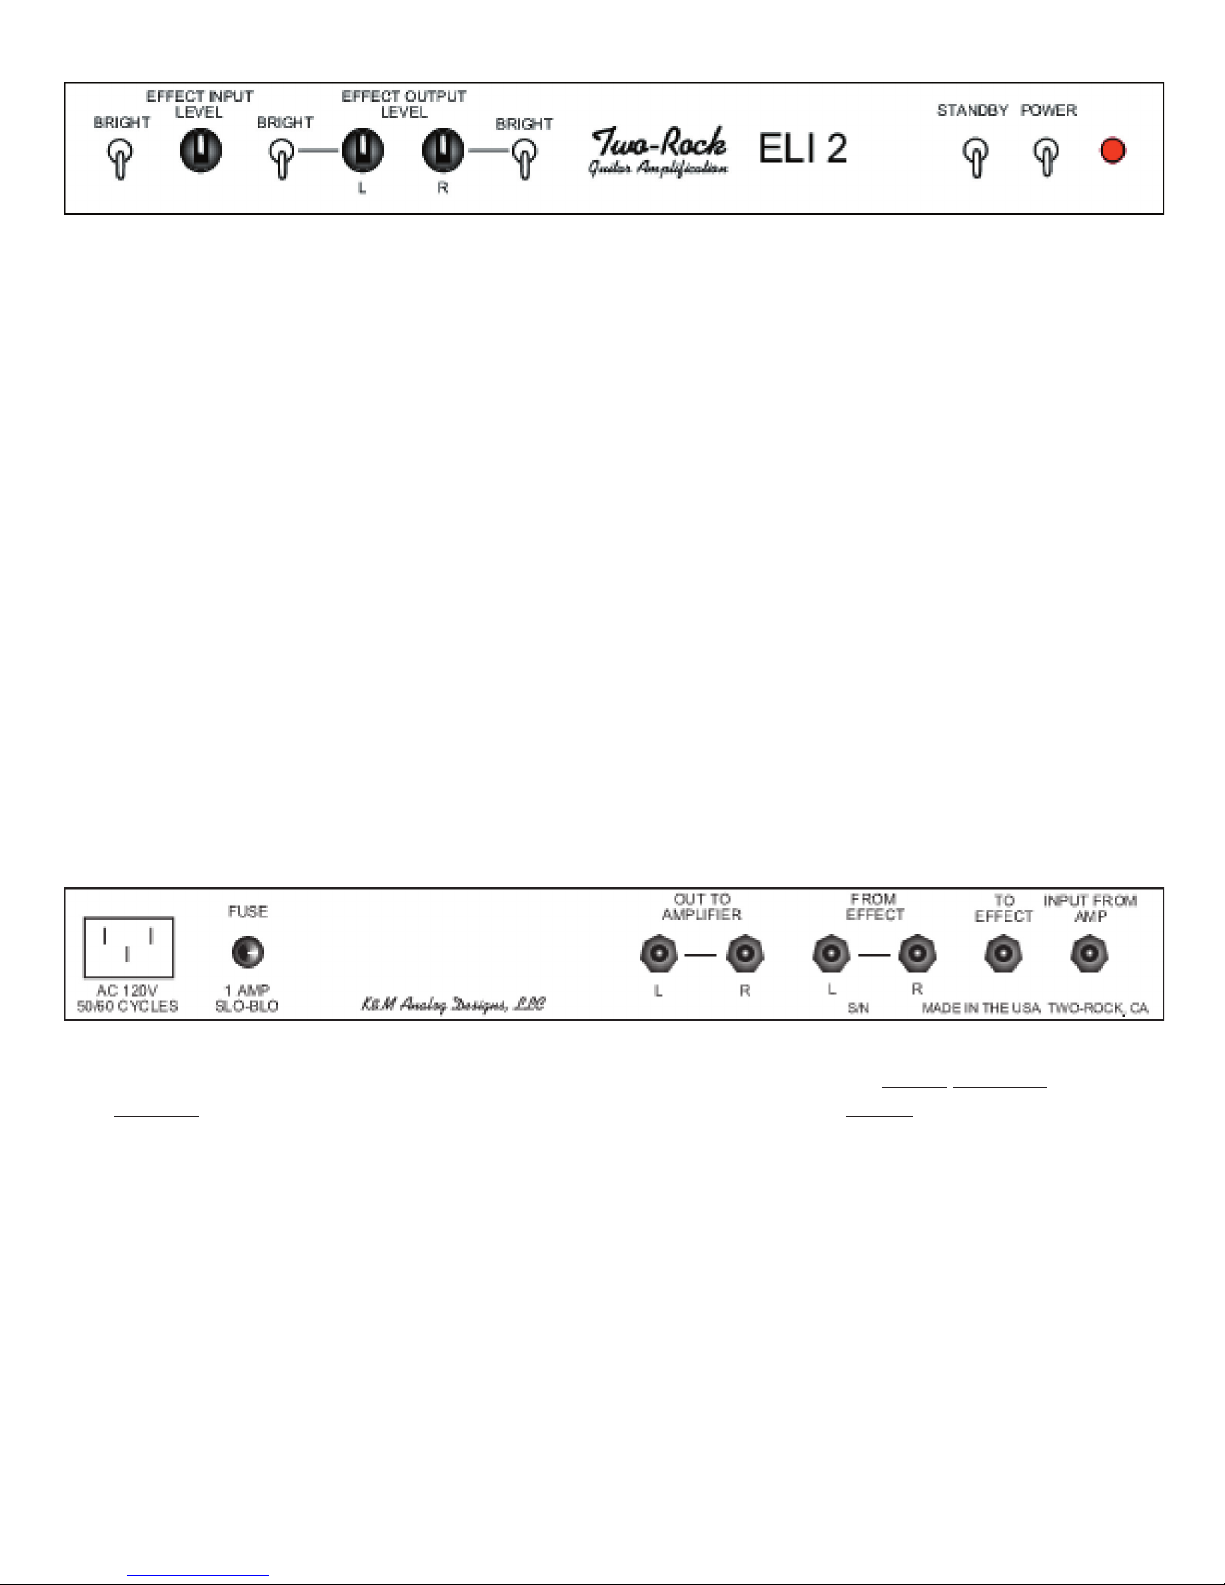
Fuse- 1 Amp Slo-Blo
OUT TO AMPLIFIER- The buffered effect signal from the unit is sent back to the amplifi er(s) via
these jacks. Connect to the “Effects Return” Jack(s) of your amplifi er(s).
FROM EFFECT- Connect the”Left” and “Right” output of your outboard effect here.
TO EFFECT- This sends a buffered signal to the input of your outboard effects.
INPUT FROM AMP- this is the dry signal input from the amplifi er, generally markd “effects send” on
your guitar amp.
S/N- Your serial number is located here. We strongly suggest that you record this number and have it
handy in case you need service, or in the event that your amp is lost, stolen, or damaged.
Bright Switch- The fi rst “BRIGHT” switch enhances hi frequency response on the input(effect
send) side of the buffer.
Effect Input Level-controls the signal level sent to the effect after the buffer stage.
Bright Switch- The second “BRIGHT” switch enhances hi frequency response on the output side
of return buffer.
Effect Output Level-controls the buffered signal level from the effect being sent back to the ampli-
fi er. If a stereo effect is used, and both left and right signals are returned to the buffer, the level of
both the left and right signal can be controlled.
Power Switch- Turns power on.
Stand-by Switch- Should be in the “down” or “stand-by” position when you apply power to the
unit. After a few seconds, place the switch in the “up” position to use the amplifi er. You may leave
the unit “powered up” and place this switch in the “stand-by” position to mute the output.
Indicator Lamp- This lamp will illuminate when the power switch is in the “up” position, indicat-
ing the unit is receiving A/C power.
Stereo Front Panel Functions
Stereo Front Panel Functions