twonav Ultra User manual


1
English
Thank you for purchasing TwoNav Ultra.
In addition to this Quick Guide, you can nd a complete user’s
manual at www.TwoNav.com
CompeGPS dedicates all its experience and effort to enable you
get the best out of your outdoor activities such as hiking, cycling,
trail running, geocaching…
All new developments are based on suggestions and feedback
from users like you. If you would like to share your ideas and
proposals with CompeGPS, feel free to do it at:
http://CompeGPS.uservoice.com
If you have any questions or problems regarding the use of
our products, please contact the on-line technical support
department of CompeGPS at: http://Support.CompeGPS.com
The Device
OK key:
• Short press: Status
(‘OK’ function in all menus)
• Long press: Shutdown / Block menu
(Turns the device on when
turned off / Unblocks the
keypad when it is blocked)
PAGE key:
• Short press: Switch between pages ‘Map >
Data elds > Menu’
• Long press: Page tools
UP / DOWN keys:
• In map: Zoom+ / Zoom-
• In data pages: Switch data pages
• In menu: Move selection
Note: You can customize button functions in ‘Menu > Settings >
Fields and buttons > Keys’.

2
Mounting
The device can be mounted on a bike’s handlebar or stem,
worn on the wrist, taken in your hand, or even carried in any
pocket using the ‘Block’ function. Either if you take the device
in your hand, wear it on your wrist or mount it on a bike, it is
recommended to use the security strap.
TwoNav Ultra can be mounted in horizontal or vertical position.
Screen rotation can be xed in ‘Menu > Settings > Display >
Screen Rotation’.
Recharging
You can recharge the battery of the GPS device by connecting the
device to the USB charger included in the product box. Battery
life can be increased by reducing the level of screen backlight
or by turning the screen off when not in use (conguring the
automatic shutdown screen function or by activating the standby
mode with a long press on ‘OK’ key and selecting ‘Block’).
Congure these options in ‘Menu > Settings > Autonomy’.
Care
Never submerge the device in water, not even when all lids are
sealed. Avoid vibration or harsh movements while USB port is
connected. Vibrations may deform the USB port whose repair is
excluded from the warranty.
Start / Shutdown / Block
In order to turn the device on, press ‘OK’ key for a few
seconds. TwoNav will automatically search for satellites. When a
strong enough signal is available, the status icon will change to
‘connected’, and your position will be marked on the map.

3
Note: GPS positioning requires good sky visibility and may take
several minutes after turning on the GPS unit.
In order to switch the device off, press ‘OK’ key for a few
seconds and select ‘Shutdown’. If you select ‘Block’, the screen
will be turned off and the keys will not respond. By doing this you
will be able to carry the device in a pocket avoiding involuntary
actions on the device. In order to unblock the device, press the
‘OK’ key for a few seconds.
Operation
Press ‘Page’ key to switch between the 3 main pages:
Map, Data elds and Menu.
Map
• Drag the map using the touch screen to explore the
surroundings.
• Use the ‘Up / Down’ keys to adjust the zoom level
• Press ‘Page’ key or ‘Re-center’ button when you wish
return to your current position.
• Shortly tap on any place of the map in order to show the tool
bar: ‘Mark waypoint’, ‘TrackUp / NorthUp’ and ‘2D / 3D’.
• Short tap again on the map to show the ‘Hint’ information.
Note: Toolbar and ‘Hint’ will be automatically hidden after 3
seconds.
Data elds
Switch between the different pages by pressing the ‘Up / Down’
keys. You can change the content of a data eld by making a long
tap on it selecting ‘Change this eld’.

4
Menu
From the main menu, you can manage most of the system’s
functions by accessing the different sections. Press on menu
elements to activate them or access their sub-menus. Press
‘Page’ key to go back.
Page tools
Many of the application pages (map, data elds, track’s list,
properties...) have specic conguration tools.
For example, choose the display mode for maps, the way to order
for waypoint lists or apply a name lter to a list of tracks. Make a
long press on ‘Page’ key to open the page tools.
Calibration
In ‘Menu > Settings > Calibration’ you can adjust the GPS instruments:
• Screen: Calibrate the screen in case you notice inaccuracies
while using the touch screen.
• Altimeter: The barometric altimeter is calibrated
automatically by default.
• Bearing: Before each departure it is very important to
calibrate the compass.
• Speed sensor: Only if using ANT+™ speed sensor
Navigate
Start
You can start a trip in two ways:
• ‘Main menu > Start!’
• ‘OK’ key > ‘Start / Stop’
Note: The ‘Start / Stop’ function will only offer to start a trip
when it is not already started. Otherwise it will open the ‘Pause’
menu.
You can select 6 navigation types:

5
• Track
• Place (waypoint, geocache, coordinates…)
• Training
• Go back (return to start point or home)
• Historic
• Free (without destination)
Follow indications
Depending on the navigation type chosen, you will receive
different indications to reach your target or destination.
• Track: The track to be followed will be
marked in green and white. You will also
be alerted if deviating more than 50m from
the track.
• Place: A ‘guide line’ will be drawn pointing
to the destination.
• Training: A specic data page for each
training type will be opened (time,
distance, calories or ‘TrackAttack™’).
In the ‘TrackAttack™’ mode, your rival’s
position will be marked on the map.
• Return: ‘Start point’ and ‘Home’ are
‘Place’ navigations. ‘Trackback’ is a ‘Track’
navigation. Indications are the same as for
‘Places’ and ‘Tracks’.
• Historic: Indications will be the corresponding ones
depending on the navigation type (place, track or training).
• Free: Without indications.
In all navigation types, you can congure alerts (deviation from
route, speed range or heart rate...). Access alert conguration
from ‘Menu > Settings > Alerts’.
Note: You can review the track you have done so far by opening
the page tools and selecting ‘Trip review’.
Pause and nish
When your destination or objective is reached, TwoNav will
display an alert and propose to pause the trip. You can also pause
the trip at any time you wish. Just press ‘OK’ key and select
‘Start / Stop’.

6
Once in the ‘Pause’ menu, you will be able to decide the next
step of your trip:
• Continue trip
• Select a new destination
• Finish trip
When trip is nished, a trip review will be
automatically shown.
Recording the track (‘Tracklog’)
The track of your course will be saved in the ‘Tracklog’ folder.
You can review your recorded tracks from list of tracks (‘Menu >
Data > Tracks > Tracklog’).
Vehicles and modes
TwoNav has 2 navigation modes (‘On-Road’ / ‘Off-Road’) which
can be selected by pressing the tabs of the main menu:
• The ‘Off-Road’ mode draws a straight line to your
destination, or highlights the track you are following.
• The ‘On-Road’ mode uses a routable road map (V-Map) to
automatically calculate the best route to destination.
Note: ‘On-Road’ mode is only available when road maps (V-Map)
are available.
You can also choose among several vehicles (‘Menu >
Conguration > Vehicle’), so the system conguration will be
adapted accordingly (pedestrian, bike, car, boat).
Maps
TwoNav automatically opens the best map based on your current
position. If you prefer to manage your maps manually, disable the
‘Auto-open maps’ option in ‘Menu > Settings > Map > Automap’.
You can see the available maps in ‘Menu > Data > Maps’. In order
to open a map, tap on it. To close it, uncheck the box on the left
side. You can purchase additional maps from www.CompeGPS.com

7
Note: You can also transfer maps from Land application (Windows
/ Mac).
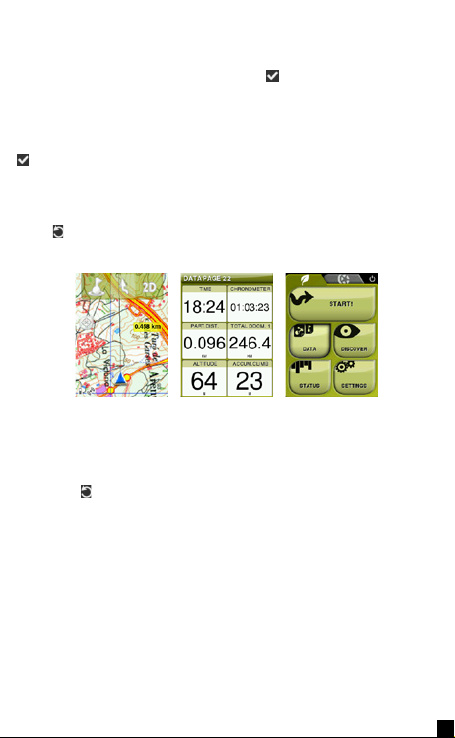
Waypoints, Routes and Tracks
In addition to maps, you can also work with different position
references for guidance: waypoints (separate points), routes (a
sequence of waypoints), tracks (itinerary ‘footprint’)...
You can get these references by creating them yourself or from
other sources (friends, webs, meeting planners, etc...). Manage
your own waypoints, routes and tracks from ‘Menu > Data’. In
order to open an item, tap on it. To close it, uncheck the box
on the left side. You can access the information of an open
element by clicking on it and opening its properties window. From
the properties window of an element you can handle several
operations (check data, see its position on the map, set it as
destination, etc.).
If an element of the list has sub-elements (e.g. a waypoints-le
contains waypoints), you can show or hide them in the list by
pressing the icon of the main element.
Press ‘Page’ to exit the properties window or ‘Data’ list.
Creation of waypoints, routes and tracks
The easiest way to create waypoints, routes and tracks is directly
on the map:
1. Do a long press on the map location where you want to create
a reference and the context menu will open.
2. Select ‘New’ and choose the type of item that you want to
create (waypoint, route, track or favorite).
3. Fill in the basic information of the item.
4. If you create a route or track, long press on the map in order to

8
create the following points (waypoints are only based on single
point with no union between them). Once nished press the
button ‘Close edition’ of the toolbar.
ANT+™ accessories
Your TwoNav Utra is ANT+™ certied and compatible with ANT+™
heart rate monitors, bike cadence sensors, bike speed sensors,
bike speed/cadence combo sensors and bike power meters. Visit
the ANT+™ product directory at www.thisisant.com/directory for a
list of compatible products. Once the sensors are mounted, follow
these steps to start receiving information:
1. Open ‘Data page’ (‘Page’ key).
2. Make a long press on the data eld that you want to activate
(e.g. ‘heart rate’).
3. Select ‘Enable FC / Cad / VeS’. TwoNav starts looking for the
sensor signal and will display it once it is available. The data is
stored for each recorded track point.
Management from a computer
Land is the perfect software to manage all your maps, waypoints,
routes and tracks from your own computer and mac.
Once installed, you only need to connect the GPS device to the PC
and Land will automatically detect and display it in the data tree.
Using Land you will be able to carry out the following operations:
• Analyze your past and future itineraries with detailed
information.
• Prepare your data for the next trip (maps, waypoints, routes
and tracks).

9
• Share your tracks through social networks (Facebook,
Twitter...).
• Synchronize the GPS device with Land in order to download
all the tracks which have been recorded on the device during
your recent activities.
• Update the software of the GPS device.
• Fix conguration problems of the GPS device.
Note: You can download the latest version of Land from
www.CompeGPS.com. The basic mode gives you access to the
basic functions of the software (communication with GPS, work
with a limited number of elements, see the properties of the
elements...). Advanced features require the purchase of a full
license.
Reset
It is recommended not to force the shutdown of the device unless
it is necessary.
You can force the device to switch off by pressing ‘OK’ key
for 10 seconds. If this doesn’t work, you can force a lower level
shutdown by pressing ‘Page’ and ‘Up’ for 7.5 seconds.
In case you detect a function that does not work properly, you can
force a software reset to initial conguration. To do so, press the
‘Page’ and ‘Down’ keys together for 10 seconds.
Warranty
The warranty begins on the day of delivery of the product
purchased from COMPEGPS TEAM SL or any ofcial distributor of
COMPEGPS TEAM SL and refers to all types of material damage or
production defect that could arise under the normal use of the
device. In the case of any claim it will be required to present the
original proof of purchase provided together with the product.
COMPEGPS TEAM SL and their authorized distributors reserve
the right to refuse a warranty repair if these documents are not
presented. In case of a defect of a product of COMPEGPS TEAM
SL which is covered by this warranty, COMPEGPS TEAM SL assures
the repair or replacement within the limits of proportionality. This

10
warranty does not cover cells, batteries and other consumables.
COMPEGPS TEAM SL does not warrant the precision of map
material whose intellectual property belongs to third parties.
COMPEGPS TEAM SL does not accept responsibility for the cost
of software conguration, loss of income, loss of software data
or any other collateral damages. When proceeding to repair
the product, COMPEGPS TEAM SL might be forced to delete the
data stored on the device. Please ensure, before shipping the
product, to have a backup of all the data of the device. If during
the repair it is discovered that the defect is not covered by the
warranty, COMPEGPS TEAM SL reserves the right to invoice the
customer for the expenses incurred by the repair in terms of
materials used, work and other costs, after presenting a budget.
COMPEGPS TEAM SL does not warrant defects and damages
caused by external factors or the user, such as accidental
damages, inadequate use or modications, rets, extensions,
use of parts from other manufacturers, carelessness, viruses or
software errors, inappropriate transport or packaging. Warranty
extinguishes in case that the defect of the products has been
caused by maintenance or repair carried out by other parties
than COMPEGPS TEAM SL or any technical service authorized by
COMPEGPS TEAM SL for this product. The warranty also expires
when the adhesive, safety seals or serial numbers of the product
or an integral part of the same have been modied, manipulated
or damaged in a way that makes them unreadable.
Note: Read all the legal conditions at www.CompeGPS.com

11
Español
Gracias por adquirir TwoNav Ultra.
Además de esta guía rápida, puede encontrar un completo manual
del usuario en www.TwoNav.com
El equipo de CompeGPS dedica todo su esfuerzo a hacer que
actividades como el senderismo, el ciclismo o el trail running
resulten cada día más divertidas, ecientes y seguras.
Los nuevos desarrollos se basan en gran parte en las sugerencias
aportadas por usuarios como usted. Si desea compartir alguna
idea con nosotros, puede hacerlo desde el sitio web
http://CompeGPS.uservoice.com
Si tiene alguna duda o problema sobre nuestros productos, por
favor contáctenos a través de nuestro servicio de soporte on-line
en http://Support.CompeGPS.com
El dispositivo
Tecla OK:
• Pulsación breve: Estado
(función ‘OK’ en los menús)
• Pulsación larga: Menú apagado
/ Bloqueo
(Enciende el aparato si está
apagado / Desbloquea el
aparato si está bloqueado)
Tecla PAGE:
• Pulsación breve: Cambiar página ‘Mapa > Campos de datos
> Menu’
• Pulsación larga: Herramientas de la página
Teclas UP / DOWN:
• En mapa: Zoom+ / Zoom-
• En páginas de datos: Cambiar página de datos
• En menú: Mover selección

12
Nota: Puede personalizar las funciones de las teclas desde ‘Menú
> Conguración > Campos y Botones > Teclas’.
Montaje
Puede montar el aparato en el manillar o potencia de la bicicleta,
en su muñeca, llevarlo en la mano o incluso en cualquier bolsillo
utilizando la función de bloqueo. Tanto si lleva el aparato en la
mano, la muñeca o montado en la bici, se recomienda utilizar la
correa de seguridad. TwoNav Ultra se puede montar en posición
horizontal o vertical. Puede seleccionar el grado de rotación de la
pantalla desde ‘Menú > Conguración > Visualización > Rotación
Pantalla’.
Recarga
Puede recargar la batería enchufando el aparato al cargador USB
incluido en la caja. Puede alargar la vida de la batería apagando
la pantalla cuando no la utilice (apagado automático o activando
el modo espera con pulsación larga en la tecla ‘OK’ y
seleccionando ‘Bloquear’) o disminuyendo el nivel de la
retroiluminación. Congure las opciones como desee desde ‘Menú
> Conguración > Autonomía’.
Cuidados
Nunca sumerja el aparato en agua, ni siquiera cuando todas las
tapas estén bien selladas. Evite las vibraciones o movimientos
bruscos mientras el puerto USB esté conectado. Puede deformar
el puerto USB, cuya reparación quedaría fuera de garantía.
Encendido / Apagado / Bloqueo
Pulse prolongadamente la tecla ‘OK’ para encender el aparato.
TwoNav iniciará automáticamente la búsqueda de satélites.
Cuando disponga de señal suciente, el icono de estado se

13
mostrará como ‘conectado’, y se marcará su posición sobre el
mapa.
Nota: La recepción de posición requiere buena visibilidad del
cielo y puede tardar varios minutos después de haber encendido
el aparato.
Para apagar el aparato, pulse prolongadamente la tecla ‘OK’
y seleccione ‘Apagar’. Si selecciona ‘Bloquear’, se apagará la
pantalla y los botones no responderán. Así podrá guardar el
aparato en un bolsillo sin que se realicen acciones no deseadas.
Vuelva a pulsar prolongadamente ‘OK’ para desbloquear el
aparato.
Nota: Puede forzar el apagado del dispositivo manteniendo
pulsado durante 10 segundos la tecla ‘OK’. No fuerce el
apagado si no es imprescindible.
Operación
Pulse la tecla ‘Page’ para acceder sucesivamente a los 3
espacios principales: Mapa, Campos de datos, Menú.
Mapa
• Arrastre el mapa utilizando la pantalla táctil para explorar los
alrededores.
• Utilice las teclas ‘Up / Down’ para ajustar el nivel de zoom.
• Cuando desee recentrar en su posición, pulse la tecla
‘Page’ o el botón ‘Recentrado’.
• Realice una pulsación breve sobre el mapa para mostrar La
barra de herramientas: ‘Marcar waypoint’, ‘2D / 3D’, ‘Track
arriba / Norte arriba’.

14
• Pulsando brevemente de nuevo en cualquier lugar del mapa
obtendrá la información de ‘Hint’.
Nota: La barra de herramientas y el ‘hint’ se ocultarán
automáticamente pasados 3 segundos.
Campos de datos
Alterne entre las distintas páginas pulsando las teclas ‘Up /
Down’. Puede cambiar el contenido de un campo de datos
pulsando prolongadamente en él y seleccionando ‘Cambiar este
campo’.
Menú
Desde el menú principal puede gestionar la mayoría de funciones
del sistema accediendo a las diferentes secciones. Pulse sobre los
elementos de menú para activarlos o acceder a su submenú.
Pulse la tecla ‘Page’ para volver atrás.
Herramientas de página
Muchas de las páginas de la aplicación (mapa, campos de
datos, lista de tracks, propiedades…) disponen de herramientas
especícas para su conguración. Por ejemplo: seleccionar el
modo de visualización de la ventana de mapa, el tipo de orden
de la lista de waypoints, o aplicar un ltro por nombre a la lista
de tracks. Pulse prolongadamente la tecla ‘Page’ para abrir las
herramientas de la página.
Calibración
Desde ‘Menú > Conguración > Calibración’ puede acceder a las
herramientas para ajustar los instrumentos del aparato:
• Pantalla: Calibre la pantalla si nota imprecisiones al trabajar
con la pantalla táctil.
• Altímetro: El altímetro barométrico se calibra
automáticamente.
• Rumbo: Es importante calibrar la brújula antes de cada salida.
• Sensor de velocidad: Sólo usando sensor de velocidad ANT+™.

15
¡En marcha!
Empezar
Puede iniciar una salida básicamente de 2 modos distintos:
• ‘Menú principal > ¡Empezar!’
• Tecla ‘OK’ > ‘Empezar / Parar’
Nota: La función ‘Empezar / Parar’ sólo ofrecerá iniciar una
salida cuando ésta no esté en marcha. En caso contrario abrirá el
menú de ‘Pausa’.
Seguir las indicaciones
Dependiendo del tipo de navegación seleccionado, recibirá
diferentes indicaciones para conseguir su objetivo.
• Track: El track a seguir se marcará de color
verde y blanco. Además, se le avisará si se
aleja más de 50m del track.
• Lugar: Se trazará una ‘línea guía’ hasta el
destino.
• Entreno: Se abrirá una página de datos
especícos para el tipo de entrenamiento
seleccionado (por tiempo, distancia, calorías
o ‘TrackAttack™’). En modo ‘TrackAttack™’ se
marcará la posición del rival sobre el mapa.
• De vuelta: ‘Punto de salida’ y ‘Casa’ son
navegaciones de lugar. ‘Trackback’ es una
navegación de track. Las indicaciones son las
mismas que para ‘lugar’ y ‘track’.
• Histórico: Las indicaciones serán las
correspondientes al tipo de elemento (lugar,
track o entrenamiento).
• Libre: Sin indicaciones sobre objetivos.
Podrá elegir 6 tipos de navegación:
• Track
• Lugar (waypoint, geocache, coordenadas...)
• Entreno
• De vuelta (volver al punto de salida o a casa)
• Histórico
• Libre (sin objetivo)

16
En todos los tipos de navegación, puede congurar alertas que le
avisen de distintos acontecimientos (desviación de la ruta, rango
de velocidad, frecuencia cardiaca…). Acceda a la conguración de
alertas desde ‘Menú > Conguración > Alertas’.
Nota: Puede revisar el trayecto realizado hasta el momento
abriendo las herramientas de página y seleccionando ‘Revisión de
salida’.
Pausar y nalizar
Cuando consiga su objetivo, TwoNav le avisará y propondrá pausar
la salida. También puede pausar la salida en cualquier momento,
pulsando la tecla ‘OK’ y seleccionando ‘Empezar / Parar’. Una
vez en el menú ‘Pausa’, podrá decidir el próximo paso en su salida:
• Continuar la salida
• Seleccionar un nuevo destino
• Finalizar la salida
Al nalizar la salida se le mostrará
automáticamente una revisión de la salida
realizada.
Grabación de track (‘Tracklog’)
El track (‘huella’) de su recorrido se grabará en la carpeta
‘Tracklog’.Puede revisar sus tracks grabados desde la lista de
tracks (‘Menú > Datos > Tracks > Tracklog’).
Modos y vehículos
TwoNav tiene 2 modos de navegación (‘On-Road’ / ‘Off-Road’)
que pueden ser seleccionados con las pestañas del menú
principal:
• El modo ‘Off-Road’ trazará una línea recta hasta el lugar
destino, o resaltará el track que se esté siguiendo.
• El modo ‘On-Road’ utilizará la información del mapa rutable
(V-Map) para calcular automáticamente la mejor ruta a
destino.
Nota: El modo ‘On-Road’ sólo está disponible si dispone de un
mapa de carreteras V-Map.
También puede elegir entre varios vehículos (‘Menú >

17
Conguración > Vehículo’), adaptándose la conguración del
sistema a cada uno de ellos (Peatón, bicicleta, coche, barco).
Mapas
TwoNav abrirá automáticamente el mejor mapa para su posición
actual. Si preere gestionar sus mapas manualmente, desactive la
función ‘Auto. Abrir mapas’ de ‘Menú > Conguración > Mapa >
Automapa’. Puede ver los mapas disponibles desde ‘Menú > Datos
> Mapas’. Para abrir un mapa pulse sobre él. Para cerrarlo pulse
sobre la casilla de su izquierda. Puede adquirir más mapas desde
www.CompeGPS.com
Nota: También puede transferir mapas desde la aplicación de
Windows / Mac Land.
Waypoints, rutas y tracks
Además de mapas, puede trabajar con diferentes referencias de
posición para orientarse: Waypoints (puntos independientes),
Rutas (sucesiones de waypoints), Tracks (‘huella’ de un recorrido).
Puede obtener este tipo de referencias creándolas usted mismo
o de otras fuentes (amigos, webs de rutas, organizadores de
eventos, etc.).
Gestione sus propios waypoints, rutas y tracks desde ‘Menú >
Datos’. Para abrir un elemento pulse sobre él. Para cerrarlo pulse
sobre la casilla de su izquierda. Puede acceder a la información
de un elemento abierto pulsando sobre él para abrir su ventana
de propiedades. Desde la ventana de propiedades de un elemento
puede realizar distintas operaciones (consultar datos, ver su
ubicación sobre el mapa, establecer como destino, etc.).
Si un elemento de la lista tiene subelementos (p.ej. un archivo de
waypoints contiene waypoints), los puede mostrar u ocultar en la

18
lista pulsando sobre el icono del elemento principal. Pulse
‘Page’ para salir de las propiedades de un elemento o de la lista.
Creación de waypoints, rutas y tracks
La manera más sencilla de crear waypoints, rutas y tracks es
directamente sobre el mapa:
1. Pulse prolongadamente sobre el punto del mapa dónde
desee crear una referencia, a continuación se abrirá el menú
contextual.
2. Seleccione ‘Nuevo’ y elija el tipo de elemento que desea crear
(waypoint, ruta, track o favorito).
3. Rellene la información básica del elemento.
4. Si ha elegido crear una ruta o track (los waypoints sólo tienen
un punto), pulse sobre el mapa para crear los siguientes
puntos. Cuando haya nalizado pulse el botón ‘Cerrar
edición’ de la barra de herramientas.
Accesorios ANT+™
Su TwoNav Utra dispone del certicado ANT+™ y es compatible
con instrumentos ANT+™: pulsómetros , sensores de cadencia de
bicicleta, sensores de velocidad, sensores combo de velocidad/
cadencia de bicileta y potenciómetro. Para leer una lista de
productos compatibles, visite el directorio de productos ANT+™
en www.thisisant.com/directory. Una vez los sensores estén
montados, siga estos pasos para recibir información:
1. Abra ‘Página de datos’ (Tecla ‘Page’).
2. Realice una pulsación prolongada en el campo de datos que
desee activar (p.ej. ‘frecuencia cardiaca’).
3. Seleccione ‘Activar FC / Cad / VeS’. Entonces TwoNav buscará
señal del sensor y la mostrará si se encuentra disponible. Los
datos también se guardarán para cada punto del track grabado.
Gestión desde un ordenador
Land es el software de PC y Mac ideal para gestionar todos
sus mapas, waypoints, rutas y tracks cómodamente desde su
ordenador personal. Después de instalarlo, sólo deberá conectar
el GPS al PC y Land detectará automáticamente el dispositivo y lo
mostrará en el árbol de datos.
Table of contents
Languages:
Other twonav GPS manuals