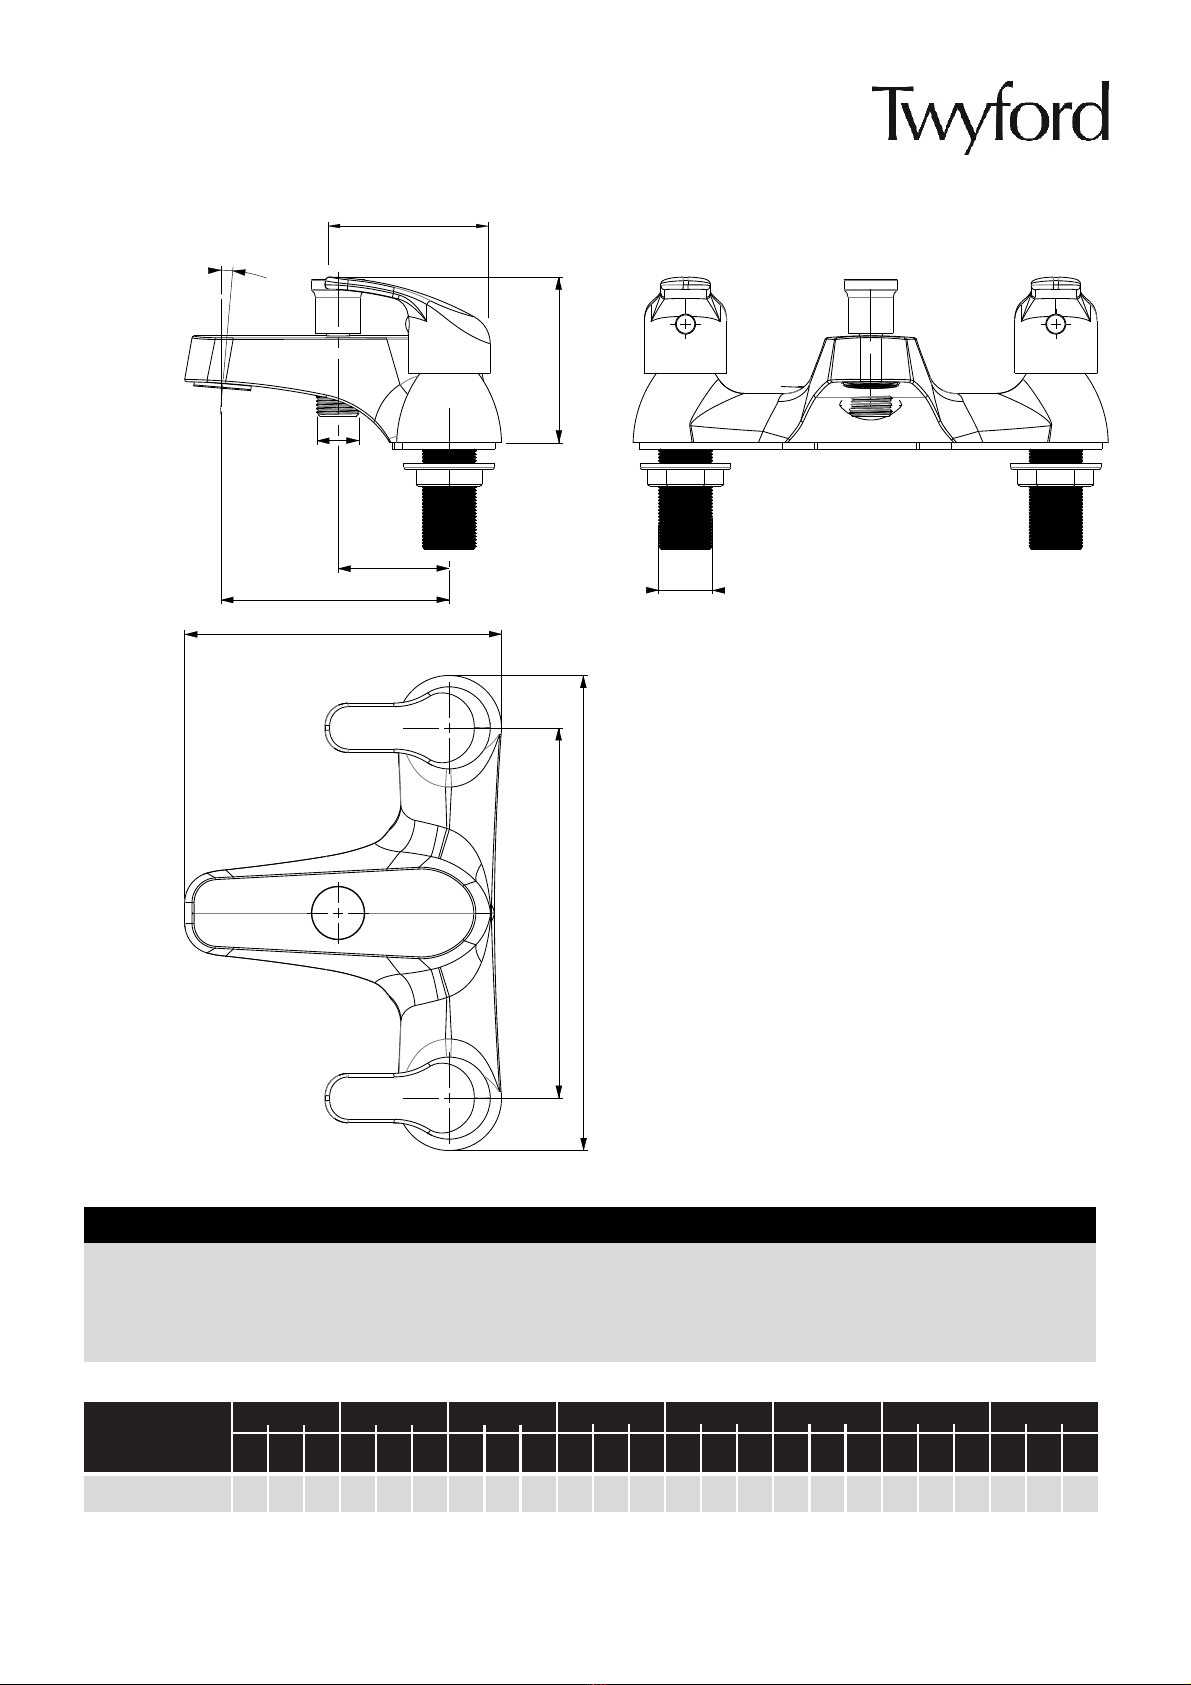
09
Basin Mixer/Bidet Mixer/Kitchen Mixer
Installation
(X525126CP, X525135CP, X525925CP)
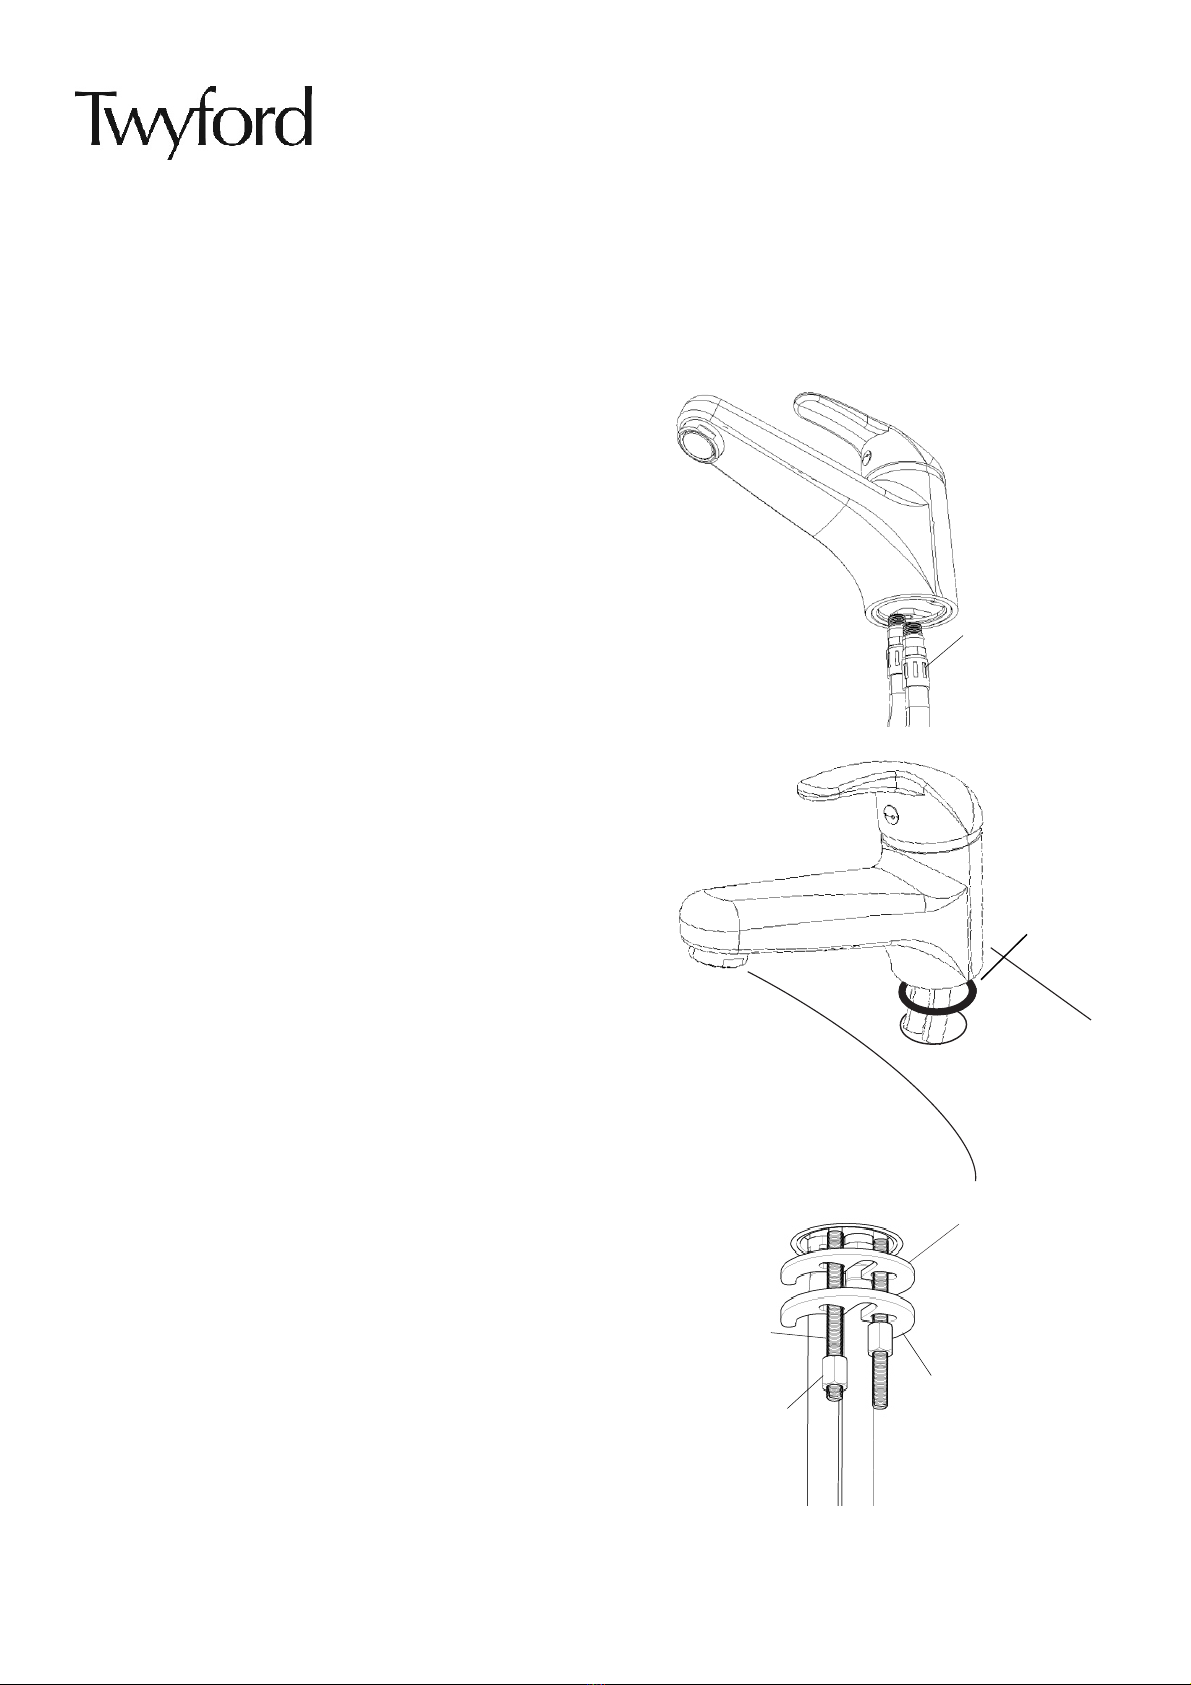
Flexi Tails
‘C’ Shaped
Rubber
Washer
‘C’ Shaped
Metal
Washer
Fixing
Rods
Fixing
Nuts
Drawings for illustration purposes only
‘O’ Ring
Identify all components are present prior to starting
the installation.
1. Screw the flexi tails into the bottom of the mixer
body by hand only (DO NOT OVERTIGHTEN).
2. Screw the fixing rods into the bottom of the mixer
body.
3. Place the ‘O’ ring over the hole in the basin,
ensuring the ‘O’ ring is fitted between the fitting
and the basin. Feed the flexi tails through hole in
basin.
4. Slide ‘C’ shaped rubber washer and ‘C’ shaped
metal washer onto the fixing rods up to the
underside of the basin.
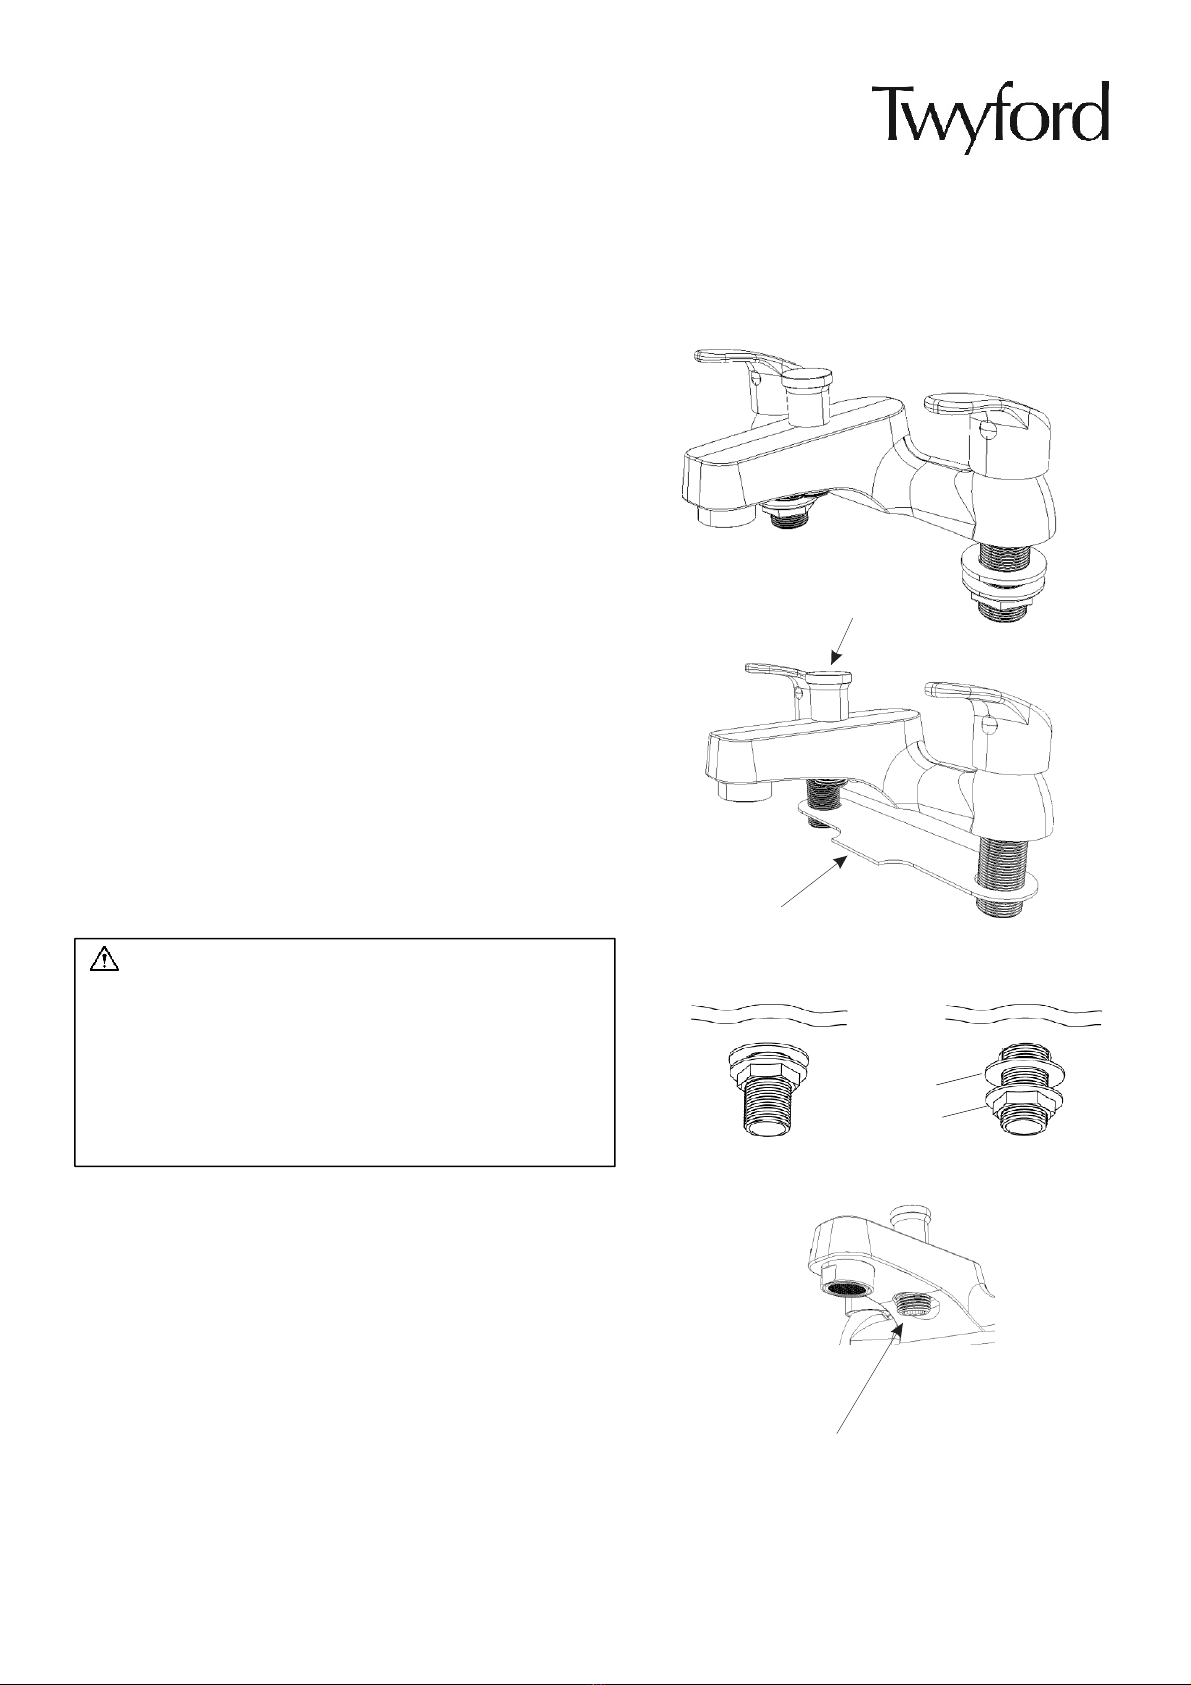
5. To secure the mixer in place tighten the fixing
nuts onto the fixing rods until they are fully
tightened against the ‘C’ shaped metal washer.
The fixing nuts can be tightened with a suitable
spanner.
6. Connect the flexi tails to the hot and cold wate r
supplies.
7. Turn on water supplies, lift the mixer handle
upwards and operate in both directions, letting
the water flow for a few minutes and purging air.
8. Fit the clicker waste ensuring a rubber washer is
fitted between the basin and the waste. Use a
pure silicon sealant where necessary. Place the
other rubber washer under the basin and secure
by tightening the backnut, in order to fill the
basin, the button in the middle of the waste
needs to be pressed down. To release the water,
press the button again.
9. Check all joints and connections for any leaks
Installation Requirements IMPORTANT - PLEASE READ
This product has been tested to the Water Regulations Advisory Scheme (WRAS) and satisfies the
requirements of the Water Supply (Water Fittings) Regulations 1999 and current bylaws.
For full Installation Requirements & Notes (IRN) please visit www.wras.co.uk/directory.