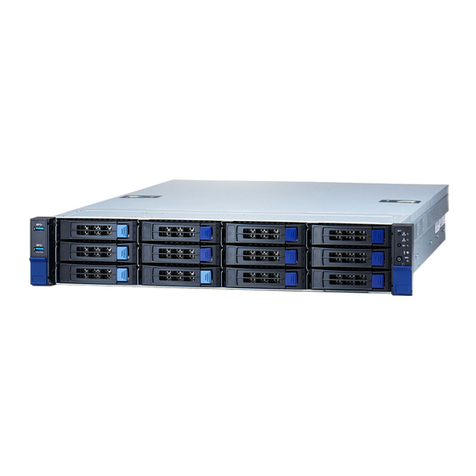
TYAN Transport TX28 User manual

1
http://www.tyan.com
B2880C2/B2880C2S /// Transport TX28
Revision 1.0
Copyright © TYAN Computer Corporation, 2002-2003. All rights reserved. No
part of this manual may be reproduced or translated without prior written
consent from TYAN Computer Corp.
All registered and unregistered trademarks and company names contained in
this manual are property of their respective owners including, but not limited to
the following.
TYAN, Thunder K8S S2880UGNR, Transport B2880C2, B2880C2S, Transport
TX28 are trademarks of TYAN Computer Corporation.
AMD, Opteron and combinations thereof are trademarks of AMD Corporation.
AMI, AMIBIOS are trademarks of AMI Software Incorporated.
Microsoft, Windows are trademarks of Microsoft Corporation..
QLogic, Zircon, and combinations thereof are trademarks of QLogic
Corporation.
IBM, PC, AT, PS/2 are trademarks of IBM Corporation.
Winbond is a trademark of Winbond Electronics Corporation.
Portable Document Format (PDF) is a trademark of Adobe Corporation.
Information contained in this document is furnished by TYAN Computer
Corporation and has been reviewed for accuracy and reliability prior to printing.
TYAN assumes no liability whatsoever, and disclaims any express or implied
warranty, relating to sale and/or use of TYAN products including liability or
warranties relating to fitness for a particular purpose or merchantability. TYAN
retains the right to make changes to product descriptions and/or specifications
at any time, without notice. In no event will TYAN be held liable for any direct or
indirect, incidental or consequential damage, loss of use, loss of data or other
malady resulting from errors or inaccuracies of information contained in this
document.
2
http://www.tyan.com
Table of Contents
Before you begin…
Chapter 1: Introduction
1.1 Congratulations
1.2 Hardware Specifications
1.3 Front View
1.4 Rear View
1.5 Top View
Chapter 2: Hardware Installation
2.0 Installation Procedures
2.1 Opening the Chassis
2.2 Installing HDD
2.3 Installing FDD
2.4 Installing CD-ROM
2.5 Installing Processor(s) and
heatsink(s)
2.6 Installing Add-on PCI Card
2.7 Installing Memory Modules
2.8 Finishing up
Chapter 3:
SCSI Backplane User Manual
3.0 Before you begin
3.1 Backplane Specifications
3.2 Backplane Layout
3.3 Pin Assignment
Appendix
Safety Document of system
...……………………………………..Page 3
...……………………………………..Page 5
..….…………………………………..Page 6
...……………………………………..Page 7
.....………………………………… ..Page 7
.....………………………………… ..Page 8
.…………………………………… ..Page 9
...………………………………… ..Page 10
...………………………………… ..Page 11
.....…………………………………..Page 13
...………………………………… ..Page 15
....…………………………………..Page 17
.....………………………………….Page 18
.....…………………………………..Page 19
..……………………………………Page 20
..…..………………………………..Page 21
.....…………………………………..Page 21
…...…..…………………………….Page 21
.....…………………………………..Page 22
.....…………………………………..Page 23
...……………………………………Page 25
…...…………………………………Page 25

3
http://www.tyan.com
Before you begin…
Check the box contents!
The barebone system package should contain the following:
1x Thunder K8S (S2880) motherboard (preinstalled)
2 x CPU retention frames
1 x 34-pin floppy drive cable (pre-installed)
1 x 40-pin CD-ROM drive cable (pre-installed)
2 x LVD Ultra320 SCSI cables for HDD (pre-installed)
2 x power cords (1 x compatible for standard US voltage, 1 x
compatible for standard German voltage)
1x Thunder K8S (S2880) User’s Manual
1x Transport B2880C2S User’s Manual
1x Thunder K8S (S2880) Quick Reference
1x TYAN driver CD
1 x screw
1x 3-slot riser card
2 x Ultra320 SCSI backplanes (pre-installed)
1x LSI SCSI driver diskette
1x Promise SATA driver disk
1x I/O shield with 2 LAN ports (pre-installed)
1x cable set: 9-pin serial and 25-pin parallelI

4
http://www.tyan.com
1x SATA drive power adapter
2 x SATA cables
If any of these items are missing, please contact your vendor/dealer for replacement
before continuing with the installation process.

5
http://www.tyan.com
Chapter 1: Introduction
1.1 –Congratulations!
Thank you for choosingthe TYAN B2880C2/B2880C2S, an extremely powerful solution,
built with ingredients of a server that will last years to come.
Designed on AMD's HyperTransportTM technology, the Thunder K8S (S2880UGNR)
platform features two 64-bit AMD OpteronTM processors and high-performancememory
controllers. The Thunder K8S also offers rich features such as: dual channel Ultra320
SCSI controller, dual channel GigabitEthernet ports, ATIRAGETM XL onboard video.
Remember to visit TYAN’s Website at http://www.tyan.com. There you can find
information on all of TYAN’s products with FAQs, distributors list and BIOS setting
explanations.

6
http://www.tyan.com
1.2 –Hardware Specifications
Processor
•Dual mPGA 940-pin ZIF sockets for
AMD OpteronTM processors
•128-bit DDR dual channel memory
controller
Chipset
•AMD-8131TM HyperTransportTM PCI-X
Tunnel
•AMD-8111TM HyperTransportTM I/O
hub
Integrated Video
•ATIRAGETM XL graphics controller
with 8MB framebuffer
Memory
•128-bit DDR memory bus
•Six 184-pin 2.5-Volt DDR DIMM
sockets (4 controlled by CPU1 and 2 on
CPU2)
•Supports up to 12GB Registered
DDR2700memory
•Dual channel memory bus
•Supports ECC type memory modules
Integrated Dual Channel SCSI
Controller
•LSI53C1030 Ultra320 SCSI controller
•Connects to PCI-X bridge A
•Available in B2880C2S
Integrated LAN Controllers
•BroadcomBCM5704C dual channel
GbE LAN:
•Two RJ-45 LAN connectors with
LED
•Connected to PCI-X bridge A
Integrated I/O
•PS/2 Mouse & Keyboard ports
•Two 9-pin Serial ports (one header)
•One Floppy connector for up totwo
drives
•Two USB 1.1 ports in rear
Chassis:
•2U rackmount
•Material/thickness:steel/1.0mm
Power Supply:
•SS EPS12V 460W powersupply
•115/230V AC auto switching
Device Bays:
•One standard floppy drive bay
•One standard CD-ROM drive bay
•Six Hot-Swappable 3.5" hard disk drive
bays (available in S2880C2S)
Thermal Solution:
•Four 80x80x20mm high performance
cooling fans
Expansion:
•Two full length PCI add-on cards
•Compatible with speed at 64bit/66MHz
Dimensions:
•Height: 3.46" (88mm)
•Width: 19.0" (482mm)
•Depth: 24.0" (610mm)
•Gross Weight: ~40lb (18.0kg)
Accessory included:
•One 64-bit riser card
•Sliding rail and mounting brackets
TYAN reserves the right to add support
or discontinue support for any OS
without notice.

7
http://www.tyan.com
1.3 –Front View
1.4 -Rear view
Power/HDD LEDs
Power/Reset Switches
CD
-
ROM
Drive
FDD
Drive
3.5
”
HDD Drive
Cages (x6)
PS/2
Mouse (top)
K/B (bottom)
GbE
Ports
w/LED
VGA
Port
Serial
Port
Power
Supply
(redundant
shown
here)
Double
-
deck
USB 1.1 Ports
Add
-
on PCI
Expansion Slots

8
http://www.tyan.com
1.5–Top View
Cooling
fans (x4)
CPU2
Memory Slots
CD
-
ROM
(bottom)
FDD
(top)
EPS 12V
PSU
CPU1
Riser
Card
HDD Drive
Cages (x6)
SCSI
backplanes
(x2)
(available
in
B2880C2S)

9
http://www.tyan.com
Chapter 2: Hardware Installation
2.0 Introduction
You are now ready toinstall your system.
The first thing you should do is read this user’s manual. It contains important
information that will make installation and setup much easier. Here are some
precautions you should take when installing your system:
(1) Ground yourself properly before removingthe top cover of the system. Unplug
the power from your computer power supply and then touch a safely grounded
object to release static charge (i.e. power supply case). For the safest
conditions, Tyan recommends wearing a static safety wrist strap.
(2) Avoid touching the motherboard components, IC chips, connectors, memory
modules, and leads.
(3) Motherboard is pre-installed in the system. if, under any circumstances, it is
removed from the system, place the motherboard on a grounded antistatic
surface.
(4) Inspect the board and systemfor damage.
The following pages include details on how to install the processor, memory, disk drive
and cables.
NOTE DO NOT APPLY POWER TO THE SYSTEM IF ANY PART OF THE
SYSTEM COMPONENTS HAS BEEN DAMAGED

10
http://www.tyan.com
2.1 Opening the chassis
2.1.1 Remove screw (x1) on the top of the
chassis.
2.1.2 Remove screws (x2) on the rear of the
chassis.
2.1.3 Pull the top cover from rear.
2.1.4 Lift up the top cover and remove it from
the chassis.
2.1.5 Top cover removed.

11
http://www.tyan.com
2.2 Installing HDD
2.2.1 Remove HDD tray from the chassis.
2.2.1.1 Use finger to open the latch on the
tray following direction on the picture.
2.2.1.2 Remove HDD tray from the chassis.
2.2.2 Picture of HDD tray.
2.2.3 Secure the drive with 4 screws from
both sides of the tray.
2.2.4 Slide the tray back into the chassis.

12
http://www.tyan.com
2.2.5 Secure the drive and tray by locking the
handle into position.
2.2.6 Repeat 2.2.1 through 2.2.5 for installing
other hard disk drive(s) if necessary

13
http://www.tyan.com
2.3 Installing FDD
2.3.1 Remove FDD cage by removing the screw
located near fan bracket.
2.3.2 Picture of the FDD cage.
2.3.3 Remove screws form both sides to detach
cover from tray.
2.3.4 Slide the drive into the cage and secure FDD
onto cage by tightening screws (x4; 2 on
eachside).
2.3.5 Slide the cage with drive on the top of the
CD-ROM drive.
2.3.6 Secure the cage onto chassis by tightening
the screw removed in 2.3.1.

14
http://www.tyan.com
2.3.7 Connect the data cable to FDD.
2.3.8 Connect the power cable to FDD.

15
http://www.tyan.com
2.4 Installing CD-ROM
2.4.1 Remove CD-ROM drive bay cover:
2.4.1.1 Remove FDD cage by removing the screw
located near fan bracket.
2.4.1.2 Remove two screws on the chassis to take
out the CD-ROM drive bay cover.
2.4.2 Slide the CD-ROM into the drive bay.
2.4.3 Connect the data cable to CD-ROM.
2.4.4 Connect the power cable to CD-ROM.

16
http://www.tyan.com
2.4.5 Secure the CD-ROM drive to the chassis
through the screw holes on the chassis
bottom.

17
http://www.tyan.com
2.5 Installing Processor (s) and Heatsink(s)
2.5.1 Note: before proceeding, please make
sure if retention frame was pre-installed.
If not, please remove themotherboard
from chassis and refer to Page 24 and 25
of the motherboard user’smanual to
install the frame(s) first.
2.5.2 Lift the lever on theCPU socket until it is
approximately 90o or as far back as
possible to the socket.
2.5.3 Align the processor with the socket. There
are keyed pins underneath the processor
to ensure that the processor’sinstalled
correctly.
2.5.4 Seat the processor firmly into the socket
by gently pressing down until the
processor sits flush with the socket.
2.5.5 Place the socket lever back down until it
locks into place.
2.5.6 Your processor is installed
2.5.7 Repeat these steps for any additional
processor if you are usingtwo
processors.
2.5.8 For installing the heatsink(s), please refer
to Page 26 and 27 of the motherboard
user’s manual for further details.

18
http://www.tyan.com
2.6 Installing Add-on PCI Card
2.6.1 Add-on picture.
2.6.2 Note: this add-on card only able to support
two PCI add-on cards-on the top slot and
middle one. The speed is 64bit/66MHz.
2.6.3 Place the add-on card to the desired slot.
2.6.4 Plug your PCI/PCI-X add-on card firmly into
the PCI socket slot on the riser card.
2.6.5 Secure Add-on card by tightening the screw
from the side.
X

19
http://www.tyan.com
2.7 Installing Memory Modules
Note: Please make sure to read through M/B User’s Manual before your
start installing memory modules.
2.7.1 Insert the DIMM modules into the memory slots, starting with memory
slots associated with CPU1.
2.7.2 Press down on the memory modules until it locks into place.

20
http://www.tyan.com
2.8 Finishing Up
2.8.1 Put the top cover back on and fasten the
screws in the back and on the top of the
chassis.
Congratulations on making it this far! You’re finished setting up the hardware aspect of
your computer. Before closing up your chassis, make sure that all cables and wires are
connected properly, especially peripheral cables and most importantly, jumpers. You
may have difficulty powering on your system if the motherboard jumpers are not set
correctly. For detailed M/B jumper settings, please refer to S2880 Thunder K8S M/B
user’smanual.
In the rare circumstance that you have experienced difficulty, you can find help by
asking your vendor for assistance. If they are not available for assistance, please find
setup information and documentation online at our website or by calling your vendor’s
support line.
This manual suits for next models
2
Table of contents
Other TYAN Desktop manuals

TYAN
TYAN Transport GX28 B2880T1S User manual

TYAN
TYAN Transport GT20 B5161 Quick start guide

TYAN
TYAN TN70E-B7106 Quick start guide

TYAN
TYAN Transport GX18 Quick start guide

TYAN
TYAN Transport GT24 B2891 Quick start guide

TYAN
TYAN Transport GX15 B2723T15 User manual

TYAN
TYAN Tank GT20 (B5211) Quick start guide

TYAN
TYAN FT48T-B7105 Quick start guide

TYAN
TYAN Barebone System B4881V50S4H User manual

TYAN
TYAN GA80-B7061 Quick start guide