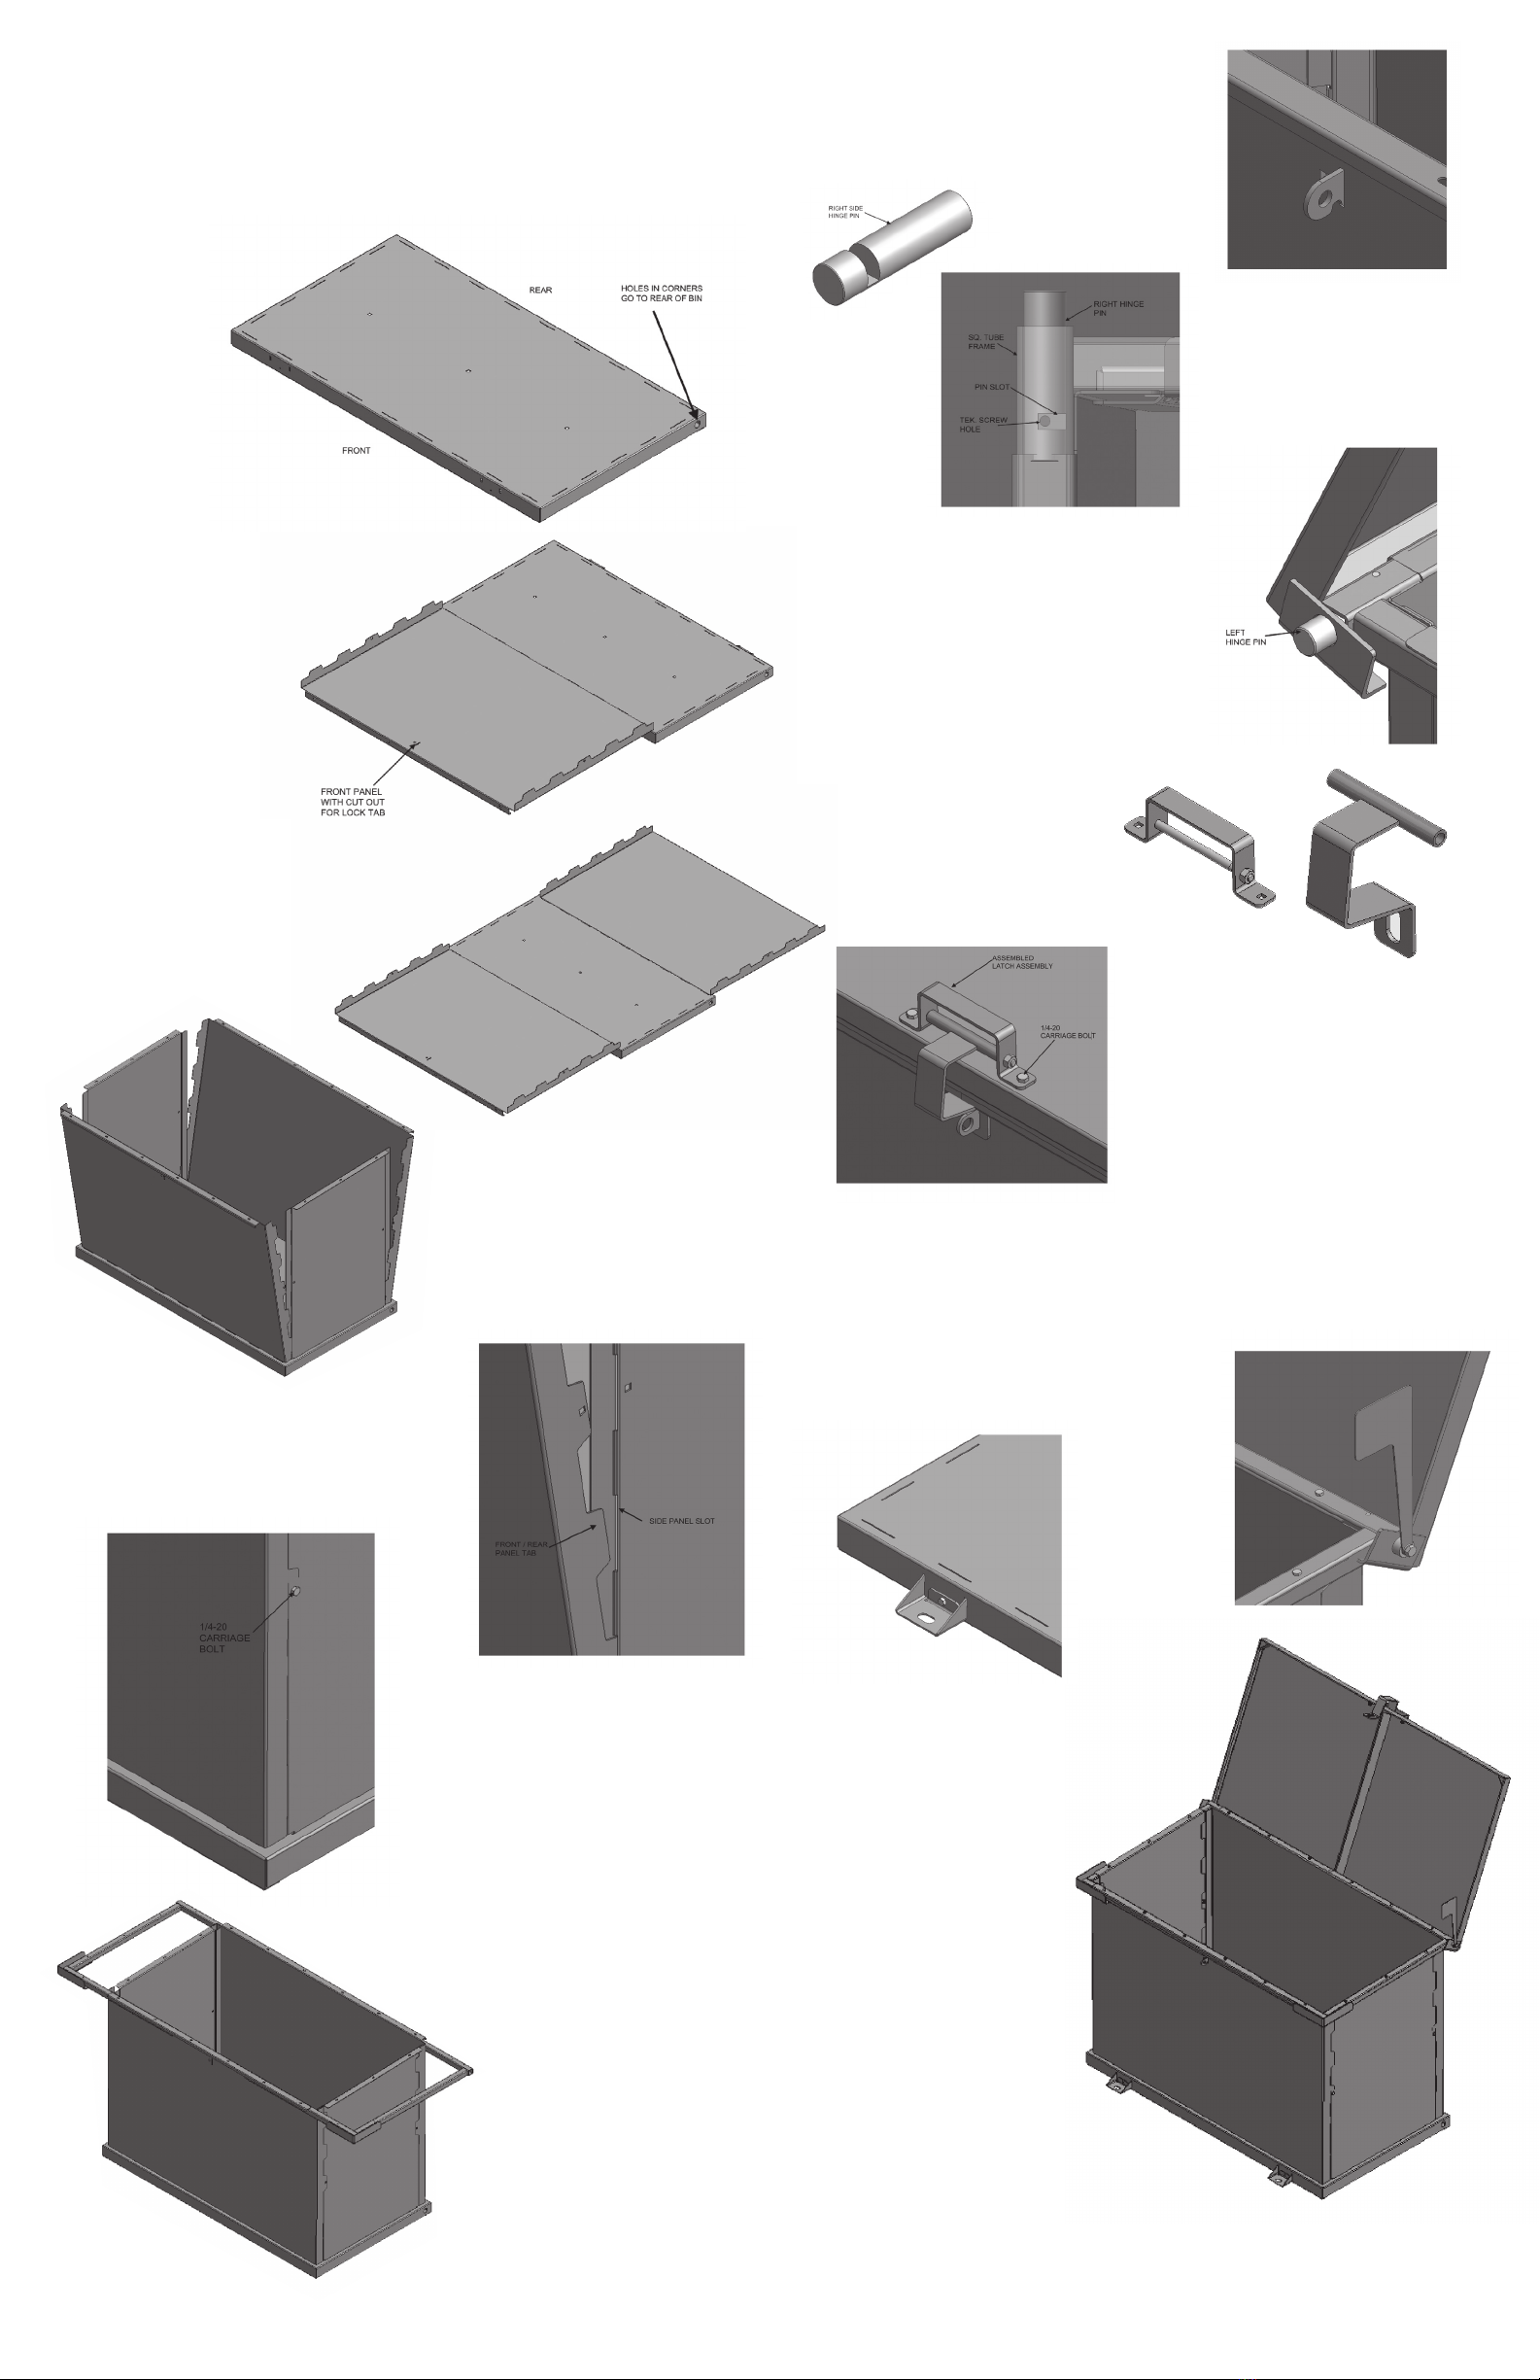
1. Remove all parts from the packaging.
2. Lay the base panel at on the ground. Note the holes in the two
corners of the base panel go to the rear of the bin.
3. Lay the front panel
down and insert the tabs
through the slots in the base
assembly. Note the front panel
has the TyeDee Bin label on
the top right corner of
the panel.
4. Lay the rear
panel down
and insertthe
tabs through the
slots in the base.
5. Insert the ngers on the bottom
of the side panels through the slots
in the base panel. Lift up the front
and rear panels 90 degrees. Make
sure tabs are fully inserted properly
into the slots in the base pan before
and during the raising of the panels.
8. Insert the lock tab through the cut out
in the front panel and fasten using a
carriage bolt, at washer, and nylock
nut. Note the XL model now has two lock
catches, install both of
these the same way.
9. Remove the right side
hinge pin by removing the
tek screw, which is already
inserted into the sq. tube
frame.
10. Install the lid from the back of the bin,
placing the left side lid hinge hole over
the welded pin. Then close the lid.
11. Insert the right hand pin in the right
lid hinge hole so that only the black
portion of the pin is seen. Open the lid,
line up the machined slot on the hinge
pin to the hole for the tek screw, and
insert tek screw.
12. Remove the bolt from
the handle and assemble
through the lock tab
portion of the latch.
13. Fasten the
handle and latch assembly to the
lid using two carriage bolts, at
washers, and nylock nuts. Note the
XL model now has two handle/latch
assemblies, install both the same
way.
14. Fasten the ag to the right
side hinge pin using the 1/4-
20 x 1/2” bolt and lock washer. You will likely have to adjust the
ag to give the right movement before tightening the bolt. It is
ideal to have the ag just past vertical with the hinge pin twisted
clockwise against the TEK screw stop.
When positioned correctly the ag will
sit horizontal in the down position and
past vertical
to indicate a
need for waste
collection.
Congratulations Your TyeDee Bin is now complete!
ASSEMBLY STEPS
6. Fasten both the side panels to
the front and rear panels using
the carriage bolts, nylock nuts,
and at washers. Important, do
not tighten until the frames are
installed.
The tabs in both the front and rear
panels will t through the slots in the
side panels.
7. Slide both the left and the right square
frame assemblies up into place underneath
the returns of the panels. Note that the
BearGard corners are to be positioned at
the front of the bin, the hinge pins
go to the rear. Ensure that the
frames are snug against the
side panels. Use vise grip
pliers or a clamp to hold the
frames in place. Secure the
frames by fastening the #12
Tek Screws through the slots
on the panels into the pre-
punched holes in the frames.
15. Add mount feet if the bin
is to be lagged to a concrete
pad or another stable base, this
is recommended. Just insert
the mount feet tabs into
the four sets of slots
at the front and rear
of the TyeDee Bin
Base. #12 Tek screws
are provided as a
convenience, but their
use is optional.
* You can also use the
holes in the rear of
the base to secure the
bin to a tree or post with
a 3/16” chain or cable. Securing
your TyeDee Bin will make the bin that
much more eective in keeping bears and
other wildlife out of your trash, and it also
helps prevent theft of your bin.


