tzs 19BN02 User manual

USER GUIDE
ACTIVE NOISE CANCELLING WIRELESS HEADPHONES
MODEL: 19BN02
ACTIVE NOISE CANCELLING FOR COMPLETED MUSIC IMMERSION
THANK YOU
FOR CHOOSING TZS

In the Box
3.5mm Audio Cable
Headphones
Type-C Charging Cable User Guide
Storage Bag
02

Overview
03
Cushion

CHARGING THE HEADPHONES
1. Slot the smaller end of the USB cable into
the USB power socket in the bottom of the
left headphone.
2. Slot the other end of the USB cable into
a power source such as a computer,
laptop or USB mains plug.
04

3. The charging indicator will glow red showing that
the headphones are charging. Charging time 2 to
2.5 hours approximately.
Once the headphones are fully charged the charging
indicator will turn o.
You can now remove the USB cable from the power
source and the headphones.
05

1. Slot one end of the 3.5mm audio cable into the 3.5mm
audio cable socket on the bottom of the right headphone.
2. Slot the other end of the audio cable into the headphone /
audio out socket on the device you want to connect to the
headphones.
CONNECTING USING AUDIO CABLE
06

3. Important: When a device is connected to the headphones
using the audio cable the controls on the headphones will
not work with the connected device.
You will have to use the devices controls to play / pause,
skip tracks and adjust the music.
Note: When using a 3.5mm audio cable you cannot use the
microphone built into the headphones.
07

TURNING ON & OFF
Turning ON: Press and hold the Obutton, until your hear the
audible prompt.
The status indicator will ash blue three times.
Turning OFF: Press and hold the Obutton until your hear the
audible prompt.
The red status indicator will come on for one second.
08

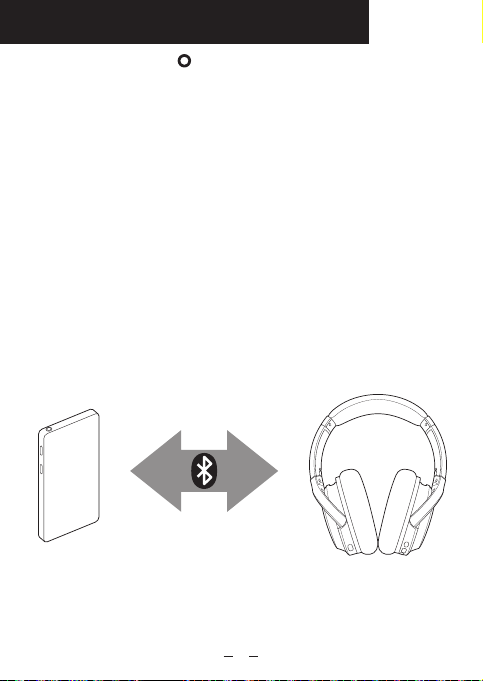
CONNECTING USING BLUETOOTH
1. Press and hold the button until you hear a tone and
the status indicator light flashes blue and red.
2. The headphones are now in pairing mode and ready to
be connected to your Bluetooth device.
3. Keep the headphones and Bluetooth enabled device
within 1 meter (3 feet) of each other during the pairing
process.
4. Open the Bluetooth search window on the device you
want to pair with your headphones.
5. When your Bluetooth enabled device finds the headphones,
select" TZS TP-BN01 " from the list of found devices.
6. After a successful registration, you will hear the audible
tone and the status indicator will slowly blink blue for 5
seconds.
Note: Your headphones will automatically try to reconnect to
the device when turned on, you will hear an audible tone.
09

ADJUSTING THE VOLUME
Increasing the volume: Repeatedly press the button on the
headphones to increase the volume. You will hear a tone when
the headphones have reached its maximum volume.
Reducing the volume: Repeatedly press the button on the
headphones to decrease the volume. You will hear a tone when
the headphones have reached their minimum volume.
10

ACCESSING SIRI
MUSIC FUNCTIONS
Double click to
access SIRI
Press to start
playback.
Press again to
pause playback
Press and hold to
skip to the next
song.
Press and hold to
skip to the previous
song.
11

MOBILE PHONE FUNCTIONS
TURNING ON THE NC FUNCTION
Press the
button once.
Press the
button again.
Press and hold
the button
for approximately
1 second.
NC stands for active Noise Cancellation and should be used
when you are in areas with high amounts of background noise.
IMPORTANT: The noise cancelling function is automatically
turned on when you turn your headphones on.
12

Turning OFF: Click the NC button on the left headphone in
again to turn off. The green light on the button will go out
when turned off.
Turning ON: Click the NC button on the left headphone in to
turn on. The green lighton the button will come on when the
noise cancelling is turned on.
IMPORTANT: When activating NC slight changes in the
playback audio may be perceived. This is a characteristic of
NC. The NC function uses more power when turned on and
will reduce the use time after the headphone is fully charged.
13

STORING YOUR HEADPHONES
The headphones fold flat for easy, convenient storage.
Place the folded headphones in a safe place.
14

TROUBLESHOOTING
Headphones have run out of power,
recharge for approximately 2 to 2.5
hours to fully charge using the USB cable.
Delete connection for Bluetooth device
and reconnect.
Power too low, device beyond 10 metre
range, or the signal has been blocked by
an obstacle.
Check your connection or turn the volume
up on the device or headphones.
Check your connection or turn the volume
up on the device or headphones.
Check the jack plugs are correctly
inserted. Check the 3.5mm audio
cable has not become damaged.
Check the charging cable is connected
and that it has not been damaged.
15

TECHNICAL SPECIFICATIONS
Approximately 2 to 2.5 hours to full charge
Bluetooth without noise cancelling: 50 hours
Bluetooth & noise cancelling: 24 hours
Approximately 10 metres without
obstructions
Rechargeable Lithium battery
16

FCC Statement
Any changes or modifications not expressly approved by the party
responsible for compliance could void the user’s authority to operate
the equipment.
This device complies with Part 15 of the FCC Rules. Operation is
subject to the following two conditions:
(1) this device may not cause harmful interference, and
(2) this device must accept any interference received, including
interference that may cause undesired operation.
Note: This equipment has been tested and found to comply with the
limits for a Class B digital device, pursuant to Part 15 of the FCC Rules.
These limits are designed to provide reasonable protection against
harmful interference in a residential installation. This equipment
generates, uses, and can radiate radio frequency energy, and if not
installed and used in accordance with the instructions, may cause
harmful interference to radio communications. However, there is no
guarantee that interference will not occur in a particular installation. If
this equipment does cause harmful interference to radio or television
reception, which can be determined by turning the equipment off and
on, the user is encouraged to try to correct the interference by one or
more of the following measures:
– Reorient or relocate the receiving antenna.
– Increase the separation between the equipment and receiver.
– Connect the equipment into an outlet on a circuit different from that
to which the receiver is connected.
– Consult the dealer or an experienced radio/TV technician for help
17
Table of contents