CONNECTING WIRED DEVICES LIVE BROADCASTING ADDITIONAL TIPS TROUBLESHOOTING
7 8
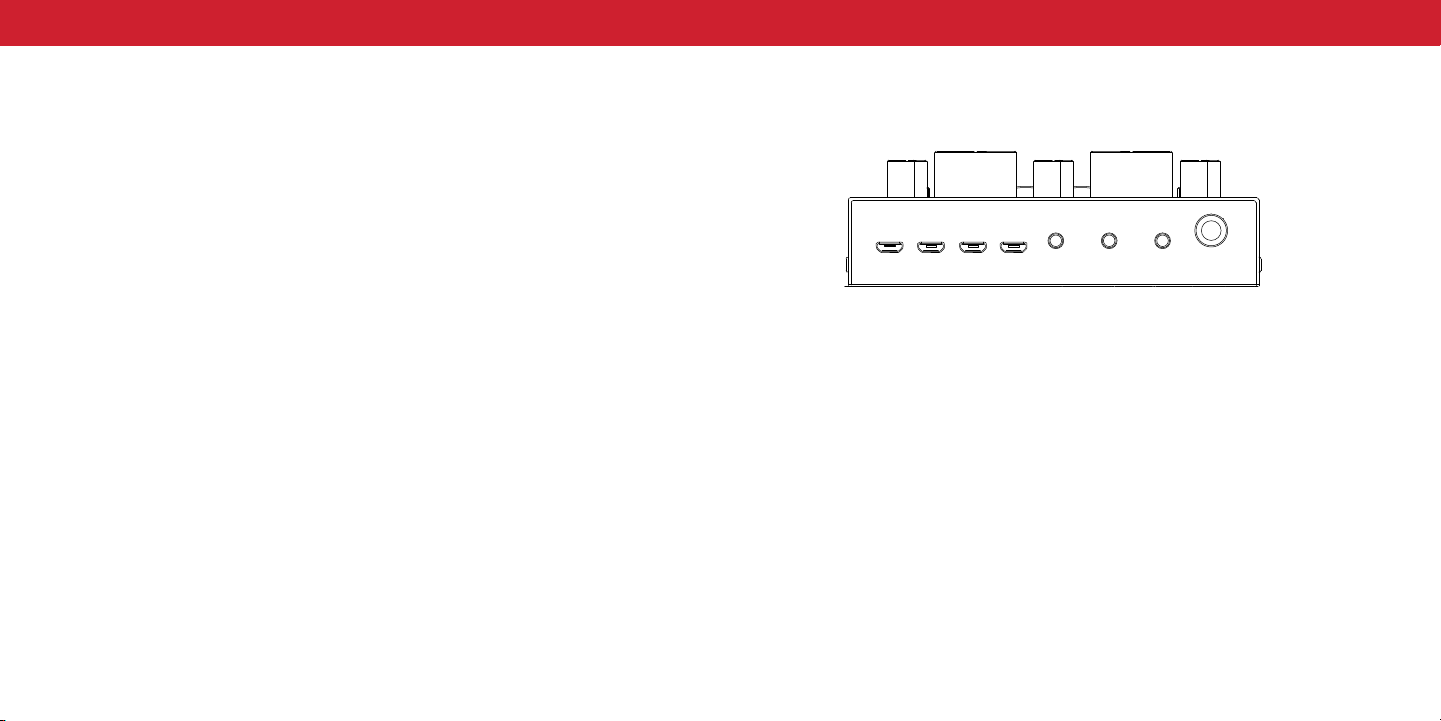
PORTS
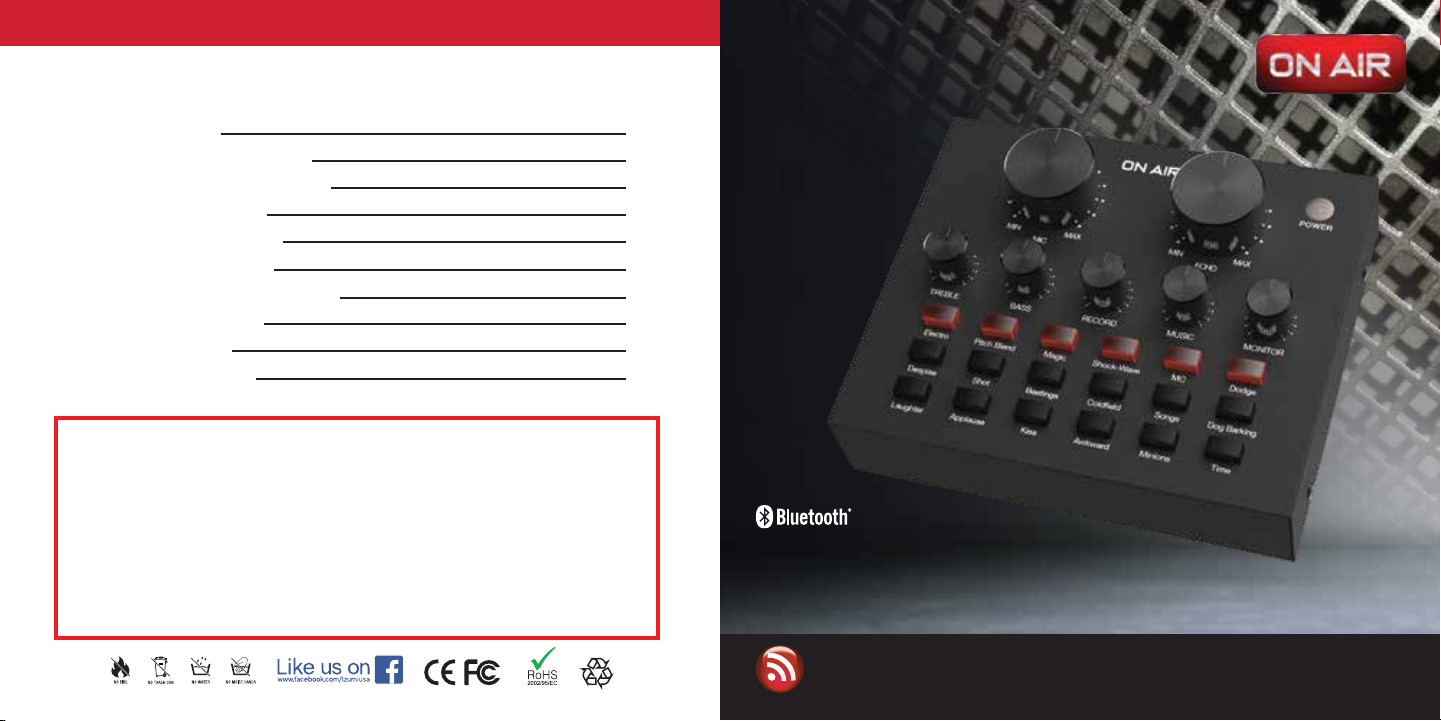
LIVE PERFORMANCES, STUDIO RECORDING &
BROADCASTING
• When using with live performances or recorded songs, the Recording
volume knob must be increased (this controls the volume that the
audience will hear).
• When using with a smartphone or other additional equipment for
broadcasting purposes, use your smartphone (or other equipment,
such as a PC) to control the sound volume.
TROUBLESHOOTING - ELIMINATING NOISE
• Try switching power sources by plugging into a different electrical outlet
or use a USB power bank.
• Check for interference from other equipment connected to the same
power circuit.
• Input devices volume control should be set around 70%. If you hear
distortion, lower the channel volume until no distortion is heard. Then
increase volume using the Monitor Volume, headphone volume wheel or
volume control on your speakers.
• Increase your input device’s volume first. Only increasing volume settings
on the mixer may cause a high noise level.
• Additional static noises may arise due to interference from other
connections in close proximity. Do not power mixer from a charging hub
that also powers other devices, especially if those devices are also
plugged into the mixer.
tzumi®Distributed by tzumi inc. NY, NY, 10016.
©Copyright 2019 tzumi. All Rights Reserved. Made In China. All pictures shown are for illustration purpose only. Actual product may vary due to product
enhancement. Other trademarks and trade names on this package are those of their respective owners.
ADDITIONAL TIPS FOR USE
• Some condenser microphones and headsets are highly sensitive and may
produce a whistling or howling sound if the selected sound level is too high
(this may be due to factors such as the microphone sound card,
reverberation, very high or very low sounds, or the paired monitor settings).
To fix, slowly adjust the levels until the howling sound subsides.
1&2Live input: Input live music/instruments via a 3.5 to micro USB cable
3Instrumental Accompaniment: Input a musical accompaniment with a 3.5
to micro USB cable
4Charging Port: Use this port to change the unit and for connecting to a PC.
Connect the micro USB to USB cable, open your Digital Audio Workstation
(DAW) on your computer to capture,
edit and record audio from the Wave Mixer
5Headset: connect your headset to listen to audio from the Wave Mixer
6Earphone Speaker: Use this port to connect the Wave Mixer to earbuds,
headphones, speakers or to any other source (I.E. Computer)
7Condenser Mic: Connect a Condenser Mic to this port
8Dynamic Mic: Connect a Dynamic Mic to this port