CB022 RONA SKU:87775001
UBER
Design
Before starting to intall your product, please take
a few minutes to READ THESE INSTRUCTIONS
CAREFULLY. In addition, please check the product
CAREFULLY for any visible damages.
Avant de commencer à installer votre produit, LIRE
ATTENTIVEMENT CE MANUEL D’INSTALLATION et
inspecter le produit pour toute défectuosité.
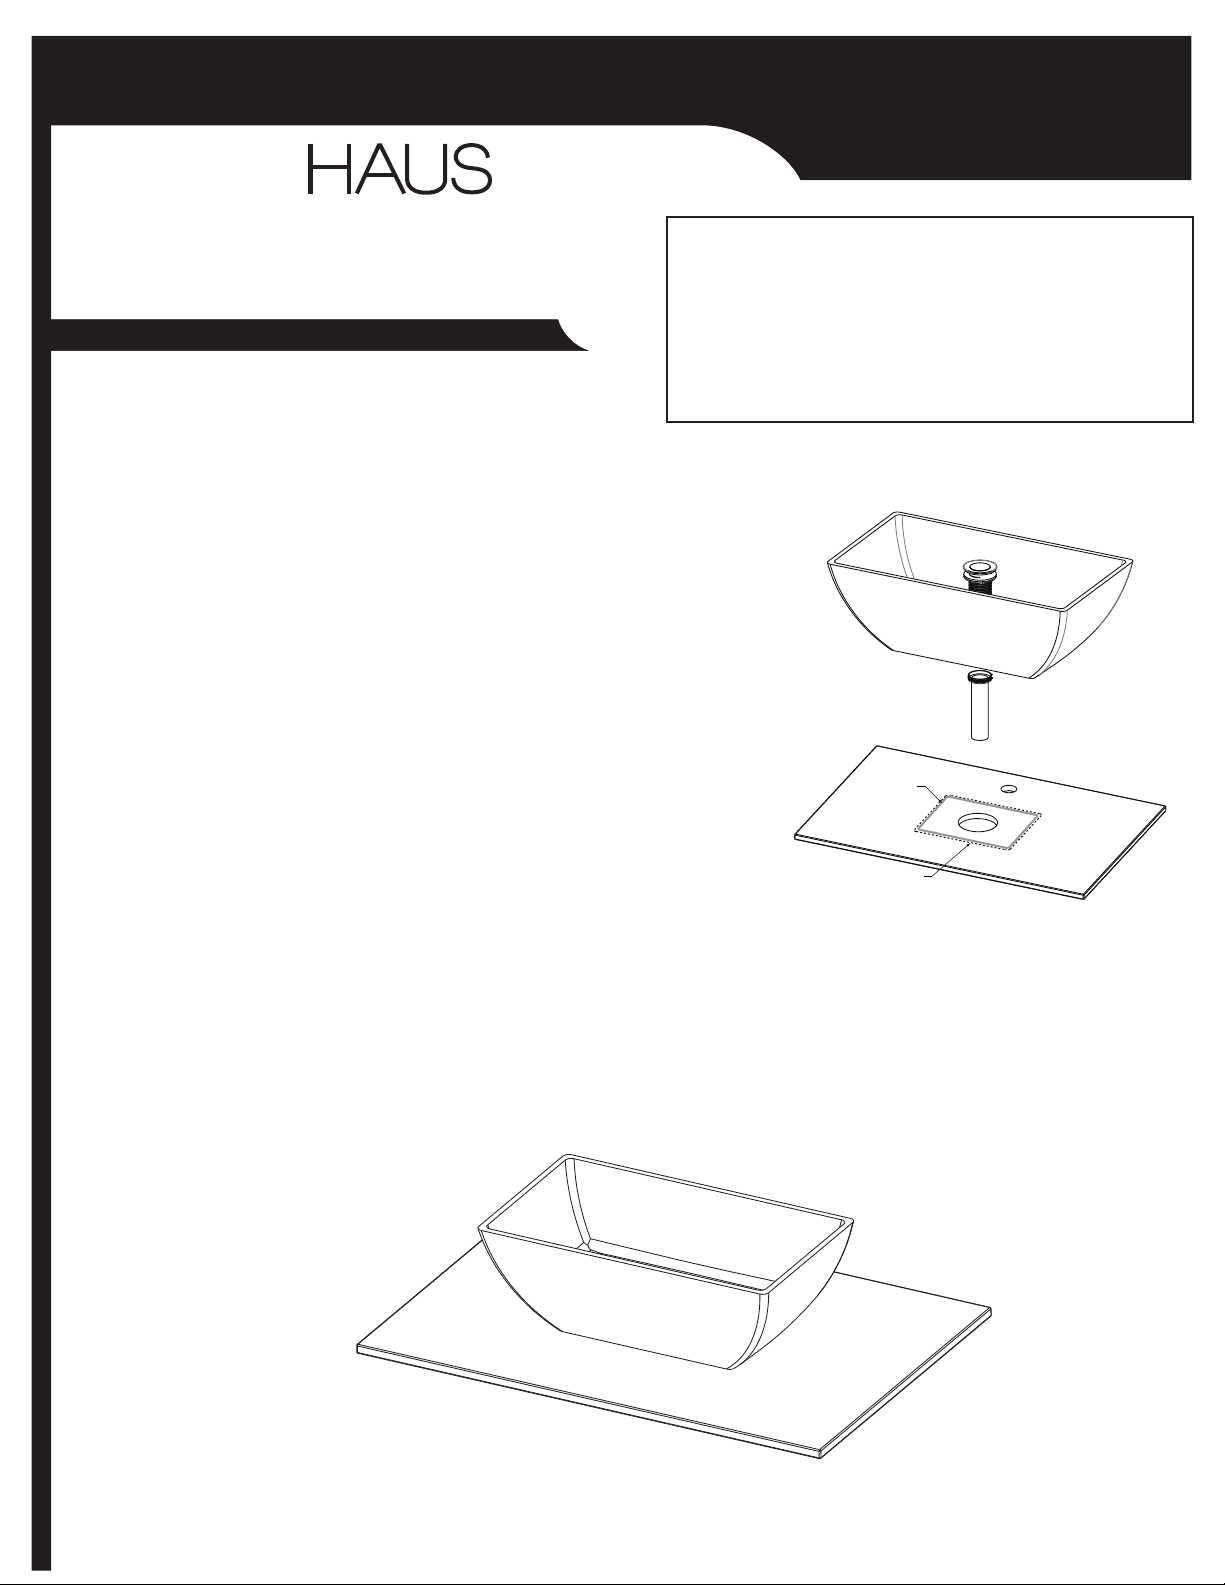
Manuel d’installation pour lavabo
Installation manual for lavatory basin
WARRANTY
Thank you for purchasing this UBERHAUS Design product. These products have been made to
demanding high-quality standards and are guaranteed for domestic use against manufacturing
faults for a period of 5 years from the date of purchase. This warranty does not affect your
statutory rights.
Should you have any problems with your product, please do not return it to the store. Call Mecanair
customer service directly at 1-866-206-0888 or visit www.mecanair.net in order to be directed to the
closest service centre. A proof of purchase (original sale receipt) from the original purchaser of the
product must be provided with any warranty claim.
The product is guaranteed if used for normal trade purposes and is valid for the original buyer only.
Any warranty is deemed invalid if the product has been overloaded or used improperly, or subject
to neglect, attempted repair other than by an authorized agent. Heavy-duty, daily professional or
hire usage are not guaranteed. RONA is not responsible for any costs related to labour, injuries or
any other loss incurred during the product installation, repair or replacement, including any indirect
or consequential damages.
Due to continuous product improvement, we reserve the right to change the product specifications
without prior notice.
GARANTIE
Merci d'avoir acheté ce produit UBERHAUS Design. Ce produit a été conçu pour répondre à des
normes de haute qualité très strictes et est garanti pour usage domestique contre tout défaut de
fabrication pour 5 ans (surface solide) suivant la date d'achat. Cette garantie n'affecte pas vos
droits légaux.
S.V.P., en cas de problème avec votre produit, ne le retournez pas en magasin. Veuillez communiquer
directement avec le service à la clientèle Mecanair au 1-866-206-0888 ou visitez le www.mecanair.net
afin de connaître le centre de service autorisé le plus près de chez vous. Une preuve d’achat (reçu
d’achat original) de l’acheteur original du produit vous sera demandé avec toute demande de
garantie.
Ce produit est garanti s'il est utilisé de façon normale et est valide pour le premier acheteur
seulement. Toute garantie est invalide si le produit a été utilisé en surcharge ou de façon non
recommandée ou a fait l'objet de négligence ou de réparations non effectuées par un agent
autorisé. L'usage professionnel au quotidien et l'usage intensif ne sont pas garantis. RONA n’est pas
responsable des frais de main d’œuvre, des blessures ou toute autre perte ou dommage subis
pendant l’installation, les réparations ou le remplacement, incluant consécutif ou indirect.
Due à l'amélioration continue de nos produits, nous nous réservons le droit de modifier les
caractéristiques de ce produit sans préavis.