- 2F Base (corded telephone) -
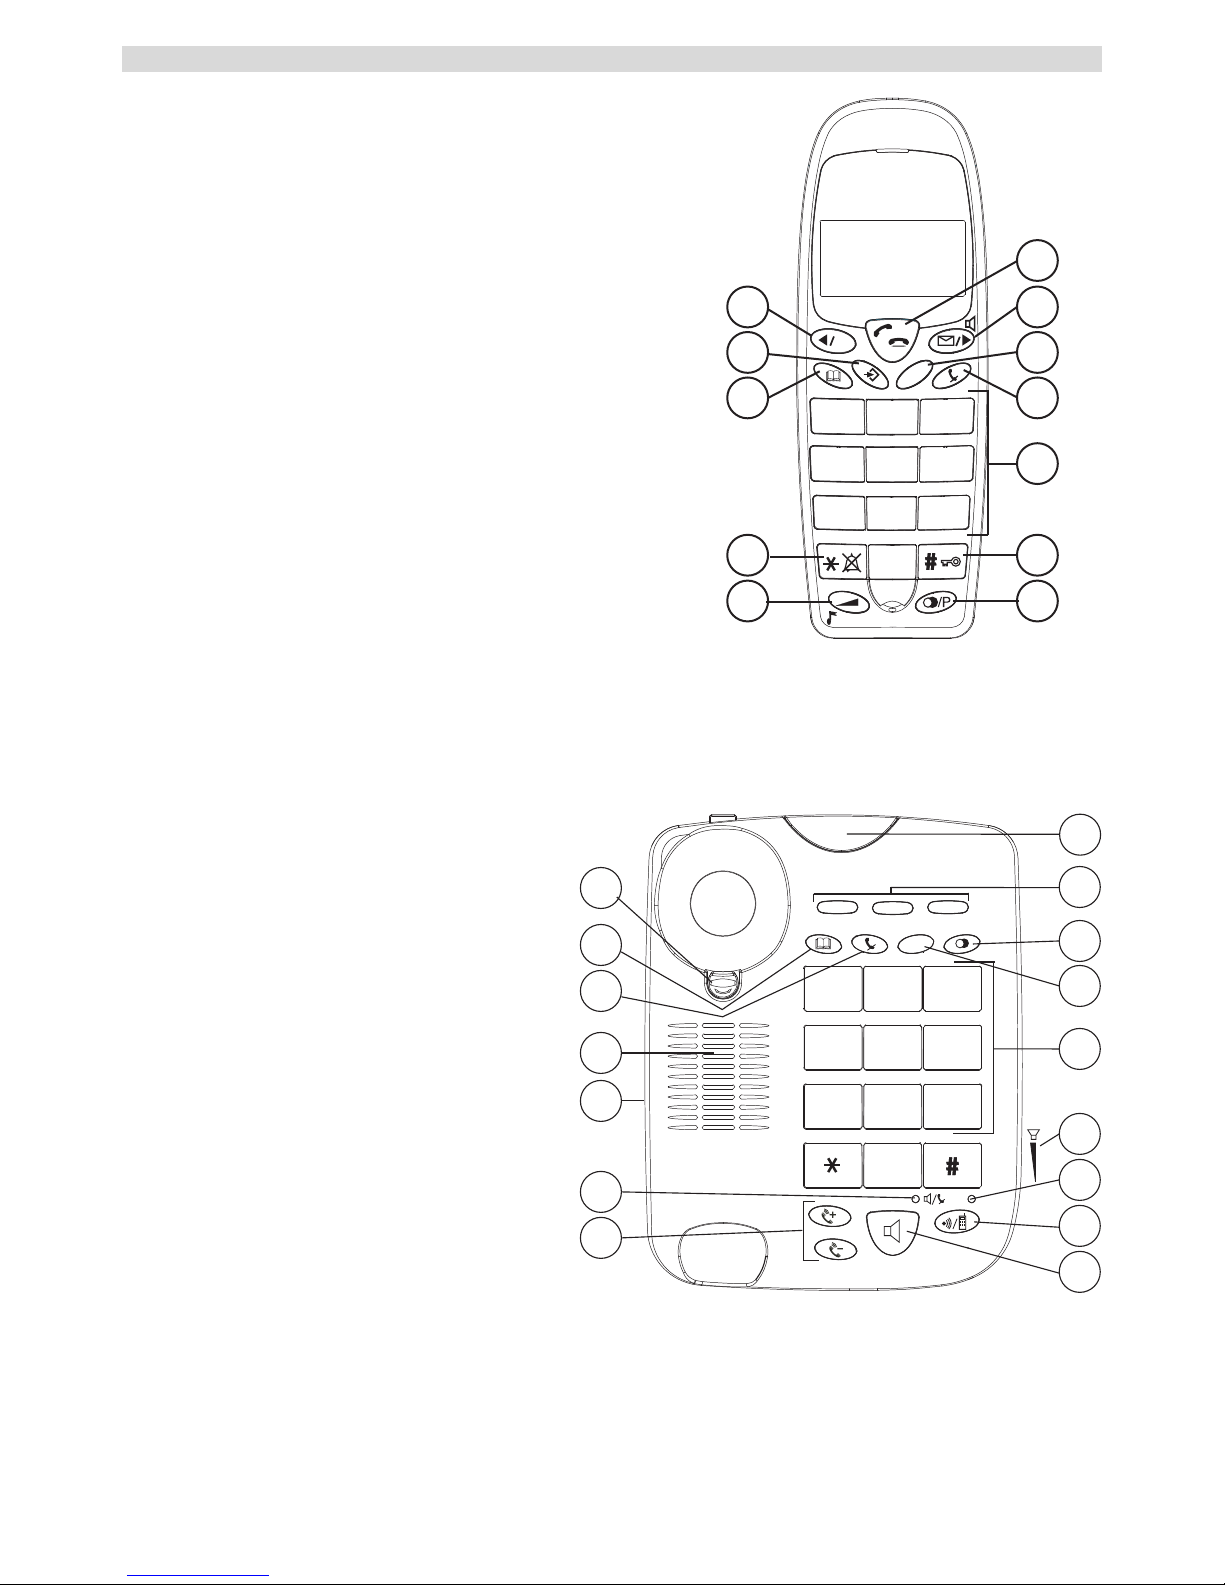
- 2E Front of the handset -
- 2G Charger -
1 Safety notes.............................................................................................................................4
2 Cleaning .................................................................................................................................. 5
3 Disposal of the device (environmental protection) .............................................................5
4 First steps................................................................................................................................5
4.1 How to use this User Guide ................................................................................................... 5
4.2 Installing the base station....................................................................................................... 6
4.3 Handset charger ..................................................................................................................... 6
4.4 Handset .................................................................................................................................. 6
4.5 Wall mounting ....................................................................................................................... 7
4.6 Battery low indicator ............................................................................................................. 7
4.7 Keys / Display........................................................................................................................ 8
4.8 Display ................................................................................................................................... 9
5 Using the corded telephone ................................................................................................... 9
5.1 Outgoing calls ........................................................................................................................ 9
5.2 Hands free mode on / off ..................................................................................................... 10
5.3 Programming memory numbers .......................................................................................... 10
5.4 Dialling a memory number .................................................................................................. 10
5.5 Mute ..................................................................................................................................... 10
5.6 Setting the speaker and handset volume .............................................................................. 10
5.7 Setting the ring tone............................................................................................................. 11
5.8 Setting the ring tone volume ................................................................................................ 11
5.9 Diverting a call to the cordless handset ............................................................................... 11
5.10 Paging function (for finding the handset) ............................................................................ 11
5.11 The R key (Flash) ................................................................................................................ 11
6 Using the cordless handset ..................................................................................................11
6.1 Navigating the menu ............................................................................................................ 11
6.2 Changing the language......................................................................................................... 12
6.3 Setting the date and time...................................................................................................... 12
6.4 Outgoing calls ...................................................................................................................... 12
6.5 Incoming calls ...................................................................................................................... 13
6.6 Hands free mode on / off ..................................................................................................... 13
6.7 Mute ..................................................................................................................................... 13
6.8 Setting the volume ............................................................................................................... 14
6.9 The R key (Flash) ................................................................................................................ 14
6.10 Selecting the ring tone and setting the volume .................................................................... 14
6.11 Key lock............................................................................................................................... 14
6.12 Setting the dialling mode ..................................................................................................... 15
6.13 Handset name....................................................................................................................... 15
7 Phonebook ............................................................................................................................15
7.1 Add a phonebook entries ..................................................................................................... 15
7.2 Dialling a memory number .................................................................................................. 15
7.3 Edit a phonebook entry ........................................................................................................ 16
7.4 Delete a phonebook entries.................................................................................................. 16
8 Calling line identification (CLIP).......................................................................................16
8.1 New calls.............................................................................................................................. 16
8.2 Opening the call list ............................................................................................................. 16
8.3 Calling a number in the call list ........................................................................................... 17