Ulti Mate E305 User manual

1
Contents
General Instructions .................................................
1. User Controls ...........................................................
2. Setting Up .................................................................
2.1 Important information ...............................................
2.2 Contents of package .................................................
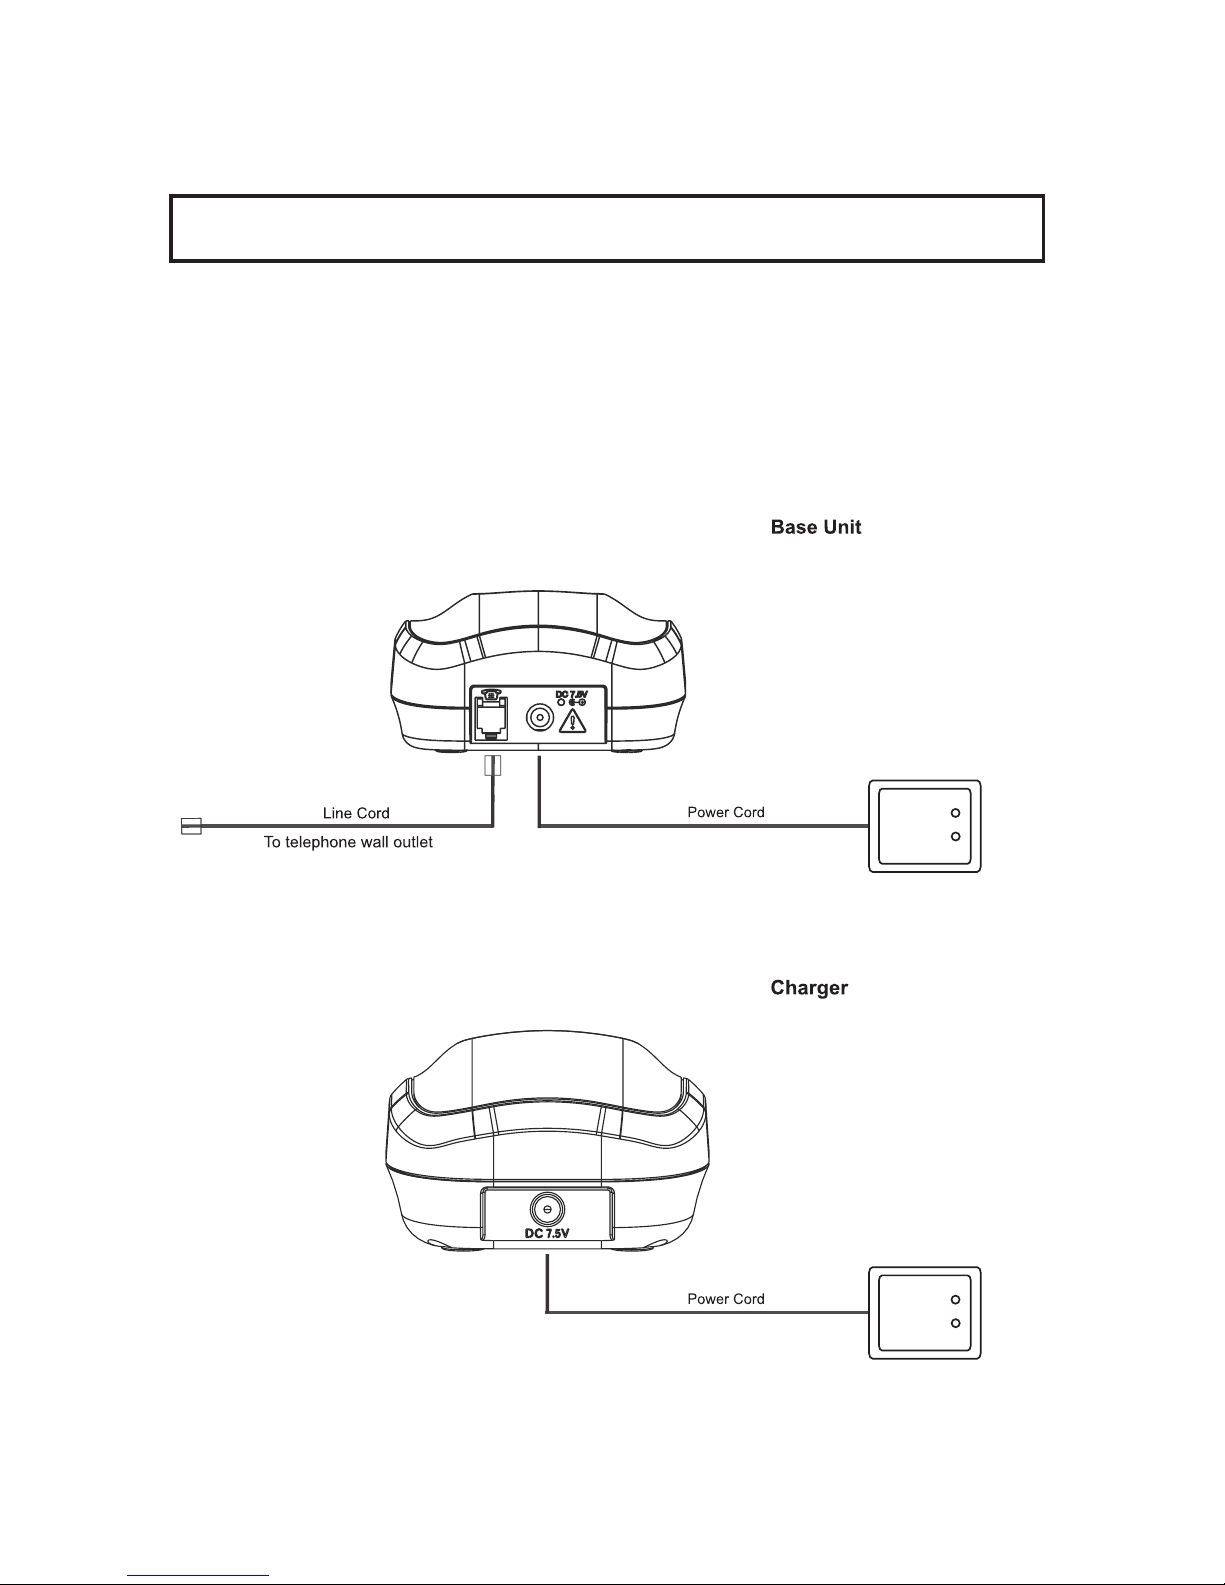
2.3 Connecting the base station and charging base ......
2.4 Replacing the batteries .............................................
2.5 Charging the batteries ..............................................
2.6 Setting the dial mode ................................................
2.7 Setting the day and time ...........................................
2.8 Setting the date format .............................................
3. Normal Use ...............................................................
3.1 The display ...............................................................
3.2 Receiving incoming calls .........................................
3.3 Dialing a number ......................................................
3.4 Handsfree facility ......................................................
3.5 Call timer ..................................................................
3.6 Turning the handset on and off .................................
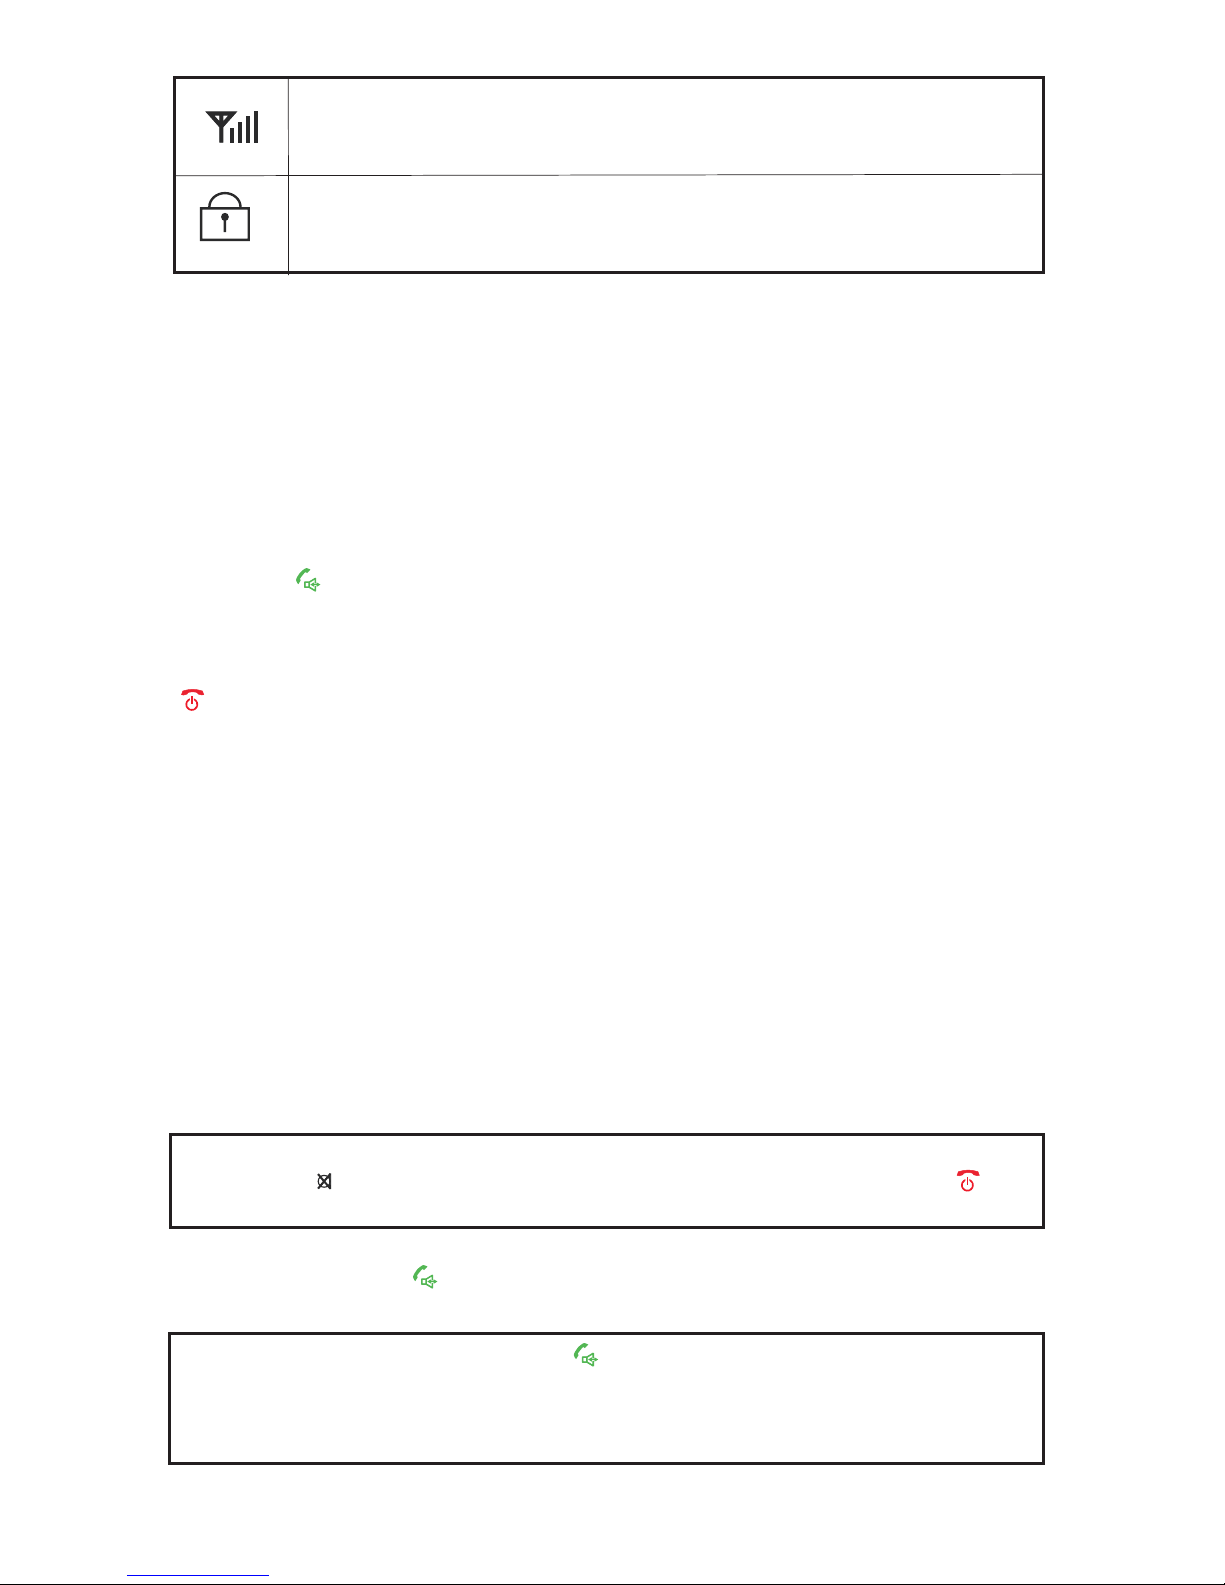
3.7 Range indications......................................................
3.8 Muting the handset microphone ...............................
3.9 Setting the receiver volume ......................................
3.10 Redial .......................................................................
3.10.1 Copying a number from the redial list into the
phonebook ................................................................
3.10.2 Deleting individual numbers from the redial list ........
3.10.3 Deleting all numbers from the redial list ...................
3.11 Keypad lock ..............................................................
3.12 Paging the handset from the base station ................
4. The Phonebook ........................................................
4.1 Entering numbers in the phonebook .........................
4.2 Viewing a number in the phonebook .....................
4.3 Modifying numbers stored in the phonebook ...........
4.4 Deleting individual numbers from the phonebook ....
4.5 Deleting the entire phonebook ..................................
4.6 PB Status ..................................................................
3
5
6
6
6
7
7
7
8
8
9
9
9
10
10
11
11
11
11
12
12
12
13
13
14
14
14
15
15
16
17
17
18
18

2
5. Calling Line Identification
(IdentiCall subscription required) .............................
5.1 The list of callers ......................................................
5.2 Storing a number from the list of callers
into the phonebook ..................................................
5.3 Deleting individual numbers from the list of callers ..
5.4 Deleting the entire list of callers ...............................
6. Recall .......................................................................
6.1 Setting the Recall time .............................................
6.2 WaitingCall ...............................................................
7. Additional Functions .................................................
7.1 Setting ring melodies and melody volume on the
handset ...................................................................
7.2 Change handset name .............................................
7.3 Turning the key tone on and off ...............................
7.4 Changing your PIN number .....................................
7.5 Setting the display language ....................................
7.6 Auto Answer .............................................................
7.7 Setting the alarm ......................................................
7.8 Audio Setup .............................................................
7.9 Factory reset ............................................................
7.10 Menu Structure ........................................................
8. Multiple Handsets ....................................................
8.1 Internal calls .............................................................
8.2 Transferring external calls to another
handset ....................................................................
8.3 Registering and de-registering handsets .................
8.3.1 Registering handsets ...............................................
8.3.2 De-registering handsets ...........................................
8.4 Additional base stations ...........................................
9. Troubleshooting Guide .............................................
10. Important Information ...............................................
10.1 Technical data ..........................................................
19
19
20
20
20
21
21
21
22
22
23
23
24
24
24
25
25
26
27
29
29
29
30
30
30
31
32
34
34

3
General Instructions
Rechargeable batteries
!we recommend you use our
rechargeable AAA Ni-MH 1.2 Volt batteries, 600mAh rating
(minimum 550mAh required) available at your nearest Game
store.
!Do not throw batteries in a fire or immerse them in water.
!Should the handsets become warmer when charging there is
no cause for alarm, as this is quite normal.
!Only charge the handset on the base station or supplied
charging bases. The use of other charging bases may cause
damage to the batteries or handset.
!Use only the 2-pin power adaptor that was supplied, other
power adaptors may cause damage.
Location of the base station
!The base station must be located within reach of a 230 Volt
power outlet socket. To avoid interference problems, do not
place the base station in the immediate proximity of other
electrical equipment such as a microwave oven or hi-fi
system. The location of the base station can significantly
influence the proper functioning of the telephone. It is also
beneficial to prevent the use of multi-power adaptors as these
can induce electrical interference.
!Place the base station on a level, non-slip surface. The feet of
the base station will not normally mark the surface on which it
stands. However, the wide range of surface finishes in use,
renders it impossible to exclude marking of any surface.
!Do not use the handset in areas where there is a danger of
explosion.
!Avoid excessive exposure to smoke, dust, vibration,
chemicals, humidity, high temperature or direct sunlight.
When replacing the batteries,

4
!Choose a central location for your base station. For maximum
range the base station should be placed in the centre of the
area in which you would like to use your handset.
Temperature and ambient conditions
!Your telephone is designed for indoor use and an operating
temperature range of -10 C to 50 C.
!The base station must not be installed in humid areas such as
bathrooms. Avoid proximity to sources of heat such as
radiators and do not expose the unit to direct sunlight.
Cleaning and care
!The outer surfaces of the unit can be cleaned with a soft, dry,
lint-free cloth. Never use cleaning agents or solvents. Apart
from occasionally cleaning the outer surfaces, no further care
is required. The rubber feet of the base station are not
resistant to all cleaning agents. The retailer cannot, therefore,
be held responsible for damage to furniture etc.
NOTE: Your telephone is guaranteed for a period of 12 calendar months
from the date of purchase as indicated on your till slip. Keep your till slip
in a safe place as it will be required for guarantee repairs. It is however
not guaranteed against damage caused by misuse, riot damage,
lightning or power surge damage, damage caused by using the unit for
purposes other than which it was intended or any damage that can be
deemed an act of God.
NOTE: No calls can be made or received during a power failure or if
your power adaptor is disconnected from the 230 volt supply.
° °

5
1. User Controls
Handset
1. Clr. / Mute button
2. End call / Power / Exit button
3. Redial button
4. Down / Phonebook button
5. Selection / Menu / Recall button
6. Up / Calls list button
7. Call / Handsfree button
8. Internal calls button
9. Keypad lock button
Base station
1. Page button
Charging base
1. Charging contacts
MENU/R C/

2. Setting Up
2.1 Important information
NOTICE: Before switching on, please read the general instructions at
the beginning of this manual.
2.2 Contents of package
The package contains:
Base station, two charging bases, three handsets, six batteries, three
power adaptors with power cords, one telephone line cord, and this
instruction manual.
6
Bottom View
Back View
Bottom View
Back View
DC 7.5VDC 7.5V

2.3 Connecting the base station and charging base
Set-up your telephone’s base station and charging base within reach of
a telephone socket and power outlet socket.
1. Insert the relevant cord from the 1st power adaptor into the
socket at the back of the base and the 2nd and 3rd power
adaptors into the socket at the back of the charging bases.
Plug the power adaptors into a conveniently located power
socket.
2. Connect the telephone line cord between the telephone
socket at the back of the base station and the telephone wall
socket.
2.4 Replacing the batteries
!When replacing the batteries, use rechargeable AAA
Ni-MH 1.2 Volt batteries of at least 550mAh. Replacement
batteries are available from the retailer where you purchased
your phone.
!To fit the batteries into the handsets, press down on the upper
edge of the battery compartment cover and slide it away from
the handset. Remove the faulty batteries and then fit the new
batteries. In doing so, be careful to ensure that the polarity is
correct as indicated. Carefully replace the cover and slide it
back until it clicks into position.
IMPORTANT NOTICE - Charging the batteries for the first time :
Place the handset on the base station and charging bases for at least 16
hours. If the batteries are not properly charged, the telephone may fail to
function correctly.
2.5 Charging the batteries
The rechargeable batteries in your telephone’s handset provides
sufficient power for a maximum standby time of 100 hours and talk time
of up to 10 hours.
7

8
The actual condition of the batteries are shown on the LCD display with
the battery capacity symbol shown below :
Full
Half
Low
If the remaining charge in the batteries is too low, the symbol on the
display will blink.
NOTICE: Like your car battery, the rechargeable batteries suffer from a
certain, unavoidable ageing effect. You can, however, minimize this by
exercising the batteries correctly. As you use your telephone, always
start with the fully charged batteries and continue using it until they are
“empty” as indicated by the blinking symbol on the display. Then
recharge them fully. This will maintain maximum battery capacity for as
long as possible. Repeated partial charging and discharging will cause a
“memory effect” which will result in reduced capacity.
2.6 Setting the dial mode
1. Press the MENU/R button.
2. Use the por qbuttons to select BS SETTING. Press the
MENU/R button.
3. Use the por qbuttons to select DIAL MODE. Press the
MENU/R button.
4. Use the por qbuttons to select between TONE or PULSE.
Press the MENU/R button.
5. You can then select further menu functions or exit by pressing
the button.
2.7 Setting the day and time
NOTE: If you subscribe to Telkom’s IdentiCall service, the time and date
in your phone will be correctly set with each incoming phone call. See
section 5 in this manual for more information on the use of caller ID and
the IdentiCall service.
1. Press the MENU/R button.
2. Use the por qbuttons to select HS SETTING. Press the
MENU/R button.
3. Use the por qbuttons to select DATE & TIME. Press the
MENU/R button.
4. Use the por qbuttons to select SET DATE. Press the
MENU/R button. The display shows the current date.

9
2.8 Setting the date format
1. Press the MENU/R button.
2. Use the por qbuttons to select HS SETTING. Press the
MENU/R button.
3. Use the por qbuttons to select DATE & TIME. Press the
MENU/R button.
4. Press the MENU/R button again to select DATE FORM.
5. Use the por qnavigation keys to select between DD-MM
and MM-DD. Press the MENU/R button.
6. You can then select further menu functions or exit by pressing
the button.
3. Normal Use
3.1 The display
During normal operation, the display shows the date and TELKOM. The
default name can be re-programmed any time, see chapter 7.2.
The display also provides symbol representation of all the main
functions and the current status of the phone.
5. Enter the date, e.g. 16 04 for 16th April.
button.
6. Use the por qbuttons to select SET TIME. Press the
MENU/R button. The display shows the current time.
7. Enter the time, e.g. 09 30 for 9:30am. Press the MENU/R
button.
8. You can then select further menu functions or exit by pressing
the button.
Press the MENU/R
Indicates the battery charge level.
You are making a call.
Indicates you have one or more missed calls.
You are in handsfree mode.

10
3.2 Receiving incoming calls
If you receive an incoming call, the handset will emit a ring signal and
the handset display shows the callers telephone number (Identicall
subscription required).
Notice: While the handset is ringing you can use the pand qbuttons
to adjust the ring volume.
Press the button on the handset to take the call. If the handset is on
the base, simply lift it and speak (if auto answer is on).
To end the call, replace the handset on the base station or press the
button on the handset.
You will find information on Calling Line Identification in chapter 5.
When automatic answering is switched on, the call will be automatically
taken as soon as you lift the handset from the base station. To find out
how to turn the automatic answer function on and off, see chapter 7.6.
3.3 Dialing a number
1. Use the keypad to enter the desired telephone number. Up to
32 digits may be entered. The digits dialed will be shown on
the display. Since the display can only display 11 digits, only
the last 11 digits of longer phone numbers will be displayed.
NOTICE: With Pre-dialing, if you dial the wrong digit you can briefly
press the button to delete one digit at a time. If you press the
button, the entire number will be deleted.
2. Press the button on the handset to dial the number.
C/
NOTICE: You can also press the button first, you will then hear dial
tone. As you enter the digits of the desired number, your telephone will
dial the number immediately. The correction of individual digits is only
possible in the pre-dialing mode.
Shows the current signal strength.
The keypad lock is activated.

11
3.4 Handsfree facility
Handsfree lets you talk to your caller without holding the handset. It also
enables other people in the room to listen to both sides of your
conversation.
Press the button twice at the start of a call or once during a call. You
will now hear the dialing tone or the person you are speaking to over the
loudspeaker in the handset.
By pressing the button repeatedly you can change over between
normal and handsfree mode during a call.
Always end a call made using handsfree facility by pressing the
button.
NOTICE: When you are in handsfree mode the symbol is shown on
the handset display.
3.5 Call timer
During a call, the duration of the call is displayed in minutes and
seconds. 5 Seconds after dialling, the display changes from the number
dialed to display the call duration. The call timer will display the call
duration for a few seconds after completion of the call.
3.6 Turning the handset on and off
By holding down the button, you can turn off the handset. If the
handset is turned off, there is no drain on the battery.
Hold down the button again to turn the handset back on. The
message, SEARCHING will be shown on the display and the handset
will be ready for use after a brief delay.
NOTICE: No calls can be made or received if the handset is switched
off.
3.7 Range indications
The range of the handset is a maximum 50 metres in enclosed areas
and up to about 300 meters in open areas (line of sight). If a strong
signal is available from the base station a symbol will appear on the
display.

12
If you move too far away from the base station, the symbol will blink.
In this case you should move closer to the base station to avoid losing
the connection.
For best performance ensure that the base station is located in the
centre of the area in which the handset will be used most frequently.
This will ensure optimum range and performance.
3.8 Muting the handset microphone
You can use the button to turn off the handset microphone during a
call. You can then speak without being heard over the telephone (secret
function). The receiver in the handset remains switched on so that you
can still hear the caller.
1. Press the button during a call. CALL MUTED will appear
on the display.
2. To turn the microphone back on, press the button briefly
once again. The words CALL MUTED will disappear and you
can continue your call.
C/
C/
3.9 Setting the receiver volume
The receiver speaker (earpiece) can be adjusted to your preference.
During a call, you can use the buttons, pand q, to adjust the speaker
volume. You can select one of five volume settings.
3.10 Redial
The redial function is especially useful if a number is engaged or the
person does not answer. Your telephone stores the last ten dialled
numbers.
1. Press the button and the last number dialed will appear
on the display.
2. By pressing the button, you can display the previous
number called. Use the pbutton to move through the list in
the opposite direction.
3. Next press the button to dial the number shown on the
display.
q
C/

13
3.10.1 Copying a number from the redial list into the phonebook
1.
on the display.
2. Use the pand qbuttons to select the number you wish to
transfer to the phonebook. Press the MENU/R button.
3. The display shows ADD TO PB. Press the MENU/R button.
4. Now enter the name (up to 12 letters) on the keypad.
5. Press the MENU/R button. The number will be displayed
again. Press the MENU/R button again to confirm.
6. Press the button to return to standby.
Once you have stored a number in the phonebook, it is not the number
but the corresponding name that is shown in the list of callers.
Press the button and the last number dialed will appear
3.10.2 Deleting individual numbers from the redial list
1.
on the display.
2. Use the pand qbuttons to select the number you want to
delete. Press the MENU/R button.
3. Use the qbutton to select DELETE. Press the MENU/R
button.
4. The display shows CONFIRM?. Press the MENUR button to
delete the number.
5. Press the button to return to standby.
Press the button and the last number dialed will appear
NOTICE: If a number in the redial list matches a phonebook entry, the
programmed name will replace the number on the display.

14
3.10.3 Deleting all numbers from the redial list
1.
on the display.
2. Press the MENU/R button.
3. Use the qbutton to select DELETE ALL. Press the MENU/R
button.
4. The display shows CONFIRM?. Press the MENU/R button to
delete all numbers from the redial list.
5. The display then returns to standby.
Press the button and the last number dialed will appear
3.11 Keypad lock
If you frequently carry the handset around with you, you can lock the
keypad so that buttons are not pressed unintentionally. You can receive
incoming calls as normal when the keypad lock is switched on.
- Activating the keypad lock
Press the button on the handset for three seconds. The display
shows HS LOCKED.
- Deactivating the keypad lock
Press the button again for three seconds.
3.12 Paging the handset from the base station
If you have misplaced your handset, press the button at the bottom of
the base station. For thirty seconds, the handset will emit a signal tone
to help you find the handset. To stop the tone, press any button on the
handset or the button at the bottom of the base station again.

15
4. The Phonebook
Up to 50 telephone numbers and names can be stored in the
phonebook. The maximum stored number length is 32 digits and name
length is 12 characters.
4.1 Entering numbers in the phonebook
1. Press the MENU/R button.
2. Use the pand qbuttons to select PHONEBOOK. Press the
MENU/R button.
3. Press the MENU/R button again to select ADD ENTRY.
4. The display now shows NAME ?.
5. Now enter the name (up to 12 letters) on the keypad.
Below you will find more information on entering names.
6. Press the MENU/R button again. The display shows
NUMBER ?.
7. Enter the desired number from the keypad.
8. Press the MENU/R button again.
9. Use the pand qbuttons to select the melody you wish to
assign the phone number to.
10. Press the MENU/R button again to confirm.
11. If you wish to store more phone numbers, go back to step 3.
To exit from the entry mode, press the button.
Further information about the phonebook:
You can assign individual contacts to a specific ring melody. You can
select between one of ten ring melodies. In this way, you can tell who is
calling you simply from the ring tone. (Identicall subscription is required
to use this feature)
If the memory capacity of 50 numbers has been exceeded, the display
will show MEMORY FULL. In this case, some numbers will have to be
deleted before new numbers can be entered.
How to enter names:
Example: you wish to enter the name, “JARED”.
To do so, press:
5button once, 2button once, 7button three times, 3button twice, 3
button once.

16
To enter a space, use the 0button. To enter the same letter twice, press
the desired letter button and then wait for the display cursor to move
automatically to the next position.
Entry errors can be deleted with the button.
In order to change a specific letter, the pand qbuttons can be used to
move the cursor to the right or left so that a new letter can be entered.
To enter a special character using the 1 or 0 buttons:
1- - 1 @ _ ?
0- Space 0 & / .
4.2 Viewing a number in the phonebook
Once you have stored a few numbers in the phonebook, they can be
quickly and easily recalled.
In standby:
1. Press the button. The display will show the first stored
number in alphabetical order.
2. The pand qbuttons can now be used to step through the
list of stored numbers.
Or
To jump directly to a number with a name beginning with a
certain letter, press the button with the desired letter.
3. The name will be displayed. Press the MENU/R button to see
the number. If the number is longer than 12 digits, press the
MENU/R button again to see the rest of the number.
4. If you wish to dial the number shown on the display, press the
button.
C/

17
4.3 Modifying numbers stored in the phonebook
1. Press the MENU/R button.
2. Use the pand qbuttons to select PHONEBOOK. Press the
MENU/R button.
3. Use the pand qbuttons to select CHANGE ENTRY. Press
the MENU/R button. The display will show the first stored
number in alphabetical order.
4. Use the pand qbuttons to select the entry you wish to
modify. Press the MENU/R button. The display will now show
the name with a blinking cursor after the last letter.
5. The name can now be changed using the number buttons.
Information on entering names can be found in 4.1.
6. After making the desired modifications to the name, press the
MENU/R button again. The display shows the phone number.
7. Next modify the phone number using the number buttons. By
pressing the button briefly, individual digits can be
deleted.
8. After making the desired modifications to the number, press
the MENU/R button again.
9. Use the pand qbuttons to select the melody you wish to
assign the phone number to. Press the MENU/R button to
confirm.
10. Press the button to return to standby.
C/
4.4 Deleting individual numbers from the phonebook
1. Press the MENU/R button.
2. Use the pand qbuttons to select PHONEBOOK. Press the
MENU/R button.
3. Use the pand qbuttons to select DELETE ENTRY. Press
the MENU/R button. The display will show the first stored
number in alphabetical order.
4. Use the pand qbuttons to select the entry you wish to
delete. Press the MENU/R button.
5. The display shows CONFIRM?. Press the MENU/R button.
6. If you wish to delete more numbers, go back to step 3. To exit
from the programming mode, press the button.

18
4.5 Deleting the entire phonebook
1. Press the MENU/R button.
2. Use the pand qbuttons to select PHONEBOOK. Press the
MENU/R button.
3. Use the pand qbuttons to select DELETE ALL. Press the
MENU/R button.
4. The display shows CONFIRM?. Press the MENU/R button
again.
5. To exit from the programming mode, press the button.
4.6 PB Status
This allows you to check the number of phonebook entries already
stored.
1. Press the MENU/R button.
2. Use the pand qbuttons to select PHONEBOOK. Press the
MENU/R button.
3. Use the pand qbuttons to select PB STATUS. Press the
MENU/R button.
4. The display will show the number of phonebook entries
already stored.
5. To exit from the entry mode, press the button.

19
5. Calling Line Identification (IdentiCall subscription
required)
The calling line identification display shows the origin of incoming calls.
If the data is available, the display shows the caller’s telephone number
after the first ring. If the caller’s name and number is stored in your
phonebook, they will be shown alternately on the display. If the caller
has blocked the sending of his number or if the number cannot be
displayed for technical reasons, the messages OUT OF AREA or
PRIVATE will appear on the display. The calling numbers are stored in a
list so that you can return missed calls easily. A total of 40 calling
numbers can be stored in the list. Once the list is full, the oldest number
is automatically deleted each time a new call is received.
If new calls have been added to the list during your absence, a blinking
symbol appears on the display.
NOTICE: A subscription is required to use the IdentiCall services.
Please call 10219 to subscribe to this service.
5.1 The list of callers
In order to see the list of callers on the display, proceed as follows:
1. Press the button or press the MENU/R button twice to view
the list of callers. If no new calls have been received, the
display will show EMPTY.
NOTICE: If the number matches a phonebook entry, then it is replaced
by the corresponding name from the phonebook.
2. Use the pbutton to search upwards through the list. Use
the qbutton to move down the list in the opposite
direction. If there are no further numbers in the list you
will hear a beep.
3. Where the number in the display is longer than 12 digits,
press the button to see the rest of the number.
4. If you wish to return a call to a number in the list of callers,
simply press the button or the button twice to dial the
number in speakerphone mode.
5. To exit from the callers list mode, press the button.
C/

20
5.2 Storing a number from the list of callers into the
phonebook
Any number in the list of callers can be transferred directly to the
phonebook.
1. Enter the list of callers.
2. Use the pand qbuttons to select the number in the list of
callers that you wish to transfer to the phonebook.
3. Press the MENU/R button. The display shows ADD TO PB.
4. Press the MENU/R button. The display shows NAME?.
5. Now enter the name (up to 12 letters) on the keypad.
6. Press the MENU/R button again. The number will be
displayed again. Press the MENU/R button.
8. Use the pand qbuttons to select the melody you wish to
assign the phone number to.
9. Press the MENU/R button again to store the number. You will
now hear a confirmation beep.
10. To exit from the entry mode, press the button.
Once you have stored a number in the phonebook, it is not the number
but the corresponding name that is shown in the list of callers.
5.3 Deleting individual numbers from the list of callers
1. Enter the list of callers.
2. Use the pand qbuttons to select the number in the list of
callers that you wish to delete. Press the MENU/R button.
3. Use the pand qbuttons to select DELETE. Press the
MENU/R button. The display shows CONFIRM?.
4. Press the MENU/R button again to delete the number from
the list.
5. The display will now show the next number in the list.
6. If you wish to delete more numbers, go back to step 2. To exit
from the entry mode, press the button.
5.4 Deleting the entire list of callers
1. Enter the list of callers.
2. Use the pand qbuttons to select DELETE ALL. Press the
MENU/R button. The display shows CONFIRM?.
3. To exit from the entry mode, press the button.
Table of contents