Uni-ram UR700QVAC User manual

USER MANUAL
UR700QVAC and
UR700QVAC-H
AUTOMATIC WET / DRY DUSTLESS
VACUUM SYSTEMS
www.uniram.com REVISED 2013-12

2
MANUAL - AUTOMATIC DUST VACS - UR700QVAC Revised 2013-12
Follow the procedures in this manual to operate this machine safely and effectively. Ensure that this
manual is readily available to the operator at all times. If you have any questions about the operation of
this machine, contact:
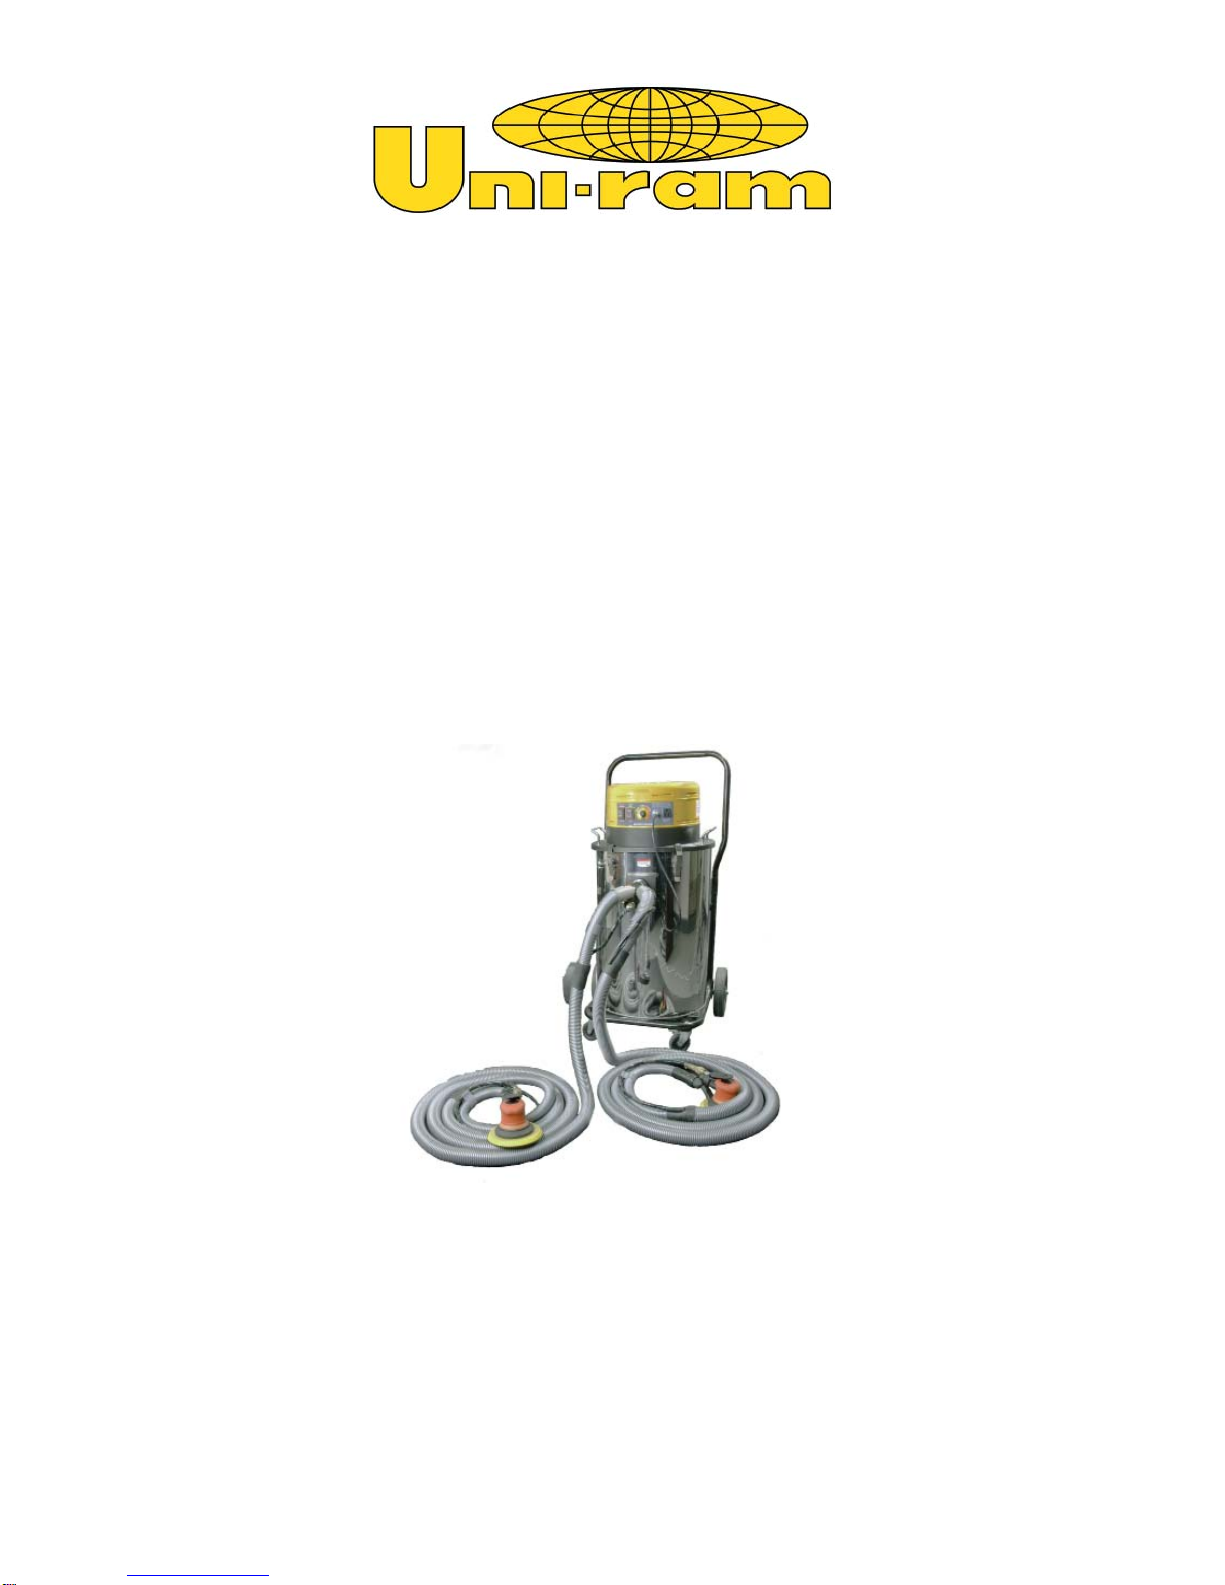
FEATURES AND SPECIFICATIONS
The UR700QVAC is 120 V, 2000 W, 50/60 Hz and the UR700QVAC-H is 240 V, 2000 W, 50/60 Hz.
These mobile vacuums are ideally suited for automotive, marine and industrial applications wherever air
operated, vacuum-assist tools are used. Two technicians can work on different projects at the same time.
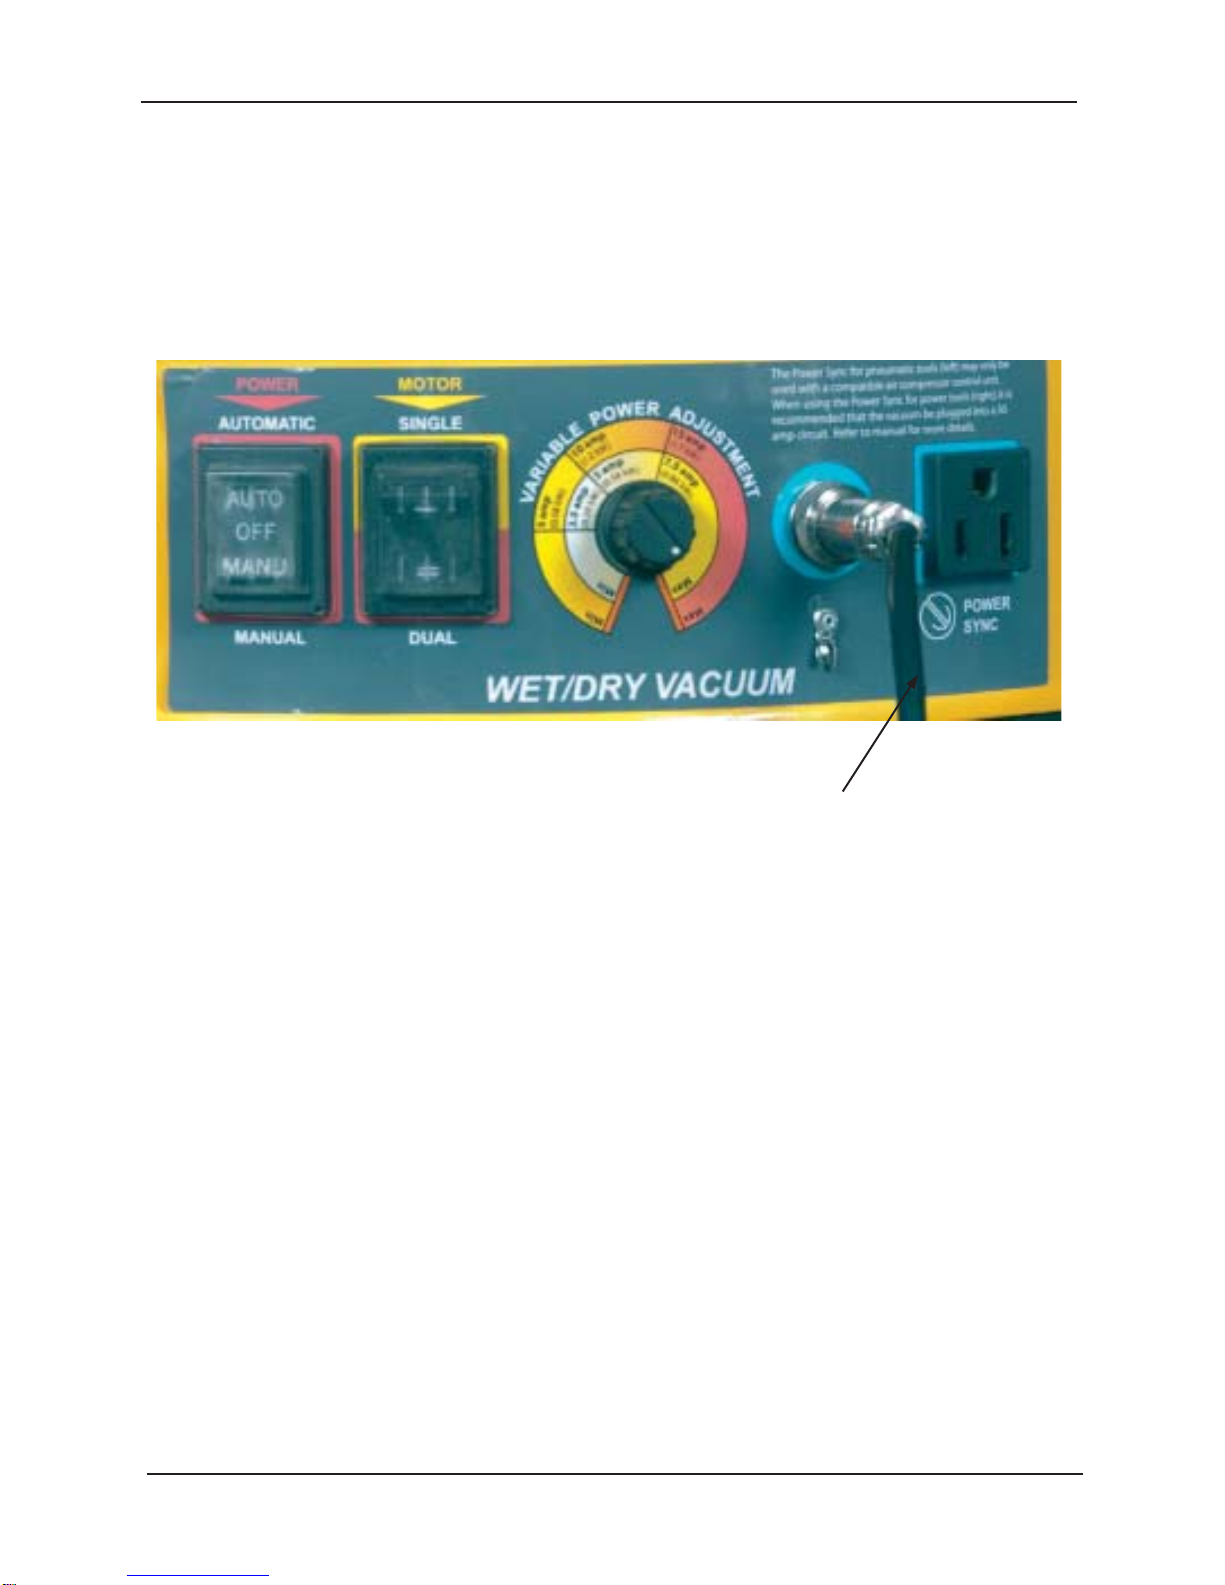
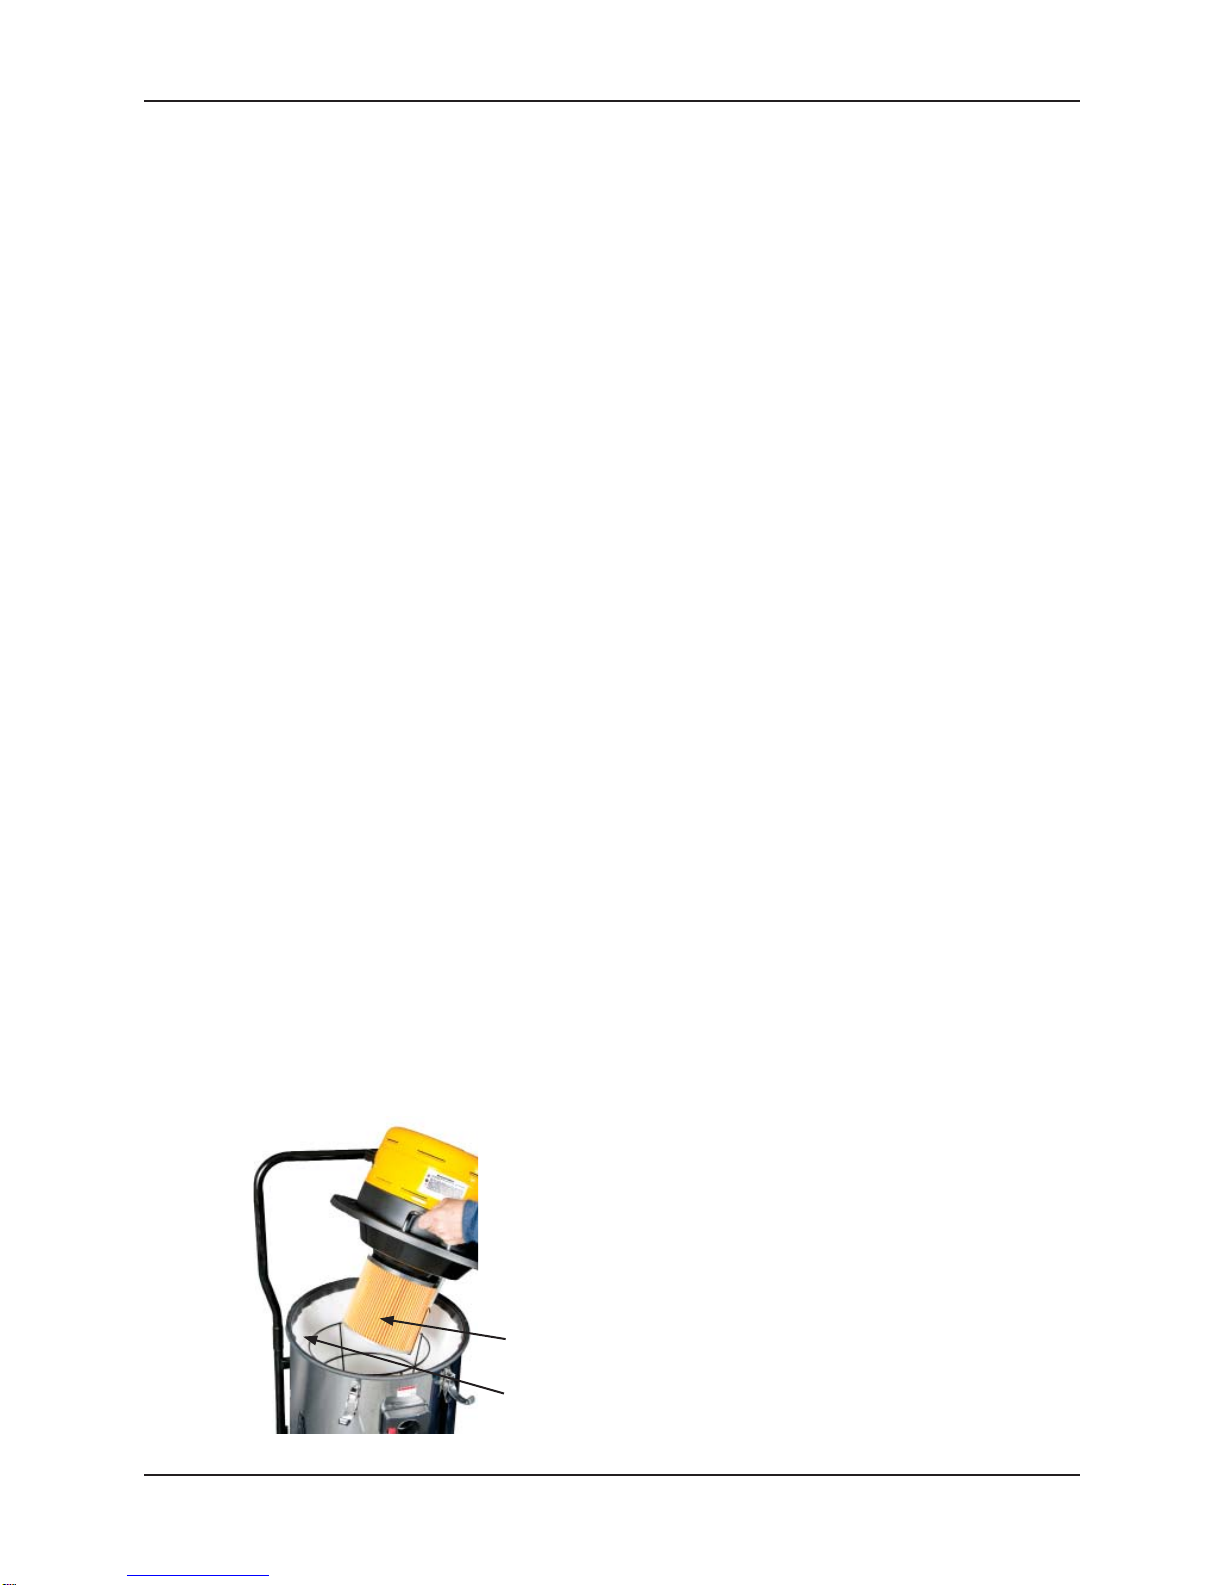
• Portable. • A Single Cartridge Filters is standard. High Density
Filters are available.
• One or two operators can work simul-
taneously, 20 foot power cord, 16 foot
vacuum hose.
• Electrical outlet for use with one electrical sander.
• Automatic activation of vacuum by air
tool, manual override. •
•
•
Sealed Vacuum: 99” water (2500mm)
Supply air pressure: 100 -150 PSI (6.510.0 bar)
Weight: (700) 72 lb / 33 kg
• 2 motors 1,000 W each; Select single or
dual vacuum motors, single - 1,000 W
and dual 2,000 W. Maximum decibel rat-
ing at 2,000 W is 70 db. Wattage (power
consumption) can be reduced using the
Variable Power Adustment dial.
•
•
Motor is a bypass, 2 stage motor for long life and va-
cum power. Diecast housing. Internal fan for cooling.
Shipping Dimensions (WDH): 41 X 23 X 24”
North America: Uni-ram Technical Service 1-800-417- 9133
Other Continents: Contact Your Supplier
SETUP
• Check for transportation or handling damage.
• Make sure the Vacuum Head is securely clamped.
• The Pressure Switch is in a separate carton. Install the Pressure Switch. Connect the Short Power
Cord from the Presure Switch to the Control Panel connector on the Vacuum Head. Make sure the
connection is secure.
• Install 1/4” npt male air plug to the the female air inlet on the pressure switch.
• Connect the two Air Supply Lines and two Vacuum Hoses to the Pressure Switch.
• Provide at least 100 PSI (7 bar) supply to the air plug on the pressure switch. To ensure dry air use a
moisture filter (not provided).
• Connect the Air Tools.
• Make sure the correct voltage is supplied. Plug in the unit. Set On / Off control toAuto. Test the
operation of the vacuum and sander. Ensure all air fitting connections are secure without air leakage.
CAUTIONS AND WARNINGS
Do not use this vacuum with hazardous dust such as alumina and magnesia dust
and do not use with flammable liquids like gasoline. Repair must be carried out
by a qualified technician.
PREVENTATIVE MAINTENANCE
Replace brushes every 450 hours. See the list of Replacement Parts.

3
MANUAL - AUTOMATIC DUST VACS - UR700QVAC Revised 2013-12
OPERATION
1. ON / OFF CONTROL:
AUTO allows the unit to be turned on and off from the Sanding Tools.
OFF turns the unit off and prevents the Sanding Tools from turning it on.
MANU turns the vacuum on only.
2. SINGLE OR DUAL MOTOR OPERATION
3. VARIABLE SPEED CONTROL
The motor speed is ajustable using the Variable Power Adjustment dial.
SHORT POWER CORD
FROM PRESSURE SWITCH
CONTROL
PANEL

4
MANUAL - AUTOMATIC DUST VACS - UR700QVAC Revised 2013-12
CARTRIDGE FILTER
BAG FILTER
CLEANING THE FILTERS and EMPTYING THE CANISTER
To keep the vacuum operating efficiently, clean the bag filter and empty the canister frequently. Clean the
cartridge filter periodically. Replace the bag filter and cartridge as required.
Unplug the unit and detach the short Power Cord from the Pressure Switch on the vacuum head, unclamp
the Head and lift it completely off the Canister.
To clean the Bag Filter:
• Remove the metal spacer from inside the bag filter.
• Place your hand inside the bag near the top and “tap” the bag so the dust will fall from the outside of
the bag to the bottom of the canister. Work your hand around the bag, 360 degrees tapping as you .
Lower your hand and “tap” around the outside of the bag. Repeat this step until you reach the bottom
• Wait 2 minutes for the the dust to settle then empty the canister. Remove the bag filter after cleaning.
To empty the Canister:
• Detach the Pressure Switch/Junction Box from the Canister (leaving the Hoses attached) by pushing
the red knob to the left and pull the Box off. Unlatch the two clips to detach the canester from the trol-
ley. Tip the Canister over so that the dust and debris fall out into a waste bag.
• Replace the bag filter and spacer. It is very important to ensure the bag sealing edge is secure to
prevent vacuum leakage. Secure the canister and place the Vacuum Head back on the Canister and
clamp securely.
To clean the Cartridge Filter:
• Slide off the clamping wires and pull off the Filter.
• Vacuum the filter inside and outside using the brush tool of another vacuum.
• Gently spray warm water into the inside of the filter. Let the water fill the cavity, then dump the water.
Repeat this step until the water is clean.
• Gently spray water on the outside of the filter to remove the dirt.
• Let the filter air dry, then reassemble.
WET OPERATION
An optional kit is available to allow water to be vacuumed (Part No. 27-710). However, to prevent water
damage to the filters, they must be removed during wet use. The unit should then be thoroughly dried
before using it on dry materials.
CAUTION: TO PREVENT AN EXPLOSION OR FIRE,
DO NOT VACUUM FLAMMABLE LIQUIDS.

5
MANUAL - AUTOMATIC DUST VACS - UR700QVAC Revised 2013-12
REPLACEMENT PARTS
PART NO. DESCRIPTION
28-110LV VAC HEAD, 120V, UR700QVAC
28-110HV VAC HEAD, 240V, UR700QVAC-H
28-123 VACUUM MOTOR, UR700QVAC (120v)
28-123H VACUUM MOTOR, UR700QVAC-H (240v)
28-129 SET OF 2 BRUSHES FOR MOTOR
28-131 PRESSURE SWITCH
28-171 CARTRIDGE FILTER, REGULAR
28-172 CARTRIDGE FILTER, HIGH DENSITY
28-173 BAG FILTER
28-710 WET VAC HOSE & BRUSH KIT
28-716 VAC HOSE + AIR HOSE, 16 FT
28-724 VAC HOSE + AIR HOSE, 24 FT
28-180 BASKET + HOSE HOOKS, OPTIONAL
TROUBLE SHOOTING GUIDE
ACTIVATION OF VACUUM
Vacuum does not start when
sander starts. • Set Auto / Off / Manu switch to Manu setting. If it
does not start call Factory.
• If it starts, Set Auto / Off / Manu switch toAuto set-
ting.
• Ensure short Power Cord connected to the Pres-
sure Switch is firmly attached.
• Ensure shop air supply is at least 100 psi.
• Adjust air control on sander to full open. Test. If
sander does not turn on check with a different
sander.
Vacuum does not stop once
sander is turned off. An air leak can cause the problem. Check for com-
pressed air leakage at fittings along air line from air
supply to sander. Secure connections. Use teflon
tape.
Vacuum turns on without
activating sander. Check for air leakage at fittings along air line from
supply to sander. Secure connections. Use teflon
tape.
Auto/ Off/ Manu Switch does
not work. Confirm power at receptical. Call Factory.
Notice: Replace motor brushes every 450 hours to preserve the life of the motor.
The brush part number is shown on the above list. Order 1 set for the UR400VAC
and 2 sets for the UR700QVAC as there are 2 motors in this model.

6
MANUAL - AUTOMATIC DUST VACS - UR700QVAC Revised 2013-12
Full Product Warranty
These Uni-ram products have been engineered and manufactured to high performance
standards. Each unit has been subjected to detailed factory testing before shipment.
This product comes with a one-year full warranty from the date of purchase. Uni-ram
Corporation reserves the right to repair or replace the unit, free of charge, to the original
purchaser if a part is found to be defective in material or workmanship as determined
by factory service personnel. The items listed below under “Conditions of Warranty” as
consumables are not covered.
Uni-ram reserves the right to direct the customer to ship the unit collect to the Uni-ram
factory or to an approved Service Center for repair using the Uni-ram Return Goods
Procedure or to repair the unit on-site. To prevent damage in transport, the purchaser
must ship the unit in the original packaging or use alternate adequate packaging. All
units must be shipped clean and free of solvent.
Conditions of Warranty:
As Uni-ram Corporation has no control over the working conditions or circumstances
under which the purchaser stores, handles or uses the product, Uni-ram makes no war-
ranty or claim, either expressed or implied with respect to this product’s fitness for any
purpose or the result to be obtained from its use. This condition applies to the sale of all
products and no representative or distributor of Uni-ram Corporation has the authority to
waive or change these conditions.
This warranty applies only to the original purchaser and does not apply if the unit has
been misused, overloaded, neglected, altered or used for any purpose other than those
specified in the operating and installation instructions. Deterioration due to normal wear
is not covered by this warranty. Damage due to accident, transportation, fire, floods or
acts of God is also not covered. Units whose serial numbers have been altered or re-
moved are not covered. Unauthorized attempts at self-repair or alterations by the owner
also invalidate this warranty. Interior or exterior finishes are not covered by this war-
ranty.
Consumable Items are not covered by this warranty.
This warranty replaces all other warranties expressed or implied by statute or otherwise.
To make a claim, call Uni-ram Service at 1-800-417-9133 and quote the serial number
of the unit.
This manual suits for next models
1
Table of contents