Unical ENERPUMP DHW 72 Manual

Luxury Air Source Heat Pump
Monobloc system
- Installation and Service Manual -
Heating/Cooling/Domestic Hot Water Heating/Cooling
ENERPUMPDHW72 ENERPUMPRK72
ENERPUMPDHW97 ENERPUMPRK97
ENERPUMP DHW 110 ENERPUMP RK 110
ENERPUMP DHW 143 ENERPUMP RK 143
ENERPUMP DHW 173 ENERPUMP RK 173

Luxury Air Source Heat Pump-Monobloc System 1
TABLE OF CONTENT
INTRODUCTION ………………………………………………………………………………………………………………. 3
General information …………………………………………………………………………………………………………………….. 3
Model identification …………………………………………………………………………………………………………………….. 3
Items inside product box ……………………………………………………………………………………………………………… 4
Cycle diagram: ENERPUMP DHW 72 (97)(110)……………………….…………………………………………….………. 6
Cycle diagram: ENERPUMP DHW 143 (173)………………………………………………………………………….………. 7
Cycle diagram: ENERPUMP RK 72 (97)(110)………………………………………….………………………………………. 8
Cycle diagram: ENERPUMP RK 143 (173)………………………….………………………………..…………………………. 9
SAFETY PRECAUTIONS …………………………………………………………………………………………………………….. 10
Warning ………………………………………………………………………………………………………………………………………. 10
Caution ……………………………………………………………………………………………………………..………………………… 11
OVERVIEW OF THE UNIT ………………………………………………………………………………..………………….…….. 13
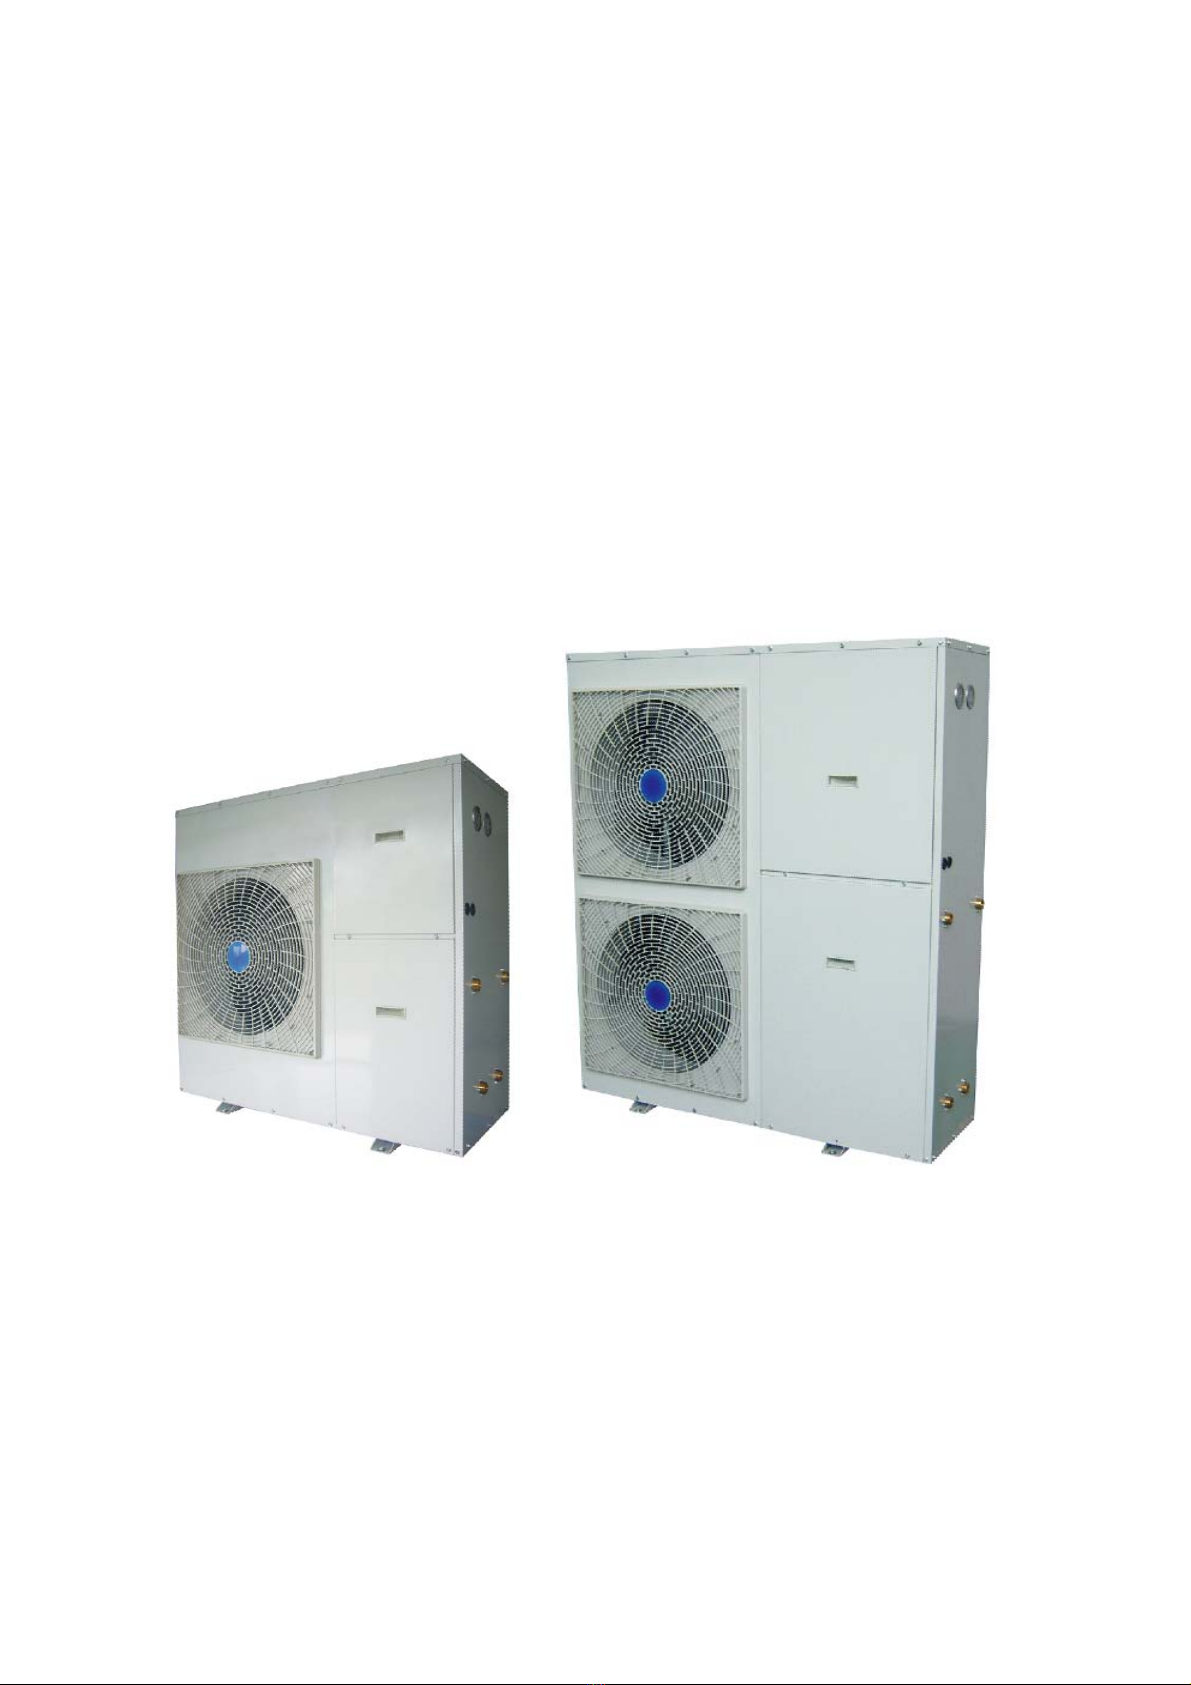
External view: ENERPUMP DHW 72 (97) and ENERPUMP RK 72 (97) ……………………………………………. 13
Internal view: ENERPUMP DHW 72 (97) and ENERPUMP RK 72 (97).……………………………………………. 14
External view: ENERPUMP DHW 110 and ENERPUMP RK 110……………………………………………………….. 15
Internal view: ENERPUMP DHW 110 and ENERPUMP RK 110……………………………………………………….. 16
External view: ENERPUMP DHW 143 (173) and ENERPUMP RK 143 (173) ……………………………………. 17
Internal view: ENERPUMP DHW 143 (173) and ENERPUMP RK 143 (173)……………………..……………... 18
CONTROL PARTS …………………………………………………………………………………………………………………….. 19
Control panel ………………………………………………………………………………………………………………………………. 19
Wiring diagram: ENERPUMP DHW 72 (97)……………………………………………………………………………………. 20
Wiring diagram: ENERPUMP DHW 110………..………………………………………………………………………………. 21
Wiring diagram: ENERPUMP DHW 143 (173)………………………………………………………………….……………. 22
Remarks for ENERPUMP DHW version ……………….………………………………………………………….……………. 23
Wiring diagram: ENERPUMP RK 72 (97)……………………………………………………………………..……..…………. 24
Wiring diagram: ENERPUMP RK 110………..……..…………………………………………………………..…….…………. 25
Wiring diagram: ENERPUMP RK 143 (173)………………………………………………..…………………………………. 26
Remarks for ENERPUMP RK version ……………….……………………………………………………………………………. 27
INSTALLATION OF THE UNIT ……………………………………………………………………………..…………… 28
Installation guidelines ………………………………………………………………………………………………………………… 28
Precautions for selecting the location …………………………………………………………………………………… 28
Selecting a location in cold climates ……………………………………………………………………………………… 28
Installation space ………………………………………………………………………………………………………………….. 29
Mounting the unit …………………………………………………………………………………………………………………………. 29
Water pipe work ……………………………………………………………………………………………………………………………. 30
Checking the water circuit ………………………………………………………………………………………………………. 30
Checking the water volume and expansion vessel pre-pressure ……………………………………………. 31
Calculating the pre-pressure of the expansion vessel ……………………………………………………………. 31
Checking the maximum allowed water volume ……………………………………………………………………… 31
Setting the pre-pressure of the expansion vessel …………………………………………………………………… 32
Connecting the water circuit …………………………………………………………………………………………………… 32
Charging water ………………………………………………………………………………………………………………………………. 33

Luxury Air Source Heat Pump-Monobloc System 2
Piping insulation …………………………………………………………………………………………………………………………….. 33
Field wiring …………………………………………………………………………………………………………………………………….. 34
SYSTEM SET-UP ………………………………………………………………………………………………………………. 35
DIP Switch Setting …………………………………………………………………………………………………………………………. 35
Pre-operation Checks ……………………………………………………………………………………………………………………. 38
Checks before initial start-up …………………………………………………………………………………………………. 38
Setting the pump speed …………………………………………………………………………………………………………. 39
MAINTENANCE …………………………………………………………………………………………………..…………… 40
TROUBLESHOOTING …………………………………………………………………………………………………………………. 41
General guidelines ………………………………………………………………………………………………………………………… 41
General symptoms ………………………………………………………………………………………………………………………… 41
Error codes ………………………………………………………………………………………………………………………………….... 43
TECHNICAL SPECIFICATION ………………………………………………………………………………………………………. 46
TEMPERATURE SENSOR R-T CONVERSION TABLE………………………………………………………….. 48
Logbook for F gases…………………………………………..…………………………………………………………….49
READ THIS MANUAL CAREFULLY BEFORE STARTING UP THE UNIT. DO NOT THROW IT AWAY.
KEEP IT IN YOUR FILES FOR FUTURE REFERENCE.
BEFORE OPERATING THE UNIT, MAKE SURE THE INSTALLATION HAS BEEN CARRIED OUT
CORRECTLY BY A PROFESSIONAL DEALER. IF YOU FEEL UNSURE ABOUT OPERATION, CONTACT
YOUR DEALER FOR ADVICE AND INFORMATION.

Luxury Air Source Heat Pump-Monobloc System 3
INTRODUCTION
This manual
This manual includes the necessary information about the unit. Please read this manual carefully before
you use and maintain the unit.
General information
The luxury air source heat pump monobloc system consists out of only the outdoor unit in which all
hydraulic parts are located. In this system no refrigerant lines need to be connected which makes the
installation easier for the domestic installer. These units are used for both heating and cooling
applications. The unit can be combined with fan coil units, floor heating, low temperature radiators,
and the domestic hot water tanks.
The unit range consists out of two main versions: a heating/cooling/domestic hot water version and a
heating/cooling version.
Both versions can optionally be delivered with an integrated backup heater for additional heating
capacity during cold outdoor temperatures. The backup heater also serves as a backup in case of
malfunctioning of the outdoor unit. The backup heaters are available in different capacities.
Domestic hot water tank option
An optional domestic hot water tank with integrated electrical booster heater can be connected to the
indoor unit. The domestic hot water tank is available in different sizes.

Luxury Air Source Heat Pump-Monobloc System 4
Items inside product box
Thank you for choosing the luxury air source heat pump- Monobloc system.
Before starting installation, please make sure that all parts are found inside the product box.
The Unit Box
Item Image Quantity
ENERPUMP DHW 72
ENERPUMP RK 72
ENERPUMP DHW 97
ENERPUMP RK 97
1
ENERPUMP DHW 110
ENERPUMP RK 110
1
ENERPUMP DHW 143
ENERPUMP RK 143
ENERPUMP DHW 173
ENERPUMP RK 173
1
Installation and Service
Manual
1
Operation Manual
1

Luxury Air Source Heat Pump-Monobloc System 5
Cycle diagram
As the luxury air source monobloc unit is an air to water heat pump, there are two different fluids cycling
inside the system, one is refrigerant and the other is water. The whole cycle diagram is shown below.
Heating/Cooling/Domestic Hot Water version:

Luxury Air Source Heat Pump-Monobloc System 6
Model: ENERPUMP DHW 72 , ENERPUMP DHW 97 and ENERPUMP DHW 110

Luxury Air Source Heat Pump-Monobloc System 7
Model: ENERPUMP DHW 143 and ENERPUMP DHW 173

Luxury Air Source Heat Pump-Monobloc System 8
Heating/Cooling version:
Model: ENERPUMP RK 72 , ENERPUMP RK 97 and ENERPUMP RK 110

Luxury Air Source Heat Pump-Monobloc System 9
Model: ENERPUMP RK 143 and ENERPUMP RK 173

Luxury Air Source Heat Pump-Monobloc System 10
SAFETY PRECAUTIONS
To prevent injury to the user, other people, or property damage, the following instructions must be
followed. Incorrect operation due to ignoring of instructions may cause harm or damage.
Install the unit only when it complies with local regulations, by-laws and standards. Check the main
voltage and frequency. This unit is only suitable for earthed sockets.
The following safety precautions should always be taken into account:
- Be sure to read the following WARNING before installing the unit.
- Be sure to observe the cautions specified here as they include important items related to safety.
- After reading these instructions, be sure to keep it together with the manual in a handy place for
future reference.
Do not install the unit yourself.
Incorrect installation could cause injury due to fire, electric shock, the unit falling or leakage of water.
Consult the dealer from whom you purchased the unit or a specialized installer.
Install the unit securely in a place.
When insufficiently installed, the unit could fall causing injury. The minimum support weight of
20g/mm² of the installation place is required. When installing the unit in a small room, please take
measures (like sufficient ventilation) to prevent the asphyxia caused by the leakage of refrigerant.
Use the specified electrical wires and attach the wires firmly to the terminal board (connection in
such a way that the stress of the wires is not applied to the sections).
Incorrect connection and fixing could cause a fire.
Be sure to use the provided or specified parts for the installation work.
The use of defective parts could cause an injury due to possible fire, electric shocks, the unit falling etc.
Perform the installation securely and please refer to the installation instructions.
Incorrect installation could cause an injury due to possible fire, electric shocks, the unit falling, leakage
of water etc.
Perform electrical work according to the installation manual and be sure to use a dedicated section.
If the capacity of the power circuit is insufficient or there is an incomplete electrical circuit, it could
result in a fire or an electric shock.
The unit must always have an earthed connection.
If the power supply is not earthed, you may not connect the unit.

Luxury Air Source Heat Pump-Monobloc System 11
Never use an extension cable to connect the unit to the electric power supply.
If there is no suitable, earthed wall socket available, have one installed by a recognized electrician.
Do not move/repair the unit yourself.
Improper movement or repair on the unit could lead to water leakage, electrical shock, injury or fire.
Have any repairs and/or maintenance only carried out by a recognized service engineer.
Do not plug or unplug the power supply during operation
There is a risk of fire or an electric shock
Do not touch/operate the unit with wet hands
There is a risk of fire or an electric shock
Do not place a heater or other appliances near the power cable
There is a risk of fire or an electric shock
Be cautious that water could not be poured to the product directly, do not allow water to run into
electric parts
There is a risk of fire or an electric shock
IF THE PRODUCT IS NOT USED FOR A LONG TIME, WE STRONGLY RECOMMEND NOT TO SWITCH
‘OFF’ THE POWER SUPPLY OF THE UNIT.
IF THE POWER IS NOT SUPPLIED, SOME SPECIAL PRODUCT-PROTECTING ACTIONS (SUCH AS
WATER PUMP ANTI-LOCKING) WILL NOT BE PERFORMED.
Do not install the unit in a place where there is a chance of flammable gas leaks.
If there is a gas leak and gas accumulates in the area surrounding the unit, it could cause an explosion.
Perform the drainage/piping work according to the installation instruction.
If there is a defect in the drainage/piping work, water could leak from the unit and household goods
could get wet and be damaged.
Do not clean the unit when the power is ‘on’.
Always shut ‘off’ the power when cleaning or servicing the unit. If not, it could cause an injury due to
the high speed running fan or an electrical shock.

Luxury Air Source Heat Pump-Monobloc System 12
Do not continue to run the unit when there is something wrong or there is a strange smell.
The power supply needs to be shut ‘off’ to stop the unit; otherwise this may cause an electrical shock or
fire.
Be cautious when unpacking and installing the product.
Sharp edges could cause injury. Especially watch the edges and the fins on the heat exchanger of the
product.
Always check for gas (refrigerant) leakage after installation or repair of product.
Low refrigerant levels may cause failure of the product.
Keep level even when installing the product.
This is to avoid vibration or water leakage.
Do not put your fingers or others into the fan, or evaporator.
The ventilator runs at high speed, this could cause serious injury.

Luxury Air Source Heat Pump-Monobloc System 13
OVERVIEW OF THE UNIT
External view: ENERPUMP DHW 72, ENERPUMP RK 72
ENERPUMP DHW 97, ENERPUMP RK 97

Luxury Air Source Heat Pump-Monobloc System 14
Internal view: ENERPUMP DHW 72, ENERPUMP RK 72
ENERPUMP DHW 97, ENERPUMP RK 97
No. Description No. Description
1 Left front plate 17 Switch box
2 Air outlet grill 18 Water pump (RS15/6)
3 Fan motor 19 Four-way valve assembly
4 Fan 20 Water flow switch
5 Plate heat exchanger 21 Three-way valve (only for DHW version)
6 Fan motor holder 22 H/C OUT
7 Condenser 23 DHW OUT (only for DHW version)
8 Expansion vessel (10L) 24 Electronic expansion valve
9 Separated plate 25 H/C IN
10 Top plate 26 DHW IN (only for DHW version)
11 Pressure relief valve 27 Water filter
12 Air purge valve 28 Compressor
13 Right back plate 29 Connector holder
14 Manometer (refrigerant pressure) 30 Base plate
15 Manometer (water pressure) 31 Right front plate 1
16 Backup heater vessel (15L) 32 Right front plate 2

Luxury Air Source Heat Pump-Monobloc System 15
External view: ENERPUMP DHW 110, ENERPUMP RK 110

Luxury Air Source Heat Pump-Monobloc System 16
Internal view: ENERPUMP DHW 110, ENERPUMP RK 110
No. Description No. Description
1 Left front plate 19 Manometer (refrigerant pressure)
2 Air outlet grill 1 20 Manometer (water pressure)
3 Fan motor 1 21 Water pump (RS25/8)
4 Fan 1 22 Four-way valve assembly
5 Air outlet grill 2 23 Water flow switch
6 Fan motor 2 24 Three-way valve (only for DHW version)
7 Fan 2 25 H/C OUT
8 Fan motor holder 26 DHW OUT (only for DHW version)
9 Switch box 27 Electronic expansion valve
10 Condenser 28 H/C IN
11 Plate heat exchanger 29 DHW IN (only for DHW version)
12 Expansion vessel (10L) 30 Accumulator
13 Top plate 31 Connector holder
14 Separated plate 32 Compressor
15 Pressure relief valve 33 Water filter
16 Air purge valve 34 Base plate
17 Backup heater vessel (20L) 35 Right front plate 1
18 Right back plate 36 Right front plate 2

Luxury Air Source Heat Pump-Monobloc System 17
External view: ENERPUMP DHW 143, ENERPUMP RK 143
ENERPUMP DHW 173, ENERPUMP RK 173

Luxury Air Source Heat Pump-Monobloc System 18
Internal view: ENERPUMP DHW 143, ENERPUMP RK 143
ENERPUMP DHW 173, ENERPUMP RK 173
No. Description No. Description
1 Left front plate 19 Backup heater vessel (20L)
2 Air outlet grill 1 20 Switch box
3 Fan motor 1 21 Water pump (RS25/8)
4 Fan 1 22 Four-way valve assembly
5 Air outlet grill 2 23 Water flow switch
6 Fan motor 2 24 Three-way valve (only for DHW version)
7 Fan 2 25 H/C OUT
8 Fan motor holder 26 DHW OUT (only for DHW version)
9 Plate heat exchanger 27 Accumulator
10 Expansion vessel (10L) 28 Electronic expansion valve
11 Separated plate 29 H/C IN
12 Condenser 30 DHW IN (only for DHW version)
13 Top plate 31 Connector holder
14 Pressure relief valve 32 Compressor
15 Air purge valve 33 Water filter
16 Right back plate 34 Base plate
17 Manometer (refrigerant pressure) 35 Right front plate 1
18 Manometer (water pressure) 36 Right front plate 2

Luxury Air Source Heat Pump-Monobloc System 19
CONTROL PARTS
Control Panel
No. Description No. Description
1 OPERATION LED 10 TEMPERATURE ADJUST BUTTON
2 COOLING/HEATING ‘ON’/’OFF’ BUTTON 11 DOMESTIC HOT WATER TEMPERATURE ADJUST
BUTTON (only for DHW version)
3 TIMER/ PROGRAMMING BUTTON 12 DOMESTIC HOT WATER TEMPERATURE ADJUST
BUTTON (only for DHW version)
4 HOUR ADJUST BUTTON 13 SPACE HEATING/COOLING BUTTON
5 DAY OF THE WEEK ADJUST BUTTON 14 DOMESTIC WATER HEATING BUTTON (only for
DHW version)
6 MINUTE ADJUST BUTTON 15 CLOCK SETTING BUTTON
7 TIME/TIMER ON ADJUST BUTTON 16 RESET BUTTON
8 TIME/TIMER OFF ADJUST BUTTON 17 TEMPERATURE CHECK BUTTON
9 TEMPERATURE ADJUST BUTTON
1
2
9
13
11
14
12
10
17
16
7
3
5
4
6
8
15
This manual suits for next models
4
Table of contents
Other Unical Heat Pump manuals
Popular Heat Pump manuals by other brands

Emerson
Emerson KHZ506 user manual

United Technologies
United Technologies Carrier MINICOLD COMPACT MCH 103 ZC operating instructions

AERMEC
AERMEC NRP 0800 Technical manual

Daikin
Daikin EBHQ006BAV3 installation manual

Dimplex
Dimplex LIKI 14TE Installation and operating instructions

Bard
Bard WH301 installation instructions