manuals.online logo
Brands
  1. Home
  2. •
  3. Brands
  4. •
  5. Universal
  6. •
  7. Smoke Alarm
  8. •
  9. Universal SS-776-CAN User manual

Universal SS-776-CAN User manual

UNIVERSAL FIVEYEAR LIMITED WARRANTY
Universal Security Instruments, Inc. (“Universal”) warrants your Universal product to be
free from defects in material and workmanship for a period of five (5) years from the
date of purchase. This warranty applies only to the original consumer purchaser and only to
products used in normal residential use and service. If this product is found to be defective, Universal’s
only obligation, and your exclusive remedy, is the repair or replacement of the product, at Universal’s
discretion, provided that the product has not been damaged through misuse, abuse, accident,
modifications, alteration, neglect or mishandling. This Warranty shall not apply to any product which is
found to have been improperly installed, set-up, or used in any way not in accordance with the
instructions supplied with the product. This warranty shall not apply to any batteries used in the
product or to any damage which may be caused by such batteries. For repair or replacement, send the
defective product to Universal Security Instruments, Inc. at 7-A Gwynns Mills Court, Owings Mills,
Maryland 21117, postage prepaid with a payment of $5.00 to cover the costs of return postage and
handling. You must include a proof of purchase (receipt) along with the returned product.
UNIVERSAL DOES NOT WARRANT AND SPECIFICALLYDISCLAIMS ANYWARRANTY, WHETHER
EXPRESSOR IMPLIED,OF FITNESSFORAPARTICULAR PURPOSE,OTHER THANTHE WARRANTY
CONTAINED HEREIN. NO IMPLIED WARRANTY ON THIS PRODUCT, CREATED BY STATE LAW,
SHALL EXTEND BEYOND THE TERM OF THIS WARRANTY UNLESS SUCH LAW OTHERWISE
PROVIDES. UNIVERSAL SPECIFICALLYDISCLAIMS ANY LIABILITYAND SHALLNOT BE LIABLE
FORANY CONSEQUENTIAL OR INCIDENTAL LOSS OR DAMAGE, INCLUDING, BUT NOT LIMITED
TO, DAMAGES TO ANY EQUIPMENT WITH WHICH THIS PRODUCT IS USED.
Some states do not allow the exclusion or limitation of incidental or consequential damages so the
above limitations or exclusions may not apply to you.
No agent, representative, dealer, or employee of the company has the authority to increase or alter the
obligations or terms of this Warranty.
This Warranty gives you specific legal rights and you may also have other rights which vary from state
to state.
This Warranty is only valid for merchandise purchased from outlets in the United States and Canada.
288-3413-00B
MODEL SS-775-CAN/SS-776-CAN
SS-775-LR-CAN/SS-776-LR/CAN
SMOKE & FIRE ALARM
with Silence Control
©2008,UniversalSecurityInstruments,Inc.
PrintedinChina
READALLINSTRUCTIONS
The smoke alarm has a recommended service life of at least 10 years under normal conditions. The smoke
alarm uses an extremely small amount of a radioactive element in the ionization chamber. Do not tamper
with radioactive sealed source or try to repair the smoke alarm yourself. Refer to instructions for repairs.
RECOMMENDEDLOCATIONOFALARMS
• Locate the first smoke alarm in the immediate area of the bedrooms. Try to protect the exit path as the
bedrooms are usually farthest from an exit. If more than one sleeping area exists, locate additional
smoke alarms in each sleeping area.
• Locate additional smoke alarms to protect any stairway as stairways act like chimneys for smoke and heat.
• Locate at least one smoke alarm on every floor level.
• Locate a smoke alarm in any area where a smoker sleeps or where electrical appliances are operated in
sleeping areas.
• Smoke, heat and other combustion products rise to the ceiling and spread horizontally. Mounting the smoke
alarm on the ceiling in the center of the room places it closest to all points in the room. Ceiling mounting is
preferred in ordinary residential construction. However, in mobile homes, wall mounting on an inside partition
is preferred to avoid the thermal barrier that may form at the ceiling.
• When mounting smoke alarm on the ceiling, locate it a minimum of 4" (10cm) from a side wall and 2 feet (.61
meters) from any inside corner (see Diagram A).
• When mounting smoke alarm on a wall, use an inside wall with the top edge of the smoke alarm a minimum
of 4" (10cm) and a maximum of 12" (30.5cm) below the ceiling and at least 2 feet (.61 meters) from any corner
(See Diagram A).
FALSEALARMS
The smoke alarm is designed to minimize false alarms. Smoking will not normally set off the alarm unless smoke
is blown directly into the smoke alarm. Combustion particles from cooking may set off the alarm if the smoke alarm
is located close to the kitchen cooking surface. Large quantities of combustion particles are generated from spills
or broiling.
If the smoke alarm does sound, check for fires first. If a fire is discovered, get out and call the fire department. If no
fire is present, check to see if one of the reasons listed above may have caused the alarm.
THIS SMOKE ALARM WILLNOT WORK WITHOUT AGOOD BATTERY PROPERLYINSTALLED.
THE SMOKE ALARM SHOULD BE TESTED WHEN INSTALLEDAND THEN TESTED WEEKLY
AFTER THAT.
AVOID THESE LOCATIONS
• the garage - products of combustion are present when you start your automobile.
• in front of forced air ducts used for heating and air conditioning.
• in the peak of an “A” frame type of ceiling.
• in areas where temperatures may fall below 40oF (4.4oC) or rise above 100oF (37.8oC).
• CURRENT STUDIES HAVE SHOWN SMOKE ALARMS MAY NOTAWAKEN ALL SLEEPING INDIVIDUALS AND
THAT ITIS THE RESPONSIBILITY OF INDIVIDUALS IN THE HOUSEHOLD WHOARE CAPABLE OFASSISTING
OTHERS TO PROVIDEASSISTANCE TO THOSE WHO MAY NOT BEAWAKENED BY THEALARM SOUND OR
TOTHOSE WHO MAY BE INCAPABLE OF SAFELY EVACUATING THEAREAUNASSISTED.
Visit Us on the Web!
OWINGSMILLS,MARYLAND21117USA
NATIONAL FIRE PROTECTION ASSOCIATION REQUIRED PROTECTION
For your information, the National Fire Protection Association's Standard 72, reads as follows:
“11.5.1 One- and Two-Family Dwelling Units. 11.5.1.1 Smoke Detection. Where required by applicable
laws, codes, or standards for the specified occupancy, approved single- and multiple-station smoke
alarms shall be installed as follows: (1) In all sleeping rooms. Exception: Smoke alarms shall not be
required in sleeping rooms in existing one- and two-family dwelling units. (2) Outside of each separate
sleeping area, in immediate vicinity of the sleeping rooms. (3) On each level of the dwelling unit, including
basements. Exception: In existing one- and two-family dwelling units, approved smoke alarms powered by
batteries are permitted.
“A.11.8.3 Are More Smoke Detectors Desirable? The required number of smoke detectors might not
provide reliable early warning protection for those areas separated by a door from the areas protected by
the required smoke detectors. For this reason, it is recommended that the householder consider the use
of additional smoke detectors for those areas for increased protection. The additional areas include the
basement, bedrooms, dining room, furnace room, utility room, and hallways not protected by the required
smoke detectors. The installation of smoke detectors in kitchens, attics (finished or unfinished), or
garages is not normally recommended, as these locations occasionally experience conditions that can
result in improper operation.”
The equipment should be installed using wiring methods in accordance with the National Fire Protection Association’s
Standard 72, Chapter 11. (National Fire Protection Association, Batterymarch Park, Quincy, MA 02269).
THIS PRODUCT IS cUL LISTED TO UL STANDARD FOR SAFETY,
UL217 6TH, BY UNDERWRITERS LABORATORIES
TAMPER LOCKING PIN (SS-775-LR-CAN/SS-776-LR-CAN only): Tomakeyoursmokealarm somewhat
tamperresistant,alocking pin has beenprovided.Usingthispin will deterchildrenandothersfrom removing
thealarmfromthe mounting ring.Tousethepin, insert it intotheholeinthe side ofthealarmafterit hasbeen
installedonthe mounting ring.Notethatthe tamperpinwill havetoberemoved in ordertochangethe battery,
whichcanbedone easilywithapairof longnosepliers.Usingthe longnosepliers,pullthe pinoutofthehole.
It is now possible to remove the smoke alarm from the mounting ring.
1. Turn the smokealarmcounterclockwisetoremoveit from the mounting ring.NOTE:The smoke alarmis
sealed and the cover is not removable. Your smoke alarm is also equipped with a safety device which
preventsmountingunlessabatteryisinstalled.If your smoke alarm will not lock onto themountingring,
check to make sure a battery is installed.
CAUTION: Early warning fire detection is best achieved by the installation of fire detection
equipment in all rooms and areas of the household as follows: A smoke alarm installed in
each separate sleeping area (in the vicinity of, but outside of, the bedrooms) and heat or
smoke alarms in living rooms, dining rooms, kitchens, hallways, attics, furnace rooms,
closets,utilitystoragerooms,basements andattached garages.Testthe smokealarm weekly
to assure proper operation.
2. Attach the mounting ring.
3. Install a 9 Volt battery by connecting it to the battery clip. See “BATTERYREPLACEMENT.”
4. Push and turn the smoke alarm clockwise onto the mounting ring.
5. See“TAMPERLOCKINGPIN.”
OPERATION, TESTING&MAINTENANCE
OPERATION: The smoke alarm is operating once the power is connected (the battery must be installed).
When products of combustion are sensed, the unit sounds a loud alarm which continues until the air is
cleared
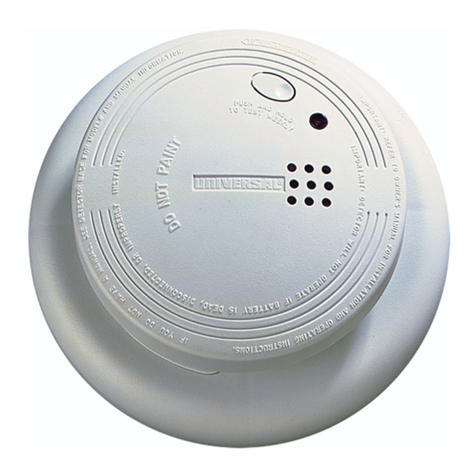
STANDBY CONDITION: The red LED flashes once every 40-60 seconds to indicate the unit is properly
functioning(SS-776-CAN/SS-776-LR-CANonly).
LOCALALARM CONDITION: Thered LEDflashesrapidlyandthe unit emits aloud,pulsatingalarmsound.
TESTING: Test by pushing the test button on the smoke alarm cover until the alarm sounds, then release.
The alarm sounds if all electronic circuitry, horn and battery are working. If no alarm sounds, the unit may
have a defective battery or other failure. You can also test the alarm by blowing smoke into the unit.
MAINTENANCE:The smokealarmisvirtually maintenancefree.However,under dustyconditions,avacuum
hose may be used to clear the sensing chamber of dust.
FALSEALARMS “SILENCE” CONTROL: Unitswiththe“silence”featurehave the capabilityoftemporarily
reducingthesensitivityofthealarmcircuit for approximately 8 minutes.Thisfeatureisto be used only when
a known alarm condition such as smoke from cooking activates the smoke alarm. The smoke alarm is
deactivated by pushing the test button on the smoke alarm cover for at least three seconds. The smoke
alarm will automatically reduce sensitivity and “beep” every 30-40 seconds for approximately 8 minutes to
indicatethealarmisinthe temporary silent condition.Thesmokealarmwill gradually reactivate during the8
minutes and sound the alarm if particles of combustion are still present. The “silence” feature may be used
repeatedly until the air has cleared.
CAUTION: Before using the alarm “silence” feature, identify the source of smoke and be certain that
safe conditions exist.
BATTERY REPLACEMENT
The smoke alarm uses a 9 Volt carbon-zinc battery. The battery should last for at least one
year under normal operating conditions. The smoke alarm has a low battery indicator, an
audible “beep.” It will operate at 30-40 second intervals for a minimum of 7 days. When this
indication occurs, replace the battery with anAlkaline type (Eveready Energizer #522, Duracell
#MN1604), Carbon-Zinc type (Gold Peak #1604P, Eveready #216) from your local retailer.
REPAIRSANDSERVICES
The smoke alarm uses a very small amount of radioactive element which is safely contained
within the chamber assembly. If the smoke alarm is defective in any way, do not tamper with the
unit.Returnthe unitforservicing.There will beaservice chargeforrepairingout of warrantyunits.
GOOD SAFETY HABITS
Therearesituations wherea smoke alarmmay not beeffective in protectingagainst fire asstated
in the NFPA 72 standard. For instance:
1. smoking in bed;
2. leaving children home alone; and
3. cleaning with flammable liquids, such as gasoline.
DEVELOPANDPRACTICE APLANOFESCAPE
BASICSOFESCAPEPLAN
o Make a floor plan indicating all doors and windows and at least two escape routes from
each room. Second story windows may need a rope or chain ladder.
o Have a family meeting and discuss your escape plan, showing everyone what to do in case
of fire.
o Determine a place outside your home where all of you can meet if a fire occurs.
o Familiarize everyone with the sound of the smoke alarm and train them to leave your home
whenthey hearthe sound.
o Identify children’s bedrooms with red stickers placed in the upper left corner of the windows.
Theyare availablefrom yourlocal fire department.
o Practice a fire drill at least every six months. Practice allows you to test your plan before an
emergency.You may not beable to reach your children.It is important they know what todo!
WHAT TO DO WHEN THE ALARM SOUNDS
o Leave immediately by your plan of escape. Every second counts, so don’t waste time getting
dressedor picking upvaluables.
o Inleaving, don’topen any insidedoor withoutfirst feelingits surface.If hot, orif yousee smoke
seepingthrough cracks,don’t open that door! Instead,use youralternate exit. Ifinside door
is cool, place your shoulder against it, open it slightly and be ready to slam it shut if heat and
smoke rush in.
o Stay close to the floor if air is smoky. Breathe shallowly through a cloth, wet if possible.
o Once outside, go to your selected meeting place and make sure everyone is there.
o Callthe firedepartmentfrom yourneighbor’shome– not from yours!
o Don’t return to your home until fire officials say that it is all right to do so.

This manual suits for next models

3

Other Universal Smoke Alarm manuals

Universal 1422 User manual

Universal

Universal 1422 User manual

Universal SS-795 User manual

Universal

Universal SS-795 User manual

Universal 976LR User manual

Universal

Universal 976LR User manual

Universal SS-901 User manual

Universal

Universal SS-901 User manual

Universal SS-785 User manual

Universal

Universal SS-785 User manual

Universal SS-775-CAN User manual

Universal

Universal SS-775-CAN User manual

Universal CD-9795 User manual

Universal

Universal CD-9795 User manual

Universal SS-770 User manual

Universal

Universal SS-770 User manual

Universal SS-2895 User manual

Universal

Universal SS-2895 User manual

Universal IoPhic MDS300 User manual

Universal

Universal IoPhic MDS300 User manual

Universal SS-901-LR User manual

Universal

Universal SS-901-LR User manual

Universal SS-775 User manual

Universal

Universal SS-775 User manual

Universal MI3050S User manual

Universal

Universal MI3050S User manual

Popular Smoke Alarm manuals by other brands

MR CARTOOL T105 manual

MR CARTOOL

MR CARTOOL T105 manual

olympia electronics BSR-6055/A/MAR quick start guide

olympia electronics

olympia electronics BSR-6055/A/MAR quick start guide

Texecom Premier 412 installation manual

Texecom

Texecom Premier 412 installation manual

Securiton ASD 535 Application guidelines

Securiton

Securiton ASD 535 Application guidelines

Bosch FMM-100 Series manual 

Bosch

Bosch FMM-100 Series manual 

Aico Ei169RF Specification sheet

Aico

Aico Ei169RF Specification sheet

Gira 0869 00/04 Instructions for installation

Gira

Gira 0869 00/04 Instructions for installation

Renkforce 1308085 operating instructions

Renkforce

Renkforce 1308085 operating instructions

Bosch D7050 installation instructions

Bosch

Bosch D7050 installation instructions

Xtralis ICAM IFT Commissioning Guide

Xtralis

Xtralis ICAM IFT Commissioning Guide

System Sensor 7251A Installation and maintenance instructions

System Sensor

System Sensor 7251A Installation and maintenance instructions

koban KDH-BAT manual

koban

koban KDH-BAT manual

System Sensor 1012 Ionization Installation and maintenance instructions

System Sensor

System Sensor 1012 Ionization Installation and maintenance instructions

Hama GS 506 operating instructions

Hama

Hama GS 506 operating instructions

Smartwares FSM-114 quick start guide

Smartwares

Smartwares FSM-114 quick start guide

First Alert 7020BSL user manual

First Alert

First Alert 7020BSL user manual

Kidde PI9000CA user manual

Kidde

Kidde PI9000CA user manual

Kidde 910 user guide

Kidde

Kidde 910 user guide

manuals.online logo
manuals.online logoBrands
  • About & Mission
  • Contact us
  • Privacy Policy
  • Terms and Conditions

Copyright 2025 Manuals.Online. All Rights Reserved.