Univox P-Loop 2.0 User manual

1
Univox®P-Loop 2.0
Portable loop case
User Guide
Univox® P-Loop 2.0
Part No 212031

2
Artwork to P-Loop 2.0 case
Material: black
Printing: white and blue PMS 284
Please find printing original on next page.
Best regards,
Lindis 2011-04-13
Mic/Line Out
110-240V AC
PUSH PUSH
Mic/Line
P-Loop 2.0
Portable loop case
In
Line
On
www.univox.eu
1. 2. 3.4. 75. 6 8.
1. In – green LED level in XLR Mic/Line
2. Mic – balanced XLR
3. Line – balanced XLR
4. Level in controls for XLR-inputs
5. Line – line in, unbalanced RCA
6. Out – line out, unbalanced RCA
7. – loop current control
8. – Loop cable connection 6,35mm
9. – Blue LED loop current indication
10. On – Yellow LED mains
11. 110-240V AC – mains connection
12.12-24V DC – DC connection (DC adapter)
Content
Introduction 3
Univox P-Loop 2.0 Portable Loop Case 3
Setting up the loop 3
Connecting signal source(s) 4
Adjusting input sensitivity (Mic/Line XLR) 4
Connecting mains power 4
Adjustment of loop current level 4
Wireless microphone systems 4
Adjustments when used with loop amplifier 5
Acoustic amplification with an active speaker 5
Tapping the signal 6
Trouble shooting guide 6
Safety/Warranty 6
Maintenance and care 7
Service 7
Technical data 7
Environment/Correct disposal 7
Measuring devices 7

3
Introduction
Thank you choosing a Univox® product. We hope you will be satisfied!
Univox® P-Loop 2.0 is a compact portable loop system used to enhance speech
intelligibility for hearing aid users with the hearing aid in T-position. It is very easy to use
and can operate in rooms of various sizes up to and including 150 square metres.
All Univox® amplifiers have a very high output current capability resulting in powerful and
secure products fulfilling existing standards, IEC 60118-4.
Please read this user guide carefully before (installation and) use of this product.
Univox P-Loop 2.0 Portable Loop Case
Univox P-Loop 2.0 portable loop case contains a complete portable loop system with a
built-in amplifier with a 35 meter loop cable on a dispenser and accessories depending
on which loop solution you have chosen. A 15 meters extension cable is also included as
well as the loop test instrument Univox Listener 2.0. Several built-in wireless microphone
options are available. Other accessories that are available for this product are listed in the
section Accessories. The microphone level is preset if you have bought a P-Loop with two
wireless microphones. Please refer to the separate Okayo user guide with addendum for a
more detailed instruction of how to set levels of microphones and amplifier.
We hope that the product will meet your highest expectations!
Setting up the loop
Place the case anywhere along the perimeter of the intended loop. If you do not have
access to a power extension cord, make sure you place the case close enough to the power
outlet for the included power cord to reach. Pull out the loop cable from its dispenser and
place it around the area that you want covered. There is no need to pull out more cable
from the dispenser than is required. Connect both ends of the cable to the amplifier’s
loop terminal marked (8). If needed there is a 15 meter extension cable, making the
maximum coverable area 150m².
Note. Construction metal can affect the hearing loop to the extent that the loop area needs
to be reduced, alternatively place the cable in a figure 8.

4
Connecting signal source(s)
There are three different audio inputs. Two Mic/Line factory set (1) and (2) to line
sensitivity and one RCA line input (5).
Adjusting input sensitivity (Mic/Line XLR)
Set all adjustments to minimum position by turning the knobs counter clockwise all the
way to the end. Make sure that all connected audio sources (if there are any) except for
the one being adjusted are turned off. Turn on the signal source. If it is a microphone make
sure that somebody is speaking into it. If it is another type of source make sure program
material is playing.
Slowly adjust the sensitivity by turning the knob to the right of the XLR socket (3)
clockwise until the “In” LED (4) lights up. The sensitivity adjustment should be based on
the weakest signal, i.e. when adjusting for a microphone the weakest signal is the weakest
voice that will use the microphone. Do not increase the level beyond that the LED just
lights up. If the level is too high there is a risk of self oscillation.
Note
When using the RCA line input (5), no adjustment is required.
Connecting mains power
Connect the mains cable to the socket marked “110-240V AC” on the amplifier and to the
power outlet.
Adjustment of loop current level
Adjust the loop current level with the knob marked (6) placed to the le of the loop
cable sockets (8). The LED indicator below the sockets indicates when current floats
through the cable(transmitting).
Use the testing device Univox Listener 2.0 (included in the case) to adjust the right loop
current level. Please consult the included user guide for instructions on how to use the
Listener 2.0.
Wireless microphone systems
Please refer to separate User Guide.

5
Adjustments when used with loop amplifier
Please note that the difference in sensitivity for handheld microphones (EJ-701TM Plus)
and pocket transmitters. The handheld microphone is set to a lower level to avoid feedback
when used in front of speakers. Due to this the adjustments have to be made in the
following order:
1. Set the sensitivity of the handheld microphone to ”HI”.
2. Set the volume control of the corresponding diversity receiver module to maximum.
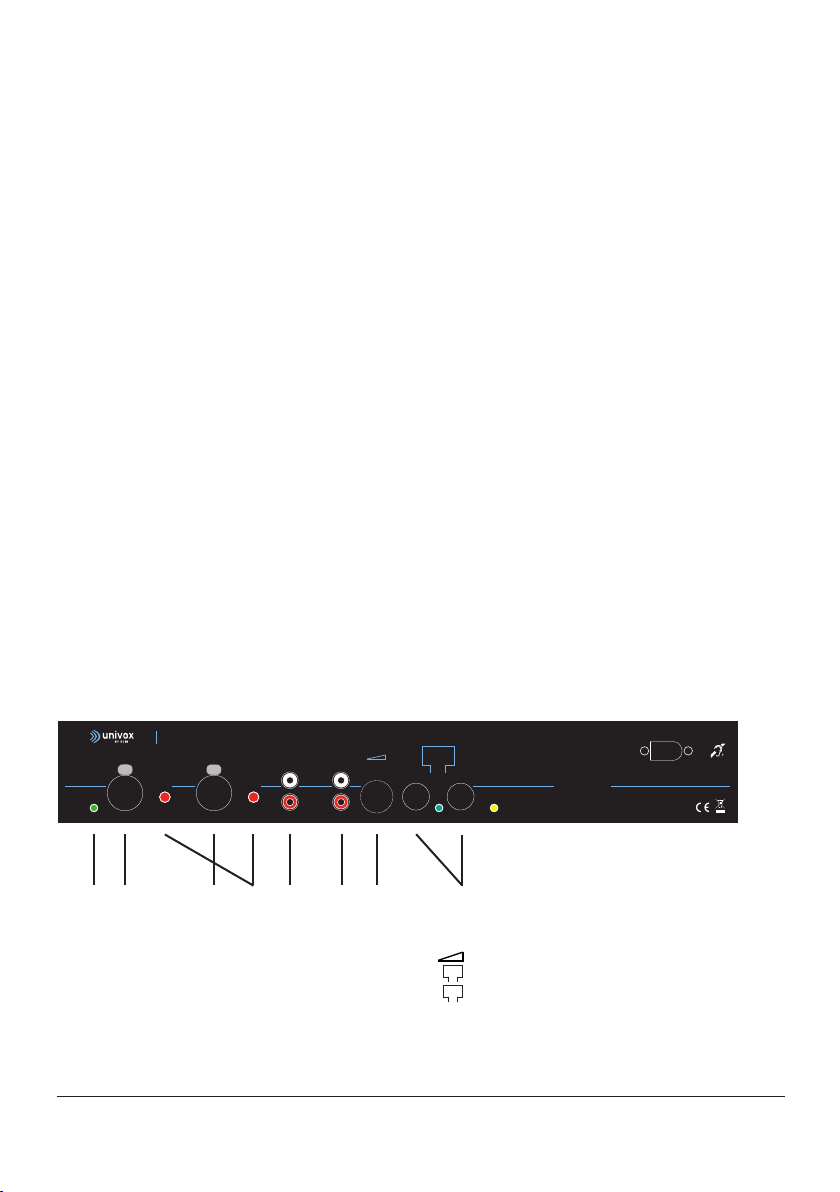
3. Adjust the input level of the loop amplifier by turning the corresponding potentiometer
until the IN led lights up distinctively at the peaks of the program signal source (AGC
knee). Do not turn it up more than necessary as this will increase the risk of distorsion.
4. Increase the loop current trimmer to reach correct level in accordance with
IEC-60118-4 (0dB at peaks of the program signal source).
5. The steps above secures a correct adjustment of the handheld microphone.
6. Adjust the sensitivity of the pocket transmitter to ”LOW”.
7. Set the volume control of the corresponding diversity receiver module to approximately
“12 o’clock”.
8. If user experiences the level of the pocket transmitter to be too low: Start to adjust the
volume level of the corresponding diversity receiver module. If still too low, adjust the
sensitivity of the pocket transmitter to “MID”.
Acoustic amplification with an active speaker
In rooms without a loudspeaker system, it may be advisable to use a portable, active
speaker with built-in wireless receivers to also acoustically enhance the sound. A slight
acoustic amplification is oen welcomed even in smaller rooms, especially when listening
for a long period of time, and it is perceived to be more natural by both lecturers and
listeners that the sound is acoustically amplified when speaking in microphones.
The Okayo GPA-670BD1 is a small, light-weight and flexible active speaker (with built-in
amplifier) especially suitable for enhanced speech intelligibility. The GPA-670BD1 has
rechargeable lithium ion batteries that provide 4-6 hours of operation, but can also be used
connected to a wall outlet. The speaker has the same type of dual wireless receiver module
that is built-in to the diversity receiver in the P-Loop case. This means that the sound from
the wireless microphones is transmitted simultaneously to the loop and the loudspeaker.
No cable or connection is necessary.

6
It is recommended to use a tripod floor stand for easy and flexible placement of the
loudspeaker. If the loudspeaker is set up at the back of the room and directed towards the
speaker, those who are in the back of the room (and thus further away from the speaker)
get a helping acoustic boost, while those who sit at the front hear the speaker acoustically
anyway. The large distance between the microphone and the loudspeaker minimizes the
risk of acoustic feedback.
Tapping the signal
The signal from the amplifier can be tapped to an external system from the RCA, marked
“Out” (7). Please consider the risk of feed back, if the system includes loudspeakers.
Trouble shooting guide
Use Univox® Listener to check the sound quality and basic level of the loop.
Verify the control LED's following the instructions in this installation guide.
Should the system not work aer having made the product test as described above, please
contact the local distributor of the product for further instructions.
Note Warranty is not valid for any damage or defects on the product due to incorrect or
incautious installation (or usage).
Safety/Warranty
Basic knowledge in audio and video installation techniques is required to achieve existing
regulations. The installer/planner is responsible for the installation hereby avoiding any risk
or cause of fire.
Also note that warranty is not valid for any damage or defects on the product due to
incorrect or incautious installation (or usage).
Bo Edin AB shall not be held responsible or liable for interference to radio or TV equipment,
and/or to any direct, incidental or consequential damages or losses to any person or
entity, if the equipment has been installed by unqualified personnel and/or if installation
instructions stated in the product Installation Guide have not been strictly followed.

7
Maintenance and care
Under normal circumstances Univox® loop amplifiers do not need any special maintenance. Should
the unit become dirty, wipe it with a clean damp cloth. Do not use solvent or strong detergents.
Service
Should the product/system not work aer having made the product test as described
above, please contact the local distributor of the product for further instructions.
If the product should be sent to Bo Edin AB, please enclose a filled Service Form,
www.univox.eu, Support.
Technical data
Please see the datasheet for the P-Loop 2.0 in the plastic pocket inside the case.
For additional information, please refer to product data sheet/brochure and CE certificate
which can be downloaded from www.univox.eu, Downloads. If required other technical
Environment/Correct disposal
When this product is finished with, please follow existing disposal regulations. Thus if you
respect these instructions you ensure human health and environmental protection.
Measuring devices
Univox® FSM 2.0, Field Strength Meter Instrument for professional measurement and
control of loop systems according to IEC 60118-4.
Univox® Listener Loop receiver for fast and simple check of the sound quality and basic
level control of the loop.

8
p-loop-2-0-du-gb-180626 Copyright © Bo Edin AB
Distributor
Univox by edin, the world’s leading expert and producer of high quality hearing loop
systems, created the very first true loop amplifier 1969. Ever since our mission is to serve
the hearing community with the highest degree of service and performance with strong
focus on Research and Development for new technical solutions.
Hearing excellence since 1965
Bo Edin AB, Stockby Hantverksby 3, SE-181 75 Lidingö, Sweden www.univox.eu
This manual suits for next models
1
Table of contents
Popular Industrial Electrical manuals by other brands

Murata
Murata GRM0335C1H5R2BA01 Series Reference sheet

Murata
Murata GCM21BC71E475KE36 Series Reference sheet

Command access
Command access VLP-UL-M-KIT installation instructions

Murata
Murata GRM033R71E391KA01 Series Reference sheet

Murata
Murata GQM22M5C2H620JB01 Series Reference sheet

WEG
WEG PFW03-M8 Configuration guide