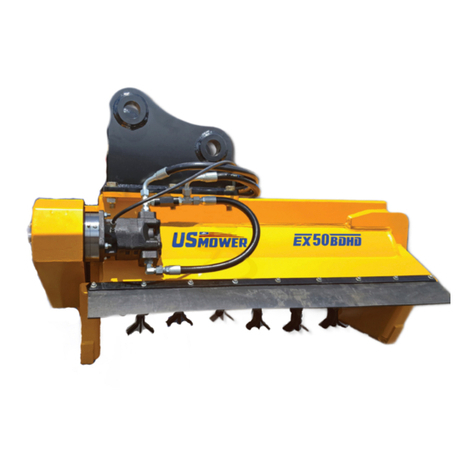
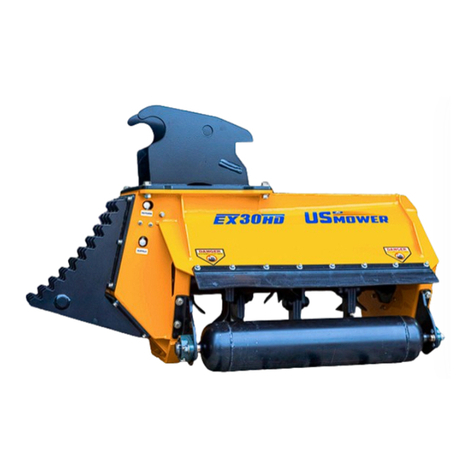
USMOWER EX40 User manual

Operator’s Manual
Flail Mower
11949 Westar Ln
Burlington, WA 98233
360.757.7555
www.usmower.com

US Mower Rotary and Flail Mowers for Excavator and Skid Steers are used by com-
mercial mowers for industrial mowing applications such as: land clearing, pipeline main-
tenance, ditch maintenance and general herbicide free vegetation management. We of-
fer Rotary Mowers and Flail Mowers for both Skid Steers and Excavators as well as
Complete Tractor Integrated Mowers for Case, John Deere, New Holland, Challenger
and McCormick. US Mower equipment is manufactured to have a long, productive ser-
vice life. Many contract mowers have reported 5,000 or more hours of working time
on their mowing equipment. The very rst ail mower built in 1999 is still in use today.
All US Mower ail mowers and rotary mowers are designed and manufactured in Burling-
ton, WA. From idea to nished project, it all happens right here in our USA factory. Each
design feature, material and component is carefully selected to provide the best per-
formance and value to our customer. We know that a ail or rotary mower is a big in-
vestment to our customer, so we make it from high strength steel, DOM tubing, and other
high quality components. We also service and stock each component to build the mow-
ers and our customers can purchase them direct form US Mower or one of our fantas-
tic dealers located throughout the USA and Canada. Because we are a fabricating man-
ufacturer, we can also make custom mounts, a variety of options and special requests.
Creating Mowing Solutions Manufactured in the USA
US Mower Rotary and Flail Mowers for Excavator and Skid Steers are used by
commercial mowers for industrial mowing applications including land clear-
ing, pipeline maintenance, ditch maintenance and general herbicide free
vegetation management. We offer Rotary Mowers and Flail Mowers for both
Skid Steers and Excavators as well as Complete Tractor Integrated Mowers
for Case, John Deere, New Holland, Challenger and McCormick. US Mower
equipment is manufactured to have a long, productive service life. Many con-
tract mowers have reported 5,000 or more hours of working time on their mow-
ing equipment. The very first flail mower built in 1999 is still in use today.
All US Mower flail mowers and rotary mowers are designed and manu-
factured in Burlington, WA. From idea to finished project, it all happens
right here in our USA factory. Each design feature, material and compo-
nent is carefully selected to provide the best performance and value to
our customer. We know that a flail or rotary mower is a big investment
to our customer, so we make it from high strength steel, DOM tubing, and
other high quality materials and components. We also service and stock
each component to build the mowers and our customers can purchase them
direct form US Mower or one of our fantastic dealers located through-
out the USA and Canada. Because we are a fabricating manufacturer, we
can also make custom mounts, a variety of options and special requests.
360.757.7555 www.usmower.com

Read the safety messages on the implement and in your manual. US Mow-
er has designed this implement to be used with all its safety equipment
properly attached to minimize the chance of injury in the event of an acci-
dent. There is no substitute for an informed, cautious, safe-minded oper-
ator who recognizes potential hazards and follows good safety practices.
• Study Operator’s Manuals and Safety Decals for excavator and cutter thorough-
ly to prevent misuse, abuse and accidents.
• Do not allow riders on excavator or implement. Falling off may cause serious
injury or death by being run over by Excavator or cutter. Keep Children Away!
• Operate with ROPS and fastened seat belt to prevent injury and possible crush-
ing death from falling off or excavator overturn.
• Wear hard hat and safety glasses for personal protection.
• Make certain that SMV sign, warning lights and reflectors are clearly visable.
• Block up or support cutter securely before putting hands or feet under or
working underneath lifted components to prevent crushing injury or death
from sudden, inadvertent dropping. Make certain area is clear before lowering.
• Follow local traffic codes. Slow down at night, in turns, and on hillsides.
• Before dismounting, secure implement in transport position or lower to Ground.
Disengage Interlock, Turn off machine. Never mount or dismount a moving vehi-
cle to prevent crushing injury or death.
Failing to follow safety messages and operating instruc-
tions can cause serious bodily injury or even death to the
operator or others in the area. Your mower is a powerful in-
dustrial machine with substantial capacity to cause proper-
ty damage, personal injury or even death when used improp-
erly or without proper safety equipment.
BEFORE YOU START!!
Safety
There are obvious and hidden potential hazards involved in the
operation of this mower. Serious injury or death may occur un-
less care is taken to insure the safety of both the operator and
other persons in the area. The following is a list of some safe-
guards which should be followed.
In addition to the design and configuration of equipment, hazard
control and accident prevention are dependent upon awareness,
concern and prudence. suitable training of personnel involved
in the operation, transport, maintenance and storage of equip-
ment is required.

Safety
• Dress for the job. Choose close-fitting clothes and long pants, hearing pro-
tecttion, eye protection, work boots with traction and heavy gloves (when han-
dling blades). Do not wear loose-fitting clothes or jewelry, which can get
caught or hung up on a machine and cause injury.
• Know your machine. Read the operators manual to familiarize yourself with
your machines unique features. For example deflector shields, adjustments,
skid shoes, retention systems and maintenance.
• Read warning labels and check safety features. Never operate your mower if
your safety guards and devices are not in place. Replace safety guards and de-
vices if damaged or not operating properly.
• stop mowing if passersby are within 50 yeard radius from mower head.
• never allow children to operate, ride on, or come close to mower or equipment.
Never lift a person or allow anyone to stand on a mower head. keep bystanders
and pets clear and off of equipment.
• Extreme care should be taken when operating near loose objects such as grav-
el, rocks or general debris. These objects should be removed or avoided to
prevent injury from thrown objects. Where grass and weeds are high enough
to hide debris that could be struck by the blades, the area should be inspected
and large debris removed. Mow cleared area at an intermediate height, inspect
closely for remaining debris and remove. Mow again at desired final height.
• Keep the mower head at least 10 feet from electric lines and pipe lines to pre-
vent accidental contact and possible serious injury or even death.
• Pressurized hydraulic fluid can penetrate the skin causing serious injury. Do
not use your hand to check for leaks on a pressurized system. Use a piece of
cardboard or paper to search for leaks. Stop the engine and relieve pressure
before connecting or disconnecting lines. Tighten all connections before
starting the engine or pressurizing lines. If fluid is injected into the skin, ob-
tain medical attention immediately.
• Check attachment points. Check your mower’s connection to the power unit. All
pins, bushings and linkage should be checked to insure they are free to travel
the full distance without interference. Repair if necessary.
• Conduct daily inspections. Verify that all shields and guards are in proper
working order. Check blade attachment bolts to insure all blades are present
and in good condition. Check blades for cracks around bolt hole. Check that
hydraulic hose connections are completely engaged.
Operating Safety Zone---50 Yard Radius
from Mower Head
Stop! And allow all vehicles to
pass through operating “Safety
Zone” before continuing cutting.
Operator awareness is key to safe
operation. Never operate or con-
tinue to operate this machine when
there is a person or vehicle with-
in a 50 yard radius of the cutting
operation. If a person comes in-
side your operating “Safety Zone”
(50 yard radius) shut the machine
down.
KNOW YOUR OPERATING SAFETY ZONE!!

Installation
Before starting the operator should read and understand
the owner/operation manual for the parent implement to de-
termine the proper procedure for turning on the auxiliary
hydraulics to run the mower.
Mounting the mower
After removing the bucket from the stick by disconnecting the quick attach mech-
anism install the mower in it’s place. The mower with its’ mount should readily
attach in place of the bucket. Confirm that the locking mechanism is properly en-
gaged. Install the case drain line and then, attach the supplied hoses with quick
couplers to the auxilary circuit lines on the excavator. Make sure that the quick
connect couplers are completely engaged.
Case drain line, what and why is it needed?
The case drain protects the motor shaft seal from excessive pressure. Motor shaft
seals are usually rated to 100 psi for brief periods or less than about 50 PSI con-
tinuously. High pressure oil from the gear section travels between the shaft and
its sleeve bearing to an area behind the shaft seal. Through the return line by
way of an internal check valve or through an external case drain. In most compact
equipment return line pressure is high enough to cause either abrupt seal blow-
out (150+ psi) or early failure of the motor shaft. Higher pressure seals are avail-
able, but are not always reliable and cause other problems as well.
The best solution is a dedicated case drain. Your machine may have an internal or
external case drain system that can accommodate the small volume of gear motor
case flow. Contact your vehicle dealer or manufacturer for technical details.
Motor shaft seals are not covered under warranty if case drain is
not properly installed or fails. Make sure case drain line couplers
are properly connected.
Attaching Mower to Excavator
Securely attach the flail mower in the same manner you would attach a bucket or
other excavator attachment. Confirm that the locking mechanism is properly en-
gaged.
Carefully clean the Hydraulic quick couplers before making connections. Dirt
quickly damages the hydraulic system. Always cover or connect couplers together
when not in use.
Connect supply, return and case drain lines. Confirm that the hydraulic quick cou-
plers are fully engaged and locked by turning the collars. Check with your power
units manuals on how best to release the pressure in the auxiliary lines for easy
coupling to the connectors.
Activate the auxiliary hydraulic circuit with the cutter head raised off the ground.
The cutter shaft should turn freely and smoothly.

Operation
Mowing with the Excavator Flail
Techniques vary with the operator and the mowing task. however, the factors be-
low should be kept in mind.
• The mower is fragile compared to an excavator bucket. The bucket is designed
to with stand very high digging force. The mower will crumple with any sub-
stantial fraction of that. Keep in mind that excavator mowing requires a light
hand. Do not push on the mower head to move the excavator or to push objects.
• It is particularly important to avoid pushing with the flail shaft. Keep the flail
shaft and blade towers clear of solid objects. Let the blades do the cutting.
Bending the flail shaft will result in vibration that requires remanufacturing
the shaft to fix. Do not continue to mow with a severely bent or unbalanced
shaft.
• Good performance depends on the free swinging of the blades. The two pound
blades can sever 4 inch diameter soft wood with one hit of one blade. forcing
the flail into vegetation, such that the blades are held against the flail shaft,
slows mowing. Keep the blades swinging.
• The flail mower is designed to cut all types of grasses, brush and small trees.
The ground conditions and the type of brush being cut will determine the best
cutting procedure and ground speed.
• Sharp blades make a substantial difference in cutter efficiency. This is most
noticeable in heavy conditions when the mower is operating at capacity. Run-
ning the blades into rocks or other hard objects will blunt blades and will
reduce mowing capacity.
• flail mowers can be equipped with cut height adjusting roller for brush cut-
ting at ground level. For brush cutting at higher levels, including canopy
mowing, the roller is best left off.
Cutter shaft should be run at 1800 to 2000 rpm.
Clearing brush in an open area
• Position the excavator at a starting point. Set the height of mower head so the
brush is less than about 2 feet above the top of the mower. Swing the mower
through the brush matching the swing speed to the performance of the mow-
er. Over feeding the mower will drag down cutter shaft speed reducing mower
efficiency. Lower the head and swing again. Repeat until desired cut height is
reached.
Canopy Mowing & Trees
• Canopy mowing requires rotating the head so that the flail is upside down and
positioned upward, the level of the canopy to be cut. Turning the cab from side
to side while moving the excavator forward, one can readily mow the underside
of a tree canopy.
• Tree mowing is generally best done by first running the flail head up and down
the trunk removing the branches. If the tree is not too large, positioning the
head at the top of what remains of the trunk while working the head up and
down can reduce the trunk to little more than a stump. Bear in mind, however,
that the flail is not a chipper or stump grinder. Its ability to do this kind of
cutting is limited by the hardness of the material.

Maintenance
Frequent and routine maintenance procedures should be followed
to ensure the safe and efficient operation of the mower. The follow-
ing procedures should be performed every 8 working hours. Under
severe conditions this schedule should be accelerated.
• Check free end bearing and bearing housing for excessive heat: indicating loss
of lubrication or possible bearing damage.
• Check blades, blade bolts, nuts and towers for excessive wear, chipping or
cracking.
• Grease bearings: free end ~4 pumps every 4 hours — drive end until grease
comes out the breather
• Check hydraulic lines for damage and leaks.
• Clean debris, leaves, grass and sticks from inside shroud and or rollers.
• Check bolts and nuts on all mountings and optional equipment.
• Check depending on your options: gates, shields, shroud and rollers etc. Re-
pair if damaged or replace if necessary.
Lubrication
The drive end bearing housing has a grease zerk and a grease vent plumbed to the
surface of the mower enclosure. The amount needed varies with ambient tem-
perature and mowing load. Generally greasing twice a day is sufficient for heavy
operation. A good quality NLGI#2 lithium grease is usually satisfactory. If the
bearing housing is pumped full of grease when cold, at first run up after a cold
fill, a substantial quantity of grease will issue from the vent as the grease heats.
This is normal. To reduce this, grease when equipment is at operating temperature.
Inspect before mowing
Inspect cutter drum and knives. Inspect the blades for wear, damage & cracks. In-
spect towers for cracks. Inspect blade bolts for wear and tightness. Replace or
repair any problem items immediately. Injury can be caused if a blade or tower is
thrown from cutter shaft while mowing.
Replacing blades and blade bolts
Your mower will be more efficient if running with sharp blades. Blades may be
turned around if one side is worn. Blades should be replaced in sets to maintain
cutter shaft balance. Blade bolts, washers and bolt nuts should be examined and
replaced if worn. Bear in mind that parts subject to intense pounding will in time
develop fatigue cracks.
Install the blade assembly as shown in the shaft diagram. Note that if top lock
nuts are used they should be threaded onto the bolt such that the nut runs out
of bolt threads. It is the resulting thread jamming effect on the nut that holds
it in place against shock and vibration. This type of nut must be driven to refusal
with a 3/4” High power impact gun.

Maintenance
Replacing bearings—free end
Removal
1. Loosen the set screw that holds the collar of the bearing to the shaft.
2. Unbolt the (4) bolts that hold the bearing in place.
3. Clean dirt and rust from surface. Smooth off raised areas.
4. Slide the bearing off the shaft. Because of rust or nicks on the shaft, a pull-
er may be needed.
Installation
1. Clean the shaft and bearing bore.
2. Apply anti-seeze.
3. Slide bearing in place.
4. Install (4 ) bolts and torque to 100 ft/lbs.
5. Tighten collar set screws.
Replacing bearings—drive end
1. Remove the hoses and the four bolts holding the hydraulic motor to the end of
the bearing housing and remove the motor.
2. Loosen the 3 set screws on the nut and remove the nut.
3. Block up the cutter shaft.
4. Remove the clamp ring that compresses the outer edge of the rubber disc.
5. You should now be able to slide the bearing housing off the shaft.
6. When reassembling the housing, note the two ball bearings must be installed so
that their thrust direction is back to back.
7. This is also a good time to examine the rubber disc and shaft seal. Inspect for
tears, wear or separation. Replace if damaged.
Installing the Compact
Drive Nut
Do not use anti-size on the nut or drive
stub.
Caution: Do not tighten set screws before
installing nut.
1. Thoroughly clean and degrease the
threads on both the nut and the drive
stub.
2. Apply Blue Loctite to set screw and stub
threads.
3. Screw the nut onto the drive stub and
tighten to about 40 FT/LBS
4. Turn the shaft 2-3 full rotations.
5. Loosen nut slightly and torque to 40 FT/
LBS
6. Tap the nut with a small ball peen ham-
mer.
7. Torque again to 20 FT/LBS.
8. Torque set screws to 160 IN/LBS.

Parts List-EX40 Flail Mower
Roller Assembly-Optional
Thumb Saddle-Optional
(not shown)
Parts List
Parts List-EX40HD Flail Mower
18
15 2
5
1
11
12
21 20
12
14
22
16
15
7
17
11
24
1312
3
10
4
6
12
19
20
9
8
ITEM
NO.
PART
NUMBER
DESCRIPTION
step
1/QTY.
1 2562485
CD40HD Lower
Cover
1
2 2562484
CD40HD Upper
Cover
1
3 2562932
CD40 HD Free
End Bearing
Plate assy
1
4 2562487
CD40HD Cutter
Shaft Assy
1
52562486
Rev A
CD40HD
Weldment
(2013)
1
6
CD40HD
Roller
CD40HD Roller
1
7 2562482
CD40HD Gate
2
8 2562483
CD40HD Gate
Clamp
2
9 2601500-S
Compact
Drive SAE C
1
10 2556827
1/2"-13 x 1.5"
Grade 8 Bolt
8
11 2557338
1/2"-13 Hex Nut
16
12 2557626
1/2" Flat
Washer
36
13 2561108
1/2"-13 x 1 3/4
Grade 8 Bolt
12
14 2559336
1/2"-13 x 2"
Grade 8 Bolt
8
15 2561301
3/8 Flat Washer
Yellow Zinc
56
16 2562572
3/8"-16 Top
lock Nut
28
17 2559028
3/8-16 x 1 1/2
G8
16
18 2556428
3/8"-16 x 1 1/4
Grade 8 Bolt
12
19 2557339
5/8"-11 Top
Lock Nut
4
20 2600375
5/8" Washer
6
21 2556605
5/8"-11 x 2
Grade 8 Bolt
4
22
2601730 L
Roller Arm Assy
1
23
2601730 R
Roller Arm Assy
1
24 2561436
Free End
Bearing
1
1
15
16
21
14
18
19
20
6
8
17
18
14
11
10 2
4
4
3
12
9
23
8
6
24
22
Optional Roller
7
ITEM
NO.
PART NUMBER
DESCRIPTION
QTY.
1 2562404
CD 40 Weldment
1
22564254
EX 40 Roller
1
32560205
1-7/16" Roller Bearing
2
42601731
Roller Arm
2
52561108
HCS 1/2 - 13 X 1.75
4
62557338
1/2"-13 Hex Nut
20
7 2560387
1/2-13X1-3/4 GR8 HCS
4
82557626
1/2" Flat Washer
36
9 2556428
3/8"-16 x 1 1/4 Grade 8
Bolt
16
10 2561301
3/8 Flat Washer Yellow
Zinc
32
11 2562572
3/8"-16 Top lock Nut
16
12 2556827
1/2"-13 x 1.5" Grade 8
Bolt
8
13 2561108
1/2"-13 x 1 3/4 Grade 8
Bolt
16
14
2601719-1
Clamp Strip
2
15 2601701
CD50 Upper Cover
1
16 2601702
CD 50 Lower Cover
1
17 2562403
CD40 Cutter Shaft
1
18
2562404-6
CD40 Gate
2
19
DD40 Free
End Bearing
assy
Free End Bearing assy
1
20 2561436
Free End Bearing
1
21 2601500
Compact Drive SAE C
1
22 2559531
5/16 Flat Washer
24
23 2556618
5/16"-18 Lock nut
12
24 2558879
5/16"-18 x 1" Grade 8
Bolt
12

5
3
2
3
4
6
1
ITEM NO.
PART NUMBER
DESCRIPTION
QTY.
1 2559277
1/2" Cutter Shaft Tower
2
22560622
De-Thatch Blade
1
32558468
2lb. Forged Blade
2
4 2558544
1" Blade Bolt - Std
1
52558349
1" Slotted Nut
1
62560759
1/4" X 1-1/2" Roll Pin
1
72561212
Cutter Bolt Pin Keeper
1
376129121354
9
1
2
3
4
ITEM NO.
PART NUMBER
DESCRIPTION
QTY.
1 2562932
CD40 HD Free End Bearing Plate
assy
1
22561436
Free End Bearing
1
32561108
1/2"-13 x 1 3/4 Grade 8 Bolt
4
42557626
1/2" Flat Washer
4
ITEM NO.
PART NUMBER
DESCRIPTION
QTY.
12 2601504
Seal - SKF CR_25076
1
13 2601506
Nut - SKF KMTA_10
1
ITEM NO.
PART NUMBER
DESCRIPTION
QTY.
1
2601501-solid
CD saeC Base Plate-solid
1
22601507
o ring
1
32601509
Clamp Ring Inner
1
42601508
outer Clamp Ring
1
52601510
Drive Iso
1
62601503
CD saeC Cap
1
72562274
1/4 - 20 x 1.0 SHCS
6
8
2601505
Drive End Bearing
1
9
2601505
Drive End Bearing
1
Drive End Assembly
Cutter Shaft Assembly
EX40 #2562403
EX40HD #2562487
Parts List
Complete Blade, Bolt and
Nut Kit EX40/EX40HD
Part #2564497

USM warrants all of its mowers for a period of 12 months.
The warranty specifically covers manufacturing or component defects only. Defects or damage
caused by non-US MOWER installers or owner/operators are not covered.
Normal wear parts are not covered by this Warranty
Exclusions not covered by warranty:
-Components showing evidence of operational misuse, abuse or modification.
-Components showing evidence of maintenance neglect including, but not limited to:
1. Failure to follow the lubrication schedule
2. Failure to maintain proper hardware bolt torque. Inspect frequently.
3. Failure to maintain proper bearing pre-load.
4. Poor quality oil, Improper oil level
5. Oil filters not replaced as needed, inappropriate filter installed
-Technician or mechanics travel time
-Machine pick-up and or delivery to repair facility.
-Components classified as consumables.
-Hydraulic hoses not of USM manufacture-Note: If an otherwise warrantable hose is replaced
from other sources, a credit will be issued which will represent USM’s cost of manufacturing
that hose and shipping by UPS ground.
-Bent flail shafts or shaft stubs
-The warranty will be considered void if closed components are disassembled prior to return.
Closed components include, but are not limited to: hydraulic pumps, motors, and cylinders.
-All replacement components will be shipped to customer/dealer via UPS Ground. All re-
placement components shipped are invoiced as a matter of course. Components that require
evaluation at the factory must be shipped freight prepaid. A credit will be issued for the re-
placement component and freight when it is determined that the warranty is applicable. All
warranty work or replacement components must be pre-authorized by US Mower. US mower is
not responsible for unauthorized repairs or replacements. If there are questions regarding
the applicability of warranty, a call to USM is recommended before work proceeds.
Credit for Labor
Labor credit for a warrantable repair will be issued only for work done in a service dealer’s
shop. No labor credit will be issued for work done in the field (i.e., at the machine site) except
by specific factory authorization. Travel time to and from machine will not be warranted. Ac-
tual warranty compensation will be based on USM flat rate manual.
CREDIT WILL NOT BE ISSUED AND WARRANTY IS NOT VALID FOR ANY UNIT THAT IS
NOT PAID WITHIN TERMS OF THE INVOICE INCLUDING THE SERIAL NUMBER FOR PUR-
CHASED COMPONENT REGARDLESS OF THE END USER. WHOLESALER OR DEALER IS RE-
SPONSIBLE FOR ALL COSTS OF WARRANTY REPAIRS UNLESS INVOICE IS WITHIN TERMS.
Damage and Injury
USM liability is specifically limited to the replacement of components for its products if a
warrantable defect is discovered. Collateral damage to property or personal injury is ex-
clusively the responsibility of the owner and or operator since USM has no control over the
circumstances in which it’s equipment is used. Lost time or expense which may have accrued
because of defects is not covered.
Express Warranty
Seller warrants that:
The goods to be supplied pursuant to this agreement (purchasers agreement to buy and sell-
er’s agreement to sell) are fit and sufficient for the purpose intended.
The goods are merchantable, of good quality and free from defects within the seller knowl-
edge, whether patent or latent, in material or workmanship.
The seller has title to the goods supplied in that the goods are free and clear of all liens,
encumbrances and security interests. All warranties made in this agreement, together with
service warranties and guarantees shall run to buyer and the original customer of buyer.
THERE ARE NO OTHER WARRANTIES EITHER EXPRESSED OR IMPLIED
Should you have questions regarding warranty issues or experience any problems, please call
US Mower Factory Warranty

www.usmower.com
This manual suits for next models
1
Table of contents
Other USMOWER Lawn Mower manuals
Popular Lawn Mower manuals by other brands

Craftsman
Craftsman 917.272352 owner's manual

Dixon
Dixon BLACK BEAR ZTR 34/968999564 Operator's manual

LawnMaster
LawnMaster L10 Quick start installation guide

Black & Decker
Black & Decker MM2000R instruction manual

Craftsman
Craftsman 917.379040 owner's manual

Gude
Gude High Wheeler ST 460 T Translation of the original instructions