QUICKGUIDE CDC 5526L|5626L
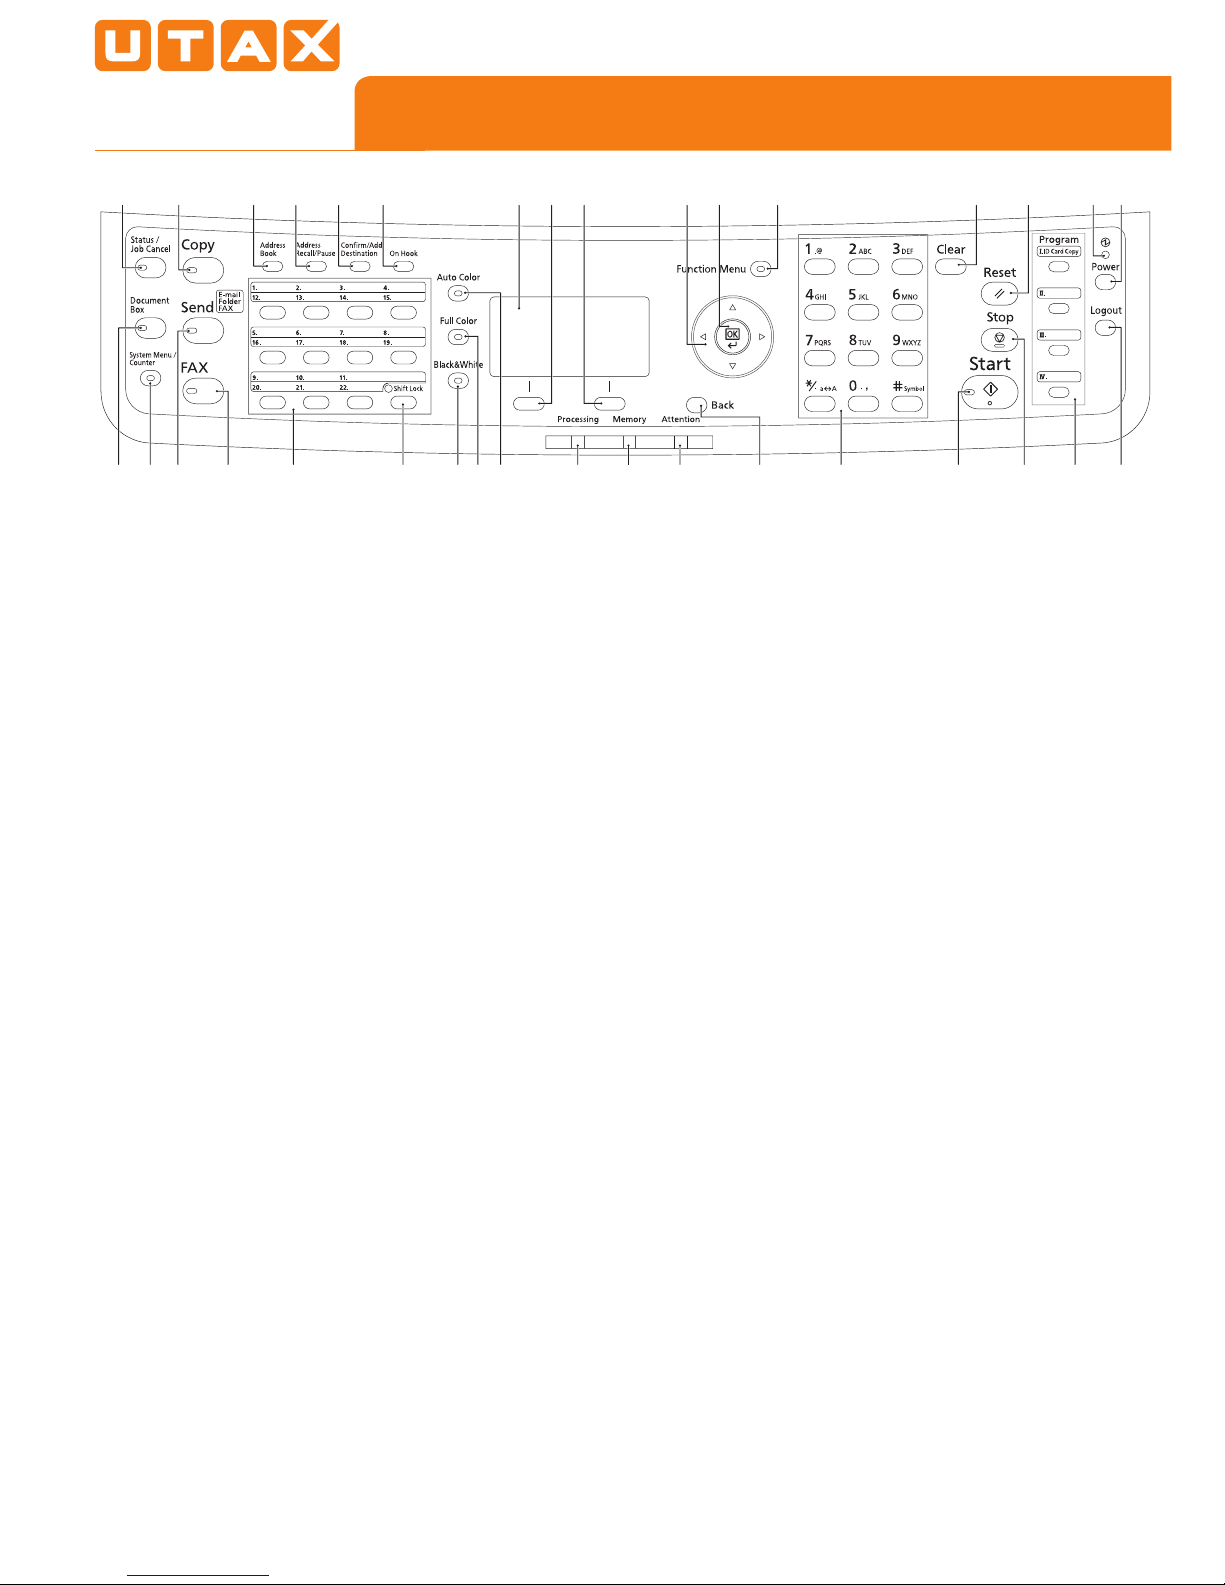
Operation panel
12
56 11
41213 19 20 21 251514 26 29 30 34 333
78910 161718 2223 24 27 28 3231
1 Displays the Status screen, where you
can check the status, print a status
report, and pause or cancel the job in
process.
2 Displays the Copy screen, where
you can make settings required for
copying.
3 Displays the Document Box screen,
where you can operate the document
box and USB memory.
4 Displays the System Menu/Counter
menu screen, where you can check the
system settings and counters.
5 Displays the Send screen, where you
can send an e-mail, folder (SMB/FTP)
or fax.*
6 Displays the fax screen, where you can
send a fax.*
7 Displays the Addressbook screen,
where you can add, edit and delete
destinations.
8 Calls the previous destination. Also
used to enter a pause when entering a
fax number.*
9 Displays the Add Destination screen,
where you can add destinations.
10 Switches between on-hook and off-
hook when manually sending a fax.*
11 Used to register, call and delete
destinations to the one-touch key
numbers (1 to 22).
12 Shifts to switch the one-touch key
numbers (1 to 11 and 12 to 22).
Indicator is lit while shifted (12 to 22).
13 Selects black and white mode.
14 Selects full color mode.
15 Selects auto color mode.
16 Message Display. Checks what is
shown here while operating the
machine.
17 Selects the menu displayed at the
lower left in the Message Display.
18 Selects the menu displayed at the
lower right in the Message Display.
19 Blinks while print data is being
received or data is transmitted.
20 Blinks while the machine is accessing
the memory.
21 Lights or blinks when an error occurs.
22 Used to select a menu item, move
the cursor when entering characters,
change a value, etc.
23 Selects the chosen item or ¿nalises the
entered value.
24 Displays the function menu for copy,
print, transmission and document box.
25 Returns the Message Display to the
previous screen.
26 Numeric keys. Enter numbers and
symbols.
27 Clears entered numbers and
characters.
28 Resets settings and displays the basic
screen.
29 Starts copying and scanning operations
and processing for setting operations.
30 Cancels the printing job in progress.
31 Lights when the machine‘s main power
is on.
32 Puts the machine to sleep or wakes it
up.
33 Ends operation (logs out) on the
Administration screen.
34 Used to register or recall programs.
*Only CDC 5626L


 Manual")


