UWE JETStream LIBRA 3 User manual

1
STR
EAM
MONTAGE- UND BEDIENUNGSANLEITUNG
INSTALLATION AND OPERATING INSTRUCTIONS
INSTRUCTIONS DE MONTAGE ET MODE D’EMPLOI
LIBRA 3-5
STR
EAM
STR
EAM

2
D Inhaltsverzeichnis
MONTAGE UND BEDIENUNGSANLEITUNG .............................................. Seite 3 - 9
GB Table of Contents
INSTALLATION AND OPERATING INSTRUCTIONS ....................................page 10 - 17
F Contenu
INSTRUCTIONS DE MONTAGE ET MODE D’EMPLOI .................................page 18- 23

3
MONTAGE- UND BEDIENUNGSANLEITUNG
1 SICHERHEITSHINWEISE
1.1 Vor der Inbetriebnahme
Die Sicherheitshinweise und die Bedienungsanleitung müssen vor der Aufstellung und Inbetriebnahme aufmerksam gelesen und
beachtet werden. Halten Sie unbedingt die Anforderungen der Firma uwe bzw. der Normgeber ein.
1.2 Erstinbetriebnahme des Gerätes
Vor jeder Inbetriebnahme sind die örtlichen Sicherheitsbestimmungen sowie die Sicherheitshinweise einzuhalten.
1.3 Gefahrenquellen
Warnung!
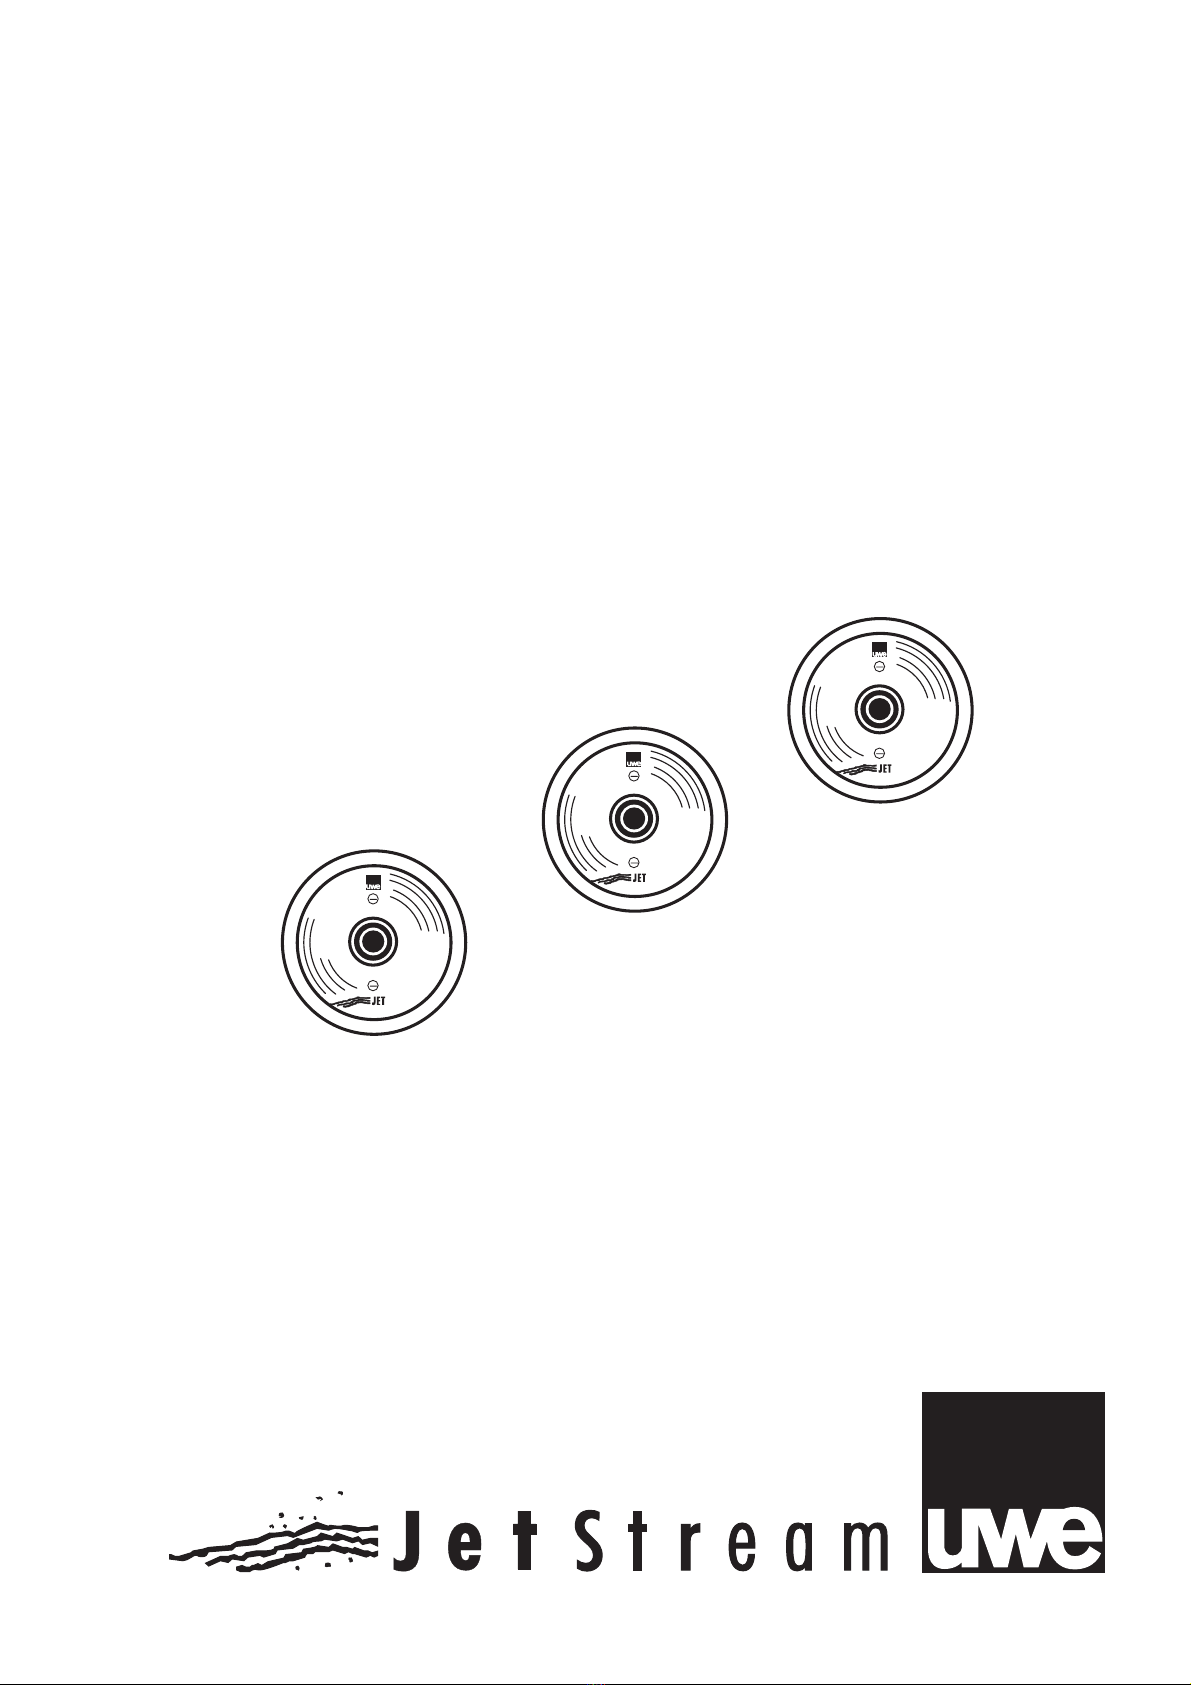
Die JETSTREAM Anlage spritzt durch die Strahldüse ja nach Gerätetyp bis zu 1200 Liter Wasser pro Minute in das Becken ein.
Wird diese enorme Kraft voll zur Massage eingesetzt, kann dies zu Verletzungen der Muskulatur, des Bindegewebes und zu
inneren Verletzungen führen. Aufgrund des verringerten elektrischen Widerstandes des menschlichen Körpers in Schwimmbä-
dern und der daraus resultierenden erhöhten Wahrscheinlichkeit des Auftretens gefährlicher Körperströme, werden erhöhte si-
cherheitstechnische Anforderungen an die Elektoinstallation gestellt.
Deshalb halten Sie unbedingt folgende Sicherheitshinweise ein.
Der Düsenstrahl besitzt eine erhebliche Energie. Drosseln Sie vor dem Massieren unbedingt den Strahldruck.
Nicht den vollen Massagestrahl gegen die Weichteile des Körpers richten.
Zum Schwenken der Strahldüse Pumpe abschalten.
Zur grossflächigen Massage Strahlstärke auf halbe Stärke drosseln.
Zum Massageschlauch aufsetzen und abnehmen, Pumpe abschalten.
Halten Sie zur Punktmassage die Düse des Massageschlauches unter Wasser fest in der Hand. Führen Sie die
Düse des Massageschlauches mit Abstand über die gewünschten Stellen.
Nicht mit offenen langen Haaren zum Einlaufseiher (falls vorhanden) tauchen.
Anforderungen an die entsprechende elektrische Installation entnehmen Sie bitte unserem jedem Gerät beigelegten, Hinweis-
blatt: "An den Elektroinstallateur". Teile der Einrichtung, die unter Spannung stehende Teile enthalten, müssen für Persnen, die
das Bad benutzen, unzugänglich sein. Geräte und Geräteteile, welche elektrische Bauteile enthalten, müssen so aufgestellt bzw.
befestigt werden, dass sie nicht ins Wasser fallen können. Geräte der Schutzklasse I müssen dauerhaft an festverlegte Leitungen
angeschlossen sein.
1.4 Bestimmungsgemässe Verwendung
Alle Geräte sind ausschliesslich bestimmt zum Betreiben in überdachten Schwimmbädern und Schwimmbädern im Freien bei
einer Wassertemperatur bis zu 35° C. Die Geräte sind zur Aufstellung und Betrieb in An-lagen und Räumen in den Bereichen 1
und 2 nach DIN VDE 0100 T 702 geeignet. Die Pumpe wird normalerweise in den Beckenumgang aufgestellt, es muss jedoch
gewährleistet sein, dass der Raum trocken und der Motor gegen Überflutung durch einen ausreichend dimensionierten Bodenab-
lauf geschützt ist. Der Steuerkasten sollte entweder in einem trockenen Umgang oder in einem angrenzenden Raum, möglichtst
höher als der Wasserspiegel untergebracht sein. Die uwe JETSTREAM TREVI-Modelle sind eine Sonderform zur nachträglichen
Ausrüstung eines Schwimmbades. Diese TREVI-Modelle werden an den Beckenrand geschraubt, und sind nicht als Startblock zu
benutzen. Jeder darüber hinausgehende Gebrauch gilt als nicht bestimmungsgemäss. Für hieraus resultierende Schäden haftet
der Hersteller nicht; das Risiko hierfür trägt allein der Benutzer. Zur bestimmungsgemässen Verwendung gehört auch die Einhal-
tung der vom Hersteller vorgeschriebenen Betriebs-, Wartungs- und Instandhaltungsbedingungen. Wartungs-, Reparaturarbeiten
und dergleichen dürfen nur von autorisierten Personen durchgeführt werden. Die Geräte dürfen nur von Personen genutzt wer-
den, die hiermit vertraut und über die Gefahren unterrichtet sind. Die einschlägigen Unfallverhütungs-Vorschriften sowie die
sonstigen allgemein anerkannten sicherheitstechnischen, arbeitsmedizinischen Regeln sind einzuhalten. Eigenmächtige Verän-
derungen an den Geräten schliessen eine Haftung des Herstellers für daraus resultierende Schäden aus.
1.5 Produkthaftung
Der Benutzer wird ausdrücklich darauf hingewiesen, dass das Gerät ausschliesslich bestimmungsgemäss eingesetzt werden
darf. Für den Fall, dass das Gerät nicht bestimmungsgemäss eingesetzt wird, geschieht dies in der alleinigen Verantwortun des
Anwenders. Jegliche Haftung des Herstellers entfällt somit.
1.6 Verhalten im Notfall
Wasser sofort verlassen und Geräte durch Hauptschalter oder Sicherungen spannungsfrei schalten und gegen unbefugtes
Wiedereinschalten sichern.
1.7 Erklärung der Gefahrensymbole
Warnung!
In dieser Bedienungsanleitung haben wir alle Stellen, die Ihre Sicherheit betreffen, mit diesem Zeichen verse-
hen. Geben Sie alle Sicherheitsanweisungen auch an andere Benutzer weiter.
In dieser Bedienungsanleitung haben wir alle Stellen, die funktionsnotwendige Hinweise enthalten, mit diesem
Zeichen versehen. Bitte beachten Sie unbedingt diese Hinweise, um Schäden am Gerät zu vermeiden.
Warnung
Funktion
Warnung

4
Funktion
Einsetzen der Rohbauteile in die Schalung
• Montage (Bild 1 Ausführung Rotguss, Bild 1a Ausführung ABS)
Schrauben Sie alle Rohbauteile der Düsen so in die Schalung, dass die lange angegossene Strebe unten liegt.
Haben Sie ein Düsen-Rohbauteil eingebaut, schliessen sich alle weiteren (3 bis 5 Stück) in einem waagrechten Abstand von ca.
1,5 m oder in gerader Linie fallend bis zu einem Bodenabstand von 60 cm an. Bringen Sie das Rohbauteil für den Pneumatik -
Schalter (Sonderzubehör) vorzugsweise bei der ersten Düse an. Setzen Sie die Rohbauteile bündig mit der Beckenwand ein
(Beton). Erhält das Becken für eine Folienauskleidung einen Putz- oder Dämmplattenauftrag, so müssen Sie das Düsenmantelge-
häuse um die Putz- bzw. Dämmplattenstärke vorziehen. Entfernen Sie die Schutzkappen erst vor dem Fliesen.
• Fliesenplan (Bild 2 und 3 Ausführung Rotguss, Bild 2a und 3a Ausführung ABS)
Fliesen Sie die Rohbauteile bis zu ihrer Innenkante. Putz- und Fliesenausgleich 6 cm.
• Becken mit Folienauskleidung (Bild 4 und 5 Ausführung Rotguss, Bild 4a und 5a Ausführung ABS)
Ordnen Sie Klemmrahmen, die Dichtungen aus Folienmaterial und die Gummidichtung nach Bild 4 und 5 an.
• Stahl-, Alu- und Polyesterbecken (Bild 6 Ausführung Rotguss, Bild 6a, Ausführung ABS)
• Pneumatikschalter einbauen (Bild 7 Ausführung Rotguss und Ausführung ABS)
4
5
Dichtung
Folie
Klemm-
ring
Folie
Klemmring
Senk-
schrauben
vor und hinter
der Folie je eine
Dichtung aus
Folienmaterial
Dichtung
vor und hinter
der Folie je eine
Dichtung aus
Folienmaterial
Senkschrauben
1
Maße in cm
Schalbrett
Rohbauteil für
Pneumatikschalter
(Sonderzubehör)
Beton
Rohbauteil
Saugrohr
Schalbrett
Rohbauteil
Düse
lose beiliegender
Schutzschlauch
für Wandstärke
über 24 bis 100 cm
Wasserspiegel
Strebe unten
Stopfen 2“
2
3
an allen Rohbauteilen
bis zur Innenkontur
fliesen
Putz- und Fliesen-
ausgleich bis 6 cm
an allen Rohbau-
teilen bis zur Innen-
kontur fliesen
Putz- und Fliesen-
ausgleich bis 6 cm
24
60
~40
24
15-20
24
~80
O
B
E
N
Ø 12,8
Ø11
Ø 8,6 10,2
Ø17
6Beckenwand
Wasserspiegel Düsenmantel-
gehäuse Düse
Klemmrahmen
Ausschnitt und Bohrun-
gen in der Beckenwand
am besten mit Hilfe des
Klemmrahmens
anreissen bzw. abbohren
Senkschraube
M 6x30
Dichtung
Klemmrahmen
Saugrohr
Stopfen 2“
Vorschlag: Die Rohbauteile der
weiteren Düsen (3 bis 5 Stück)
schliessen sich in einem
seitlichen Abstand von - 1,5 m
waagrecht oder wahlweise in
gerader Linie fallend bis auf einen
Abstand von
60 cm vom Beckenboden zum
Rohbauteil der letzten Düse an
Senkschraube
M 6x30
Dichtung
Maße in cm
Düsenmantelgehäuse
Ø 0,7
24
~ 60
~ 80
15
17
8
x
4
5
°
=
3
6
0
°
45°
7
60°
Ø 0,7
8,6
6
x
6
0
°
=
3
6
0
°
15 - 20

5
1a
Maße in cm
Schalbrett
Rohbauteil für
Pneumatikschalter
(Sonderzubehör)
Beton
Rohbauteil
Saugrohr
Schalbrett
Rohbauteil
Düse
lose beiliegender
Schutzschlauch
für Wandstärke
über 24 bis 100 cm
Wasserspiegel
24
60
~40
24
15-20
24
~80
Ø 12,8
Ø11
Ø 8,6 10,2
~40
Ø17
Strebe unten
Stopfen 2“
2a
4a
Klemmring
Beckenwand
Senkschrauben
M6 x 30
vor und hinter
der Beckenwand
je eine Dichtung
Flachkopf-
schraube M5
An allen Rohbau-
teilen bis zur Innen-
kontur fliesen
Putz- und
Fliesenausgleich
bis 6 cm
3a
an allen Rohbau-
teilen bis zur Innen-
kontur fliesen
Putz- und Fliesen-
ausgleich bis 6 cm
6a
Becken-
wand
Wasserspiegel Düsenmantelgehäuse Düse
Klemmrahmen Ausschnitt und Bohrun-
gen in der Beckenwand
am besten mit Hilfe des
Klemmrahmens
anreissen bzw. abbohren
Senkschraube
M 6x30
Dichtung
Klemmrahmen Saugrohr
Stopfen 2“
Vorschlag: Die Rohbauteile der weiteren Düsen (3 bis 5 Stück)
schliessen sich in einem seitlichen Abstand von - 1,5 m waagrecht
oder wahlweise in gerader Linie fallend bis auf einen Abstand von
60 cm vom Beckenboden zum Rohbauteil der letzten Düse an
Senkschraube
M 6x30
Dichtung
Maße in cm
Düsenmantel-
gehäuse
Maße in cm
Wasserspiegel Wasserspiegel
Becken-
wand für Betonwandstärke
über 24 cm Schutzrohr
abschrauben und bei-
liegenden Schutz-
schlauch verwenden
Klemmrahmen
Dichtung
Senkschraube
7
10-35
Ø 0,7
8,6
6
x
6
0
°
=
3
6
0
10,2
24
Schutzschlauch
Ausschnitt und Bohrungen
in der Beckenwand am Besten
mit Hilfe des Klemmrahmens
anreissen bzw. abbohren
24
45°
22,5°
15
17
8
x
4
5
°
-
3
6
0
22,5°
22,5°
26
M 6
M 5
20-35
(opt. 25)
80
7
60°
Ø 0,7
8,6
6
x
6
0
°
=
3
6
0
°
Kernbohrung
Flachkopf-
schraube M5
5a
Klemmring
Beckenwand
Senkschrauben
M6 x 30
vor und hinter
der Beckenwand
je eine Dichtung
Flachkopf-
schraube M5

6
ANGABEN NUR FÜR AUTORISIERTE PERSONEN
Vor der Montage
Die Sicherheitshinweise müssen vor der Aufstellung aufmerksam gelesen werden. Halten Sie unbedingt die Anforderungen der
Fa. uwe bzw. der Normgeber ein. Für den Fall, dass die Hinweise nicht berücksichtigt werden, geschieht dies in der alleinigen
Verantwortung des Monteurs. Jegliche Haftung des Herstellers entfällt somit.
Montage LIBRA-Düsen (Bild 8 Ausführung Rotguss)
Feuchten Sie die Dichtringe (1) der Düsen (2) mit Wasser an. Setzen Sie die Düsen dann so in die Rohbauteile, dass die Befes-
tigungslöcher der Düse vertikal liegen und dass sich die Gewindebohrungen des Rohbauteils und die Senkbohrungen der Düse
decken. Drehen Sie die Senkschraube (3) ein. Leicht anziehen.
Montage Pumpe mit Saugschlauch (Bild 8 Ausführung Rotguss)
Drehen Sie, von der Beckenaussenwand herkommend, die beiden beiliegenden Edelstahl-Verschlussschrauben (7) mit Dichtun-
gen (8) in die Gewindebohrungen (9) ein. Fest anziehen.
Dichtung (16) nicht vergessen.
Hanfen Sie den Doppelnippel (10), den Schieber (11), den Spezialbogen von 90 Grad (12) und den Saugschlauch (13) ein.
Schrauben Sie entweder die Pumpe (14) mit den mitgelieferten Ankerschrauben auf einen betonierten oder gemauerten Sockel,
oder montieren Sie die Pumpe auf die von uwe lieferbare starre bzw. verstellbare Konsole. Die starre Konsole wird an der
Aussenseite der Beckenwand montiert, die verstellbare Konsole wird am Boden des Beckenumganges montiert. Bauen Sie zwi-
schen Pumpenfuss und Konsole die mitgelieferten Schwingungsdämpfer (15) ein.
Wichtiger Hinweis
Die Pumpe wird normalerweise in dem Beckenumgang aufgestellt. Der Aufstellungsort muss trocken und durch
einen ausreichend dimensionierten Bodenablauf geschützt sein.
Legen Sie zwischen Saugschlauch (13) und Pumpe (14) die Dichtung (16) ein. Drehen Sie dann die Überwurfmutter (17) auf den
Saugstutzen (18) der Pumpe. Ziehen Sie die Überwurfmutter fest. Auf dem Spezialbogen von 90 Grad (12) befindet sich ein
Gewindeanschluss R ½ ”. Dieser ist mit einer Verschlussschraube (19) abgedichtet. Es wird empfohlen, diesen Anschluss durch
eine korrosionsfeste Leitung ½ ” oder 1” (Reduzierung von 1” auf ½ ”) mit der Druckseite des Schwimmbadfilters zu verbinden.
Der Vorteil besteht darin, dass die Leitungen der JETSTREAM-Anlage auch dann vom Wasser durchflossen werden, wenn die
Anlage ausgeschaltet ist.
Montage Druckschlauch (Sonderzubehör: Flexibles Verrohrungssystem) (Bild 8 Ausführung Rotguss)
Hanfen Sie den Nippel 1¼ ” (20), den Schieber 1¼ ” (21) und das T-Stück 2”/1¼ ”/2” (22) in die Rohbauteile der Düsen ein. Auf
der Pumpenseite wird der Druckschlauch (23) mit der Überwurfmutter (17) und der Dichtung (16) mit dem Druckstutzen (24) der
Pumpe verschraubt. Verschrauben Sie den Druckschlauch ebenso mit der Überwurfmutter (17) und der Dichtung (16) mit dem T-
Stück der ersten Düse. Schrauben Sie die Verbindungsschläuche (25) der Düsen mit den Überwurfmuttern (17) und Dichtungen
(16) auf die T-Stücke der benachbarten Düsen. Schrauben Sie auf den äussersten Anschluss des letzten T-Stückes die Ver-
schlusskappe (26) mit der innenliegenden Dichtung.
Hinweis:
Die Länge der Verbindungsschläuche muss fast immer den Gegebenheiten vor Ort angepasst werden. Deshalb
ist auch immer nur ein Schlauchnippel montiert, der andere Nippel plus Überwurfmutter, Dichtung und Schlauch-
schellen liegt lose bei.
Wenn Sie einen Schlauch kürzen mussten, muss dieser auf den Schlauchnippel angebracht werden. Erwärmen Sie dazu das
Schlauchende mittels Heisswasser oder Heissluft bis zur Erweichung, und schieben Sie ihn auf den Schlauchnippel. Klemmen
Sie nach dem Abkühlen den Schlauch mit beiliegenden Schlauchschellen fest.
Wird die druckseitige Verrohrung bauseits erstellt, ist darauf zu achten, dass sowohl die Druckleitung von der
Pumpe zu der Düse als auch von Düse zu Düse mindestens eine Nennweite von 2” hat.
Warnung
Funktion
Funktion
Funktion

7
8

8
Montage LIBRA-Düsen (Bild 8a Ausführung ABS)
Feuchten Sie die Dichtringe (1) der Düsen (2) mit Wasser an. Setzen Sie die Düsen dann so in die Rohbauteile, dass die Befes-
tigungslöcher der Düse vertikal liegen und dass sich die Gewindebohrungen des Rohbauteils und die Senkbohrungen der Düse
decken. Drehen Sie die Senkschraube (3) ein. Leicht anziehen.
Montage Luftansaugschlauch (Bild 8a Ausführung Rotguss und Ausführung ABS)
Schieben Sie den Schlauch über den Schlauchnippel des Ventils. Klemmen Sie den Schlauch mittels der Schlauchschellen fest.
Dübeln Sie die Halter (32) so in die Wand, dass die Oberkante des Ventils (33) mindestens 5 cm über dem max. Wasserspiegel
des Schwimmbeckens liegt.
Hinweis:
Das Ventil (33) fängt einen eventuell vorkommenden Rückstau ab, der z.B. bei Verwendung des Massage-
schlauches, der Düse für Rückenmassage oder bei mutwilligem Verschliessen der Düse entstehen kann. Das
Ventil verhindert, dass Wasser aus dem Luftansaugschlauch spritzt. Das Ventil ist nur solange dicht, solange
sich keine Ablagerungen oder Haare darin festsetzen.
Deshalb das Ventil unbedingt über dem Wasserspiegel anbringen.
Kürzen Sie die Luftansaugschläuche, wenn diese länger sind, als Sie diese benötigen.
Je kürzer der Luftansaugschlauch, desto geringer ist sein Widerstand und desto höher ist der Luftdurchsatz.
Pneumatikschalter in der Beckenwand (Sonderzubehör) (Bild 8a Ausführung Rotguss und Ausführung ABS)
Drehen Sie die Druckschraube (34) aus dem Rohbauteil (35) heraus. Entfernen Sie die Dichtscheibe.
Belassen Sie aber unbedingt die Dichtung (36) in der Verschraubung.
Nehmen Sie den kurzen Schaltschlauch (38) des Pneumatik-Schalters (37), ziehen Sie diesen durch die Druckschaube (34), und
stecken Sie diesen auf den Schlauchnippel des Schlauch-Verbindungstückes (39). Stecken Sie auf den anderen Schlauchnippel
des Schlauch-Verbindungstückes (39) den langen Pneumatikschlauch (40), und schieben Sie diesen durch die zentrische Ver-
schraubung im Rohbauteil nach hinten in den Beckenumgang.
Stecken Sie das Schlauch-Verbindungstück (39) in die Verschraubung am Rohbauteil, und drehen Sie die Druckschraube (34)
wieder ein. Bitte anziehen.
Schieben Sie das Schaltergehäuse (41) so in das Rohbauteil, dass sich die Gewindebohrungen des Rohbauteils mit des Senk-
bohrungen im Schaltergehäuse decken.
Drehen Sie die Senkschrauben (42) ein. Ziehen Sie diese leicht an.
Stecken Sie den im Beckenumgang befindlichen Schaltschlauch, nachdem Sie ihn auf die erforderliche Länge gebracht haben,
auf das freie Ende des T-Stückes (43) am Steuerkasten (44).
Montage Einlaufseiher (Bild 8a Ausführung Rotguss und Ausführung ABS)
Legen Sie den Einlaufseiher (4) zentrisch so über das Rohbauteil (5), dass sich die Gewindebohrungen des Rohbauteils und die
Senkbohrungen des Einlaufseihers decken. Drehen Sie die Senkschrauben (6) ein. Leicht anziehen.
Montage Pumpe, Saug- und Druckschlauch (Bild 8a Ausführung ABS)
Die Pumpe sollte tiefer als der Wasserspiegel angebracht werden. Setzen Sie die Pumpe entweder mit einem Schwingmetall
(Stossdämpfer) auf die Konsole oder, wenn Sie einen Sockel betonieren möchten, unterbauen Sie diesen entsprechend.
Kleben Sie mit einem geeigneten Kleber den Saug- und Druckschlauch ein.
Vergessen Sie dabei nicht die Dichtung (16) zwischen Schlauchnippel und Pumpenstutzen einzulegen.
Schrauben Sie die Pumpe fest, bzw. setzen Sie die Steinschrauben.
Wichtiger Hinweis:
Die Pumpe wird normalerweise in dem Beckenumgang aufgestellt.
Der Aufstellungsraum muss trocken, belüftet und durch einen ausreichend dimensionierten Bodenablauf ge-
gen Überflutung geschützt sein.
Anschluss Steuerkasten (Bild 8a Ausführung Rotguss und Ausführung ABS)
Der Steuerkasten (44) sollte entweder in einem trockenen Umgang oder in einem angrenzenden Raum untergebracht werden.
Der Anschluss ist nach DIN VDE 0100 Teil 702 auszuführen. In die Netzzuleitung ist sowohl ein Hauptschalter, mit dem das Gerät
allpolig vom Netz getrennt werden kann, als auch ein FI-Schalter vorzusehen. (siehe Hinweisblatt: “An den Elektroinstallateur”)
Warnung
Funktion
Warnung
Warnung

9
8a
44
16
33
32
16
43
40 35
5
41 37 38 34 39 36
4
6
1
32
31
42
1
32
31

10
INSTALLATION AND OPERATING INSTRUCTIONS
1 SAFETY INSTRUCTIONS
1.1 Before Setting into Operation
Before installation and setting into operation, the Safety Instructions and the Operating Instructions must be carefully read and
observed.You must definitely comply with the requirements of the uwe company and of the standards authorities.
1.2 Setting the Unit into Operation for the First Time
Before the unit is set into operation, the local safety regulations and the Safety Instructions must always be complied with.
1.3 Sources of Danger
Warning!
The JETSTREAM system forces up to 1200 litres of water per minute into the pool through the nozzle. If all of this enormous force
is used for massage, it can cause injuries to muscles and to connective tissue, as well as internal injuries. Because of the reduced
electrical resistance of the human body in swimming pools and the resulting increased probability of the occurrence of dangerous
currents in the body, increased safety requirements are imposed on the electrical installation.
Therefore, you must definitely observe the following Safety Instructions:
The JETSTREAM has substantial power. Before massage, you must definitely reduce the pressure.
Do not utilize full thrust against soft parts of the body.
Switch off pump before adjusting angle of nozzle.
For large-area massage, reduce the strength to half thrust.
In order to attach and detach the massage fitting switch off the pump.
To massage a single part of the body, grip the massage hose firmly. When using the hose keep a distance to
those parts of the body that require massaging.
Do not approch the suction filter with long hair unless tied back.
Before putting the massage hose on or taking it off, switch off the pump.
For point massage, hold the nozzle of the massage hose firmly in your hand under water. Guide the nozzle of
the massage hose over the required places but at some distance from them.
Do not dive to the intake screen (if there is one) with long, unrestrained hair.
For requirements regarding the appropriate electrical installation, please see „Information for the Electrician“. Parts of the equip-
ment that contain electrically live parts must be inaccessible to persons using the pool. Units and unit parts containing electrical
components must be installed or fixed in such a way that they cannot fall into the water. Units of enclosure class I must be
permanently connected to permanently laid cables.
1.4 Proper Operation
All units are intended soleley for operation in covered swimming pools and in open-air swimming pools with a water temperature
up to 35°C. The units are suitable for installing and operating in installations and rooms in areas 1 and 2 as per EN-60335-2-41.
The pump is normally installed in the walkway behind the pool wall, but it must be ensured that the environment is dry and that the
motor is protected by a suitably sized floor drain to prevent flooding. The control panel should be installed either in a dry walkway
or in an adjacent room, if possible higher than the water level. Any kind of use other than the intended use is improper. The
manufacturer will not accept liability for any damage or injury resulting from improper operation; the user alone must bear this risk.
Proper operation also includes compliance with the operating, maintenance and repair conditions specified by the manufacturer.
Maintenance work, repair work and suchlike may only be performed by authorised persons. The units may only be used by
persons who are familiar with them and who have been informed about the dangers. The relevant regulations for the prevention of
accidents and the other generally recognised rules relating to safety and to occupational medicine must be complied with. If
unauthorised modifications are made on the units, the manufacturer will not accept liability for any resulting damage or injury.
1.5 Product Liability
The user’s attention is expressly drawn to the fact that the unit may only be operated in the proper manner. If it is operated in an
improper manner, the user must bear sole responsibility. In such cases, therefore, the manufacturer cannot accept any liability.
1.6 Procedure in an Emergency
Leave the water immediately, switch off the electrical supply to the unit by operating the main power switch or circuit-breaker, and
secure the unit to prevent it from being switched on again without authorisation.
1.7 Explanation of the Danger Symbols
Warning!
In these Operating Instructions, we have used this symbol to mark all texts which relate to your safety. Please
pass all safety instructions on to other users too.
In these Operating Instructions, we have used this symbol to mark all texts containing instructions that are
necessary for functional reasons. Please be sure to obey these instructions in order to avoid damage to the
unit.
Warning
Warning
Function

11
2 INITIAL OPERATION
2.1 Before starting
Safety precautions and operating instructions must be carefully read and observed before setting up and operating.
2.2. First time operation
Before operating, local safety requirements must be met and safety precautions must be observed.
Before operating the unit for the first time, rotate the pump by hand several times at the ventillating fan in the
direction shown.
Do not set a defective unit into operation.
Display the Safety Instructions in a clearly visible manner.
Keep the Operating Instructions available.
The water temperature must not exceed 35°C.
INSTALLING THE WALL NICHE IN CONCRETE SHUTTERED POOLS
• Installation (picture number 1 red bronze version)
Position the wall niches of the jet nozzles as shown in the drawings
Position first stage wall and wall components flush with structural concrete. Remove protective covers only when ready to lay tiles/
mosaics. In the case of a concrete/liner pool first stage components may project in order to compensate for cement render or liner
insulation thickness. First stage components must be accessible from the outside of the pool wall to allow for the installation of
pipes and air suction lines later. Locate the pneumatic switch housing in a convenient position 15-20 cm below water level. After
having installed the first jet, the others (3 - 5) should be located either at a laterial distance approx. 1.5 m from the first, either in a
straight line horizontally at approx. 1.5 m from the last jet or diagonally to a distance of 60 cm from the bottom of the pool. It is
advisable to make provision for protecting the pneumatic tube (PVC 2/4 dia.) and air inlet tubes (PVC 12/21 dia.) by placing in
protective conduit or through adjacent cable/ventilation ducts.
• Tile plan (picture number 2 and 3 red bronze version)
Render and tile to inner edge. Render & tile 6 cm max.
• Pools with plastic liner (picture number 4 red bronze version)
strut for air inlet
screw
shuttering
concrete
protective sleeve
for pneumatic tube
Wall thickness
24 -100 cm
water level
nozzle
housing
clamping
frame
liner
12
3
4
render & tile
to inner edge
rubbergasket
one rubber
gasket to
either side
of liner
render & tile
6 cm max
render & tile
to inner edge
render & tile
6 cm max
pneumatics switch
housing
(optionally)
suction
housing
dimensions in cm
shuttering
stopper 2“
24
60
~40
24
15-20
24
~80
O
B
E
N
Ø 12,8
Ø11
Ø 8,6 10,2
Ø17
Function
Warning

12
• Installation (picture number 1a ABS version)
Position the wall niches of the jet nozzles as shown in the drawings
Position first stage wall and wall components flush with structural concrete. Remove protective covers only when ready to lay tiles/
mosaics. In the case of a concrete/liner pool first stage components may project in order to compensate for cement render or liner
insulation thickness. First stage components must be accessible from the outside of the pool wall to allow for the installation of
pipes and air suction lines later. Locate the pneumatic switch housing in a convenient position 15-20 cm below water level. After
having installed the first jet, the others (3 - 5) should be located either at a laterial distance approx. 1.5 m from the first, either in a
straight line horizontally at approx. 1.5 m from the last jet or diagonally to a distance of 60 cm from the bottom of the pool. It is
advisable to make provision for protecting the pneumatic tube (PVC 2/4 dia.) and air inlet tubes (PVC 12/21 dia.) by placing in
protective conduit or through adjacent cable/ventilation ducts.
• Tile plan (picture number 2a and 3a ABS version)
Render and tile to inner edge. Render & tile 6 cm max.
• Pools with plastic liner (picture number 4a ABS version)
• Steel, aluminum and polyester pools (picture number 6 red bronze version and 6a ABS version)
• Pneumatic switch (picture number 5 red bronze version and ABS version)
5pool wall
suction tube
use clamping
frame for cutting
and drilling
proposal:
nozzle housing 3- 5 may be
installed horizontally at 1,5 m
centre approx. or diagonally to a
distance 60 cm from pool-floor
dimensions in cm
nozzle housing
clamping frame
screw 6 x 30
gasket
suction housing
water level
screw
clamping
frame
liner rubbergasket
one rubber
gasket to
either side
of liner
stopper 2“
clamping frame
screw 6 x 30
gasket
6
Ø 0,7
24
~ 60
~ 80
15
17
8
x
4
5
°
=
3
6
0
°
45°
7
60°
Ø 0,7
8,6
6
x
6
0
°
=
3
6
0
°
15 - 20
Function

13
water level
dimensions in cm
1a 2a
4a
screw M 6 x 30
screw M5
3a
pneumatics
switch
housing
(optionally)
suction
housing
strut for air inlet
shuttering
concrete protective sleeve
for pneumatic tube
Wall thickness
24 -100 cm
nozzle
housing
shuttering
stopper 2“
render & tile
to inner edge
render & tile
6 cm max
render & tile
to inner edge
render & tile
6 cm max
one rubber
gasket to either
side of liner
clamping
frame
liner
screw
clamping
frame
liner
one rubber
gasket to either
side of liner
pool wall
suction tube
use clamping
frame for cutting
and drilling
proposal:
nozzle housing 3- 5 may be
installed horizontally at 1,5 m
centre approx. or diagonally to a
distance 60 cm from pool-floor
dimensions in cm
nozzle housing
clamping frame
screw 6 x 30
gasket
suction housing
water level
stopper 2“
clamping frame
screw 6 x 30
gasket
protection tube
In case of a concrete wall
thickness of more than 24
cm, unscrew the protection
pipe and use the enclosed
protection tube.
use clamping frame for
cutting and drilling
water level pool wall
water level
clamping frame
screw 6 x 30
dimensions in cm
gasket
24
60
~40
24
15-20
24
~80
Ø 12,8
Ø11
Ø 8,6 10,2
~40
Ø17
5a
7
10-35
Ø 0,7
8,6
6
x
6
0
°
=
3
6
0
10,2
24
6a
24
45°
22,5°
15
17
8
x
4
5
°
-
3
6
0
22,5°
22,5°
26
M 6
M 5
20-35
(opt. 25)
80
7
60°
Ø 0,7
8,6
6
x
6
0
°
=
3
6
0
°
screw M5
screw M5

14
INSTRUCIONS FOR AUTHORIZED PERSONS ONLY
Before installation
The safety instructions must be read carefully before installation. You must definitely fulfil the requirements stated by the uwe
company and by the standard authorities. If the instructions are not observed, the installation engineer shall bear the sole respon-
sibility. The manufacturer shall thus be absolved of any liability.
See drawing 7 on the last folded page.
Mounting the nozzle assembly (picture number 8 red bronze version)
Moisten the gasket rings (1) of the nozzle assembly (2) and push the assembly into the wall fitting (30) until the front plate rests
against the tiles in the case of tiled/mosaic pools. Ensure that the countersunk holes on the nozzle assembly line up with the
threaded holes in the wall fitting. Insert the countersunk screws (3) and screw in without over tightening.
Repeat the above operation as necessary.
Mounting the intake screen and pump suction hose (picture number 8 red bronze version)
Centre the intake screen (4) on the wall fitting (5) in such a way that the threaded holes in the wall fitting are in line with the
countersunk holes of the intake screen. Insert countersunk screws (6) without over tightening.
Screw both stainless steel screw plugs (7) and washers (8) from the outer side of the pool into the threaded holes (9) if necessary
and seal with PTFE tape or similar sealing material.
Do not forget to insert gasket (16)
Connect the nipple (10), gate valve (11), 90 degree elbow (12) and suction hose (13) to the wall fitting with PTFE tape or similar
sealing material.
The plastic suction and pressure hose connectors should be connected tothe plastic pumpcasing (18/24), first ensuring that the
fibre washers (16) are in place.The plastic connecting nuts should be started by hand, and gently tightened using a strap wrench.
Tightening by means of a metal Stillson type wrench is not advised as it is likely to cause the nuts to fracture.
The pump requires a flooded suction and should be installed in a chamber or walkway behind the pool wall.The chamber must be
dry, drained and ventilated.The motor must be protected against flooding by a suitably sized floor drain, or in cases of high water
table by a float operated submersible pump.
If the pump is to be installed on a console/mounting bracket, supplied as an optional extra, the console should be fitted to the back
of the pool wall beforehand with concrete wall fixings. The pump should be secured with anti vibration mountings.
Alternatively the pump should be secured with appropriate fixing on a concrete plinth (20 cm x 20 cm, minimum height 10 cm).
The 90 degree special pipe-bend (12) features a threaded 1/2" pipe connection, which is sealed by means of a screw plug (19).
This pipe connection may if required be linked with the delivery side of the swimming pool filter by means of a 1/2" or 1" plastic pipe.
The advantage of this is that the lines of the jet system may if necessary be flushed through.
Pipework on the discharge side (picture number 8 red bronze version)
Insert nipple (20), gate valve (21), ‘T’ connector (22) to rear of wall fitting (30) nearest to pump. Into the end of the delivery hoses
(23) insert brass hose connector (17), secure clamps and connect to ‘T’ connector (22) inserting fibre washer (16) before tighte-
ning.
Into the opposite end of the delivery hose insert plastic hose connector and nut (17) and clamps having first cut hose to required
length. Ensure that fibre washer (16) is in place and connect to plastic pump delivery port (14).
To facilitate entry of connectors into plastic hose (23), hose ends may be softened using hot air or by dipping into very hot water.
Insert nipple (20), gate valve (21), ‘T’ connector (22) to rear of wall fitting (30) furthest from pump, attach blanking cap and washer
(26) to spare leg of ‘T’ connector (22).
Into the end of the connecting delivery hose (25) insert brass hose connector and nut (17), secure clamps and connect to ‘T’
connector (22) inserting fibre washer (16) before tightening.
Into the opposite end of the connecting delivery hose insert brass hose connector and nut (17) and clamps having first cut hose to
required length. Ensure that fibrewasher (16) is in place and connect to ‘T’ connector.
Repeat operations for additional wall fittings as necessary.
Installing the air inlet fittings (picture number 8 red bronze version)
It is advisable to make provision for protecting the pneumatic tube (PVC 2/4 Dia.) and air inlet tubes (PVC 12/21 Dia.) by placing
in protective conduit or through adjacent cable/ventilation ducts. Insert and tighten the threaded straight hose connector (27) with
washer (29) into the threaded apertures in the back of the wall fitting (30). This operation applies to all wall fittings.
The air inlet fittings (33) consist of a ball type non return valve with a straight connector, pipe clamp and fixing clip (32).
The air inlet fittings (33) should be located behind the pool wall with its opening at least 5 cm above the maximum water level of the
pool, away from the pump chamber to avoid any possibility of flooding.
The 4 m lengths of air inlet tube (PVC 12/21 ) may be shortened if necessary. The shorter the tube, the lesser the resistance, and
the higher the volume of air flow. It is advisable to thread the air inlet tubes through protective sleeving.
Steps should be taken to ensure that builders debris does not enter the tube or valve during the course of construction. The
purpose of the non return valve is to prevent water spraying out of the air inlet fitting. The valve will only function properly as long
as no hair/debris or lime deposit accumulates within it.
Fit the supplied air inlets to the end of the air suction hose. Push the hose nipple of the valve (33) into the hose and secure by
means of the hose clamps. Fasten the pipe clip (32) with screw supplied to an adjacent wall. This should be repeated for remaining
fittings.
Warnung

15
8

16
Mounting the nozzle assembly (picture number 8a ABS version)
Moisten the gasket rings (1) of the nozzle assembly (2) and push the assembly into the wall fitting (30) until the front plate rests
against the tiles in the case of tiled/mosaic pools. Ensure that the countersunk holes on the nozzle assembly line up with the
threaded holes in the wall fitting. Insert the countersunk screws (3) and screw in without over tightening.
Repeat the above operation as necessary.
Installing the air inlet fittings (picture number 8a red bronze version ABS version)
It is advisable to make provision for protecting the pneumatic tube (PVC 2/4 Dia.) and air inlet tube(s) (PVC 12/21 Dia.) by placing
in protective conduit or through adjacent cable/ ventilation ducts.
Note:
The air inlet fittings (33) consist of a ball type non return valve with a straight connector, pipe clip and fixing
clip.The air inlet fittings (33) should be located behind the pool wall with their openings at least 5 cm above
the maximum water level of the pool, away from the pump chamber to avoid any possibility of flooding.
The 4 m length of air inlet tube may be shortened if necessary. The shorter the tube, the lesser the resistance, and the higher the
volume of air flow.
Steps should be taken to ensure that builders debris does not enter the tube or valve during the course of construction. The
purpose of the non return valve is to prevent water spraying out of the air inlet fitting. The valve will only function properly as long
as no hair/debris or lime deposit accumulates within it.
Fit the supplied air inlet valves to the end of the air suction hoses. Push the hose nipple (32) of the valve (33) into the hose and
secure by means of the hose clips (34). Fasten the pipe clip (35) with screw supplied to an adjacent wall.
Pneumatic switch operable from pool (picture number 8a red bronze version and ABS version)
Turn gland nut (34) anticlockwise in order to remove it together with blank sealing disc from wall fitting whilst ensuring that the
rubber sealing washer (36) remains inside the gland aperture in wall fitting (35). Thread free end of the 10 m length of pneumatic
tube (40) through the gland aperture from within the pool. On the pneumatic switch is a short length of pneumatic tube (38).Thread
this through the gland nut (34), soften end of tube and fix to the free end of the tube connector (39). Replace and tighten the gland
nut (34), having ensured that tube connector (39) is flush against the rubber sealing washer in the housing (11). Coil surplus
pneumatic tube (38) around rear end of switch assembly (37).
Push the switch assembly (37) into the wall fitting so that the outer faceplate (41 ) is in contact with the pool wall ensuring that the
pneumatic tube does not get crushed. Line up the countersunk holes in the switch assembly with the threaded holes in the
wall fitting (35) an insert the countersunk screws (42) without over tightening.
Mounting the intake screen (picture number 8a ABS version)
Centre the intake screen (4) on the wall fitting (5) in such a way that the threaded holes in the wall fitting are in line with the
countersunk holes of the intake screen. Insert countersunk screws (6) without over tightening.
Assembly of pump, suction tube and pressure tube (picture 8a ABS version)
The pump should be assembled beneath the water level.If the pump is to be installed on a console/mounting bracket, supplied as
an optional extra, it should be fitted to the pool wall beforehand with concrete wall fixings. The pump should be secured with anti-
vibration mountings. Alternatively, the pump should be secured with appropriate fixings on a concrete plinth. Glue the suction tube
and the pressure tube by means of an appropriate bonding agent.
Do not forget to insert the gasket (16) between hose nipple and pump nipple.
Tighten the pump base with fixing bolts or anti-vibration mountings.
Important note:
The pump is normally installed in the walkway behind the pool wall. The installation environment must be dry
and must be protected by a suitably sized floor drain to prevent flooding.
Mounting the control panel (picture number 8a red bronze version and ABS version)
The control panel must not be installed in a chamber. It should be accommodated either in a dry walkway behind the pool wall or
in an adjacent room. The connection must be effected carefully in accordance with EN 60335-2-41. Connection to the power
supply is effected by means of a 5 x 2,5 mm² (3N PE 400V) cable or a 4 x 2,5 mm² (3 PE 230 V) cable. Both a power switch, with
which the unit can be isolated from the power supply on all poles, and an earth leakage circuit breaker (R.C.C.B.) should be
provided in this cable (see: “Information for the Electrician”).
Warnung
Warnung
Warnung

17
8a
44
16
33
32
16
43
40 35
5
41 37 38 34 39 36
4
6
1
32
31
42
1
32
31

18
INSTRUCTIONS DE MONTAGE ET MODE D’EMPLOI
1 INSTRUCTIONS DE SECURITE
1.1 Avant la mise en service
Les instructions de sécurité et le mode d’emploi doivent être lus attentivement avant l’installation et la mise en service et respectés
impérativement. Conformez-vous exactement aux instructions de la société uwe et aux différentes normes en vigueur.
1.2 Première mise en service de l’appareil
Il est impératif d’observer, avant toute mise en service, les prescriptions locales de sécurité ainsi que les instructions de sécurité.
1.3 Sources de danger
Attention ! L’installation JETSTREAM peut, selon le type d’appareils, injecter par sa buse éjectrice jusqu’à 1200 litre d’eau à la
minute dans le bassin. L’utilisation de cette pleine puissance pour un massage peut conduire à des blessures au niveau de la
musculature, du tissu conjonctif ainsi qu’à des lésions internes. En raison de la faible résistance électrique du corps humain dans
les piscines et de la probabilité ainsi accrue de l’apparition de courants dangereux, l’installation électrique est soumise à des
exigences de sécurité élevées. Reportez-vous au feuillet d’information „ A l’attention de l’électricien“, joint à chacun de nos
appareils, pour consulter les exigences soumises à l’installation électrique. Les composantes de l’installation qui comprennent
des pièces sous tension doivent se situer hors de portée des personnes utilisant le bassin. Les appareils et pièces d’appareils qui
renferment des composants électriques doivent être installés et fixés de telle manière à ce qu’ils ne puissent pas tomber dans
l’eau. Les appareils de la classe de protection 1 doivent être branchés en permanence sur des conducteurs reliés à la terre.
1.4 Utilisation correcte de l’appareil
Tous les appareils sont destinés à être uniquement utilisés dans des piscines couvertes et des piscines non couvertes dont la
température de l’eau ne dépasse pas 35°C. Les appareils conviennent pour être montés et utilisés dans des installations et des
locaux faisant partie des zones 1 et 2 selon la norme DIN VDE 0100 T 702. La pompe est en général à monter dans le pourtour du
bassin. Le local de pompe doit être situé sous les plages. Son couvercle ne doit pouvoir être ouvert qu’à l’aide d’une clé spéciale
ou un outil. Le lieu d’implantation doit être sec et le moteur protégé contre les inondations par un écoulement de dimension
suffisante dans le sol. Le coffret électrique est à placer soit dans un endroit sec soit dans une pièce avoisinante à une hauteur plus
élevée que la surface de l’eau, si possible. Le constructeur n’engage aucune responsabilité pour tout dommage résultant d’utilisation
incorrecte ou non conforme. Seul l’utilisateur en est tenu responsable. La conformité d’utilisation de l’appareil comporte égale-
ment le respect des conditions d’utilisation, d’entretien et de maintenance prescrites par le constructeur. Les travaux d’entretien,
de réparation et autres doivent être exclusivement effectués par des personnes autorisées. Les appareils doivent être utilisés
uniquement par les personnes qui sont familiarisées avec ces appareils et ont été instruites des dangers pouvant résulter de leur
manipulation et utilisation. Les instructions de prévention applicables contre les accidents, de même que les diverses prescripti-
ons de sécurité et de médecine du travail en vigueur doivent être respectées. Toute modification apportée arbitrairement sur
l’appareil exclue la responsabilité du constructeur pour des dommages en résultant.
1.5 Responsabilité produit
L’utilisateur est expressément averti que l’appareil doit être utilisé exclusivement de manière correcte, c’est-à-dire selon le para-
graphe «1.4 - Utilisation correcte de l’appareil». En cas de mauvaise utilisation, l’utilisateur est seul tenu responsable.
Le constructeur est alors dégagé de toute responsabilité.
1.6 Comportement en cas d’urgence
Sortir de l’eau et désactiver l’appareil à l’aide du commutateur central ou des fusibles. S’assurer que l’appareil ne soit pas réactivé
sans autorisation.
Ne pas rester avec des cheveux longs et dénoués près de l’aspiration d’eau.
INFORMATIONS IMPORTANTES
1. L’installation électrique des appareils JetStream VIVA doit être protégée individuellement par un interrupteur différentiel
caiibré à 30 mA.
2. Le local technique de l’appareil JetStream VIVA doit être hors du volume de protection du bassin (soit à plus de 2,50 m, soit
sous Ia plage). Le couvercle doit s’ouvrir à l’aide d’une clé ou d’un outil être équipé d’un système de coupure électrique des
éléments actifs à l’ouverture du couvercle (norme NF C 15.100 section 702).
3. La distance maximum entre Ia pompe et Ia piscine ne doit pas excéder 12 mètres.
Si Ia pompe n’est pas derrière Ia piscine, respecter les sections de tuyauteries suivantes:
a. Jusqu’à 5 m: diamètre intérieur 50 mm (2")
b. De 5 à 10 m: diamètre intérieur 63 mm (2 ½“)
c. De 10 à 12 m: diamètre intérieur 75 mm (3")
Utiliser des courbes à grand rayon pour les changements de direction de tubes. Utiliser des tubes supportant au moins 10
bar de pression.
4. La pompe doit toujours être en charge (axe de la pompe sous le niveau de l’eau).
5. La longueur maximum de tube de commande pneumatique est de 10 m.
„Pour ne pas risquer de détérioration, la pompe doit être positionnée sous le niveau d’eau du bassin.
Si elle doit être placée au dessus, utiliser la pompe uwe spéciale triphasée auto-amorçante.“
2 MISE EN SERVICE
2.1 Avant la mise en service
Les instructions de sécurité et le mode d’emploi doivent être lus attentivement avant l’installation et la mise en service de l’appareil.
2.2 Première mise en service de l’appareil
Il est impératif d’observer les prescriptions locales de sécurité ainsi que les instructions de sécurtié avant chaque mise en service
de l’appareil. Une fois l’appareil monté complètement, le corps de la pompe remplie d’eau pour l’amorçage et branchements au
circuit électrique réalisés, l’appreil peut être mis en service.
Warnung

19
Remarques à l’attention de l’expoitant:
Ne pas mettre en service une installation défectueuse.
Placer les instructions de sécurité bien en vue.
Tenir le mode d’emploi à disposition. La température de l’eau ne doit pas dépasser 35°C.
Montage des pièces à sceller dans le coffrage
• Montage (image numéro 1 exécution en bronze au zinc)
Procéder comme montré dans image numéro 1.
Monter les pièces à sceller à surface plane avec la paroi de béton. Retirer la protection seulement avant la pose des carrelages.
Si le bassin reçoit pour un revêtement liner des plaques d’enduit et d’isolation, il faut avancer le boîtier de la pièce à sceller de
l’épaisseur de ces plaques. Les pièces à sceller des autres buses (3 - 5 buses) sont raccordées avec un espace latéral d’environ
1.5 m horizontalement ou verticalement en ligne droite jusqu’à un espace de 60 cm entre le fond du bassin et la pièce à sceller de
la dernière buse. Placer la pièce à sceller pour le commutateur pneumatique (accessoire spécial) de préférence au niveau de la
première buse.
• Plan de carrelage (image numéro 2 et 3 exécution en bronze au zinc)
Carreler jusqu’au contour intérieur de la pièce à sceller. Compensation d’enduit et de carrelage jusqu’à 6 cm.
• Bassins avec revêtement de liner ou polyester (image numéro 4 e 5 exécution en bronze au zinc)
Proceder comme montré en fig. 4 et 5.
• Piscines d’acier, d’aluminium et de revêtement Polyester (image numéro 6 exécution en bronze au zinc)
Warnung
12
24
60
~40
24
15-20
24
~80
O
B
E
N
Ø 12,8
Ø11
Ø 8,6 10,2
Ø17
6
Ø 0,7
24
~ 60
~ 80
15
17
8
x
4
5
°
=
3
6
0
°
45°
7
60°
Ø 0,7
8,6
6
x
6
0
°
=
3
6
0
°
15 - 20
Compensation d’ enduitet
decarrelage jusqu à 6 cm
carreler sur toutes les
pièce à sceller jusqu àu
contour intérieur de la bride
niveau de l’ eau
chambre
d’aspiration d’air
pièce
à sceller buse
planche de
coffrage
béton gaine de protection
amovible pour
épasseurs de paroi
entre 24 et 100
pièce à sceller du
commutateur pneu-
matique (accessorie
Spécial)
mesure en cm planche de
coffrage
pièces à
sceller de la
tubulure
d’aspiration
bouchon 2“
mesure en cm
bouchon 2“
niveau d’eau
tube aspiration
pièce à sceller
découpage et trous
dans la paroi piscine
sont facile à faire
avec l’ aide du cadre
de serrage
Proposition: Les pièces à sceller
des autres buses (3 à 5 buses) sont
raccordées avec un espace latéral d’env.
1,5 m horizontalement ou, au choix
verticalement en ligne droite jusqu’ à un
espace de 60 cm entre le fond du bassin
et la pièce à sceller de la demierè buse
paroi pièce à sceller
carreler sur toutes les pièce
à sceller jusqu àu contour
intérieur de la bride
Compensation d’enduitet
decarrelage jusqu à 6 cm
3
cadre de serrage
vis 6 x 30
joint
cadre de serrage
vis 6 x 30
joint
4
5liner
vis
anneau de
serrage
devant et
derrière le liner
un joint adhèsif
foumi
vis
joint
anneau de
serrage
devant et derrière
le liner un joint
adhèsif foumi
liner

20
• Montage (image numéro 1a exécution en ABS)
Monter les pièces à sceller à surface plane avec la paroi de béton. Retirer la protection seulement avant la pose des carrelages.
Si le bassin reçoit pour un revêtement liner des plaques d’enduit et d’isolation, il faut avancer le boîtier de la pièce à sceller de
l’épaisseur de ces plaques. Les pièces à sceller des autres buses (3 - 5 buses) sont raccordées avec un espace latéral d’environ
1.5 m horizontalement ou verticalement en ligne droite jusqu’à un espace de 60 cm entre le fond du bassin et la pièce à sceller de
la dernière buse.
Placer la pièce à sceller pour le commutateur pneumatique (accessoire spécial) de préférence au niveau de la première buse.
• Plan de carrelage (image numéro 2a et 3a exécution en ABS)
Carreler jusqu’au contour intérieur de la pièce à sceller. Compensation d’enduit et de carrelage jusqu’à 6 cm.
• Bassins avec revêtement de liner ou polyester (image numéro 4a et 5a exécution en ABS)
Proceder comme montré en fig. 4a et 5a
• Piscines d’acier, d’aluminium et de revêtement Polyester (image numéro 6a exécution en ABS)
• Commutateur Pneumatique à partir du Bassin (Accessoire)
(image numéro 7 exécution en bronze au zinc e image exécution en ABS)
Compensation d’ enduitet
decarrelage jusqu à 6 cm
carreler sur toutes les pièce
à sceller jusqu àu contour
intérieur de la bride
1a
niveau de l’ eau
chambre
d’aspiration d’air
pièce
à sceller buse
planche de
coffrage
béton gaine de protection
amovible pour
épasseurs de paroi
entre 24 et 100
pièce à sceller du
commutateur pneu-
matique (accessorie
Spécial)
mesure en cm planche de coffrage
pièces à
sceller de la
tubulure
d’aspiration
bouchon 2“
mesure en cm
bouchon 2“
6a
cadre de serrage
vis 6 x 30
joint
niveau d’eau
tube aspiration
pièce à sceller
découpage et trous dans
la paroi piscine sont facile
à faire avec l’ aide du
cadre de serrage
Proposition: Les pièces à sceller des autres buses (3 à 5 buses) sont
raccordées avec un espace latéral d’env. 1,5 m horizontalement ou,
au choix verticalement en ligne droite jusqu’ à un espace de 60 cm
entre le fond du bassin et la pièce à sceller de la demierè buse
cadre de serrage
vis 6 x 30
joint
paroi
pièce à sceller
24
60
~40
24
15-20
24
~80
Ø 12,8
Ø11
Ø 8,6 10,2
~40
Ø17
2a
7
3a
24
45°
22,5°
15
17
8
x
4
5
°
-
3
6
0
22,5°
22,5°
26
M 6
M 5
20-35
(opt. 25)
80
7
60°
Ø 0,7
8,6
6
x
6
0
°
=
3
6
0
°
Compensation d’ enduitet
decarrelage jusqu à 6 cm
carreler sur toutes les
pièce à sceller jusqu àu
contour intérieur de la bride
4a
5a liner
anneau de
serrage
devant et derrière le liner
un joint adhèsif foumi
anneau de
serrage
devant et derrière le
liner un joint adhèsif foumi
liner
vis M5
vis
vis
vis M5
10-35
Ø 0,7
8,6
6
x
6
0
°
=
3
6
0
10,2
24
Dévissez le tuyau de protection en
cas d’une épaisseur de la paroi de
béton de plus de 24 cm et utilisez
la tube de protection en annexe.
niveau de l’eau
mesures en cm
cadre de
serrage
vis M 6 x 30
joint
paroi
vis M5
Other manuals for JETStream LIBRA 3
1
This manual suits for next models
1
Table of contents
Languages: