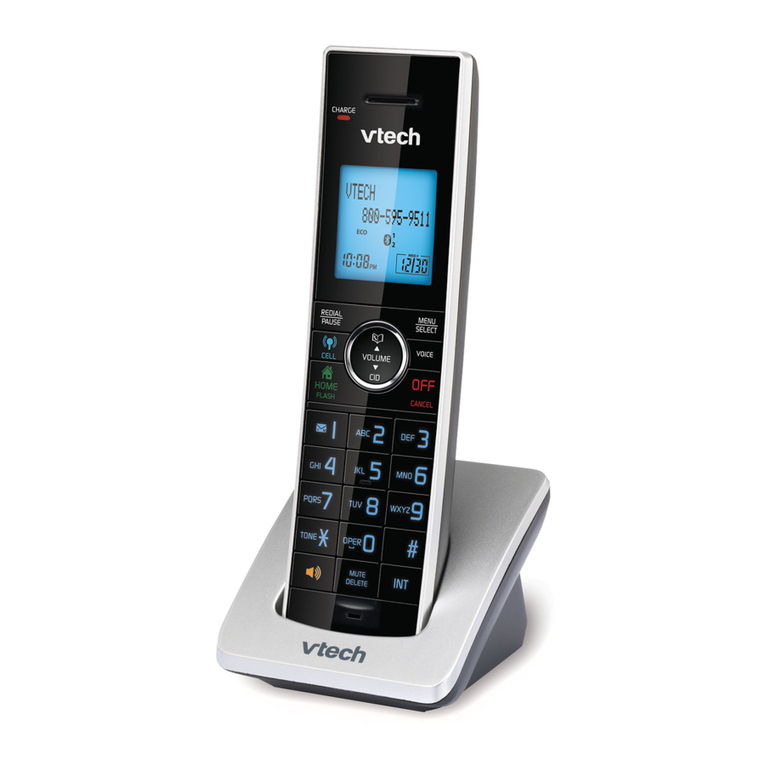
V-tech VT-1910c User manual


Page
...............................................................................................................
INTRODUCTION 1
..............................................................................................................
Special Features 2
Parts Check List
...............................................................................................................
3
...........................................................................................
FCCAND IC REGULATIONS 4
IMPORTANT SAFETY INSTRUCTIONS
........................................................................
7
REPLACINGTHE BATTERIES
......................................................................................
9
.........................................................................................................
GElTlNG STARTED 11
THE LCD DISPLAY
..........................................................................................................
15
THE HANDSET LAYOUT
..................................................................................................
16
THE BASESET LAYOUT
..................................................................................................
17
QUICK REFERENCE GUIDE
..........................................................................................
18
BASIC OPERATION
...................
..
...............................................................................
20
ADVANCED FUNCTIONS
.................................................................................................
21
CID
With CallWaiting
.........................................................................................................
21
Switching Calls
..................................................................................................................
21
TemporayTone
..................................................................................................................
21
ProgrammingThe Ringer
..................................................................................................
21
Changing RingerTypes
.....................................................................................................
21
Turning
Off
The Ringer
......................................................................................................
22
CheckingThe RingerType
.................................................................................................
22
CLWDEL KeyFunction
......................................................................................................
22
Advanced Dialing
...............................................................................................................
22
MEMORY DIALING
.........................................................................................................
23
Storing Speed Dial Numbers
.............................................................................................
23
Dialing From Memory
........................................................................................................
24
ChangingStored Numbers
.................................................................................................
24
DeletingStored Numbers
..................................................................................................
24
Storing Special Codes
.....................................................................................................
25
CID-CALLER ID
...............................................................................................................
26
CID-CALLER
ID
................................................................................................................
26
Receiving and Storing Calls
..............................................................................................
26
Dialing From CID Memory
...............................................................................................
26
Out
Of
Area Calls
............................................................................................................
27
"Private" Calls
.........................................................................................
........................
27
Transmission Error
...........................................................................................................
27
ReviewingNumbers
..........................................................................................................
28
Deleting Numbers
.............................................................................................................
29
SPECIAL MESSAGE INDICATION
.................................................................................
30
MAINTENACE
..................................................................................................................
31
IN CASE OF DIFFICULTY
...............................................................................................
32
WARRANTY
.......................................................................................................................
34
TECHNICAL SPECIFICATIONS
...........................
.;
............................................
.............
35

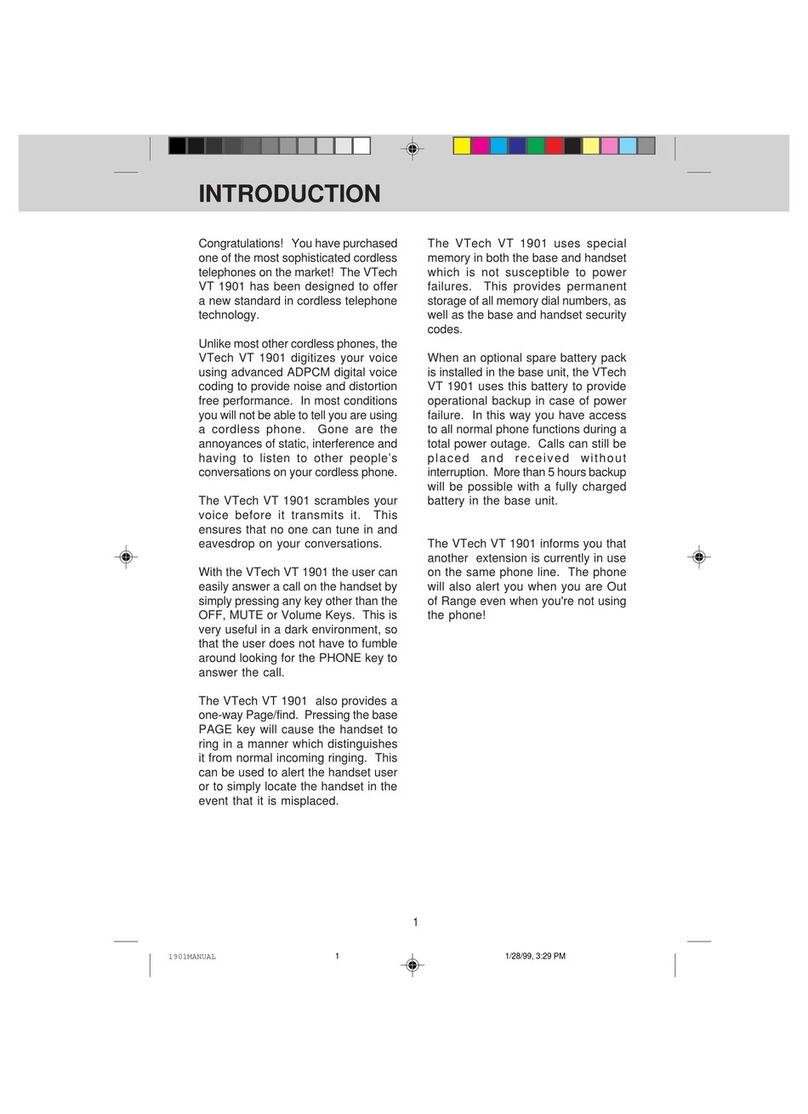
Congratulations! Youhavepurchased
oneof the mostsophisticatedcordless
telephonesonthe market! The VTech
VT 1910c has been designedto offer
a new standard in cordless telephone
technology.
Unlikemostothercordlessphones,the
VTech VT 1910c digitizes your voice
using advanced ADPCM digital voice
coding to providenoise and distortion
free performance. In most conditions
youwillnotbeabletotellyouareusing
a cordless phone. Gone are the
annoyancesof static, interferenceand
having to listen to other people's
conversationsonyourcordlessphone.
The VTech VT 1910c scrambles your
voice beforeittransmitsit. Thisallows
youthesecurityof knowingthatnoone
can tune in and eavesdrop on your
conversations.
The VTech VT 1910c decodes and
displays name and number Caller ID
(CID) informationwhere available and
when subscribed to. The alpha-
numeric display will show both the
nameand numberof the calling party.
Upto24 namecharactersor 11phone
numberdigits canbedisplayedonthe
LCD.
WiththeVTech
VT
1910cthe usercan
easily answer a callonthe handset by
simplypressingany keyotherthanthe
OFF, MUTE or Volume Keys. This is
very useful in a dark environment, so
that the user does not haveto fumble
around lookingfor the PHONE key to
answer the call.
The VTech VT 1910c also provides
a one-way Pagelfind. Pressing the
basePAGEkeywillcausethehandset
to ringinamannerwhichdistinguishes
it from normal incoming ringing. This
can be usedto alert the handset user
or to simply locatethe handset in the
event that it is misplaced.
The VTech VT 1910c uses special
memoryin boththe base and handset
which is not susceptible to power
failures. This provides permanent
storageof allspeed dial numbers,CID
information as well as the base and
handset security codes.
Whenasparebattery isinstalledinthe
base unit, the VTech VT 1910c uses
this battery to provide operational
backupincaseof powerfailure. Inthis
way you have access to all normal
phone functions during a total power
outage. Calls can still be placedand
received without interruption. More
than 5 hours backup will be possible
with afully charged battery inthe base
unit.
SPECIAL
FEATURES
900 MHz Operation.
Fully Digital Link between Handset
and Base with ADPCM voice cod-
ing.
Digitally-ScrambledVoice Commu-
nication.
Name
/
Number CID display.
2 row by 12 character 5x7 dot
matrix alpha-numeric LCD.
50 CID memories.
Backlit LCD on the handset.
Backlit handset keypad.
20location ProgrammableMemory
for 20 Digit Phone Number.
10 Channel Operation with auto
channel selection.
Out-of-Range indication while the
handset is in use or in standby
mode.
Removable handset battery pack.
Spare battery charger in the base
unit.
Complete battery back-up in case
of 'powerfailure (with spare battery
installed in base).
TheVTechVT 191
0c also informsyou
that another extension iscurrentlyoff-
hook on the same phone line. The
phonewillalso alert you when you are
Out of Range even when you're not
using the phone!
Easy answer
-
When the phone
rings simply press any key other
than OFF, MUTE, or the Volume
Keys on the handset to answer.
Auto hang up when returning the
handset to the base cradle.
Extension in use indicator.
24 Bit Digital Security Code for
16.8 million combinations.
DTMF and Pulse Dialing.
Low Battery Detect and Warning
indicator.
Handset Power Saving for 7 days
Standbytime7.0 Hourscontinuous
talk time.
Volume Adjust on Handset.
REDIAL, HOLD, PAGE and MUTE.
Hearing-AidCompatible Receiver.
Detachable power supply.
Non-volatile storage of security
code and speed dial memories.
Programmable Ringer Types.
This manualis designed to make you
familiar with the VTech
VT
1910c. We
strongly recommend you read the
manual before using your phone.

Parts
Check
List
To purchase replacement battery This equipmentcomplies with Parts 15
1. Baseunit,HandsetandAC adapter packs, call VTECH Communications and68of theFederalCommunications
2.
One-Line Telephone Cord at 1-800-624-5688. In Canada, call Commission(FCC)rulesfortheUnited
3.
Battery Pack VTECH Electronics at 1-800-267- States. Italsocomplieswithregulations
RSS210 and CS-03 of Industry and
4.
Mountingscrews for wall mounting 7377.
5. Wall mount accessory
HANDSET
n
BASE UNIT
AC POWER ADAPTER
=-la
TELEPHONELINE CORD
WALL MOUNTING
BRACKET
u
BATTERY PACK
WALL MOUNTING
SCREWS and CAPS
ScienceCanada. Operation issubject
to thefollowingtwo conditions: (I)this
device may not cause interference,
and (2) this device must accept any
interference,includinginterferencethat
may cause undesired operation of the
device.
A label is located on the underside of
thebaseunitcontainingeitherthe FCC
registrationnumberandRingerEquiva-
lence Number (REN) or the IC
registrationnumberandLoadNumber.
You must, upon request, provide this
information to your local telephone
company.
This equipment is compatible with
inductively coupled hearing aids.
Shouldyouexperiencetroublewiththis
telephone equipment, please contact:
VTECH
COMMUNICATIONS
SERVICE DEPT. at 1-800-624-5688.
In Canada, call VTECH Electronics at
1-800-267-7377.
For repairlwarranty information. The
telephone company may ask you to
disconnectthisequipmentfromtheline
network until the problem has been
corrected.
FCC
Part
15
Warning: Changesor modificationsto
thisunitnotexpresslyapprovedbythe
party responsible for compliance's
could void the user's authority to
operate the equipment.
The equipment has been tested and
foundtocomplywithpart15of theFCC
rules. These limits are designed to
providereasonable protectionagainst
harmful interference in a residential
installation.Thisequipmentgenerates,
uses and can radiate radio frequency
energy and, if not installed and used
in accordance with the instructions,
may cause harmful interference to
radiocommunications. However,there
is no guarantee that interferencewill
notoccur ina particular installation. If
this equipment does cause harmful
interference to radio or television
reception,whichcanbedeterminedby
turning the equipment off and on, the
user is encouraged to try and correct
the interferencebyone or more of the
following measures:
-
Reorient or relocate the receiving
antenna.
-
Increase the separation between
the equipment and receiver.
-
Connect the equipment into an
outlet or on a circuit different from
that to which the receiver is
connected.
-
Consult the dealer or an
experienced radiorrV technician
for help.

FCC
Part
68
The FCC requires that you connect
your cordless telephone to the
nationwidetelephonenetworkthrough
a modular telephone jack (USOC
RJllC, RJIIW or RJ14).
Your telephone company may
discontinue your service if your
equipment causes harm to the
telephonenetwork. Theywillnotifyyou
inadvanceof disconnection,ifpossible.
Duringnotification,youwillbeinformed
of your rightto file a complaintwith the
FCC.
Occasionally,yourtelephonecompany
may make changes in its facilities,
equipment, operation, or procedures
that could affect the operation of your
equipment. If so, you will be given
advance notice of the change to give
you an opportunity to maintain
uninterrupted service.
The base unit contains no user
serviceable parts. The handset
contains a user replaceable battery
pack.
If it is determinedthat your telephone
equipmentis malfunctioning,the FCC
requires that it not be used and that
it be unpluggedfrom the modularjack
until the problem has been corrected.
Repairs to this telephone equipment
canonly be madebythe manufacturer
or its authorized agents or by others
who may be authorized by the FCC.
For repair procedures, follow the
instructionsoutlinedundertheVTECH
Limited Warranty.
This equipment may not be used on
coin service provided by the phone
company or Party Lines.
The REN is useful in determiningthe
number of devices you may connect
to your telephone line and still enable
the devices to ring when you receive
acall. Thegeneralruleisthatthe REN
value should not exceed
5.OA
total;
however,contactyour localtelephone
company for the specific number in
your area.
IC (Industry Canada)
This telephone is registeredfor use in
Canada.
Notice:The LOAD NUMBER (LN)
assigned to each terminal
devicedenotesthepercentage
of thetotalloadtobeconnected
to a telephone loop which is
usedby the device, to prevent
overloading. The termination
of a loop may consist of any
combinationof devicessubject
onlytothe requirementthatthe
sum of the loadnumbersof all
devices not exceed 100.
Notice:The Industry Canada label
identifies certified equipment.
This certification means that
the equipment meets certain
telecommunications network
protective, operational and
safety requirements. The
Department does not
guarantee the equipment will
operate to the user's
satisfaction.
Before installingthis equipment, users
should ensure that it is permissibleto
be connected to the facilities of the
local telecommunications company.
The equipment must also be installed
using an acceptable method of
connection. The customer should be
aware that compliancewith the above
conditionsmaynotpreventdegradation
of services in some situations.
Repairs to certified equipment should
be made by an authorized Canadian
maintenancefacilitydesignatedbythe
supplier. Any repairs or alterations
made by the user to this equipment,
or equipment malfunctions, may give
the telecommunications company
causeto requestthe usertodisconnect
the equipment.
Users should ensure for their own
protection that the electrical ground
connections of the power utility,
telephone lines and internal metallic
water pipe system, if present, are
connected together. This precaution
may be particularly important in rural
areas.
Caution: Users should not attemptto
make such connections
themselves, but should
contact the appropriate
electrical inspection
authority, or electrician, as
appropriate.
Your VTech VT 1910c is designed to
operateatthemaximumpowerallowed
by the FCC and IC. This means your
handset and base unit can
communicate only over a certain
distance
-
which will depend on the
locationof the base unit and handset,
weather, and the construction and
layout of your home or office.
If you move the handset out of range
during a phone conversation,you will
hearan 'Out of Range'tone to tell you
to move closer to the base. If you do
not move within range within
25
seconds the 'call is automatically
disconnected.
If you move out of range when the
handsetis instandby mode,itwill give
an 'Out of Range'tone to tell you that
the handsetwill not be able to receive
or place calls.
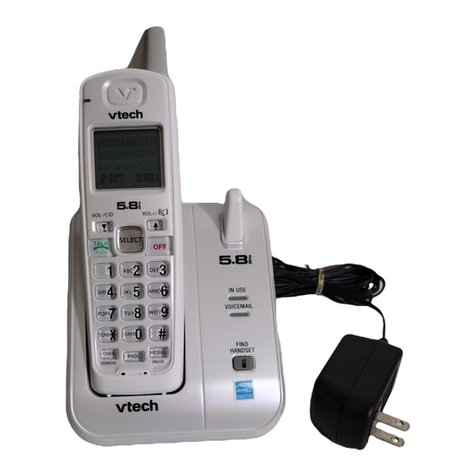
Charging the handset batteries
The handsetof your VTech VT
191
0c
cordless telephone is powered by a
rechargeablebattery pack. It charges
automaticallywheneverthe handsetis
in the base. You should charge the
batterypackfor
16
hourswhenyoufirst
receive your phone. You'll know the
battery pack needs charging when:
The phone beeps when you press
the PHONE key.
The low battery message is
displayed:
exchangethe drainedhandset battery
pack with the fully charged replace-
ment battery pack from the base
charger. Place the drained handset
battery pack into the base charger so
that it-will charge.
The base spare battery charger does
NOTchargeabatteryPACKasquicklv
as the main handset battery charge;.
A full charge requires
24
hours.
IT'S IMPOSSIBLE TO OVER-
CHARGE THE BAlTERY PACK
The battery pack can be recharged
manytimes but if you geta low-battery
signal even after
8
hours of charging
in the base cradle (or
24
hours in the
basesparebatterycharger),thebattery
pack(s) should be replaced.
The handset seems completely
dead, the LCD is completely clear
and the handset does not beep
when you press the keys.
To purchase replacement battery
packs,callVTECHCommunicationsat
1-800-624-5688.
In Canada, call
VTECH Electronics at
1-800-267-
7377.
To Charge The Battery Pack
To charge the battery pack, place the
handsetinthebaseunit. TheCHARGE
indicatorwill lightto show the handset
isseatedproperlyandthebatterypack
ischarging. Itisrecommendedthatthe
battery pack be chargedfor at least
8
hours. You can use your telephone
before that with diminished capacity,
butit isbesttochargethebattery fully.
It will take several recharge cycles to
maximizethe charge capacity of your
batterypack.Themaximumbatterylife
between charges is
7
hours of
continuoustalk time or
7
daysof stand
by.
Alternatively, if you have purchaseda
Spare battery pack and it has been
charging in the base unit, simply
Replacing The Handset Battery Pack
Follow the steps below:
1.
Removethe battery case cover by
pressing on the ridged lines and
sliding downward.
PRESS
and
SLIDE
DOWNWARD
2.
Discardthe oldbatterypack. Don't
put the old battery pack in a trash
compactor or a fire
-
it could burst.
3.
Place the new battery pack in its
housing with the metal contacts
facing down.
-
J
I
1
PLACE
THE
NEW
EATERY
PACK
INTO
THE
BATTERY
COMPARTMENT
J
PLEASE NOTETHE
CORRECT POSlTlON
OFTHE EATERY
PACK WHEN
CHANGINGEATERY
4.
Replacethe batterycase cover by
sliding the cover upwards.
SLIDE
IN
THE
BATTERY
COVER
5.
If the new battery pack is not
alreadycharged,placethe handset
in the cradle of the base unit to
allow it to charge for
16
hours.
To Reduce the Risk of Fire or Injury
to Persons, Read and Follow the
Instructions
1.
Use only VTECH rechargeable
battery pack.
2.
Do not dispose of the battery in a
fire. The cell may explode.
IMPORTANT: Do not dispose of this
battery into household garbage. For
information on recycling or proper
disposal,consultyourlocalsolidwaste
collection or disposal organization.
3.
Donotopenor mutilatethe battery.
Released electrolyte is corrosive
and may cause damage to the
eyes or skin. It may be toxic if
swallowed.
4.
Exercisecare in handling batteries
in order not to short the battery
with conductingmaterialssuch as
rings, bracelets, and keys. The
battery or conductor may overheat
and cause burins.
To purchase replacement battery
packs,callVTECHCommunicationsat
1-800-624-5688.
In Canada, call
VTECH Electronics at
1-800-267-
7377.

Setting Up Your VTech VT19lOc
1.
Choose an area near an electrical
outlet and a telephone wall jack.
2.
Connectyour telephoneLineCord.
AC Power Adapter
Plug the AC power adapter into an
electrical outlet and the DC connector
to the back of the base unit.
SETTING
UP
YOUR
VT1910C
A
CAUTION:
Use CLASS
2
POWER SUPPLY
ONLY and use
9V
DC.
Handset Ringer
The handsetringerisprogrammedON
as the factory defaultsetting. Referto
PROGRAMMING THE RINGER on
page
21
for more information.
Setting the ToneIPulse Switch
TheTONEJPULSEswitchislocatedon
the bottom of the base unit and is
factorysettoTONE. Ifyou havetouch
tone service, do notchange the switch
setting. If you have rotary (Pulse)
service, set the switch to PULSE.
-TONE
PULSE
SELECTION
Charge the handset battery pack
beforeuse.Thebatterypackrecharges
automaticallywhenever the handset is
in the base unit. ,The batteries must
be charged for
16
hours before using
your phone for the first time.
Fill in the telephone number card on
Check
for
a dial tone. After the
batteries are charged, pick up the
handset. Now press PHONE on the
handset. "PHONEON"will appear on
the LCD, and you will heara dialtone.
If not,see 'IN CASE OF DIFFICULTY'
on page
32.
CAUTION:
1.
Never install telephone wiring
during a lightning storm.
2.
Neverinstalltelephonejacks inwet
locations unless the jack is
specifically designed for wet
locations.
3.
Nevertouch uninsulatedtelephone
wires or terminals unless the
telephone line has been
disconnected at the network
interface.
4.
Use caution when installing or
modifying telephone lines.

WALL INSTALLATION USING
MOUNTING SCREWS PROVIDED
Tools You Will Need:
A
hammer, a
nail,apencilor ballpointpen,aPhillips
head
(+)
screwdriver, and the Wall
Mounting Template included in the
back of this booklet.
1.
Chooseaspot near anelectrical
outlet and a telephone jack.
Your phone requires a modular
telephone jack and a standard
electrical outlet (120v
AC).
The
power cord is six feet long; make
sure there is an electrical outlet
within reach of the base. The
outlet should not be controlled by
a wall switch. If the switch is ever
turned off, the phone will not
operate.
2.
Choose and mark the mounting
position.
The mountingscrewsshouldscrew
intoa wooden stud within the wall-
they will not hold securely in
wallboard alone. Locate a wall
stud inthe areawhere you want to
install your telephone. Use the
Wall- Mounting Template and a
pencilto mark the screw positions
on the wall over the stud (Figure
1). Put the template aside.
3.
Installthemountingsleevesand
screws.
Start the screw holes by lightly
tapping a nail into the marks you
madeon the wall. Removethe nail
from the wall. Now slip the
mountingsleeves onto the screws
-
-
Figure 1
Figure2
as shown, with the smaller end of
the sleeve toward the screw head.
lnsertthescrewsintothe holesyou
started. Tighten the screws until
the larger end of the mounting
sleeve is flat against the wall
(Figure
2).
USING THE WALL MOUNT
ADAPTOR
1.
Position the wall mount bracket
on the base.
Line up the tabs on the wall mount
adaptor with the holes on the
bottom of the base (Figure
1).
Snap the wall mount bracketfirmly
in place.
2.
Mount the base on the wall.
Positionthe base so the mounting
studs will fit into the holes on the
bottom of the base. Position the
powercordto extenddownthe wall
the phone is to be mounted on.
Slide the base down on the
mounting studs until it locks into
place.
3.
Connectthetelephone linecord.
The telephone line cord has a
snap-in plug at each end. lnsert
oneof the plugsintothejack onthe
bottomof the base. lnsertthe other
end of the plug into the wall jack.
4.
Plug the ac adaptor on the
power cord into an electrical
outlet (Figure
2).
5.
Set the TONUPULSE SWITCH
on the base unit.
If you have touch tone service on
Figure 1
phone line, set the switch to
TONE. If you have rotary service,
set the switchto PULSE (Figure
3).
TONE PULSE
SELECTION
gure
3

""..
....."
.
.
I.; :I
--
-
:
I:
-L
--
--
:: :-
1."-
C."
-.-
-."
.-
..-
.....
"
.-
-.."
"..."
...
...
...
""." -..
...""
...
:I
--
""
.
.
.
.
""
:
-
..".
"
:I! .+I
".."
..
I I I I-.;
.
.
.......
.....
".-
I;;
[-
.....
.......
.....
:
.
.
:
j:i
:
"""
...
.
.4
3
.
."
."""
...
...
...
. .
..- .-
!-;
I"-:
.....
.
.
.
..
.
......
.
.
.
..
.
.....
".
"'
. .
-
--
--
i I-!
..
-]
(-3
-
...
I
I
I
..-:"I
-
---
---
.-":
:":
.-"
-
-"
. .
.
.
'un'
......
.-"
.....
::
:
...
. .

TO MUTE A CALL
Press
(SE)
on the handset to
disable the handset microphone.
Here'sabriefguidetothefeaturesand
functions of your VTech
VT
1910c
cordless telephone:
Press
(E)
again to returnto
normal operation.
SET-UP
Connect telephone line cord to
base unit and telephone jack.
THE BASE FEATURES
TO PAGE THE HANDSET
Plug AC adapter into a standard
electrical outlet To age from the base, press
(&].
Set Dial Mode switch to
PULSE
or
TONE.
The unit is factory set to
TONE.
To cancel the
PAGE
either press
again on the base or press
Let handset battery pack charge
for
16
hours before first use.
STORING:
The phone should be
OFF.
AC POWER
JACK-
]
PHONE CORD JACK
TONEIPULSESELECTOR
7
MAKING CALLS
Press the
(m)
key on the
handset. When the
"PHONE ON"
indicatoris displayed and you hear
a dial tone, dial the number.
Enterthe numbervou wish to store
on the LCD up to
a
maximumof 20
diaits.
ANTENNA
POWER
INDICATOR
IN
USE
INDICATOR
CHARGING
INDICATOR
SPARE BATT
INDICATOR
PAGE KEY
MEMORY
THE PHONE
SHOULD
BE
OFF
Enter the number to be dialed on
the
LCD
andthen pressthe
PHONE
key.
ENTER
THE
TELEPHONE
NUMBER YOU WISH
TO
STORE
PRESS-
YOU
WILL
SEE
~FOGRFIM
ANSWERING CALLS
To answer a call on the handset,
press any key other than
m,
(WE),
or the Volume Keys on the
handset. The handset will not
auto-answer when lifted off the
base cradle.
>"sJ
@CRT
ION
--
j
ENTER MEMORY
LOCATION
(01
-
20)
Press
(KG].
DIALINGCARD
SPARE BATTERY CHARGING
Enterthetwodigitmemorylocation
(01
..
20), the unit will store the
number, emit a happy tone to
confirm successful programming
and exit program mode.
HANGING UP
Press
(OFF)
on the handset or
place the handset in the base
cradle to hang up a call.
TO PLACE A CALL ON HOLD
Press
(*)
on the handset
to place an active call on hold.
Press again to return to
the call.

MEMORY DIALING:
0
-
MEMORY
DIALING
1
IWI
I
PRESS-
PRESS
W
YOU
WlLL
SEE
ENTER
MEMORY
LOCATION
(01
-
20)
-
~
Press the
[m~)
key.
Press
m.
Enter the memory location of the
numbersyou wish to dial (01
...
20).
The number will be displayed on
the LCD and will be dialed.
CID
-
CALLER ID
To view information stored in CID
memory, press
(CID)
on the
handset.
The display will show the most
recent call received.
To view the time and date of the
call press and hold the
7
key.
The time and date will be shown
along with the phone number. You
will see something like:
As long as the key is held down.
To view othercalls, scrollbackwards
and forwards by using the
A
(*)
and
v
(*)
keys.
To view additionaldlgits not shown
onthe display, pressthe
-.
(9)
key
To exit press
m.
USING REDIAL
Press the
(m~]
key, then
(-L)
to automatically redial
out the last number you dialed.
Press
(-L)
so that the
number is shown on the display
and then press the
(m)
key.
HOLD
press to putacallon hold.
To returnto the call, press
key again
MAKING CALLS
You can make calls directly from the
handset whether you are at the base
or away from it.
NOTE:
There aretwodifferent
ways
to dial a number:
1.
Press the
(M)
key and wait
for dial tone.Then dial the number
you want.
2. Enter the number onto the display
first, then press the
(-E)
key.
This will dial the number that is
displayed on the LCD after 2
seconds. See "ADVANCED
DIALING" on Page 22
If you make a mistake when dialing,
press to hangup, then press
the PHONE key to get the dial tone
again.
DISCONNECTING
To enda call, either placethe handset
back in the base, or press on
the handset.
OFF MODE (STANDBY)
When the unit is
OFF
the display will
be clear.
VOLUME CONTROLS
The handset has a digital volume
control.
The volume controls for the handset
are located on the side of the unit.
Press the
A
(up) or
v
(down) keys
to increase of decrease the volume.
Holding either key down will
continuouslychangethevolumesetting.
The ear piece volume level indicator
will change accordingly.
FLASH
You can use your Vtech VT 1910c
cordless phone with services such as
Call Waiting. Instead of pressing the
switch-hook(asyouwouldonaregular
phone) press the
(-E]
key.
REDIAL
To
REDIAL
thelastnumberyoudialed,
[)key, then press
phonewillautomatically
dial the number. The number will be
shown on the display.
CLEARING THE DISPLAY
Thedisplaycanbeclearedbypressing
andholdingthe
CLEAWDEL
keydown
until the display clears.
MUTE
Press on the handset
todisablethe handset microphone.
Press again to return to
normal operation.
RINGER MUTE
Press
(Kq
on the handset
during incomingringingwill disable
the ringer for the duration of the
call.

CLRIDEL Key Function
The
CLEAR
and
DELETE
functions
canbeaccessedseparatelydepending
on how longthe key ishelddown. For
example, toclearthe lastdigitentered
on the display, press the(~m~)
keyfor lessthan
1
second. Pressand
holdthe
em)
keyfor morethan
1
second tocompletelyclearthe LCD.
To end the call, press or place
the handset back in the base. The
phone will automatically go back to
The handset LCDwill show the ringer
tvDe selected:
CID WITH
CALL
WAITING
If during a normal phone call another
call comes in with CID information,
notification beeps will be heard in the
handset earpiece. rotarv (dial-~ul
sel
I
service.
The new CID information will be
displayed on the LCD for
10
seconds
and will then be stored in memory.
TEMPORARY
TONE
DIAL
YOUR
CALL
NUMBER
PRESS
@
PRESS
THE
NUMBERS
OR
SYMBOLS
PRESS
Press
(m)
or to exit.
Turning Off The Ringer
To turn offthe ringer do the following
-
The delete function is also used to
delete CID and speed dial memories,
see
DELETINGSTOREDNUMBERS
on page 24, and
DELETING
NUMBERS
on page
29.
Switching calls
To switch over to the new call,
press the phone key, the first call
is put on hold.
To switch back to the first call,
press the(pX~)ke~again.
TURNING
OFFTHE
RINGER
PRESS
PRESS
@
PRESS
@
PRESS
a
ProgrammingThe Ringer Advanced Dialing
There are two different ways to dial a
he-handset
ringer is capable of four
different types of ringer tones
.
The
following sectiondetails how to select
different ringer types and how to turn
off the handset ringer.
SWITCHING
CALLS
number:
1.
Press the
(m)
key and wait
TO
SWITCH
OVER
TO
THE
NEW
CALL
PRESS-
for a dial tone. Then dial the
number you want either manually,
using
MEMORY
(MEM) dialing,
CID
dialing or
REDIAL.
Changing Ringer Types
Toprogram,thehandsetmustbe
OFF.
Checking The Ringer Type
TO
SWITCH
BACK
TO
THE FIRST
CALL
PRESS-
AGAIN
To test the present ringer type, do the 2. Enter the number you wish to dial
onthe display first. Then pressthe
(PHONE)
key. This will dial the
number which is displayed on the
LCD after
2
seconds.
followina:
To select adifferent ringer type do the
Temporary Tone
If you have a rotary (dial-pulse)
telephone service,
(TONEIPULSE
switch is set to
PULSE),
this feature
allowsyou to enter special codes and
tonestooperateansweringmachines,
useelectronicbankingservices,calling
cards, or other special services.
CHECKING
THE
RINGER
TYPE
PRESS
G3
PRESS
@
PRESS
@
AGAIN
PRESS
NOTE:
Thephonewilldialanynumber
whichisshownonthedisplay,
If you do not want to dial the
number shown on the LCD, it
can be changed by:
Press and hold
(m)
until
the display is cleared, then dial
First, dial the call normally. Then
activate the Temporary Tone feature
bypressing
TONE
(the
*
key). Youcan
thenpressthenumbersorsymbolsyou
need, and your phone will send the
proper signals.
Press
(-1
or to exit. normally.
Wait for the dis lay to clear, then
press
(-7
and enter the
number you wish to dial.
Press:
1
for ringer type
1
2 for ringer type 2
3
for ringer ;type
3
4
for ringer type 4
0
for
ringer
off
(ringerdisabled)

The VTech VT 1910c is capable of
memory dialing. You can dial by
pressingthe memorylocationinwhich
the number was stored.
If you wish todial the number stored
in a particular memory location (e.g.
15) then do the following:
1. Press the
(m~)
key to get a
dial tone.
2. Press
.
You will be
prompted to enter a location
number.
3.
Enter the memory location you
wish to dial. E.g.
15.
The number
stored at that location will be
shown on the display and will
automatically be dialed.
You can also review the contents
of the memorylocationswhen you
are notconnectedto a line. When
the phone is off you can scroll
through the memory locations by
using the
a
(
*
)
and
V
(
#
)
keys. If you wish to dial out a
The phone will exit MEMORY
mode and dial the number
displa ed. Otherwise,press0
or
&
to exit MEMORY mode.
Storing speed dial numbers
To program a speed dial location, do
the following:
With the phone
OFF,
enter the
telephone number you wish to
store. (20 Digits Maximum).
Enter program mode by pressing
PROG.
The displaywill show the
following:
Enterthe memorylocation (01..20)
you wish to storethe numberin. As
soon as the second memory
locationdigitisentered,the unit will
emit a happy tone (a short series
of beeps) to confirm successful
programming and exit program
mode.
-
&&o
)
STORING
SPEED
DIAL
(OQO)
NUMBERS
(@-@)
DIALYOUR
PHONE
)
WMBER
(0-
PRESS
6ii)
~g-eJ1
OQO
PRESS
LOCATION
Ifprogrammingisunsuccessfulthe unit
will display:
I:::
i:;?
r;
!:;:I
j::!
p-1
pi
k..!
p:;
i
:
....
".:
:
urn
:
m........
.:.
.
".,
...
..............
f
-nm
13
1
I..
.
I
I...
1.
P-CI
...a
i..
I
I.
:
....
:
.....
:
....
Unsuccessfulprogrammingcan result
from not correctly completing the
programmingsequence. Forexample,
if after enteringa numberon the LCD
and entering program mode, the
OFF
key were pressed instead of entering
a valid memory location, the
programming incomplete message
wouldappear. Ifthismessageappears,
simply repeat the programming
sequence.
Dialing From Memory
Press
(P-J
to get a line.
Press
,
you're promptedto
entera speeddiallocationnumber:
Enter a 2 digit location number
(01-20)
The number stored in that location
will be displayed and immediately
dialed. Or
Beginning from standby mode,
press(MEM)followed by a 2 digit
location number (01-20).
Press again to exit rnem
modeand leavethe number onthe
display.
Note that if digits were on the
display prior to entering mem
mode, the contents of the speed
dial memory will be appended to
those digits. For example, if
1503
was on the LCD and the contents
of the memorylocationis6438981,
then the display would show the
following upon exiting mem mode:
Press
(PHONE),
the number on the
display will be dialed after a
2
., second pause.
NOTE:
The abilityto temporarilyadd memory
contents to digits already entered on
the display operates in the same way
for CID and speed dial memories.
In this way, long distance and area
codes (for example,
1503)
can be
entered on the LCD and can preface
numbers recalled from CID memory
before dialing. This is important
because only the last
7
digits of any
number are displayed when dialing
from CID memory.
Changing Stored Numbers
To changeor replacea storednumber
simply enter the new number on the
display and store it in the memory
location you wish to change.
Deleting Stored Numbers
Press . The display will
change to
"SPEED DIAL
LOCATION-
-".
Enter memory location number
will change to
"LOCATION
XX
DELETED".
~ressmto finish.
NOTE:
Storednumbersareretainedinmemory
even if the base loses its power or the
handset battery is removed.

Storing Special Codes
To inserta ause ina phone number,
press
0
at the appropriate point
whenenteringthe numberontheLCD.
This inserts a 1.5 second pause. A
"
p
"
appears in the display to show
For longer pauses, press
or moretimes. Eachpress
makes the pause 1.5 seconds longer
and is treated as a stored digit.
If your phoneisconnected to a PBX
you can store the
PBX
access
number and a pause before the
phone number. For example, to store
9-PAUSE-555-1234inmemorylocation
08,
do the following:
3. Dial 5551234
4. Press
(KG]
5. Enter
08
CID
-
CALLER
ID
Your VTechVT
191
0c cordless phone
has an additionalfeature in that it can
displayboththe name andthe number
ofthepersoncallingbeforeyouanswer
the phone.
The unit is designed to store and
display specific information provided
by your local telephone company to
subscribers of the "Caller Information
andIdentificationService"(CID).When
CID service is active, your telephone
company transmits to you certain
information between the first and
second rings of each call. This
information includes the telephone
numberand nameof thecaller,aswell
as the date and time of the call.
This information is immediately
displayed on the unit's LCD screen,
enablingyoutoidentifythecallingparty
without having to answer the call.
Simultaneously, this information is
stored in memoryfor review at a later
time.
NOTE:
You must be in an area where CID
service is available and you must
subscribe to it to use this feature.
If you do not subscribe to the CID
service, the phone will still operate
normallyexceptthattheCIDinformation
is not received or displayed.
Receiving and Storing Calls
This unit receivesanddisplays all CID
information, the caller's telephone
number, the callers name and the
exact date and time of the call.
Thephonesequentiallynumbersthese
call records and retains them in the
unit's CID memory for later review.
These call record numbers are
displayed as the first two digits inthe
display. The unit can store up to 50
numbers in its memory.
Note, once the unit's memory is full,
any new call forces a deletion of the
oldest call record.
DIALING FROM CID MEMORY
It is important to note that only the last
7
digits of any number are displayed
when dialina from CID memorv.
For example, when you review CID
memorytodeterminethetimeanddate
a callwas received,you would seethe
following:
However, when you dial directly from
CID memory, only the last
7
digits of
the receivedtelephone numberwill be
used. Consequently,youwouldactually
dial this:

TheVTech
VT
1910c was designedto
accommodate this situation. If you
needtotemporarilyaddalongdistance
andlor area code (such as 1503)
beforetheCIDnumber,dothefollowing:
Beginningfrom the standby mode,
key in the necessary digits. Your
display will look like this:
Then, to temporarily add the last
7
Using the
A
(*)
and
V
(#)
keys,
scroll through the receivedcalls to
locatethe numberyou wish to dial.
Onceyou have locatedthe number
you wish to dial, simply press
PHONE.
The last seven digits will
be added to the numbers already
inthe LCD, and the whole number
shown below will be automatically
dialed.
Special Message Indicators
Out
of
Area Calls
Iffor any reasonthetelephonenumber
of the caller is unavailable, or if the
caller is outsidethe CID servicearea,
the message UNAVAILABLE is dis-
played on the LCD.
"Private" Calls
If the caller has exercised the option
to block his or her number from being
sent, then the display will show
PRIVATE.
Transmission Error
If an error is detected then the CID
information is incomplete and will
not be displayed. "TRANSMISSION
ERROR"will be displayedon the LCD
screen.
L
J
The occasional appearance of
"TRANSMISSION ERROR" on your
display does not indicate a problem
with your unit or your telephone line.
However, if this appears frequently,
you may want to notifyyour telephone
company.
Reviewing Numbers
Calls stored in memo can be
reviewed by pressing
h.
The
display will show the number of the
most recent call. The top line of the
display is used to indicate the
memory location number and the
bottom line of the display shows the
name, see below:
There may be additional characters
in the name which can not be
shownonthe current display. Press
the
A
(
9
)
key. This will overwrite
theCIDmemorylocationonthetopline
to show up to a maximum of 15alpha
characters for the duration of the
keypress.Thefirst12alphacharacters
will be on the top line with up to 3
additional characters on the second
line.
REVIEWING
CID
PHONE
NUMBERS
PRESS
0
PRESS
@
OR
@
TO
SCROLL
PRESS
&
HOLD
@TO
VIEW
PHONE NUMBER
Once the view key is released, the
display returns back to normal.
To find out the corresponding phone
number as well as the date and
time of the call, press and hold
the
7
@
key. The date and time will
beshown. Releasingthekeywillagain
show the caller's name.
Pressing the
(A
(f)
key) displays the
next lower in sequence call record.
Likewise, pressing the
(
v
(#)
key)
displaysthe next higher in sequence)
call record
To save you time in reviewing call
records, you can "wrap-around the
call history log. For example, if you
press the
A
(f)
key enough to scroll
back to the first record, pressing it
againwill forcethe displayto go to the
very end of the call record.

DELETING NUMBERS
Pressingthe CLRIDEL button deletes
the CID number displayed.
While the phone is in CID mode,
press the
(cLR/DEL
key once to
delete the current call and the
display will show:
\
The older CID number will be
moved forward by one location
.
Pressand hold the
(cmq
key
for more than 2 seconds to delete
the entire contents of CID memory.
The displaywill show the following,
for a final confirmation, before the
entire CID memory is erased:
Pressing any key other than
(CLR/DEL)will cancelthe operation.
Pressing
(-9
will confirm
the operation and the display will
then show:
The message will remain on the
display for 2 seconds.
NOISE OR INTERFERENCE
Your VTech VT 1910c cordless
telephone has auto-channel scan
circuitrywhich will detect excess noise
i
and change the channel of the phone
to reduceit. Thisisdoneautomatically.
Since the VTech VT 1910c is a fully
digital phone, it does not suffer from
noiseassociatedwith regularcordless
phones. At times you may experience
occasional"dropouts"especiallyatthe
extreme edges of the phone's range.
Simply move closer to the base unit
and this will disappear.
AUTOMATIC SECURITY CODING
YourVTech VT 1910c phoneisfactory
set with
16.8
million possible security
codes. This unique security code
allows your handset and base to
recognize each other, and minimizes
the possibility of another cordless
phone using your telephone line.
OUT OF RANGE INDICATION
Ifthehandsetismovedtoapointwhere
the base and handset can no longer
communicate,the handsetwill makea
quick series of beeps to signal Out of
Range.
If the handset is active when taken
out-of-range, it will beep twice a
second and enter standby mode after
25 seconds if the link is not
reestablished. If the handset is
brought back within range, it will
automatically re-link.
P
Forout-of-range instandby mode, the
handsetwill beep once and then at 15
second intervals, will display
"CHANNEL SERACHING"
on the
LCD, and scan all channels in an
attempt to re-link with the base.
OUT OF RANGE WHEN PHONE IS
ON
Ifyouarepresentlyengagedinaphone
conversation move closer to the base.
If the base unit does notcommunicate
with the handset within 25 seconds of
losing contact, it will automatically
hang up.
OUT OF RANGE WHEN PHONE IS
OFF
If the phone is
OFF,
the handset and
base still monitor each other to make
surethatthey cancommunicate. Ifthe
handset is moved out of range, the
handset will make a series of beeps,
and will then display
"CHANNEL
SERACHING"
on the LCD. At 15
second intervalsthe handset will scan
allchannelsinanattemptto reestablish
communication with the base. This
process does not require user
intervention; the handset will re-link
with the base automatically once it is
brought back within range. The unit
will then be able to receive and place
calls.
When the base unit is unpluggedfrom
the powersupply,the handsetwill give
the"Outof Range"warningbeep. Plug
the base in again and this will stop.

TAKING CARE OF YOUR TEL-
EPHONE.
Your VTech VT 1910c cordless
telephone contains sophisticated
electronic parts, so it must be treated
with care.
Cleaning your telephone
Your telephone has a durable plastic
casing that should retain its luster for
many years. Clean it only with a soft
cloth slightly dampened with water or
a mildsoap. Do not use excess water
or cleaning solvents of any kind.
Avoid rough treatment
Placethe handsetdown gently. Save
theoriginalpackingmaterialstoprotect
your telephone if you ever need
to ship it.
Avoid water
Your telephone can be damaged if it
gets wet.
Do
not use the handset
outdoors in the rain, or handle it with
wet hands. Do not install your base
unit near a sink, bathtub or shower.
Electrical storms
Electricalstormscansometimescause
power surges harmful to electronic
equipment.
Foryourownsafety, usecautionwhen
usingelectricappliancesduringstorms.
Remember that electrical appliances
can cause seriousinjury
if
usedwhen
you are wet or standing in water. If
your base unit should fall into water,
DO NOT RETRIEVE IT UNTIL YOU
UNPLUG THE POWER CORD AND
TELEPHONE LINE CORDS FROM
THE WALL. Then pull the unit out by
the unplugged cords.
If you have difficulty operating your
phone, the suggestions below should
solve the problem. If you still have
difficultyafter trying these suggestions,
call VTECH Communications at
1-800-624-5688. In Canada, call
VTECH Electronics at 604-273-5131.
THE PHONE DOESN'T WORK AT
ALL.
Make sure the Power Cord is
PKlged
Make sure the telephone line cord
is pluggedfirmly intothe base unit
and the telephone wall jack.
Makesurethe batteriesareproperly
charged. If the
'LOW
BATTERY'
message is shown, the battery
pack needs charging.
NO DIAL TONE.
First check all the suggestions
above.
If you still don't hear a dial tone,
disconnect the base unit from the
telephone jack and connect a
different phone. If there is no dial
tone on that phone either, the
problem is in your wiring or local
service. Call your local telephone
company.
YOU GET NOISE, STATIC, OR A
WEAKSIGNALEVENWHENYOU'RE
NEAR THE BASE UNIT.
Householdappliancespluggedinto
the same circuit as the base unit
cansometimescauseinterference.
Try moving the appliance or the
,
base unit to another outlet.
YOU GET NOISE, STATIC, OR A
WEAK SIGNAL WHEN YOU'RE
AWAY FROM THE BASE UNIT.
You may be out of range. Either
movecloseto the base, or relocate
the base unit.
The layout of your home may be
limiting the range. Try moving the
base unit to another position.
THE HANDSET DOES NOT RING
WHEN YOU RECEIVE A CALL.
Make sure you have the handset
ringer activated. To set the ringer,
see "PROGRAMMING THE
RINGER"on page 21.
Make sure the telephone line cord
is plugged firmly into the base unit
andthetelephonejack. Makesure
the power cord is plugged in.
You may be too far from the base
unit.
You may have too many extension
phones on your telephone line to
allow all of them to ring. Try
unplugging some of the other
phones.
YOU HEAR OTHER CALLS WHILE
USING YOUR PHONE.
Disconnectyour base unitfrom the
telephone jack, and plug in a
regulartelephone.
If
you still hear
othercalls, the problem is probably
inyour wiring or local service. Call
your local telephone company.
YOUHEARNOISEINTHEHANDSET,
AND NONE OF THE KEYS OR
BUTTONS WORK.
Make sure the power cord is plugged
in.

'
I
COMMONCUREFOR ELECTRONIC
EQUIPMENT
Electronics,likepeople,cansometimes
getconfused. Iftheunitdoesnotseem
to be responding normally, then try
putting the handset in the cradle. If it
.'
I
,
does notseem to respondafter trying
this a few times, do the following (in
,
I
the order listed):
1.
Disconnectthe power to the base.
I
2.
Disconnect the handset battery.
3.
Wait a few minutes.
4.
Connect power to the base.
1
5.
Connect the handset battery.
6.
Put the handset in the base.
LIMITED
WARRANTY
VTECH Communicationswarrants, to the original purchaseronly, the materialand
workmanship of this productfor ONE YEAR from the date of purchase. VTECH
will repair or replace,at our option, this product without charge should it fail due
to a defect in material or workmanship within that time period.
This warranty does not apply to loss or damage which is the result of accident,
misuse or negligence. All other warranties, expressed, implied, or statutory,
includingwarranties of fitnessforaparticularpurpose,arelimitedto thetimeperiod
listed and are otherwiseexcludedfrom this warranty. VTECH may, at its option,
voidthe warranty if unauthorizedrepairsare attempted. Additionally,VTECHshall
not be liable for any incidental or consequential damage or commercial loss, nor
for any other loss or damages.
VTECH assumes no responsibility for products sent without prior Return
Authorization.
To arrange for service, in or out of warranty, please call our Customer Service
department at 1-800-624-5688; In Canada, call VTECH Electronics at 1-800-
267-7377 for Return Authorization. For warranty service, proof of purchase
is required.

FREQUENCY CONTROL
Crystal Controlled Dual
PLL
Synthesizer
TRANSMIT FREQUENCY
Handset
:
925.05 MHzto 927.75 MHz
(
Alltenchannelswithinthis
range)
Base
:
902.3 MHz to 905.0 MHz
(Alltenchannelswithin this
range)
RECEIVE FREQUENCY
Handset: 902.3 MHz to 905.0 MHz
(Alltenchannelswithinthis
range)
Base
:
925.05 MHz to 927.75MHz
(Alltenchannelswithinthis
range)
NOMINAL EFFECTIVE RANGE
Maximumpower allowedby FCC and
IC. Actual operating range may vary
accordingto environmentalconditions
at the time of use.
WEIGHT
Handset
:
250 grams
Base
:
415 grams
POWER REQUIREMENTS
Handset
:
Self-contained nickel-
cadmium rechargeable
battery supply, 3.6V
nominal,6OOmAh capacity.
Base: 9VDC
Q
300mA
MEMORY
Speed Dial:20 Memory locations,
20
digits per location.
CID
:
Alpha Numeric Display
50
Memory locations
SPECIFICATIONS ARE TYPICAL
AND MAY CHANGE WITHOUT
NOTICE.
SIZE
Handset
:
19 x
6
x 3.5cm
(L
x
W
xT)
Maximum (Antenna ex-
cluded)
Base
:
21.5 x 14.5 x 5cm
(L
x
W
x T) Maximum (Antenna
excluded)
VT191
OC
Cordless
Telephone
Wall
Mounting
Template
Use this template when wall
mounting your base unit. To mark
the positions of the mounting
screws, hold this template against
the wall, and pressa pencilor pen
point through the center of each
crossmark.
NOTE:
Select a spot where you can
screw into a wooden stud within
the wall. The mountingscrewswill
not hold securely in plaster or
wallboard alone.
Table of contents
Other V-tech Cordless Telephone manuals

V-tech
V-tech VSP600 User manual

V-tech
V-tech LS6113-BK User manual

V-tech
V-tech DS3111-2 - DECT 6.0 Cordless Phone User manual

V-tech
V-tech I 5858 User manual

V-tech
V-tech LS6125 User manual

V-tech
V-tech vz2652 Instruction Manual

V-tech
V-tech CS6120-2 User manual

V-tech
V-tech VT 9114 User manual

V-tech
V-tech VT 9161 User manual

V-tech
V-tech CS5159-3 User manual

V-tech
V-tech t2415 User manual

V-tech
V-tech PHONES PACKAGE I6720 User manual

V-tech
V-tech I 5858 User manual

V-tech
V-tech DS6520-22 User manual

V-tech
V-tech CS6909 User manual

V-tech
V-tech VT6221 User manual

V-tech
V-tech vt9117 User manual

V-tech
V-tech LS1650-B User manual

V-tech
V-tech vt2467 User manual

V-tech
V-tech LS6245 User manual