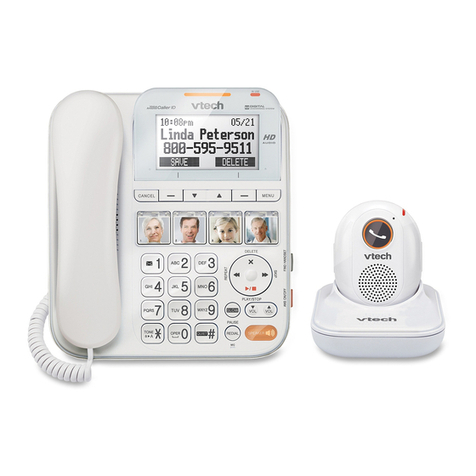
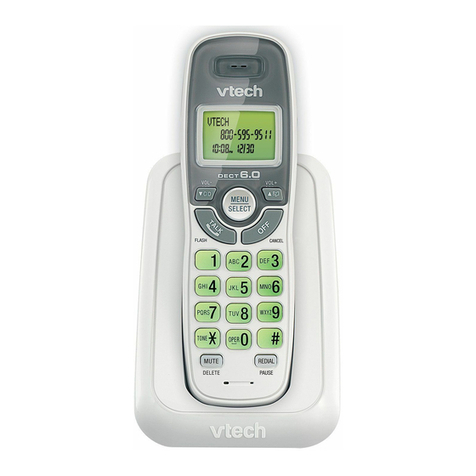
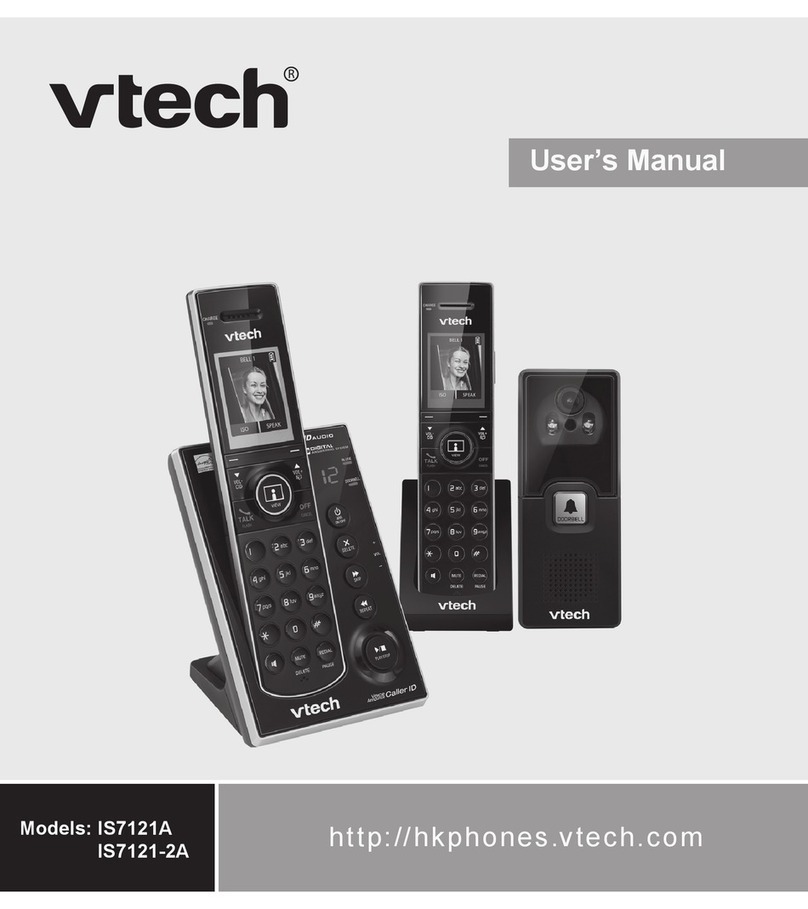
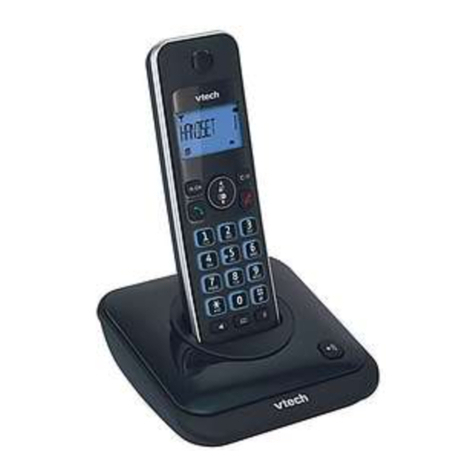
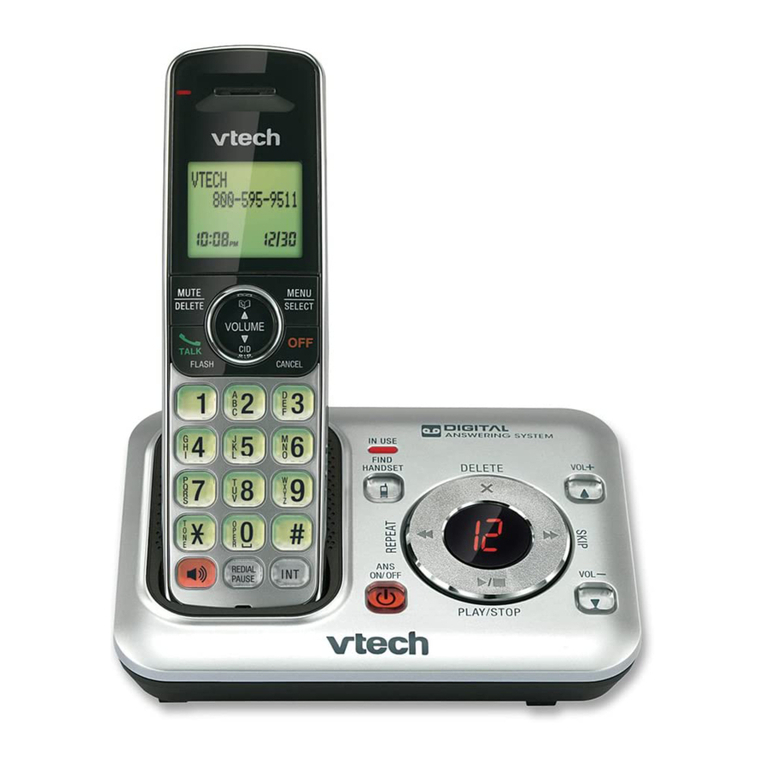
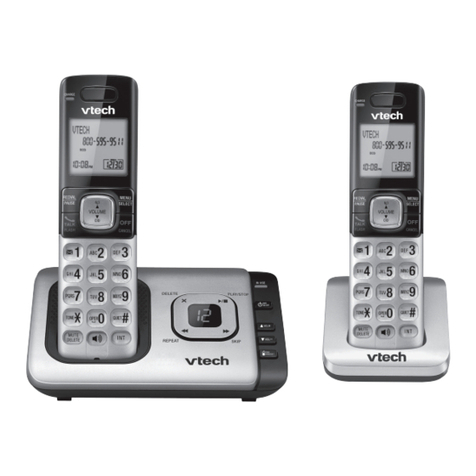
V-tech vt9030 User manual

1
Congratulations! Youhavepurchased
one of the most sophisticated cordless
telephonesonthemarket! TheSBC9030
has been designed to offer a new
standard in cordless telephone
technology.
Unlike most other cordless phones,
theSBC9030digitizesyourvoiceusing
advanceddigitalvoicecodingtoprovide
noise and distortion free performance.
Inmostconditionsyouwillnotbeableto
tell you are using a cordless phone.
Gone are the annoyances of static,
interferenceandhavingtolistentoother
people’sconversationsonyourcordless
phone.
The SBC9030 scrambles your voice
beforeittransmitsit. Thisallowsyouthe
securityofknowingthatnoonecantune
inandeavesdroponyourconversations.
TheSBC9030decodesanddisplays
name and number Caller ID (CID)
information where available and when
subscribed to. The alpha-numeric
display will show both the name and
number of the calling party (when
available). Up to 15 name characters
and/or 11 phone number digits can be
displayedontheLCD.
WiththeSBC9030,theusercaneasily
answeracallbypressinganykeyother
thanthe OFF,VOLUMEkeysor3PPU
keys. In addition, the handset keypad
and LCD illuminate while the handset
rings to signal an incoming call. This is
veryuseful in adark environment.
The SBC9030 includes a
SpeakerphoneandkeypadontheBase
Unit. This enables you to make and
receivecallshands-freeattheBase.In
INTRODUCTION
addition,theIntercomfeatureallowstwo-
way communication between the
Handset and Base Unit. Pressing
INTERCOM ontheBasecanalsoassist
youinlocating a misplaced Handset.
The SBC9030 uses special memory
inboththeBaseUnitandHandsetwhich
isnotsusceptibletopowerfailures. This
providespermanentstorageofallspeed
dialnumbers,CIDinformationaswellas
the Base Unit and Handset security
codes.
Whenasparebattery(notincluded)is
installedintheBaseUnit,theSBC9030
usesthisbatterytoprovideoperational
backupincase of power failure. In this
way, you have access to all normal
phone functions during a total power
outage. Calls can still be placed and
receivedwithoutinterruption. Morethan
4 hours backup will be possible with a
fullycharged battery in the Base Unit.
The phone will also alert you when
youareOutofRangeevenwhenyou're
notusingthephone!

2
SPECIAL FEATURES
• 900 MHz Operation.
• Direct Sequence Spread Spectrum
- Digital Cordless Telephone.
• Digitally-Scrambled Voice
Communication.
• Simultaneous display of Name,
Number, and Time/Date stamp for
Caller ID.
• 50 Caller ID memory locations.
• Voice announce Caller ID
• 4-row by 16-character dot matrix
alphanumericdisplay.
• Backlit display on handset.
• Backlit handset keypad.
• ThreeSoftKeyswhichallowtheuser
to access different functions,
dependingonwhichmodethephone
iscurrentlyin(i.e.CallerID,Memory
Programming,etc.).
• SmartDialingfromCallerIDmemory
eliminates the need to pre-program
your local area code.
• 25locationsProgrammableMemory
for 16-Digit Phone Number. Each
location can also be assigned up to
a 15 character name.
• Out of Range indication while the
handsetisinuseorinstandbymode.
• Handsetspeakerphone.
• Speakerphone and keypad on the
Base Unit.
• Two-wayintercombetweenHandset
and Base Unit.
• Removable handset battery pack.
• Spare battery charger in the base
unit.
• Completebatteryback-upincaseof
powerfailure(withadditionalbattery
pack installed in base).
• Faceupor down Handset charging.
• Easy answer - When the phone
INTRODUCTION
rings, simply press any key other
than OFF, the Volume keys or the
3 PPU keys on the handset to
answer.
• Pressing the OFF key on handset
during incoming ring will stop the
ringing.
• Auto hang up when returning the
handset to the base cradle.
• 24-Bit Digital Security Code.
• Low Battery Detect and Warning
indicator.
• Tone or Pulse dialing.
• Visual Message Waiting Indication
(VMWI) for use with voicemail
service.
• Upto7hoursofcontinuoustalktime
or 14 days standby time.
• 8-level Volume control on Handset.
• Programmable Ringer Tones and
Volume.
• Headset Compatible, for use with
2.5mmheadsets.
Thismanualisdesignedtofamiliarize
you with the SBC9030. We strongly
recommendyoureadthemanualbefore
usingyourphone.

3
PARTS CHECK LIST
1.
Base Unit, Handset, Belt Clip and AC
adapter
2.One-Line Telephone Cord
3.Battery Pack
4.Wall mount accessory
To purchase replacement battery
packs, call CustomerService at 800-
667-2118.
INTRODUCTION
Battery Pack AC Adapter
Telephone Cord
Belt Clip Wall mount accessory
Base Unit
Handset
PHONE OFF
FLASH
1
2
ABC
3
DEF
4
GHI
5
JKL
6
MNO
7
PQRS
TONE
0
OPER
8
TUV
9
WXYZ
AUTO CALL
RETURN*69
3-WAY
CALLING
AUTO BUSY
REDIAL *66
INTERCOM SPEAKER
POWER IN-USE CHARGE SPAREBATT
MESSAGE
AUTO CALL
RETURN *69
3-WAY
CALLING
AUTO BUSY
REDIAL *66
7
pqrs
8
tuv
9
wxyz
4
ghi
5
jkl
6
mno
1
3
def
2
abc
tone
0
oper
MIC
MUTE VOL
INTERCOM SPEAKERPHONE
FLASH
MEMORY
REDIAL
HOLD
MEMORY

4
FCC REGULATIONS
This equipment complies with Parts
15 and 68 of the Federal
Communications Commission (FCC)
rulesfortheUnitedStates.Operationis
subject to the following two conditions:
(1) this device may not cause
interference, and (2) this device must
accept any interference, including
interferencethat may cause undesired
operationofthedevice.
The underside of the Base Unit
containing engravements of either the
FCC registration number and Ringer
Equivalence Number (REN), or the IC
registration number . You must, upon
request,providethisinformationtoyour
localtelephonecompany.
This equipment is compatible with
inductivelycoupledhearingaids.
Should you experience trouble with
this telephone equipment, please
contact:
CustomerService at 800-667-2118
Thetelephonecompanymayaskyou
to disconnect this equipment from the
linenetworkuntiltheproblemhasbeen
corrected.
FCC Part 15
Warning: Changes or modifications
to this unit not expressly approved by
the party responsible for compliance's
couldvoidtheuser’sauthoritytooperate
theequipment.
The equipment has been tested and
foundtocomplywithpart15oftheFCC
rules. These limits are designed to
provide reasonable protection against
harmful interference in a residential
installation. Thisequipmentgenerates,
uses and can radiate radio frequency
energy and, if not installed and used in
accordance with the instructions, may
cause harmful interference to radio
communications. However,thereisno
guaranteethatinterferencewillnotoccur
in a particular installation. If this
equipment does cause harmful
interference to radio or television
reception,which can bedeterminedby
turning the equipment off and on, the
userisencouragedtotryandcorrectthe
interference by one or more of the
followingmeasures:
- Reorient or relocate the receiving
antenna.
- Increase the separation between the
equipmentandreceiver.
- Connect the equipment into an outlet
or on a circuit different from that to
which the receiver is connected.
- Consult the dealer or an experienced
radio/TVtechnicianforhelp.

5
FCC REGULATIONS
FCC Part 68
The FCC requires that you connect
your cordless telephone to the
nationwidetelephonenetworkthrough
a modular telephone jack (USOC
RJ11C, RJ11W or RJ14).
Your telephone company may
discontinue your service if your equip-
ment causes harm to the telephone
network. They will notify you in ad-
vance of disconnection, if possible.
Duringnotification,youwillbeinformed
of your right to file a complaint with the
FCC.
Occasionally, your telephone
company may make changes in its fa-
cilities,equipment,operation,orproce-
duresthat could affecttheoperationof
yourequipment. Ifso,youwillbegiven
advance notice of the change to give
you an opportunity to maintain
uninterruptedservice.
The Base Unit contains no user
serviceableparts. TheHandsetcontains
auser replaceable battery pack.
Ifitisdeterminedthatyourtelephone
equipment is malfunctioning, the FCC
requiresthatitnotbeusedandthatitbe
unplugged from the modular jack until
the problem has been corrected.
Repairstothistelephoneequipmentcan
onlybemadebythemanufacturerorits
authorized agents or by others who
may be authorized by the FCC. For
repairprocedures,followtheinstructions
outlinedundertheLimitedWarranty.
This equipment may not be used on
coin service provided by the phone
company or Party Lines.
TheREN isusefulin determiningthe
numberof devices you mayconnect to
your telephone line and still enable the
devicestoringwhenyoureceiveacall.
The general rule is that the REN value
should not exceed 5.0 total; however,
contact your local telephone company
forthe specific number in your area.

6
When using your telephone
equipment, basic safety precautions
shouldalwaysbefollowedtoreducethe
risk of fire, electric shock and injury to
persons,includingthefollowing:
1.Readandunderstandallinstructions.
2.Follow all warnings and instructions
marked on the product.
3.Unplug this product from the wall
outlet before cleaning. Do not use
liquid cleaners or aerosol cleaners.
Use a damp cloth for cleaning.
4.Do not use this product near water
(forexample,nearabathtub,kitchen
sink, or swimming pool).
5.Do not place this product on an
unstable cart, stand, or table. The
product may fall, causing serious
damage to the product.
6.Slotsandopeningsinthecabineton
the back or bottom are provided for
ventilation.To protect it from
overheating, these openings must
notbeblockedbyplacingtheproduct
on a bed, sofa, rug, or other similar
surface. This product should never
be placed near or over a radiator or
heatregister.Thisproductshouldnot
be placed in a built-in installation
where proper ventilation is not
provided.
7.Thisproductshouldbeoperatedonly
from the type of power source
indicatedonthemarkinglabel. Ifyou
are not sure of the type of power
supply to your home, consult your
dealer or local power company.
IMPORTANT SAFETY INSTRUCTIONS
8.Do not allow anything to rest on the
power cord. Do not locate this
product where the cord will be
abused by persons walking on it.
9.Never push objects of any kind into
thisproductthroughcabinetslotsas
they may touch dangerous voltage
points or short out parts that could
resultinariskoffireorelectricshock.
Never spill liquid of any kind on the
product.
10.Toreducetheriskofelectricshock,
donotdisassemblethisproduct,but
take it to an authorized service
facility. Openingorremovingcabinet
parts other than specified access
doorsmayexposeyoutodangerous
voltage or other risks. Incorrect
reassembling can cause electric
shock when the appliance is
subsequently used.
11.Do not overload wall outlets and
extensioncords as thiscan result in
the risk of fire or electric shock.
12. Unplug this product from the wall
outlet and refer servicing to an
authorized service facility under the
followingconditions:
A.Whenthepowersupplycordorplug
is damaged or frayed.
B.If liquid has been spilled into the
product.
C.If the product has been exposed to
rain or water.
7
IMPORTANT SAFETY INSTRUCTIONS
SAVE THESE INSTRUCTIONS
D.If the product does not operate
normallyby following theoperating
instructions. Adjust only those
controls that are covered by the
operating instructions, because
improperadjustmentofothercontrols
mayresultindamage andwilloften
require extensive work by an
authorizedtechniciantorestorethe
product to normal operation.
E.Iftheproducthasbeendroppedand
the cabinet has been damaged.
F. If the product exhibits a distinct
change in performance.
13.Avoidusingatelephone(otherthan
acordlesstype)duringanelectrical
storm. Theremaybearemoterisk
of electric shock from lighting.
14.Donotusethe telephone to report
agasleakinthevicinityoftheleak.
CTIONS

8
The Handset of your SBC9030 is
poweredbyarechargeablebatterypack.
It charges automatically whenever the
HandsetisintheBaseUnit. Youshould
charge the battery pack for 16 hours
whenyoufirstreceiveyourphone. You’ll
know the battery pack needs charging
when:
• Thelowbatterymessageisdisplayed:
• TheHandsetseemscompletelydead,
theLCDiscompletelyclearanddoes
not activate when you press the
keys.
TO CHARGE THE BATTERY
PACK
Tochargethebatterypack,placethe
Handset in the Base Unit. The
CHARGING indicator will light to show
theHandsetisseated properly and the
battery pack is charging. It is
recommendedthat the batterypackbe
charged for at least 16 hours initially.
Afterwards, 8 hours of maintenance
charging should be sufficient. You can
use your telephone before that with di-
minishedcapacity,butitisbesttocharge
thebatterypackfully.Itwilltakeseveral
rechargecyclestomaximizethecharge
capacity of your battery pack. The
maximumbatterylifebetweencharges
is 7 hours of continuous talk time or 14
days of stand by.
INSTALLINGTHE BATTERY PACK
Alternatively, if a spare battery pack
has been charging in the Base Unit,
simply exchange the drained Handset
battery pack with the fully charged
replacementbatterypackfromtheBase
Unitcharger. PlacethedrainedHandset
batterypackintotheBaseUnitcharger
so that it will charge.
TheBaseUnitsparebatterycharger
does NOT charge a battery pack as
quickly as the main Handset battery
charger. Afullchargerequires24hours.
A WORD ABOUT
RECHARGEABLE BATTERIES
Your Ni-Cd battery pack recharges
whenevertheHandsetisreturnedtothe
BaseUnit.
IT’S IMPOSSIBLE TO
OVERCHARGE THE BATTERY
PACK
The battery pack can be recharged
manytimesbut if you get alow-battery
signaleven after8hours ofchargingin
theBaseUnitcradle(or24hoursinthe
Base Unit spare battery charger), the
batterypack(s) should be replaced.
Topurchasereplacementbattery
packs, call Customer Service at
800-667-2118.

9
INSTALLINGTHE BATTERY PACK
REPLACING THE HANDSET
BATTERY PACK
Followthe steps below:
1.Remove the battery case cover by
pressing on the ridged lines and
slidingdownward.
2.Discard the old battery pack. Don’t
put the old battery pack in a trash
compactor or a fire - it could burst.
Please recycle.
3.Place the new battery pack in its
housing with the metal contacts
facing down.
+-
4.Replace the battery case cover by
sliding the cover upwards.
5.Ifthenewbatterypackisnotalready
charged, place the Handset in the
cradle of the Base Unit to allow it to
charge for 16 hours.
CAUTION: To Reduce the Risk of
Fire or Injury, Read and Follow the
Instructions
1.UseonlyCincinnatiBellrechargeable
battery pack, or equivalent.
2.Do not dispose of the battery pack
in a fire. The cell may explode.
IMPORTANT: Do not dispose of this
batterypackintohouseholdgarbage.
Forinformationonrecyclingorproper
disposal, consult your local solid
waste collection or disposal
organization.
3.Do not open or mutilate the battery
pack. Released electrolyte is
corrosiveandmaycausedamageto
the eyes or skin. It may be toxic if
swallowed.
4.Exercisecareinhandlingbatteriesin
order not to short the battery with
conducting materials such as rings,
bracelets, and keys. The battery
packorconductormayoverheatand
cause burns.
Topurchase replacementbattery
packs, call Customer Service at
800-667-2118.
SPARE BATTERY CHARGER/
POWER BACKUP FUNCTION
Whenanoptional,SpareBatterypack
is installed in the Base Unit, the
SBC9030 uses this battery to provide
operational backup in case of a power
failure. Ifyouhaveafullychargedbattery
pack in the Spare Battery charger and
thereis apoweroutage,youwillstillbe
able to place and receive calls on the
SBC9030 Handset for up to 4 hours.
The Spare Battery pack can also be
used to replace a drained Handset
batterytoensureuninterrupteduse. Be
sure to put the drained battery pack in
theSpare Battery charger.

10
GETTING STARTED
SETTING UP AC POWER
ADAPTER
Plug the AC power adaptor into an
electrical outlet and the DC connector
to the back of the Base Unit.
xxxxx xxxxxxxxxxx
PRODUCTCONTAINSNICKEL-CADMIUM BATTERY:
MUST BERECYCLEDORDISPOSED OFPROPERLY.
DO NOT BURN OR PUNCTURE BATTERY.LIKE
OTHERBATTERIESOFTHIS TYPE.IFITIS BURNED
OR PUNCTURED.IT COULD RELEASE TOXIC
MATERIAL WHICH COULD CAUSE INJURY.
Cd
CAUTION: USE CLASS 2, 9V
DC POWER SUPPLY ONLY.
SETTING RINGER
The Handset ringer is programmed
ON as the factory default setting. To
change ringer settings, see RINGER
TONE / VOLUME.
The Base Unit ringer is controlled
independently, by a switch located on
thefront,righthandside(antennaside)
ofthe Base.
TheBaseringer has3settings;high,
lowand off.
TONE/PULSE SELECTION
Your SBC9030 is preset for Tone
dialing. If you have rotary (pulse)
service, program the Handset
accordingly. See SET TONE/PULSE
fordetails.
CHARGETHEHANDSET
BATTERY PACKBEFOREUSE.
The battery pack recharges
automaticallywhenevertheHandsetis
intheBaseUnit. Thebatterypackmust
be charged for 16 hours before using
yourphoneforthefirsttime.
CONNECT THE TELEPHONE
LINE CORD
Plug one end of the telephone line
cord into the jack on the back of the
BaseUnit,plugtheotherendofthiscord
intothe wall jack.
CHECK FOR A DIAL TONE
Afterthebatteryischarged,rotatethe
Base Unit antenna to upright position.
Now press PHONE on the Handset.
PHONE ON will appear on the LCD,
andyouwillhearadialtone. Ifnot,see
IN CASE OF DIFFICULTY.
Fill in the telephone number card on
theBase Unit.
CAUTION:
1.Neverinstalltelephonewiringduring
a lightning storm.
2.Never install telephone jacks in wet
locations unless the jack is
specifically designed for wet
locations.
3.Never touch uninsulated telephone
wires or terminals unless the
telephonelinehasbeendisconnected
at the network interface.
4.Use caution when installing or
modifyingtelephonelines.

11
USING THE WALL MOUNT
ADAPTOR
1. Position the wall mount bracket
on the Base Unit.
Line up the tabs on the wall mount
adaptorwith the holesonthebottom
of the Base Unit . Snap the wall
mount bracket firmly in place.
xxxxx xxxxxxxxxxx
PRODUCTCONTAINSNICKEL-CADMIUM BATTERY:
MUST BERECYCLEDORDISPOSED OFPROPERLY.
DO NOT BURN OR PUNCTURE BATTERY.LIKE
OTHERBATTERIESOFTHIS TYPE.IFITIS BURNED
OR PUNCTURED.IT COULD RELEASE TOXIC
MATERIAL WHICH COULD CAUSE INJURY.
Cd
2. Mount the Base Unit on the wall.
Position the Base Unit so the
mountingstuds will fit into theholes
on the bottom of the Base Unit.
Position the power cord to extend
down the wall the phone is to be
mounted on. Slide the Base Unit
down on the mounting studs until it
locks into place.
3. Plug in the AC adaptor.
PlugtheACadaptor intoanelectrical
outlet, and the DC connector to the
backof the BaseUnit.IftheHandset
battery pack has not been charged
previously, place the Handset in
the Base Unit cradle, and allow it
to charge for 16 hours.
WALL MOUNTING
xxxxx xxxxxxxxxxx
PRODUCTCONTAINSNICKEL-CADMIUM BATTERY:
MUST BERECYCLEDORDISPOSED OFPROPERLY.
DO NOT BURN OR PUNCTURE BATTERY.LIKE
OTHERBATTERIESOFTHIS TYPE.IFITIS BURNED
OR PUNCTURED.IT COULD RELEASE TOXIC
MATERIAL WHICH COULD CAUSE INJURY.
Cd
4. Connect the telephone line cord.
The telephone line cord has a
snap-inplug ateach end.Insertone
of the plugs into the jack on the
bottom of the Base Unit. Insert the
other end of the plug into the wall
jack.

12
HANDSET LAYOUT
3-WAY CALL
PHONE OFF
FLASH
1
2
ABC
3
DEF
4
GHI
5
JKL
6
MNO
7
PQRS
TONE
0
OPER
8
TUV
9
WXYZ
SOFT KEYS
DIALING KEYS
HEADSET JACK
RETURN CALL BUSY REDIAL
VOLUME UP
VOLUME DOWN
SPEAKER KEY
INTERCOM KEY
PHONE ON PHONE OFF
AUTO CALL
RETURN *69
3-WAY
CALLING
AUTO BUSY
REDIAL *66
INTERCOM SPEAKER

13
BASE LAYOUT
9V DC TEL LINE
PHONE CORD JACK
AC POWER JACK
POWER IN-USE CHARGE SPARE BATT
MESSAGE
AUTO CALL
RETURN *69
3-WAY
CALLING
AUTO BUSY
REDIAL *66
7
pqrs
8
tuv
9
wxyz
4
ghi
5
jkl
6
mno
1
3
def
2abc
tone 0oper
MIC
MUTE VOL
INTERCOM SPEAKERPHONE
FLASH
MEMORY
REDIAL
HOLD
SPARE BATT. LED
CHARGE LED
IN USE LED
POWER LED
FLASH KEY
MEMORY KEY
REDIAL KEY
HOLD KEY
DIALING KEYS
VOLUME UP/DOWN KEY
MUTE KEY/LED
SPEAKERPHONE KEY
INTERCOM KEY
SPARE BATTERY
CHARGER
COMPARTMENT
AUTO CALL RETURN *69
3-WAY CALLING KEY
MESSAGE INDICATOR
AUTO BUSY REDIAL *66 KEY
MEMORY

14
QUICK REFERENCE GUIDE
Here is a brief guide to the features
andfunctionsofyourSBC9030 cordless
telephone:
SET-UP
• Plug AC adaptor into a standard
electricaloutlet.
• LetHandsetbatterypack chargefor
16 hours before first use.
• Set Dial Mode setting in MENU to
PULSEor TONE.Theunitisfactory
set to TONE.
• ConnecttelephonelinecordtoBase
Unit and telephone jack.
SETTING TIME
WiththeHandsetintheidle(off)mode:
• Press MENU
1.
• Use the / soft keys to scroll
until 5. Set Time is highlighted
• Press ENTER
2.
3.
• Enterthecurrenthour. Asingle-digit
hour must be preceded by a 0.
•Next, enter the minute.
•Next, select the HourPresentation
(12-hour or 24-hour format) by
pressing the key directly below the
12 or 24 iconinthe handset display.
•PressSAVE.The displaywillconfirm
that the time has been updated.
4. Or
•The time setting will also
automaticallybeupdatedwhenTime/
Date information is received from
Caller ID.
MAKING CALLS
FROM THE HANDSET
•Press PHONE. The Handset will
briefly display CONNECTING, then
PHONE ON. Listen for dial tone.
Using the keypad, dial the desired
number. To end your call, press
OFF, or return the handset to the
base unit. -OR-
•First,dialthe desired number. Then,
press PHONE. Afteraccessing dial
tone, the phone number will be
dialed. To end your call,press OFF,
or return the handset to the base
unit.

15
Whenyouend your call by pressing
OFF or returning the handset to the
base unit, the phone will return to
the rotary (PULSE) mode.
VOLUME CONTROL
FROM THE HANDSET
•The phone must be ON.
•Locatedonthe side of the Handset,
presstheVOLUMEUP orVOLUME
DOWN keys to raise or lower the
earpiece volume. There are 8
volume levels.
FROM THE BASE
•The Base Unit has its own volume
control. The VOL Up and Down
keys are located directly above the
SPEAKERPHONE key.
RINGER CONTROL
FROM THE HANDSET
WiththeHandsetintheidle(off)mode:
• Press MENU
• Using the / soft keys, scroll
until 3. Ringer Tone/Vol is
highlighted.
FROM THE BASE
•PressSPEAKERPHONE,then wait
fordial tone. Dial the desiredphone
number.
•To end your call, press
SPEAKERPHONE again.
ANSWERING CALLS
• When there is an incoming phone
call, pressing OFF key on the
handsetcanstoptheringing.Youcan
also answer the call simply by
pressing any key except OFF,
VOLUME, INTERCOM and the 3
PPU keys.
FROM THE HANDSET:
•PressanykeyexceptOFF, Volume,
INTERCOM and the 3 PPU keys.
•Press OFF to end your call.
FROM THE BASE:
•Press SPEAKERPHONE. To end
yourcall, pressSPEAKERPHONE
again.
TEMPORARY TONE
•If your local telephone service
requires rotary (PULSE) dialing,
you cantemporarily switchto TONE
dialing for such purposes as
accessing answering machines,
bank-by-phoneservices, and using
calling cards.
•To switchfrom rotaryto tone dialing
during a call, press the *TONE key.
QUICK REFERENCE GUIDE

16
• Press ENTER
• Use the RING soft key to select the
RingerType (there are 4ring styles)
and Vol soft key toselect the ringer
volume (High, Low or Off).
3. 2.
• Press SAVE to store your ringer
settings
4.
• To exit programming mode at any
time, press OFF key .
FROM THE BASE
• The Base Unit ringer is controlled
independently, by a switch located
onthe front,righthand side(antenna
side) of the Base.
• The Base ringer has (3) settings:
High, Low and Off.
HOLD
FROM THE HANDSET
•Press the HOLD soft key to place
an active call on hold. Press the
TALK soft key or the PHONE key
to return to your call.
•If an extension phone is activated
while the SBC9030 has a call on
HOLD, the SBC9030 will release
the call and turn itself OFF.
FROM THE BASE
•During a Speakerphone call, press
HOLD on the Base Unit. The red
light (LED) buit into the
SPEAKERPHONE key, will flash
rapidly while your call is on hold.
•Press either HOLD or
SPEAKERPHONE to return to
your call.
MUTE
FROM THE HANDSET
• Press the MUTE soft key to disable
the Handset microphone during an
active call. Press the TALK soft
key to return to normal 2-way
conversation.
FROM THE BASE
• During a Speakerphone call, press
MUTE to disable the Base Unit
microphone.The red light (LED) buit
into the MUTE key, will glow.
• Press MUTE again to return to a
two-way conversation.
REDIAL WITH THE HANDSET
ON (OFF HOOK)
•Press the RDL soft key to display
the last three telephone numbers
you dialed.
QUICK REFERENCE GUIDE

17
OFF
1.
•Usingthe / soft keys, select
the number from the list and then
press DIAL soft key.
3. 2.
REDIAL WITH THE HANDSET
OFF (ON HOOK)
•PressRDL.TheHandsetwilldisplay
last 3phone numbers dialed.
PHONE OFF
1.
•Use the / soft keys to
highlightthedesiredphone number.
•Press PHONE. The SBC9030 will
access dial tone, and dial the
number.
PHONE OFF
INT.COM
FLASH
3. 2.
PAGE/HANDSET LOCATOR
•To pagethe Handset from theBase
Unit, press INTERCOM. The
Handset will emit a special beep
tone for up to 60 seconds, In
addition, the Handset will display
BASE PAGING.
•To answer the page, press
INTERCOM on the Handset. You
are now in intercom mode.
•To terminate the page, press OFF
on the Handset,or INTERCOM on
the Base Unit.
INTERCOM BETWEEN
HANDSET AND BASE
FROM THE HANDSET (when
HANDSET OFF or ON HOOK)
• Press the INTERCOM key. The
Base Unit will emit 2 short tones
and then enter Intercom mode.You
can now talk to the person at the
Base Unit.
• The Handset will display as:
QUICK REFERENCE GUIDE
R

18
• Press the MUTE softkeyto mute the
handset microphone. But you can
stillhearthespeaking from the Base.
• You can return the intercom
conversationwith the Base by press
the TALK softkey.
• Press the OFF key to end the
intercommode.
FROM THE HANDSET (with
HANDSET ON or OFF HOOK)
• You can use the intercom when you
are in a call.
• Press the INTERCOM key, then you
can talk to the Base unit.
• Atthesame time, your active call will
be placed on HOLD.
• You can press the MUTE softkey to
mute the handset microphone. But
you can still hear the speaking from
the Base.
• You can return the intercom
conversation with the Base by
pressing the TALK soft key.
• Press the OFF key to end the
intercommode.But, at thistime,your
call still on hold.You need to press
the TALK softkey or the PHONE
key to return to your call.
• Anytime in the intercom mode, you
can press the PHONE key to end
the intercom and return to your call.
QUICK REFERENCE GUIDE
FROM THE BASE (with
SPEAKERPHONE OFF)
• Press INTERCOM key to page the
Handset.
• Afterthe Handset receives thepage
fromthe Base,presstheINTERCOM
key on the Handset to establish
conversatiion.
• During the intercom, you can press
the MUTE key to mute the
microphone on the Base. But you
can still hear the speaking from the
Handset.
• Press the MUTE key once again to
release the mute function.
• Press INTERCOM key to exit the
intercommode.
FROM THE BASE (with
SPEAKERPHONE ON)
• You can use intercom during a call
• Press INTERCOM key to page the
Handset.You will be on hold.
• Afterthe Handset receives thepage
fromthe Base,presstheINTERCOM
key on the Handset to establish
conversation.
• During the intercom, you can press
the MUTE key to mute the
microphone on the Base. But you
can still hear the speaking from the
Handset.
• Press the MUTE key once again to
release the mute function.
• Press INTERCOM and then
SPEAKERPHONE key to exit the
intercommodeandreturntothecall.
• Or simply press SPEAKERPHONE
toexit the intercom mode andreturn
to the call.

19
QUICK REFERENCE GUIDE
CONFERENCE
Your SBC9030 allows you to establish
a 3 party conference between the
Handset, Base and the incoming call:
1) Use either the Base or the Handset
to make a call.
2) If you are using the Base to make
the call, the Handset can join the
conference by pressing PHONE.
Or, press the SPEAKERPHONE
key on the Base if you use the
Handset to make the call.
3) If either the Handset or the Base
partieswantto leavethe conference,
either side can press OFF (on the
Handset) or SPEAKERPHONE(on
the Base) to leave.
REVIEWING CALLER ID
RECORDS
NOTE: CallerIDandCall WaitingID
are subscription services, available
through most local telephone service
providers. Theseareoptionalservices;
you are not required to subscribe to
them. However,toreceiveCallerIDon
your SBC9030, subscription through
yourlocal phone companyisrequired.
WiththeHandsetintheOFF(onhook)
mode:
• Press MENU
1.
• Using the / soft keys scroll
until 1. Caller ID is highlighted
• Press the ENTER soft key.
OFF
2.
• Use the / soft keys to scroll
through the Caller ID records. The
SBC9030 will store the last 50
Caller ID records to come in.The
latest one will be in #01.
• Press OFF to exit Caller ID mode.
MEMORY DIALING
FROM THE HANDSET
With the Handset OFF (on hook):
• Press the MEM soft key.
1.
• Enter Memory Location (01-25).As
soon as you enter the second digit,
thecontentsof the selected Memory
Location will be displayed.
• Press PHONE key or the DIAL soft
key to dial the displayed phone
number.

20
QUICK REFERENCE GUIDE
With the Handset ON (off hook):
• Press PHONE. Listenfor dial tone.
PHONE OFF
INT.COM
FLASH
1
2
1.
• Press the MEM soft key.
2.
• Enter Memory Location (01-25).
• Press the PHONE or DIAL key.
3.
FROM THE BASE
• Press SPEAKERPHONE to get
the dial tone.
• Press MEMORY key, then enter 2
digit location number (01-25).
• You will then hear the dialing
sequence.
FLASH
• You can use your SBC9030 with
services such as Call Waiting.
Simply press the PHONE key to
flash the line on the Handset, OR
press FLASH on the Base.
HANDSET SPEAKERPHONE
FEATURE
1
2
3
DEF
4
GHI
5
JKL
6
MNO
7
PQRS
TONE
0
OPER
8
TUV
9
WXYZ
AUTO CALL
RETURN *69
3-WAY
CALLING
AUTO BUSY
REDIAL *66
INTERCOM SPEAKER
SPEAKER KEY
Press the SPEAKER to make or
answer a call using the Handset
Speakerphone. The Handset displays
HS SPEAKER. You can now talk
hands-free away from the Base Unit.
Press OFF to end a call.
CallWaiting:If youhearaCallWaiting
tone during a speakerphone call,
press the SPEAKERkey toanswer
it. (Do not use the PHONE key to
answer CallWaitingwhile usingthe
speakerphone.)
Switching from Speakerphone to
Earpiece: At any time during a
Handset speaker call, you can
press PHONE to switch to a non-
speaker call. The Handset will
display PHONE ON, and you can
holdthehandsettoyourearnormally.
PressSpeaker wheneveryouwant
to change back to the
Speakerphone. The Handset will
display HS SPEAKER.
This manual suits for next models
1
Table of contents
Other V-tech Cordless Telephone manuals

V-tech
V-tech CS5219 User manual

V-tech
V-tech CS6419-2 User manual

V-tech
V-tech vt2910 User manual

V-tech
V-tech i6735 User manual

V-tech
V-tech CS6909 User manual

V-tech
V-tech 9109 User manual

V-tech
V-tech gz 2334 User manual

V-tech
V-tech VT20-2481 User manual

V-tech
V-tech i6775 User manual

V-tech
V-tech i6789 User manual

V-tech
V-tech t2350 User manual

V-tech
V-tech DS6520-22 User manual

V-tech
V-tech CS6199-4 User manual

V-tech
V-tech DS6771-3 User manual

V-tech
V-tech bs2652 User manual

V-tech
V-tech vt2458 User manual

V-tech
V-tech mi6820 - 5.8 GHz Handset User manual

V-tech
V-tech VT 1900 User manual

V-tech
V-tech ia5865 User manual

V-tech
V-tech AM18047 User manual