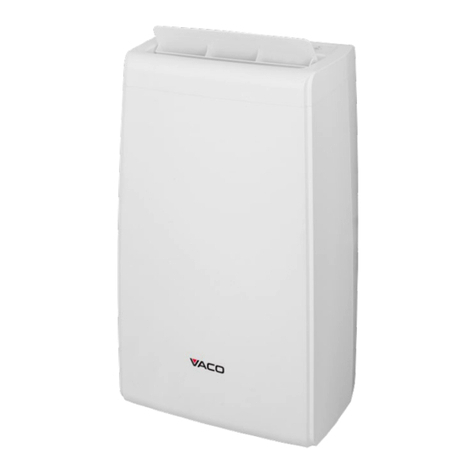
Vaco VAC07W User manual

VAC-PO-0007-W06M
VAC07W


3
CONTENT
IMPORTANT SAFEGUARDS ............................................................................................8
INSTALLATION INSTRUCTIONS ....................................................................................17
WINDOW SLIDER KIT INSTALLATION...........................................................................19
LOCATION....................................................................................................................20
TURNING THE APPLIANCE ON .....................................................................................21
SETTING THE TIMER ....................................................................................................24
SELF-DIAGNOSIS ..........................................................................................................26
INSERTING OR REPLACING THE BATTERIES.................................................................29
SETTING THE TIMER ....................................................................................................31
TIPS FOR CORRECT USE ...............................................................................................32
WATER DRAINAGE METHOD.......................................................................................34
CLEANING....................................................................................................................36
CLEANING THE CABINET..............................................................................................36
CLEANING THE AIR FILTERS .........................................................................................36
START-END OF SEASON OPERATIONS .........................................................................38
TROUBLESHOOTING ....................................................................................................39
INHALT
WICHTIGE SICHERHEITSVORKEHRUNGEN...................................................................43
INSTALLATIONSANWEISUNGEN ..................................................................................52

4
FENSTERSCHIEBER-SATZ INSTALLIEREN ......................................................................54
STANDORT...................................................................................................................55
GERÄT EINSCHALTEN...................................................................................................56
TIMER EINSTELLEN ......................................................................................................59
SELBSTDIAGNOSE ........................................................................................................61
BATTERIEN EINLEGEN ODER WECHSELN.....................................................................64
TIMER EINSTELLEN ......................................................................................................68
TIPPS ZUR RICHTIGEN HANDHABUNG.........................................................................69
WASSERABLAUF ..........................................................................................................71
REINIGUNG..................................................................................................................75
GEHÄUSE REINIGEN.....................................................................................................75
LUFTFILTER REINIGEN..................................................................................................75
MASSNAHMEN ZU ANFANG/ENDE DER SAISON.........................................................77
FEHLERBEHEBUNG ......................................................................................................78
SPIS TREŚCI
BEZPIECZEŃSTWO .......................................................................................................82
INSTRUKCJE INSTALACJI ..............................................................................................91
MONTAŻ ZESTAWU UCHWYTU OKIENNEGO ..............................................................93
UMIEJSCOWIENIE........................................................................................................94
WŁĄCZANIE URZĄDZENIA............................................................................................95
USTAWIANIE TIMERA ..................................................................................................98

5
AUTODIAGNOSTYKA..................................................................................................100
WKŁADANIE LUB WYMIANA BATERII ........................................................................102
USTAWIANIE TIMERA ................................................................................................104
PORADY DOTYCZĄCE PRAWIDŁOWEGO UŻYTKOWANIA..........................................105
METODA ODPROWADZANIA WODY..........................................................................107
CZYSZCZENIE..............................................................................................................110
CZYSZCZENIE OBUDOWY...........................................................................................110
MONTAŻ FILTRÓW POWIETRZA................................................................................110
CZYNNOŚCI WYKONYWANE PRZED SEZONEM I PO NIM ..........................................111
ROZWIĄZYWANIE PROBLEMÓW...............................................................................112

6
Portable Air Conditioner
VAC07W
VAC-PO-0007-W06M
User Manual
Mateko Sp. z o.o.
ul. Przyleśna 17a
PL-05-126 Michałów-Grabina
www.blaupunkt.com
Thank you for selecting our quality appliance. Please be sure to read this user manual
carefully before using. Any question, please contact the professional service for help.

7

8
IMPORTANT SAFEGUARDS
•This appliance can be used by children aged from 8 years and above and persons with
reduced physical, sensory or mental capabilities or lack of experience and knowledge if
they have been given supervision or instruction concerning use of the appliance in a
safe way and understand the hazards involved.
•Children shall not play with the appliance.
•Cleaning and user maintenance shall not be made by children without supervision.
•Disconnect the appliance from its power source during service and when replacing
parts.
•The appliance shall be installed in accordance with national wiring regulations.
•Warning: before obtaining access to terminals, all supply circuits must be disconnected.
•If the supply cord is damaged, it must be replaced by the manufacturer, its service agent
or a similarly qualified person in order to avoid a hazard.
•Disconnect the power supply before cleaning and maintenance.
•The appliance shall not be installed in the laundry.
•Please note: Check the nameplate for the type of refrigerant gas used in your appliance.
•Specific information regarding appliances with refrigerant gas.
•R410A, R134a, R290 is a refrigerant that complies with European ecological standards;
nevertheless, it is recommended not to pierce the cooling circuit of the machine. At the
end of its useful life, deliver the appliance to a special waste collection centre for
disposal.
•This hermetically sealed system contains fluoridated greenhouse gases.
•ENVIRONMENTAL INFORMATION: This unit contains fluoridated greenhouse gases
covered by the Kyoto Protocol.
•The maintenance and disposal operations must be carried out by qualified personnel
only. (For more details on the refrigerant, see back cover).
•GWP(Global Warming Potential): R410A:2088, R134a: 1430, R290: 3.
•Do not use this unit for functions other than those described in this instruction manual.
•If the power cord becomes worn or damaged, the cord should only be replaced by a
qualified service technician using genuine replacement parts.
•Make sure the plug is plugged firmly and completely into the outlet. It can result in the
risk of electric shock or fire.

9
•Do not plug other appliances into the same outlet, it can result in the risk of electric
shock.
•Do not disassemble or modify the appliance or the power cord, it can result in the risk of
electric shock or fire. All other services should be referred to a qualified technician.
•Do not place the power cord or appliance near a heater, radiator, or other heat source.
It can result in the risk of electric shock or fire.

10
•This unit is equipped with a cord that has a earthed wire connected to an earthed pin or
grounding tab. The plug must be plugged into a socket that is properly installed and
earthed. Do not under any circumstances cut or remove the earthed pin or grounding
tab from this plug.
•The unit should be used or store in such a way that it is protected from moisture e.g.
condensation, splashed water, etc. Unplug unit immediately if this occurs.
•Always transport your appliance in a vertical position and place on a stable, level surface
during use. If the unit is transported laying on its side it should be stood up and left
unplugged for 6 hours.
•Always use the switch on the control panel or remote control to turn the unit off, and do
not start or stop operation by plugging in or unplugging the power cord. It can result in
the risk of electric shock.
•Do not touch the buttons on the control panel with your wet and damp fingers.
•Do not use hazardous chemicals to clean or come into contact with the unit. To prevent
damage to the surface finish, use only a soft cloth to clean the appliance. Do not use
wax, thinner, or a strong detergent. Do not use the unit in the presence of inflammable
substance or vapour such as alcohol, insecticides, gasoline, etc.
•Young children should be supervised to ensure that they do not play with, operate or
climb on the appliance.
•If the appliance is making unusual sounds or is emitting smoke or an unusual odor,
unplug it immediately.
•Do not clean the unit with water. Water can enter the unit and damage the insulation,
creating a shock hazard. If water enters the unit, unplug it immediately and contact
Customer Service.
•Utilize two or more people to lift and install the unit.
•Be sure all accessories are removed from the packing before use.
•To avoid possible cuts, avoid contacting the metal parts of the appliance when removing
or re-installing the filter. It can result in the risk of personal injury.
•Do not block the air inlet or outlet of the appliance. Reduced air flow will result in poor
performance and could damage the unit.
•Always grasp the plug when plugging in or unplugging the appliance. Never unplug by
pulling on the cord. It can result in the risk of electrical shock and damage.
•Install the appliance on a sturdy, level floor capable of supporting up to 110lbs(50kg).
Installation on a weak or unlevel floor can result in the risk of property damage and
personal injury.

11
•Close all doors and windows to the room for most efficient operation.
•GWP: R410A: 2088, R134a: 1430, R290: 3

12
IMPORTANT - GROUNDING METHOD
This product is factory equipped with a power supply cord that has a three-pronged
grounded plug. It must be plugged into a mating grounding type receptacle in accordance
with the National Electrical Code and applicable local codes and ordinances. If the circuit
does not have a grounding type receptacle, it is the responsibility and obligation of the
customer to exchange the existing receptacle in accordance with the National Electrical
Code and applicable local codes and ordinances. The third ground prong should not,
under any circumstances, be cut or removed. Never use the cord, the plug or the appliance
when they show any sign of damage. Do not use your appliance with an extension cord
unless it has been checked and tested by a qualified electrical supplier. Improper
connection of the grounding plug can result in risk of fire, electric shock and/or injury to
persons associated with the appliance. Check with a qualified service representative if in
doubt that the appliance is properly grounded.
ELECTRICAL CONNECTIONS
Before plugging the appliance into the mains socket, check that:
•The mains power supply corresponds to the value indicated on the rating plate on the
back of the appliance.
•The power socket and electrical circuit are adequate for the appliance.
•The mains socket matches the plug. If this is not the case, have the plug replaced.
•The mains socket is adequately earthed. Failure to follow these important safety
instructions absolves the manufacturer of all liability.
•Important information for correct disposal of the product in accordance with EC
Directive 2012/19/EU.
At the end of its working life, the product must not be disposed of
as urban waste. It must be taken to a special local authority
differentiated waste collection centre or to a dealer providing this
service. Disposing of a household appliance separately avoids
possible negative consequences for the environment and health
deriving from inappropriate disposal and enables the constituent
materials to be recovered to obtain significant savings in energy
and resources. As a reminder of the need to dispose of household
appliances separately, the product is marked with a crossed-out
wheeled dustbin.

13

14
SPECIFIC INFORMATION REGARDING APPLIANCES WITH R290 REFRIGERANT GAS
•Thoroughly read all of the warnings.
•When defrosting and cleaning the appliance, do not use any tools other than those
recommended by the manufacturing company.
•The appliance must be placed in an area without any continuous sources of ignition (for
example: open flames, gas or electrical appliances in operation).
•Do not puncture and do not burn.
•Refrigerant gases can be odourless.
•The appliance must be installed, used and stored in an area that is greater than 13 m2
•R290 is a refrigerant gas that complies with the European directives on the environment.
Do not puncture any part of the refrigerant circuit.
•If the appliance is installed, operated or stored in a non-ventilated area, the room must
be designed to prevent the accumulation of refrigerant leaks resulting in a risk of fire or
explosion due to ignition of the refrigerant caused by electric heaters, stoves, or other
sources of ignition.
•The appliance must be stored in such a way as to prevent mechanical failure.
•Individuals who operate or work on the refrigerant circuit must have the appropriate
certification issued by an accredited organisation that ensures competence in handling
refrigerants according to a specific evaluation recognized by associations in the industry.
•Repairs must be performed based on the recommendations from the manufacturing
company.
•Maintenance and repairs that require the assistance of other qualified personnel must
be performed under the supervision of an individual specified in the use of flammable
refrigerants.

15
1. Control panel
2. Handle (both side)
3. Castors
4. Deflector
5. Intake grille
6. Air outlet grille
7. Intake grille
8. Power cable
9. Plug fixer
10. Middle condenser drain
11. Condenser drain
12. USB charging slot
Note: USB charging just some mode have this function.
ACCESSORIES
PARTS
PARTS NAME
QUANTITY
Hose inlet
Exhaust hose
Hose outlet
1 set
Window slider kit
1 set
Window slider
without hole
1 set
(May not supply)
Remote control
Battery
1 set
Drainage hose
1 set
(May not supply)

16
Note: All the illustrations in this manual are for explanatory purposes only. Your appliance
may be slightly different.

17
The window slider kit has been designed to fit most standard vertical and horizontal
window applications, however, it may be necessary for you to modify some aspects of the
installation procedures for certain types of windows. The window slider kit can be fastened
with screws.
Note: If the window opening is less than the minimum
length of the window slider kit, cut the end without the
INSTALLATION INSTRUCTIONS
EXHAUSTING HOT AIR
In the Cool Mode the appliance must be placed close to a
window or opening so that the warm exhaust air can be
ducked outside.
First position unit on a flat floor and make sure there's a
minimum of 17.7" (45cm) clearance around the unit, and is
within the vicinity of a single circuit outlet power source.
1. Extend either side of the hose (Fig. 1)
2. Screw the hose inlet (Fig.2).
3. Screw it to the hose inlet (Fig.3).
4. Install the hose inlet into the unit (Fig.4).
5. Affix the hose outlet into the window slider kit and seal.
(Fig.5 &6).
Extend the side of hose
Fig. 2
Fig. 3
Fig. 1
Fig.4
Slide into
Vertical
Window
Window slider
Fig.5
Horizontal
Window
Window slider
Fig.6

18
hold in it short enough to fit in the window opening. Never cut out the hole in window
slider kit.
Cut on opposite
side of hole.

19
WINDOW SLIDER KIT INSTALLATION
1: Parts name:
A) Panel (Second slider may not supplied)
B) Panel with one hole
C) Panel without hole (may not supplied)
D) Screw to lock window kit In place
2: Assembly:
Slide Panel B and C Into Panel A and size to widow width. Windows sizes vary. When sizing
the window width, be sure that the window kit assembly is free from gaps from gaps and/or
air pockets when taking measurements.
3. Lock the screw into the holes that correspond
With the width that your window requires to ensure that there are no gaps or air pockets in
the window kit assembly after installation.

20
LOCATION
INSTALLATION LOCATION
•The unit should be placed on a firm foundation to minimize noise and vibration. For safe
and secure positioning, place the unit on a smooth, level floor strong enough to support
the unit.
•The unit has casters to aid placement, but it should only be rolled on smooth, flat
surfaces. Use caution when rolling on carpeted surfaces. Use caution and Protect floors
when rolling over wood floors. Do not attempt to roll the unit over objects.
•The unit must be placed within reach of a properly rated grounded socket.
•Never place any obstacles around the air inlet or outlet of the unit.
•Allow at least 45cm of around and above space away from the wall for efficient working.
•The hose can be extended, but it Is the best to keep the length to minimum required.
Also make sure that the hose does not have any sharp bends or sags.
This manual suits for next models
1
Table of contents
Languages:
Other Vaco Air Conditioner manuals