VAL CUCINE TA-25GX1 User manual

Air Fryer Oven
Instruction Manual
TA-25GX1 / TA-25GB1
BEFORE OPERATING THIS PRODUCT, READ UNDERSTAND AND
FOLLOW THESE INSTRUCTIONS.
BE SURE TO SAVE THIS BOOKLET FOR FUTURE REFERENCE.
EN INSTRUCTION BOOK
ES MANUAL DE INSTRUCCIONES

The brand new VAL CUCINE Air Fryer is a “multi-purpose” product to satisfy the needs of modern living. It is an
“air fryer” with roasting and slow cooking capabilities with an additional convection feature for faster and ecient
food preparation. It is an elegant stainless- steel countertop model with 1750W electrical power that covers a
wide-range of daily food preparation requirements. This model comes with a variety of accessory attachments
with a recipe booklet covering a wide range of delicious international cuisines that is easy to prepare at home.
VAL CUCINE Air Fryer “multi-functional” convection oven has 10 convenient presets including: Air Fry, Toast,
Bake, Broil, Roast, Pizza, Reheat, Warm, Slow Cook & Dehydrate functions. Many of the presets has already
built-in time and temperature, so all you have to do is push a button and turn a dial. However, for those who like
to cook foods with their particular quality and nish, you can also adjust these presets to your personal liking, a
exibility not often seen in appliances like the VAL CUCINE. A wonderful family meal has never been so easily
prepared.
Staying healthy is a requirement of modern living. The ability to fry foods without oil needless to say is the idea
of a healthy lifestyle. The VAL CUCINE Air Fryer oers a 360 degrees super-hot air circulation to fry foods
without oil, to give foods desired crispy outside with a soft and tender interior nish. There is an 85% reduction
of caloric intake from oil and its by-products.
To operate the new VAL CUCINE Air Fryer is a simple aair. This air fryer/convention oven has only 2 knobs
and 4 buttons to operate with all the information clearly presented in LCD display. You can easily adjust the
function, temperature and timing to suit your cooking needs. All the accessory attachments for this appliance are
dishwasher safe and are easily cleaned.
So, stay with the trend of an essential lifestyle, of happiness and health! The VAL CUCINE Air Fryer will provide
you with good and a leisurely life of cooking in the kitchen!
MARKETING STATEMENT
EN INSTRUCTION BOOK

4 5
IMPORTANT PRODUCT SAFEGUARDS
When using electric appliances, basic safety precautions should always be followed,
including the following:
SAVE THESE INSTRUCTIONS FOR FUTURE REFERANCE
1. Read all instructions carefully before operating for the rst time;
2. Do not touch hot surfaces of the oven. Use oven mitts, handles or knobs;
3. To protect against electrical shock do not immerse cord, plugs, or any other electrical part in water or any other
types of liquid;
4. Close supervision is necessary when an electrical is used by or near children;
5. Unplug the appliance from outlet when not in use and before cleaning. Allow appliance to cool before putting
on or taking o parts.
6. Do not operating any appliance with a damaged cord or plug or after the appliance malfunctions or has been
damaged in any manner. Return appliance to the nearest authorized service facility for examination, repair or
adjustment;
7. The use of accessory attachments not recommended by the appliance manufacturer may cause injuries;
8. Do not use this appliance outdoors;
9. Do not let electrical cord hang over the edge of table or counter, or touch hot surfaces;
10. Do not place appliance on or near hot gas or electric burner, or in a heated oven;
11. Extreme caution must be used when moving an appliance hot oil or any other hot liquids;
12. Always attach plug to appliance rst, then plug cord into wall outlet. To disconnect, turn any control to “o”
position, then remove plug from wall outlet;
13. Do not use appliance for other than intended use;
14. Use extreme caution when removing tray or disposing of hot grease;
15. Do not clean appliance using metallic scouring pads. Pieces may break o the pad and touch electrical parts
inside of appliance, creating risk of electrical shock;
16. Oversize foods or metal utensils must not be inserted in a “deep-fryer / toaster-oven” as they may create re
or risk of electric shock;
17. A re may occur if a “deep-fryer / toaster-oven” is covered or touching ammable material, including curtains,
draperies, walls and the like when the appliance is in operation. Do not store any item on top of the
appliance at any time, especially when the appliance is in operation;
18. Extreme caution should be exercised when using containers constructed other than metal or glass;
19. Do not store any materials, other than manufacturer’s recommended accessories in this oven when not in
use;
20. Do not place any of the following materials in the oven: paper, cardboard, plastic and the likes;
21. Do not cover crumbs tray or any other part of the oven with metal foil. This will cause overheating of the
oven;
22. Caution: To ensure continued protection against risk of electric shock, connect appliance to properly
grounded outlet only;
23. Remove plug from outlet when the appliance is not in use, before putting on or taking o any parts, and
before cleaning. Allow appliance to cool before handling;
24. Avoid contacting moving parts;
25. This appliance is designed for household use only;
26. During the process of cooking, press “START/STOP” button to stop the oven in operation.
SHORT CORD INSTRUCTION
(DETACHABLE POWER-SUPPLY CORD)
BEFORE USE FIRST TIME
1. A short power supply cord (or detachable power-supply cord) should be used to reduce the risk resulting from
becoming entangled in or tripping over a longer cord.
2. Longer detachable power-supply cords or extensions cords are available and maybe used if care is exercised
in their use.
3. If a longer detachable power supply cord is used:
1. Remove all the accessories and packing materials before operating the oven.
2. Wash the rack and pan in warm soapy water. Wipe inside of the oven with damp cloth or sponge. Blot dry
with paper towels to be sure the appliance is completely fry before using.
3. Place the appliance on a at counter or other at and stable surface. DO NOT OPERATE THIS APPLIANCE
ON THE SAME CIRCUIT WITH ANOTHER APPLIANCE.
4. Make sure the crumbs tray is properly installed before using the appliance.
5. Before using the appliance, always place the crumbs tray underneath the bottom heating elements.
For the rst time use only, set the “TEPERATURE KNOB” to MAX; and set the function setting to “Roast” and set
the “TIMER” to 15 minutes. NOW PUSH THE START/STOP button and let the unit run for the full 15 minutes.
This will burn o any of the oil remaining in the oven.
NOTE: The oven may smoke during this process. This is normal for a new appliance, the smoke will not last
longer than the 15 minutes the appliance is running for the rst time.
a. The marked electrical rating of the cord or extension cord should be at least as great as the electrical rating
of the appliance.
b. The cord should be arranged so that it will not drape over the countertop or tabletop where it could be pulled
by children or tripped over accidentally.
c. If the appliance is of the grounded type, the extension cord should be a grounded 3-wire cord type.

6 7
NAME OF PARTS
CONTROL PANEL
A1: Fries
A2: Wings
A3: Nuggets
A4: Seafood
A5: Snacks
A6: Vegetables
AIR FRY-MENUS:
1. Control Panel
Super large LCD let the operation status clear to see, dial and buttons make the unit easy to use.
2. Door Handle
Handle designed to avoid hand scald.
3. Interior Light
Interior Light to clearly view the food during cooking.
4. Viewing Window
Viewing Window makes sure you can check the cooking process whenever you want.
5. Oven Rack
Can change position to adjust dierent kind of food.
A. Position 1 is the bottom position and this is recommended when cooking larger foods (e.g., whole chicken).
B. Most items can be baked on the second oor, either directly on the grill or with the Airfry Basket.
C. The third layer can bake a few sh food, need to match the gear and temperature.
6. Rack Positions
7. Easy-Clean Interior
The galvanized interior is easy to clean after cooking.
8. Crumb Tray
Don’t worry about cleaning the crumb in your oven, you could open the door and pull out the crumb tray easily
to clear it.
9. AirFryer Basket
The basket for AirFry, Broil or Dehydrate functions.
10. Baking/Drip Pan
The pan for Baking or Roasting, also use it with the AirFryer Basket when AirFrying, Broiling or Dehydrating.

8 9
HOW TO USE
1. Place the rack and grill tray in position that will accommodate the height of the food to be cooked.
2. The food must be placed in the grill tray to prevent the re danger caused by food and grease drippings unto
the heating pipes below.
3. Make sure you always use an oven-proof container in the oven, never use plastic, cardboard or paper
containers in the oven for cooking purposes.
4. Clean the heating pipes periodically when the appliance has been turned o and the heating pipes are cool.
5. Never use glass or ceramic pans or lids in the oven; and while cooking.
6. DO NOT let juice run to the bottom of the oven; always use the crumbs tray when cooking.
7. Set the oven temperature as suggested by the recipe or as desired.
8. Securely shut the door and set the cooking time to begin operating the oven.
9. When placing the wire rack, place the convex side upward.
10. DO NOT unplug the power cord when the oven has not completed the cooking process. Make sure the
cooking is nished before you unplug the appliance from the power outlet.
1. When the appliance has been plugged in to the outlet and receiving power, the buzzer will ring once. And
after one second all the indicators should be on display and the “A1” signal for the “AIR FRY” function will
begin to ash.
2. After the appliance has power with all displays showing, if the appliance has not received information and
cooking instructions, the displays will automatically turn o after 10 minutes. To have the displays come back
up, all you need is to push any button on the main panel.
3. To set cooking functions, just rotate the “FUNCTION KNOB” on the main panel to the function desired,
including “AIR FRY”, “TOAST”, “BAKE”, “BROIL”, “ROAST”, “PIZZA”, “REHEAT”, “WARM”, “SLOW-COOK”
and “DEHYDRATE”. Now rotate the “SELECT” KNOB to choose time, temperature, the slice, color and all the
other defaults for AIR FRY.
4. Convection “@” can be used with BKKE, BROIL, ROAST, PIZZA or REHEAT functions. Press “@” to turn on
the fan. This method of cooking allows heat to penetrate evenly on the food.
5. During the process of cooking, press the “START/STOP” button to stop the cooking process.
1. Rotate the “FUNCTION” knob to select “AIR FRY”. The screen will display “A1”.
2. Rotate the “SELECT” knob to select “A1—A6”. Press the “TIME/TEMP” button once, then the screen will
display the default time and default temperature (when you select and use “A1”, place the potato fries in the
cooking wire basket, and use the default time and temperature.
3. If you choose the settings “A2 – A6”, press the “START/STOP” button to start preheating the oven. At this
time, the “PREHEAT” icon will start ashing. When the oven pre-heat process has been completed, a buzzer
will ring and the “COMPLETE” icon will begin to ash. However, if you choose “A1” as default function, you
can skip “step 3”.
4. After “preheat” step has been completed, place the food in the oven and press the “START/STOP” button to
begin cooking. The cooking timer will now begin to count down.
5. If you would like to change the cooking temperature at this time, press the TIME/TEMPERTURE” button once
CAUTION: THE OVEN SURFACES ARE HOT DURING AND AFTER USE
GENERAL INSTRUCTIONS
AIR FRY FUNCTION
1. Rotate the “FUNCTION” knob to select “TOAST”. The screen will display “4 SLICES”.
2. Rotate the “SELEC” knob to select 1-6 slices.
3. Press “TIME/TEMP” button once and then rotate the “SELECT” knob. Now select the degree of the toasting
color of the toast.
4. Now press the “START/STOP” button to start toasting, and the cooking time will begin to count down.
5. The oven will shut down automatically once toasting has been completed.
6. Always remove the food from the oven with oven mitts to prevent injuries from heat. The food cooked in the
oven could be very “hot”.
Please make sure you use the proper rack to place food for cooking in the appliance.
We recommend the following:
We recommend you use the #11 Wire Rack to place the bread on for purpose of toasting.
DISPLAY
A4
A2
A6
A1
A5
A3
AIR FRY MENU RECOMMEND
Seafood Airfry Basket on Baking Pan
Wings Airfry Basket on Baking Pan
Vegetables Airfry Basket on Baking Pan
Fries Airfry Basket on Oven Rack
Snacks Baking Pan
Nuggets Airfry Basket on Baking Pan
TOAST FUNCTION
NOTE:
NOTE:
and rotate the “SELECT” knob to the desired cooking temperature. If you would like to change the cooking
time, press the “TIME/TEMP” button twice and then rotate the “SELECT” button to the desired cooking time.
6. Check temperature of the food cooked with a temperature thermometer of you have one to ensure proper
internal food temperature has been reached.
7. Always remove the food from the oven with oven mitts to prevent injuries from heat. The food cooked in the
oven could be very “hot”.
1. Rotate the “FUNCTION” knob to select “BAKE”.
2. Rotate the “SELECT” knob to select the temperature you want to bake the food. The baking temperature
selected will begin to ash on the screen.
3. Press “TIME/TEMP” button once and then rotate the “SELECT” knob. Select the length of time you would like
to bake the food.
4. Press the “START/STOP” button to start baking, and the cooking time will begin to countdown.
5. Check internal food temperature with a food thermometer if desired to determine if ideal food temperature has
been reached.
6. When removing food from the oven, make sure oven mitts are always used. The food in the oven maybe very
hot, and cause injuries.
BAKE FUNCTION

10 11
1. Rotate the “FUNCTION” knob to select “REHEAT”.
2. Rotate the “SELECT” knob to select the temperature you want to reheat the food. The reheat temperature
selected will begin to ash on the screen.
3. Press “TIME/TEMP” button once and then rotate the “SELECT” knob. Select the length of time you would like
to reheat the food.
4. Press the “START/STOP” button to start reheating, and the cooking time will begin to countdown.
1. Rotate the “FUNCTION” knob to select “BROIL”.
2. Rotate the “SELECT” knob to select the temperature you want to broil the food. The broiling temperature
selected will begin to ash on the screen.
3. Press “TIME/TEMP” button once and then rotate the “SELECT” knob. Select the length of time you would like
to broil the food.
4. Press the “START/STOP” button to start broiling, and the cooking time will begin to countdown.
5. Check internal food temperature with a food thermometer if desired to determine if ideal food temperature has
been reached.
6. When removing food from the oven, make sure oven mitts are always used. The food in the oven maybe very
hot, and cause injuries.
1. Rotate the “FUNCTION” knob to select “ROAST”.
2. Rotate the “SELECT” knob to select the temperature you want to roast the food. The roasting temperature
selected will begin to ash on the screen.
3. Press “TIME/TEMP” button once and then rotate the “SELECT” knob. Select the length of time you would like
to broil the food.
4. Press the “START/STOP” button to start roasting, and the cooking time will begin to countdown.
5. Check internal food temperature with a food thermometer if desired to determine if ideal food temperature has
been reached.
6. When removing food from the oven, make sure oven mitts are always used. The food in the oven maybe very
hot, and cause injuries.
1. Rotate the “FUNCTION” knob to select “PIZZA”. The screen will display “9 inch”.
2. Rotate the “SELECT” knob to select 6-inch, 9-inch or 12-inch pizzas.
3. Press “START/STOP” button to start preheating and the “PREHEAT” icon ashes. When the preheating has
been completed, the buzzer will ring and the “COMPLETE” icon will begin to ash.
4. Place the pizza in the oven to begin and press the “START/STOP” button to start baking pizza, and the
cooking time will begin to countdown.
5. Press “TIME/TEMP” once and then rotate the “SELECT” knob to change the time and temperature of baking
pizza if desired or necessary.
6. Check internal food temperature with a food thermometer if desired to determine if ideal food temperature has
been reached.
7. When removing food from the oven, make sure oven mitts are always used. The food in the oven maybe very
hot, and cause injuries.
REHEAT FUNCTION
BROIL FUNCTION
ROAST FUNCTION
PIZZA FUNCTION
1. Rotate the “FUNCTION” knob to select “WARM”.
2. Rotate the “SELECT” knob to select the temperature between 100F—300F at which you want to keep the food
warm. The warming temperature selected will begin to ash on the screen.
3. Press “TIME/TEMP” button once and then rotate the “SELECT” knob. Select the length of time (1 minute to 4
hours) you would like to keep the food warm.
4. Press the “START/STOP” button to start warming, and the cooking time will begin to countdown.
5. Check internal food temperature with a food thermometer if desired to determine if ideal food temperature has
been reached.
6. When removing food from the oven, make sure oven mitts are always used. The food in the oven maybe very
hot, and cause injuries.
1. Rotate the “FUNCTION” knob to select “SLOW COOK”.
2. Rotate the “SELECT” knob to select the temperature you want to slow cook the food. The slow cook
temperature selected will begin to ash on the screen.
3. Press “TIME/TEMP” button once and then rotate the “SELECT” knob. Select the length of time you would like
to slow cook the food.
4. Press the “START/STOP” button to start slow cooking, and the cooking time will begin to countdown.
5. Check internal food temperature with a food thermometer if desired to determine if ideal food temperature has
been reached.
6. When removing food from the oven, make sure oven mitts are always used. The food in the oven maybe very
hot, and cause injuries.
WARM FUNCTION
SLOW COOK FUNCTION
5. Check internal food temperature with a food thermometer if desired to determine if ideal food temperature has
been reached.
6. When removing food from the oven, make sure oven mitts are always used. The food in the oven maybe very
hot, and cause injuries.
1. Rotate the “FUNCTION” knob to select “DEHYDRATE”.
2. Rotate the “SELECT” knob to select the temperature you want to dehydrate the food. The dehydrating
temperature selected will begin to ash on the screen.
3. Press “TIME/TEMP” button once and then rotate the “SELECT” knob. Select the length of time you would like
to dehydrate the food.
4. Press the “START/STOP” button to start dehydrating, and the cooking time will begin to countdown.
5. Check internal food temperature with a food thermometer if desired to determine if ideal food temperature has
been reached.
6. When removing food from the oven, make sure oven mitts are always used. The food in the oven maybe very
hot, and cause injuries.
DEHYDRATE FUNCTION

12 13
CERTIFICATION
CARE AND CLEANINGOVEN RACK AND PAN POSITION DIAGRAMS
AIRFRYER CHART
1. Before cleaning, unplug the oven and allow the appliance to cool completely.
2. Wash all the attachments with warm and mild kitchen detergent water, including the “rack” and the “grill tray”.
3. Do not use abrasive cleansers, hard scrubbing brushes and chemical cleaners, as these items will cause
damage to the non-stick coating of the “grill tray”.
4. Use a wet cloth to wipe the inside of the oven.
5. To clean the door of the appliance with a wet cloth saturated with a mild kitchen detergent.
6. Never immerse the appliance in water or any other types of liquid.
7. Any other type(s) of service the appliance shall be performed by an authorized service representative(s).
Please refer to the chart below for suggested Oven Rack, Grill Tray, and AirFryer Basket positions.
Warning: HOT SURFACES!
Manufacture Info:
Website: www.valcucineusa.com
Service:
Call Us: +1 (949) 6682018
AirFryer Basket
SUGGESTED RACK / Tray / BASKET POSITIONS
Grill Tray Oven Rack
Shrimp
Chicken wings
Food
Function
AirFry
Toast
Bake
Broil
Roast
Pizza
Reheat
Warm
Slowcook
Dehydrate
Position 1 Position 2 Position 3
Potatoes Angle
The squid ring
The cod
Onion rings
460g
500g
Recommended Amount
350g
350g
350g
300g
400 ℉
400 ℉
Temperature
400 ℉
400 ℉
400 ℉
400 ℉
5~8 min
10~13 min
Time
11~14 min
11~14 min
13~16 min
11~14 min
Chilled pollock
Chicken nuggets
Frozen French fries
Burritos
Cod steak
Potato cheese sticks
Mixed greens
500g
560g
350g
1 piece
360g
300g
500g
400 ℉
400 ℉
400 ℉
400 ℉
400 ℉
400 ℉
360 ℉
10~13 min
17~20 min
17~20 min
3~4 min
14~17 min
10~13 min
5~8 min

La nueva Freidora de Aire VAL CUCINE es un producto "multiuso" para satisfacer las necesidades de la vida
moderna. Es una "freidora de aire" con capacidades de asado y cocción lenta con una función adicional de
transmisión de calor por convección para preparar los alimentos de una forma más rápida y eciente. Se trata
de un elegante modelo de acero inoxidable para la encimera de su cocina con una potencia eléctrica de 1750
W que cubre una amplia gama de necesidades de preparación diaria de alimentos. Este modelo viene con una
variedad de accesorios y además un libro de recetas que contiene una amplia gama de deliciosas comidas
internacionales fáciles de preparar en casa.
La Freidora de Aire VAL CUCINE es un horno de convección "multifuncional" que dispone de 10 pre-
conguraciones que incluyen las siguientes funciones: Air Fry (freidora de aire), Toast (tostar), Bake (hornear),
Broil (brasas), Roast (asar), Pizza, Reheat (recalentar), Warm (calentar), Slow Cook (cocción lenta) & Dehydrate
(deshidratar). La mayoría de las pre-conguraciones ya tienen incorporados el tiempo y la temperatura, por lo
que todo lo que tiene que hacer es pulsar un botón y girar un dial. Sin embargo, para aquellos que les gusta
cocinar los alimentos con su calidad y acabado particular, también pueden ajustar estas pre-conguraciones a
su gusto personal, una exibilidad que no se ve a menudo en aparatos como el VAL CUCINE. Una maravillosa
comida familiar nunca ha sido tan fácil de preparar.
Mantenerse sano es un requisito de la vida moderna. La posibilidad de freír alimentos sin aceite es, por
supuesto, la idea de un estilo de vida saludable. La Freidora de Aire VAL CUCINE ofrece una circulación de aire
súper caliente de 360 grados para freír los alimentos sin aceite, y darle a sus comidas un delicioso y crujiente
exterior con un acabado interior suave y tierno. Se reduce en un 85% el consumo de calorías procedentes del
aceite y sus derivados.
El funcionamiento de la nueva Freidora de Aire VAL CUCINE es muy sencillo. Esta freidora de aire/horno
de convección tiene sólo 2 controles giratorios y 4 botones para operar con toda la información claramente
presentada en la pantalla LCD. Puede ajustar fácilmente la función, la temperatura y el tiempo para adaptarse
a sus necesidades culinarias. Todos los accesorios de este electrodoméstico son aptos para el lavavajillas y se
limpian fácilmente.
¡Siga la tendencia de un estilo de vida esencial, de felicidad y salud! ¡La Freidora de Aire VAL CUCINE le
proporcionará una vida saludable y relajada al cocinar!
Enunciado de Marketing
ES MANUAL DE INSTRUCCIONES

16 17
CONSERVE ESTAS INSTRUCCIONES PARA FUTURAS CONSULTAS
INSTRUCCIONES DE CABLE CORTO DE ALIMENTACIÓN
(CABLE DE ALIMENTACIÓN DESMONTABLE)
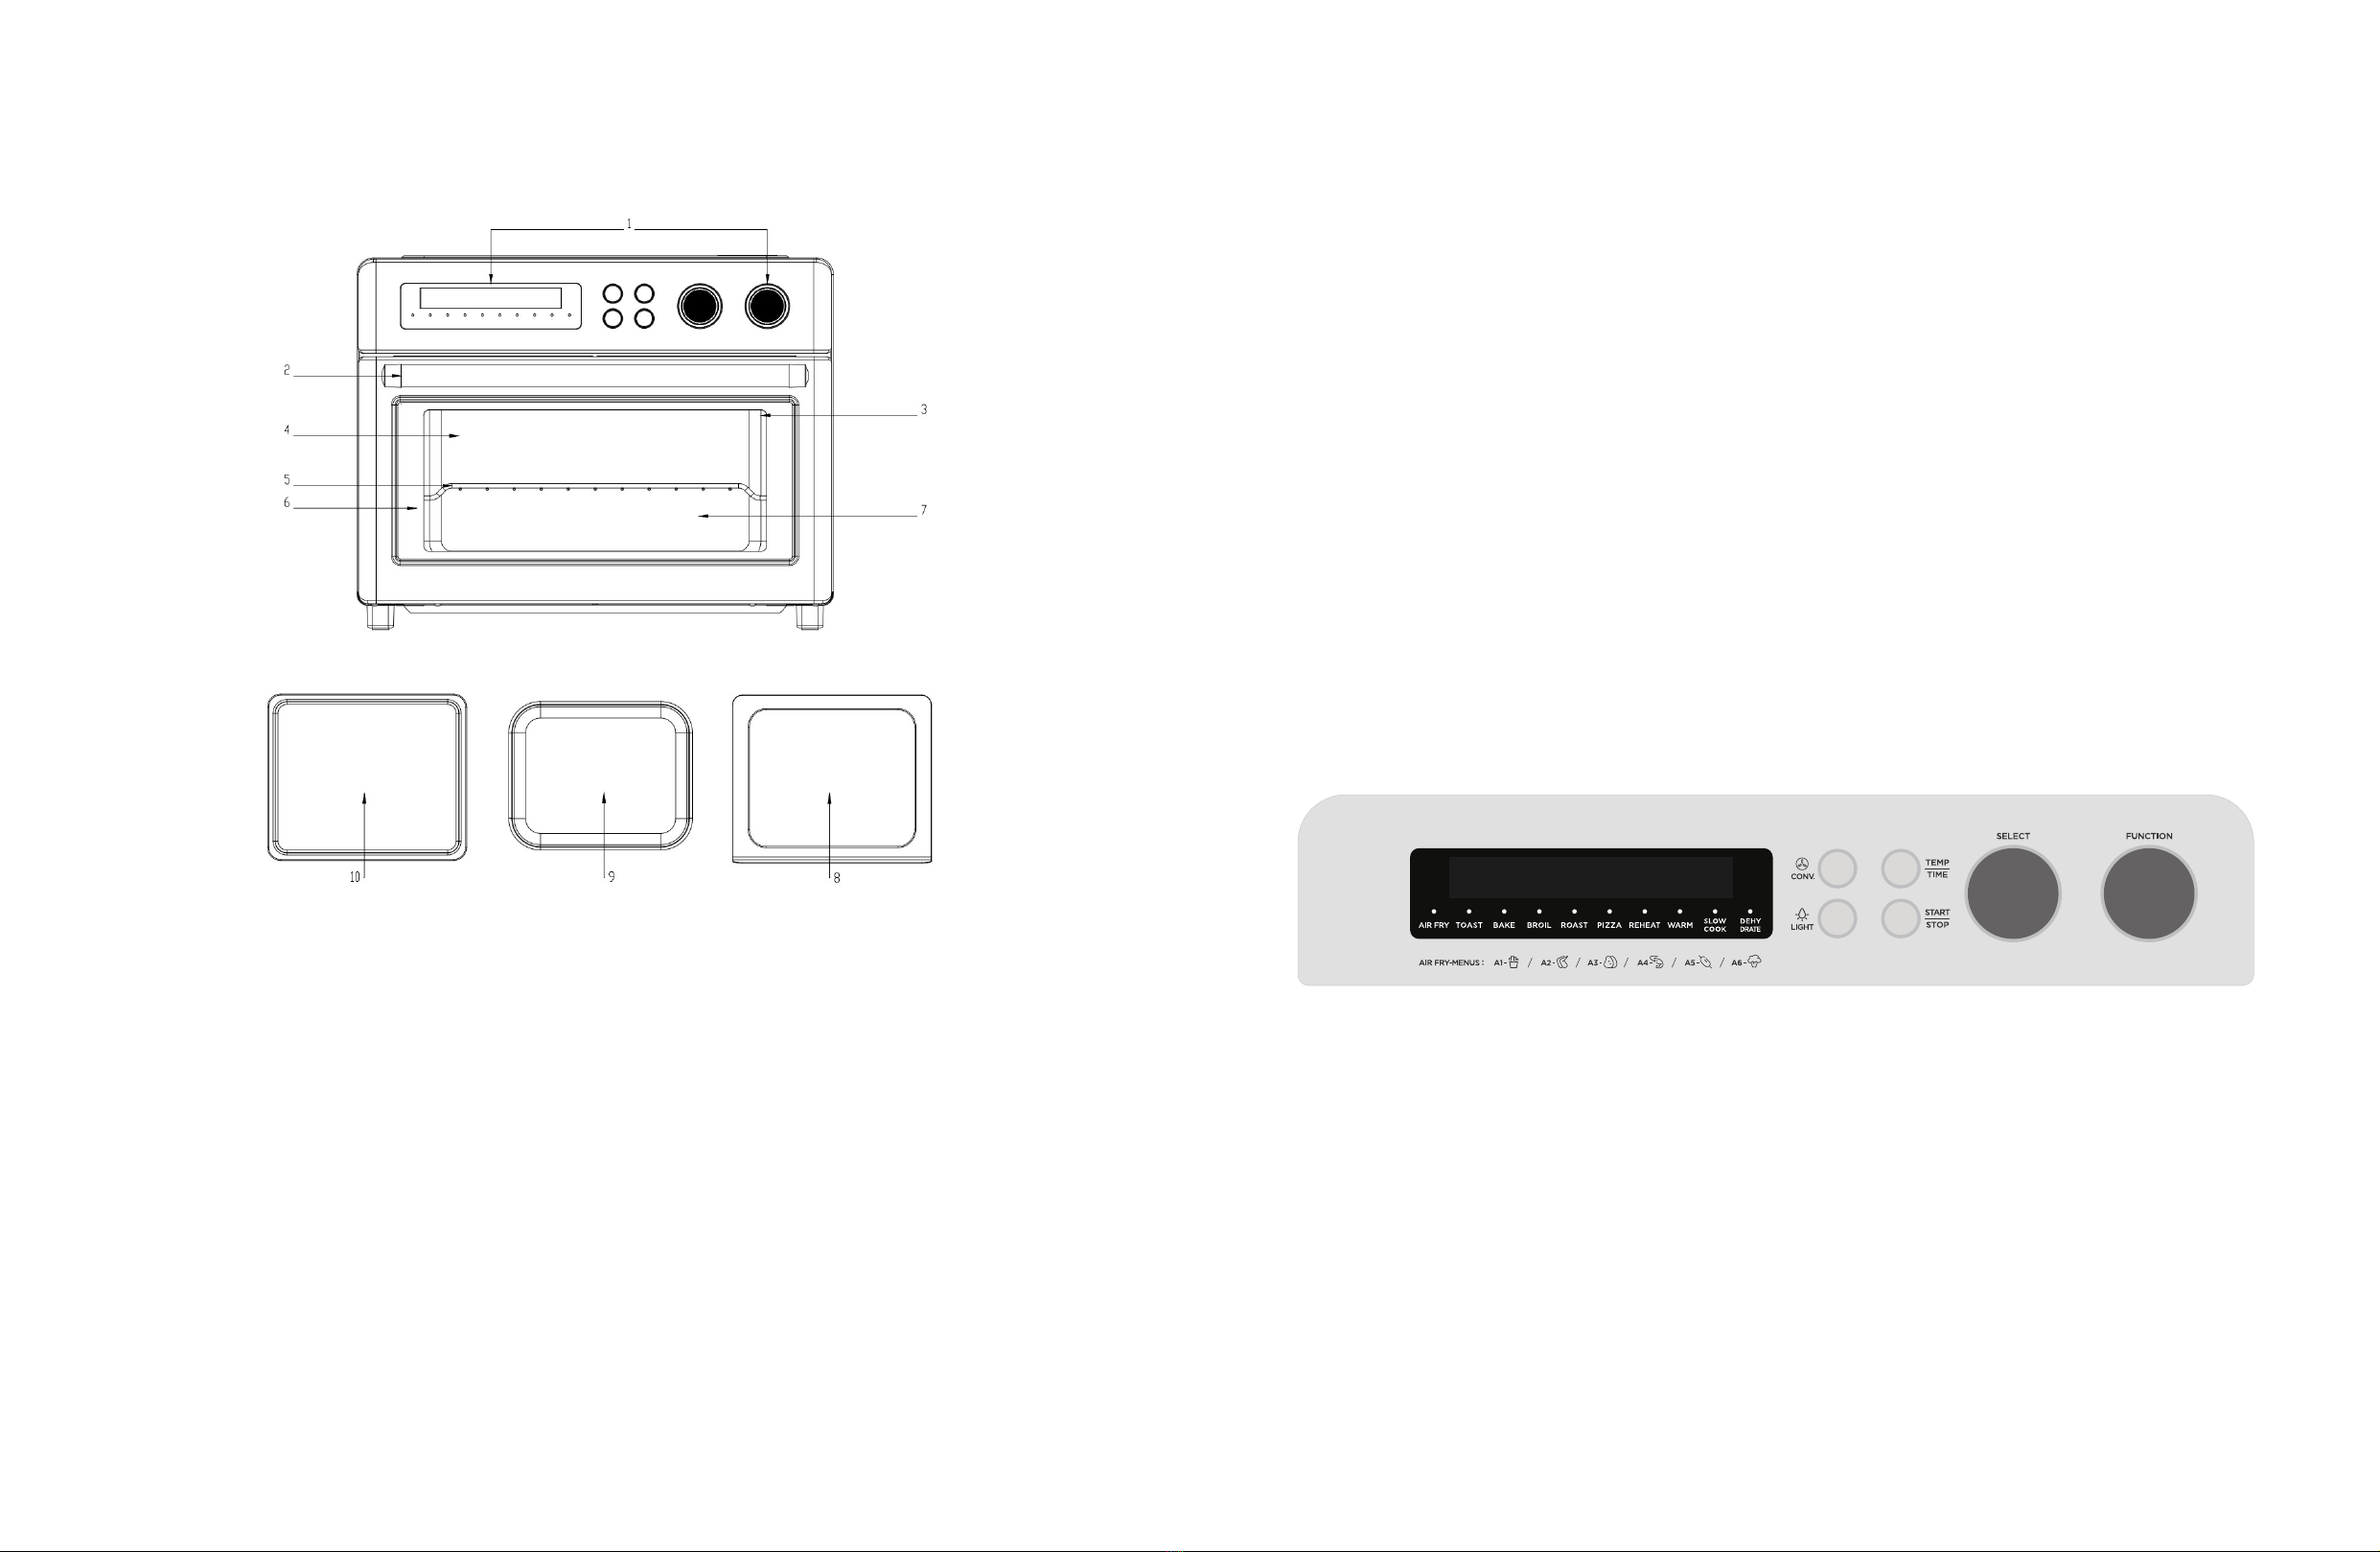
ANTES DE USAR POR PRIMERA VEZ
1. Se debe utilizar un cable de alimentación corto (o un cable de alimentación desmontable) para reducir el
riesgo de enredarse o tropezarse con un cable más largo.
2. Se encuentran disponibles cables de suministro de energía extraíbles o cables de extensión más largos y se
pueden usar si se tiene cuidado en su uso.
3. Si se utiliza un cable de alimentación extraíble más largo:
1. Retire todos los accesorios y materiales de empaque antes de operar el horno.
2. Lave la rejilla y la sartén con agua tibia y jabón. Limpie el interior del horno con un paño húmedo o una
esponja. Seque con toallas de papel para asegurarse de que el aparato esté completamente frito antes de
usarlo.
3. Coloque el aparato sobre una encimera plana u otra supercie plana y estable. NO OPERE ESTE APARATO
EN EL MISMO CIRCUITO CON OTRO APARATO.
4. Asegúrese de que la bandeja para migas esté correctamente instalada antes de usar el aparato.
5. Antes de utilizar el aparato, coloque siempre la bandeja recogemigas debajo de los elementos calefactores
inferiores.
Solo para el primer uso, ajuste la “PERILLA DE TEMPERATURA” en MAX. y establezca el ajuste de la función
en “ROAST” y ajuste el “TIMER” en 15 minutos. AHORA PRESIONE EL botón START / STOP y deje que la
unidad funcione durante los 15 minutos completos.
Esto quemará el aceite que quede en el horno.
NOTA: El horno puede humear durante este proceso. Esto es normal para un aparato nuevo, el humo no durará
más de los 15 minutos que el aparato está funcionando por primera vez.
a. La clasicación eléctrica marcada del cable o el cable de extensión debe ser al menos tan buena como la
clasicación eléctrica del aparato.
b. El cable debe colocarse de manera que no cuelgue sobre la encimera o la mesa de donde no pueda ser
jalado por niños o causar tropeziezos accidentalmente.
c. Si el aparato es del tipo con conexión a tierra, el cable de extensión debe ser del tipo de cable de 3 hilos
con conexión a tierra.
IMPORTANTE DETALLES A SALVAGUARDAR
Al usar aparatos eléctricos, siempre se deben seguir las precauciones básicas de
seguridad, incluidas las siguientes:
1. Lea todas las instrucciones detenidamente antes de operar por primera vez.
2. No toque las supercies calientes del horno. Utilice guantes, asas o perillas para horno.
3. Para protegerse contra descargas eléctricas, evite sumerjir el cable, los enchufes o cualquier otra parte
eléctrica en agua o cualquier otro tipo de líquido.
4. Es necesario la supervisión de alguien mayor a la hora de que un niño lo use o este cerca de ella.
5. Desenchufe el aparato del tomacorriente cuando no esté en uso, y antes de limpiarlo. Deje que el aparato se
enfríe antes de poner o quitar piezas.
6. No opere ningún electrodoméstico con un cable o enchufe dañado o después de que el electrodoméstico
haya fallado o haya sido dañado de alguna manera. Devuelva el aparato al centro de servicio autorizado más
cercano para que lo examinen, reparen o ajusten.
7. El uso de accesorios no recomendados por el fabricante del aparato puede causar lesiones.
8. No utilice este aparato al aire libre.
9. No permita que el cable eléctrico cuelgue del borde de la mesa o mostrador, ni toque supercies calientes.
10. No coloque el aparato sobre o cerca de un quemador de gas o eléctrico caliente, o en un horno caliente.
11. Se debe extremar la precaución al mover un artefacto con aceite caliente o cualquier otro líquido caliente.
12. Siempre conecte primero el enchufe al electrodoméstico, luego enchufe el cable en el tomacorriente de la
pared. Para desconectar, gire cualquier control a la posición de "OFF", luego retire el enchufe del toma
corriente de pared.
13. No utilice el aparato para otro uso que no sea el indicado.
14. Tenga mucho cuidado al retirar la bandeja o al desechar la grasa caliente.
15. No limpie el aparato con estropajos metálicos. Los pedazos pueden desprenderse de la almohadilla y tocar
las partes eléctricas dentro del aparato, creando riesgo de descarga eléctrica.
16. No se deben introducir alimentos o utensilios de metal de gran tamaño en una “freidora / horno tostador”, ya
que pueden provocar un incendio o un riesgo de descarga eléctrica.
17. Puede ocurrir un incendio si una "freidora / horno tostador" se cubre o toca material inamable, incluidas
cortinas, cortinas, paredes y similares cuando el aparato está en funcionamiento. No guarde ningún artículo
encima del aparato en ningún momento, especialmente cuando el aparato está en funcionamiento.
18. Se debe extremar la precaución cuando se utilicen recipientes que no sean de metal o vidrio.
19. No almacene ningún material, excepto los accesorios recomendados por el fabricante en este horno cuando
no esté en uso.
20. No coloque ninguno de los siguientes materiales en el horno: papel, cartón, plástico y similares.
21. No cubra la bandeja para migas ni ninguna otra parte del horno con papel de aluminio. Esto provocará un
sobrecalentamiento del horno.
22. Precaución: Para garantizar una protección continua contra el riesgo de descarga eléctrica, conecte el
aparato únicamente a un tomacorriente debidamente conectado a tierra.
23. Retire el enchufe del tomacorriente cuando el aparato no esté en uso, antes de poner o quitar cualquier
pieza y antes de limpiarlo. Deje que el aparato se enfríe antes de manipularlo.
24. Evite el contacto con las piezas móviles.
25. Este aparato está diseñado para uso doméstico únicamente.
26. Durante el proceso de cocción, presione el botón "START / STOP" para detener el funcionamiento del horno.

18 19
6. Posiciones de la rejilla
7. Interior de fácil limpieza
El interior galvanizado es fácil de limpiar después de cocinar.
8. Bandeja para migas
No se preocupe por limpiar las migas en su horno, podría abrir la puerta y sacar la bandeja para migas
fácilmente para borrarlo.
9. Cesta de la freidora de aire (AirFryer)
La cesta para las funciones AirFry, Broil o Deshidratar.
10. Bandeja para hornear / goteo
La bandeja para hornear o asar, también úsela con la canasta AirFryer para freír, asar o deshidratar.
PANEL DE CONTROL
A1: Papas fritas (Fries)
A2: Alitas (Wings)
A3: Nuggets (Nuggets)
A4: Mariscos (Seafood)
A5: Bocadillos (Snacks)
A6: Verduras (Vegetables)
MENÚS PARA FREIDORA DE AIRE
A. La posición 1 es la posición inferior y se recomienda para cocinar alimentos más grandes (por ejemplo,
pollo entero).
B. La mayoría de los alimentos se pueden hornear en el segundo piso, ya sea directamente en la parrilla o
con la canasta Airfry.
C. La tercera capa puede hornear algunos alimentos de pescado, es necesario que coincida con el equipo y
la temperatura.
NOMBRE DE LAS PARTES
1. Panel de control
La pantalla LCD supergrande permite ver claramente el estado de funcionamiento, el dial y los botones
facilitan el uso de la unidad.
2. Manija de la puerta
Mango diseñado para evitar quemaduras en las manos.
3. Luz interior
Luz interior para ver claramente los alimentos durante la cocción.
4. Ventana de visualización
La ventana de visualización se asegura de que pueda comprobar el proceso de cocción cuando lo desee.
5. Rejilla del horno
Puede cambiar de posición para ajustar diferentes tipos de alimentos.

20 21
1. Cuando el aparato se haya enchufado a la toma de corriente y esté recibiendo energía, el timbre sonará una
vez. Y después de un segundo todos los indicadores deberían estar en la pantalla y la señal "A1" para la
función "AIR FRY" comenzará a parpadear.
2. Una vez que el electrodoméstico se enciende y se muestran todas las pantallas, si el electrodoméstico no
ha recibido información e instrucciones de cocción, las pantallas se apagarán automáticamente después de
10 minutos. Para que las pantallas vuelvan a aparecer, todo lo que necesita es presionar cualquier botón en
el panel principal.
3. Para congurar las funciones de cocción, simplemente gire la “PERILLA DE FUNCIÓN” en el panel principal
a la función deseada, incluyendo “AIR FRY”, “TOAST”, “BAKE”, “BROIL”, “ROAST”, “PIZZA”, “ REHEAT”,“
WARM”,“ SLOW-COOK ”y“ DEHYDRATE”. Ahora gire la PERILLA "SELECT" para elegir el tiempo, la
temperatura, la rebanada, el color y todos los demás valores predeterminados para AIR FRY.
4. La convección “@” se puede utilizar con las funciones BKKE, BROIL, ROAST, PIZZA o REHEAT. Presione
“@” para encender el ventilador. Este método de cocción permite que el calor penetre uniformemente en los
alimentos.
5. Durante el proceso de cocción, presione el botón “START/STOP” para detener el proceso de cocción.
1. Gire la perilla "FUNCTION" para seleccionar "TOAST". La pantalla muestrada "4 SLICES".
2. Gire la perilla “SELECT” para seleccionar de 1 a 6 cortes.
3. Presione el botón “TIME / TEMP” una vez y luego gire la perilla “SELECT”. Ahora seleccione el grado de
tostado color de la tostada.
4. Ahora presione el botón “START / STOP” para comenzar a tostar, y el tiempo de cocción comenzará a contar
hacia atrás.
5. El horno se apagará automáticamente una vez que se haya completado el tostado.
6. Retire siempre los alimentos del horno con guantes de cocina para evitar lesiones por el calor. Los alimentos
cocinados en el horno pueden estar muy "calientes".
Asegúrese de utilizar la rejilla adecuada para colocar los alimentos para cocinar en el aparato. Recomendamos
lo siguiente:
Le recomendamos que utilice la rejilla de alambre # 11 para colocar el pan con el n de tostarlo.
DISPLAY
A4
A2
A6
A1
A5
A3
MENU DE FREIDORA DE AIRE SUGERENCIA
Mariscos (Seafood)Cesta de cocción sobre Bandeja para parrilla
Alitas (Wings)Cesta de cocción sobre Bandeja para parrilla
Vegetales (Vegetables)Cesta de cocción sobre Bandeja para parrilla
Papas fritas(Fries)Cesta de cocción sobre Rejilla
Bocadillos (Snacks)Bandeja de parrillla
Nuggets(Nuggets)Cesta de cocción sobre Bandeja para parrilla
FUNCIÓN TOSTADA
NOTA:
NOTA:
5. Si desea cambiar la temperatura de cocción en este momento, presione el botón “TIME/TEMP ”una vez y gire
la perilla“ SELECT”a la temperatura de cocción deseada. Si desea cambiar el tiempo de cocción, presione el
botón “TIME/TEMP” dos veces y luego gire el botón “SELECT” al tiempo de cocción deseado.
6. Revise la temperatura de los alimentos cocinados con un termómetro de temperatura del que tenga uno para
asegurarse de que se haya alcanzado la temperatura interna adecuada de los alimentos.
7. Siempre retire la comida del horno con guantes para horno para evitar lesiones por calor. Los alimentos
cocinados en el horno pueden estar muy "caliente".
1. Gire la perilla "FUNCTION" para seleccionar "BAKE".
2. Gire la perilla “SELECT” para seleccionar la temperatura a la que desea hornear la comida. La temperatura
de horneado seleccionada comenzará a parpadear en la pantalla.
3. Presione el botón “TIME / TEMP” una vez y luego gire la perilla “SELECT”. Seleccione el tiempo que le
gustaría hornear la comida.
4. Presione el botón “START / STOP” para comenzar a hornear, y el tiempo de cocción comenzará a contar
regresivamente.
5. Verique la temperatura interna de los alimentos con un termómetro para alimentos si lo desea para
determinar si la temperatura ideal de los alimentos ha alcanzado.
6. Al sacar los alimentos del horno, asegúrese de utilizar siempre guantes de cocina. La comida en el horno
puede ser muy calientes y causar lesiones.
FUNCIÓN HORNEAR
CÓMO OPERAR
1. Coloque la rejilla y la bandeja para grill en una posición que se adapte a la altura de los alimentos a cocinar.
2. Los alimentos deben colocarse en la bandeja de la parrilla para evitar el peligro de incendio causado por los
alimentos y los goteos de grasa en los tubos de calefacción que se encuentran debajo.
3. Asegúrese de usar siempre un recipiente apto para horno en el horno, nunca use recipientes de plástico,
cartón o papel en el horno para cocinar.
4. Limpie los tubos de calefacción periódicamente cuando el aparato se haya apagado y los tubos de calefacción
estén fríos.
5. Nunca use ollas o tapas de vidrio o cerámica en el horno; y mientras se cocina.
6. NO deje que el jugo corra al fondo del horno; Utilice siempre la bandeja para migas al cocinar.
7. Congure la temperatura del horno según lo sugerido por la receta o según lo desee.
8. Cierre bien la puerta y programe el tiempo de cocción para comenzar a operar el horno.
9. Al colocar la rejilla, coloque el lado convexo hacia arriba.
10. NO desenchufe el cable de alimentación cuando el horno no haya completado el proceso de cocción.
Asegúrese de que la cocción haya terminado antes de desenchufar el aparato de la toma de corriente.
1. Gire la perilla "FUNCTION" para seleccionar "AIR FRY". La pantalla mostrará "A1".
2. Gire la perilla "SELECT" para seleccionar "A1 — A6". Presione el botón “TIME/TEMP” una vez, luego la
pantalla mostrará la hora y la temperatura predeterminadas (cuando seleccione y use “A1”, coloque las papas
fritas en la canasta de alambre de cocción y use la hora y temperatura predeterminadas.
3. Si elige la conguración “A2 - A6”, presione el botón “START/STOP” para comenzar a precalentar el horno.
En este momento, el icono "PREHEAT" comenzará a parpadear. Cuando se haya completado el proceso de
precalentamiento del horno, sonará un timbre y el ícono “COMPLETE” comenzará a parpadear. Sin embargo,
si elige "A1" como función predeterminada, puede omitir el "paso 3".
4. Una vez completado el paso de "precalentamiento", coloque la comida en el horno y presione el botón
"START / STOP" para comenzar a cocinar. El temporizador de cocción comenzará ahora a contar hacia atrás.
PRECAUCIÓN: LAS SUPERFICIES DEL HORNO ESTÁN CALIENTES
DURANTE Y DESPUÉS DEL USO
INSTRUCCIONES GENERALES
FUNCIÓN DE FREIDORA DE AIRE

22 23
1. Gire la perilla "FUNCTION" para seleccionar "WARM".
2. Gire la perilla "SELECT" para seleccionar la temperatura entre 100F y 300F a la que desea mantener la
comida caliente. La temperatura de calentamiento seleccionada comenzará a parpadear en la pantalla.
3. Presione el botón “TIME / TEMP” una vez y luego gire la perilla “SELECT”. Seleccione el período de tiempo (de
1 minuto a 4 horas) que le gustaría mantener la comida caliente.
4. Presione el botón “STAR / STOP” para comenzar a calentar, y el tiempo de cocción comenzará a contar
regresivamente.
5. Verique la temperatura interna de los alimentos con un termómetro para alimentos si lo desea para
determinar si la temperatura ideal de los alimentos ha alcanzado.
6. Al sacar los alimentos del horno, asegúrese de utilizar siempre guantes de cocina. La comida en el horno
puede ser muy calientes y causar lesiones.
1. Gire la perilla de “FUNCTION” para seleccionar “DEHYDRATE”.
2. Gire la perilla “SELECT” para seleccionar la temperatura a la que desea cocinar lentamente los alimentos. La
temperatura de cocción lenta seleccionada comenzará a parpadear en la pantalla.
3. Presione el botón “TIME / TEMP” una vez y luego gire la perilla “SELECT”. Seleccione el período de tiempo
que le gustaría cocinar lentamente los alimentos.
4. Presione el botón “START/STOP” para iniciar la cocción lenta y el tiempo de cocción comenzará a contar
regresivamente.
5. Verique la temperatura interna de los alimentos con un termómetro para alimentos si lo desea para
determinar si la temperatura ideal de los alimentos ha alcanzado.
6. Al sacar los alimentos del horno, asegúrese de utilizar siempre guantes de cocina. La comida en el horno
puede ser muy calientes y causar lesiones.
FUNCIÓN CALENTAR
FUNCIÓN DE COCCIÓN LENTA
4. Presione el botón “START / STOP” para comenzar a calentar y el tiempo de cocción comenzará a contar
regresivamente.
5. Verique la temperatura interna de los alimentos con un termómetro para alimentos si lo desea para
determinar si la temperatura ideal de los alimentos ha alcanzado.
6. Cuando saque los alimentos del horno, asegúrese de que siempre se utilicen guantes de cocina. La comida
en el horno puede ser muy calientes y causar lesiones.
1. Gire la perilla de "FUNCTION" para seleccionar "DEHYDRATE".
2. Gire la perilla “SELECT” para seleccionar la temperatura a la que desea deshidratar la comida. La
temperatura de deshidratación seleccionada comenzará a parpadear en la pantalla.
3. Presione el botón “TIME / TEMP” una vez y luego gire la perilla “SELECT”. Seleccione el tiempo que le
gustaría para deshidratar la comida.
4. Presione el botón “START / STOP” para comenzar a deshidratar, y el tiempo de cocción comenzará a contar
regresivamente.
5. Verique la temperatura interna de los alimentos con un termómetro para alimentos si lo desea para
determinar si la temperatura ideal de los alimentos ha alcanzado.
6. Al sacar los alimentos del horno, asegúrese de utilizar siempre guantes de cocina. La comida en el horno
puede ser muy calientes y causar lesiones.
FUNCIÓN DESHIDRATAR
1. Gire la perilla "FUNCTION" para seleccionar "REHEAT".
2. Gire la perilla “SELECT” para seleccionar la temperatura a la que desea recalentar la comida. La temperatura
de recalentamiento seleccionada comenzará a parpadear en la pantalla.
3. Presione el botón “TIME / TEMP” una vez y luego gire la perilla “SELECT”. Seleccione el tiempo que le
gustaría para recalentar la comida.
1. Gire la perilla "FUNCTION" para seleccionar "BROIL".
2. Gire la perilla “SELECT” para seleccionar la temperatura a la que desea asar los alimentos. La temperatura
de asado seleccionada comenzará a parpadear en la pantalla.
3. Presione el botón “TIME / TEMP” una vez y luego gire la perilla “SELECT”. Seleccione el tiempo que le
gustaría asar la comida.
4. Presione el botón “START / STOP” para comenzar a asar, y el tiempo de cocción comenzará a contar
regresivamente.
5. Verique la temperatura interna de los alimentos con un termómetro para alimentos si lo desea para
determinar si la temperatura ideal de los alimentos ha alcanzado.
6. Al sacar los alimentos del horno, asegúrese de utilizar siempre guantes de cocina. La comida en el horno
puede ser muy calientes y causar lesiones.
1. Gire la perilla "FUNCTION" para seleccionar "ROAST".
2. Gire la perilla “SELECT” para seleccionar la temperatura a la que desea asar los alimentos. La temperatura
de tueste seleccionada comenzará a parpadear en la pantalla.
3. Presione el botón “TIME / TEMP” una vez y luego gire la perilla “SELECT”. Seleccione el tiempo que le
gustaría asar la comida.
4. Presione el botón “START / STOP” para comenzar a asar, y el tiempo de cocción comenzará a contar
regresivamente.
5. Verique la temperatura interna de los alimentos con un termómetro para alimentos si lo desea para
determinar si la temperatura ideal de los alimentos ha alcanzado.
6. Al sacar los alimentos del horno, asegúrese de utilizar siempre guantes de cocina. La comida en el horno
puede ser muy calientes y causar lesiones.
1. Gire la perilla "FUNCTION" para seleccionar "PIZZA". La pantalla mostrará "9 pulgadas".
2. Gire la perilla "SELECT" para seleccionar pizzas de 6, 9 o 12 pulgadas.
3. Presione el botón "START / STOP" para iniciar el precalentamiento y el icono "PREHEAT" parpadeará.
Cuando se haya completado el precalentamiento, sonará el zumbador y el icono “COMPLETE” comenzará a
parpadear.
4. Coloque la pizza en el horno para comenzar y presione el botón “START / STOP” para comenzar a hornear la
pizza, y el tiempo de cocción comenzará la cuenta regresiva.
5. Presione “TIME / TEMP” una vez y luego gire la perilla “SELECT” para cambiar el tiempo y la temperatura de
hornear pizza si lo desea o es necesario.
6. Verique la temperatura interna de los alimentos con un termómetro para alimentos si lo desea para
determinar si la temperatura ideal de los alimentos ha alcanzado.
7. Al sacar los alimentos del horno, asegúrese de utilizar siempre guantes de cocina. La comida en el horno
puede ser muy calientes y causar lesiones.
FUNCIÓN DE RECALENTAR
FUNCIÓN ASAR
FUNCIÓN ASADO
FUNCIÓN PIZZA

24 25
CERTIFICACIÓN
CUIDADO Y LIMPIEZA
1. Antes de limpiar, desenchufe el horno y deje que el aparato se enfríe por completo.
2. Lave todos los accesorios con agua tibia y detergente de cocina suave, incluida la "rejilla" y la "bandeja de la
parrilla".
3. No utilice limpiadores abrasivos, cepillos de fregar duros ni limpiadores químicos, ya que estos elementos
dañarán el revestimiento antiadherente de la "bandeja de la parrilla".
4. Utilice un paño húmedo para limpiar el interior del horno.
5. Limpiar la puerta del aparato con un paño húmedo empapado con un detergente de cocina suave.
6. No sumerja el aparato en agua ni en ningún otro tipo de líquido.
7. Cualquier otro tipo de servicio, el aparato debe ser realizado por un representante de servicio autorizado.
Advertencia: Supercies CALIENTES!
Información del fabricante:
Sitio: www.valcucineusa.com
Contacto de soporte:
Llamanos a: +1 (949)6682018
DIAGRAMAS DE POSICIÓN DE LA PARRILLA DEL HORNO
TABLA DE COCCIÓN
Consulte la tabla a continuación para conocer las posiciones sugeridas para la parrilla del horno, la bandeja de
la parrilla y la canasta de la freidora de aire (AirFryer).
Cesta de la freidora de aire
POSICIONES SUGERIDAS PARA RACK / BANDEJA / CESTA
Bandeja de parrilla Rejilla del horno
Camarón
Alitas de pollos
Tipo de comida
FUNCIÓN
Freir al aire
Tostada
Hornear
Asar
Asado
Pizza
Re-calentar
Calentar
Cocción lenta
Deshidratar
Posición 1 Posición 2 Posición 3
Patatas angular
Anillo de calamar
Bacalao
Aros de cebollas
460g
500g
Cantidad recomendada
350g
350g
350g
300g
400 ℉
400 ℉
Temperatura
400 ℉
400 ℉
400 ℉
400 ℉
5~8 min
10~13 min
Tiempo
11~14 min
11~14 min
13~16 min
11~14 min
Abadejo frío
Nuggets
Papitas congeladas
Burritos
Filete de bacalao
Palito de papa con queso
Verduras mixtas
500g
560g
350g
1 pedazo
360g
300g
500g
400 ℉
400 ℉
400 ℉
400 ℉
400 ℉
400 ℉
360 ℉
10~13 min
17~20 min
17~20 min
3~4 min
14~17 min
10~13 min
5~8 min

Food feeds the Body
Cooking feeds the Soul
Recipe Booklet Created by

28 29
Appetizers & Snacks
6 strips of thick-cut bacon
3 tablespoons brown sugar
2 tablespoons maple syrup
Ingredients
Air Fried Bacon & Maple & Brown Sugar Bacon
Line the metal pan of the air fryer with aluminum foil and place it under the wire basket.
Preheat the air fryer @ “BAKE” to 360F/180C with “CONVECTION” function; spray the wire
basket with cooking oil spray.
Lay the bacon pieces in the wire basket. Mix together the maple syrup and the brown sugar
and brush the mixture onto the bacon. Bake for 7 minutes, and turn the bacon over in the
wire basket, brush again with the maple syrup/brown sugar mixture and bake for 7 more
minutes.
Now serve and enjoy!
Make the Perfect Bacon
1 pound of good quality bacon
Preheat the air fryer @ “ROAST” to 390F/200C with “CONVECTION” function; spray the
wire basket with cooking oil spray.
Place the bacon in the air fryer basket and cook for 8-10 minutes. Turn the bacon over
about half way through cooking.
Remove the bacon from the basket & serve immediately.
13oz (1 bag) of salted tortilla chips
1 or 2 ripe avocados
1 can (14oz) of canned black beans,
rinsed & drained
1 large chicken breast, grounded
¼ cup white onion, diced
1 tablespoon of olive or cooking oil
¼ cup of chicken broth
2 tablespoons mole paste (optional)
18oz of shredded mixed cheeses
(cheddar, mozzarella & peppered
jack)
½ teaspoon garlic akes
1 teaspoon cumin powder
¾ cup Pico de Gallo
Pinch of salt
Ingredients
Oaxaca Nachos
Heat a sauté pan over medium heat, add some oil, sauté the ground chicken breast until
they are done to your taste. If you like them crispier, then cook them longer. Remove the
ground chicken breast, set aside.
Heat a sauté pan over medium heat, add the oil. Sauté the onion and cumin for 5 minutes
until fragrant. Add the beans and cook for another 5 minutes, then add the vegetable broth,
the garlic akes and the mole paste if you have it. Cook until the mole paste has been
dissolved. Add the cooked grounded chicken breast and stir to combine, remove from heat
immediately
Preheat the air fryer @ “BAKE” to 350F/175C with “CONVECTION” function; spray the wire
basket with cooking oil spray.
On the air fryer wire basket, spread out a series layer of tortilla chips. Next, evenly spread
half of the chicken and beans mixture over the chips, and then half of the cheese. Repeat
with another layer of chips, the rest of the chicken and beans, and then the rest of the
cheese. If you like your nachos cheesy, add more cheese!
Bake the nachos for 9-12 minutes, until the cheese has all but melted. Make sure you watch
the nachos during the cooking progress and adjust the cooking time if necessary.
After the nachos are out of the oven, you can add some chopped avocado or avocado
cream if you have the time to make it. Or you may add some “Pico de Gallo”. If you like
your nachos spicy, add some chopped jalapeno or spicy Mexican chili sauce over top.
4-6 servings
MARINADE
2 pounds chicken wings
2 tablespoons olive oil
½ cup soy sauce
¼ cup oyster sauce
2 tablespoons fresh lemon juice
1 tablespoon balsamic vinegar
1 teaspoon garlic powder
¼ teaspoon cayenne
SAUCE
1 cup sour cream
1 tablespoon blue cheese
Tobasco sauce, to taste
Cayenne powder for decoration
1 tablespoon of scallion, white part
only, nely chopped
Ingredients
Clean the chicken wings and place them in a large bowl, add all the ingredients for the
marinade together, toss in the chicken wings and mix all the contents until well blended and
the chicken wings are coated evenly. Cover the bowl and place the bowl in a cool place or in
the refrigerator for at least 30 minutes. The best marinating result is to marinate the chicken
wings overnight in the refrigerator.
Preheat the air fryer @ “BAKE” to 360F/180C with “CONVECTION” function; spray the wire
basket with cooking oil spray.
Place half of the chicken wings in the wire basket and cook for 25 minutes. After 25 minutes,
take the wings out of the air fryer, turn the wings over and cook for another 5 minutes more.
While the chicken wings are cooking, make the key component to the “Bualo Chicken
Wings”, the dip. First, mash up the blue cheese and then add it to the sour cream. Now add
the Tobacco sauce to the sour cream, and then the scallion. Mix well, place the dip in a bowl
and then sprinkle the cayenne powder over top. Set aside.
When the wings are cooked, arrange them on a plate, set them around the dip. To eat the
Bualo chicken wings, dip them I the “sour cream/blue cheese” dip rst before consuming
them. This is the classic recipe where the Bualo chicken wings originated.
NUTRITIONAL FACTS
Calories: 481Kcal; Fat: 42.5g; Cholesterol: 120.4mg; Carbohydrates: 7.3g; Protein: 20.7g;
Sodium: 1328.4mg.
Buffalo Chicken
Wings

30 31
Appetizers & Snacks
1 medium crusty baguette
6 medium tomatoes or heirloom tomato
6 tablespoons olive oil, more for
brushing the bruschetta
3 large cloves of garlic
2 tablespoons of fresh basil, sliced thin
2 tablespoons balsamic vinegar
1 teaspoon Maldon coarse sea salt
Freshly ground black pepper, to taste
Chili akes (optional)
Ingredients
Air Fried Italian Bruschetta
To make good bruschetta, it is very important that you use the best quality and fresh
ingredients. Bruschetta is all about the best quality in life and you get to taste all the good
in life through great foods. The quality of olive oil and balsamic vinegar are essential for the
success of this dish. The very same consideration applies to the purchase of bread you will
use.
Mince 2-3 garlic cloves and set aside. In a pan over medium-low heat, add 4 tablespoons of
olive oil and allow the oils to heat up. Now add the garlic cloves and cook quickly for about 1-2
minutes, just until you can smell the garlic and it become lightly browned. Do not burn the
garlic, remove the garlic from heat and let cool.
Slice the tomato into small chunks, slice the basil into thin strips. Place the tomato, basil,
vinegar, salt and chili akes into bowel and mix. Add the garlic and oil, toss to combine.
Place the mixture in a bowl, cover and refrigerate for 30 minutes allow avors to combine.
Preheat the air fryer @ “ROAST” to 375F/190C; spray the wire basket with cooking oil spray.
Cut the baguette into slices, but not too thin, at least 1/4-inch. Slice the garlic in half and rub
the garlic on slices of the baguette for avor. After the garlic, brush the baguette slices with
olive oil.
Place as many pieces of the bread in the air fryer basket with a little gap between each slice
of the bread. Air fry the bread for 3-4 minutes and remove them to cool. There is no need
to ip the bread during the cooking process. The bread should have a crusty nish but still
fresh and moist in the middle.
Now spoon the tomato and basil mixture on top of the baked baguette and you have an
Italian bruschetta. You can now sprinkle some shaved cheese or coarse salt or black pepper
or chili akes!
POTATO
4 medium size russet potatoes
Olive oil
Sprinkle of salt
GRAVY
2 tablespoons of butter
1 tablespoon our
14 oz beef broth
14 oz chicken broth
1/8 teaspoon black pepper
½ teaspoon salt
2 tablespoons milk
2 tablespoons corn starch
Fresh or dried herbs (optional)
TOPPING
1 cup / 8oz white cheese curds or
mozzarella
1 link of good quality sausage
Ingredients
Preheat the air fryer @ “A1” on the panel (400F/205C); spray the wire basket with cooking
oil spray.
Slice the potato to about ¼ inch French fries in size, skins left on. Soak the potatoes in
water for about 30 minutes to bleed some of the starch out. After that, drain the potato strips
well and pat them dry. Now place the olive oil in a large pan and put the potatoes in, sprinkle
with the salt and then toss and coat the French fry stirps before cooking.
Bake the French fries in the air fryer @ “A1” (18 minutes), depending on the rmness you
desire, you may add some additional cooking time. Stop the cooking process halfway, take
the wire basket out of the fryer and toss the potatoes and place them back in the air fryer to
nish.
Before you make the gravy, squeeze the sausage out of the casing and cook the sausage
meat in a little olive oil. When the sausage meat is cooked to the desired nish, remove the
cooked sausage meat from the pan and set aside.
To make the gravy, add the butter in a sauce pan and cook until it begins to bubble and
brown slightly. Whisk in the our, cook it for a minute or two, and then add the beef and
chick broths. Now add the black pepper and salt; and fresh or dried herbs if desired. Bring
the mixture to a boil and then simmer for 2 minutes. Now whisk together the corn starch and
milk, mix together completely and add it to the gravy.
When the gravy is nished, pour it over the French fries, and then add the cheese curds and
the cooked sausage over top. Serve immediately!
This is a wonderful Canadian classic from the province of Quebec. Poutines have now
gained world-wide recognition, turning ordinary French fries into a savory delicacy.
Poutine aux
Gatineau
4 servings

32 33
10oz / 230g kale leaves, washed &
dried
2 tablespoons/1oz/30g of Extra Virgin
olive oil or light cooking oil
3.5 tablespoons/1.75oz/50g shaved
cheddar cheese
½ teaspoon of coarse kosher salt
½ teaspoon of sugar
Pinch of ground black pepper (optional)
Varieties of dried spices such as garlic,
onion or curry powders (optional)
Ingredients
Crispy Kale & Cheddar Chips
Preheat the air fryer @ “BAKE” to 350F/175C with “CONVECTION” function; spray the wire
basket with cooking oil spray.
Hand-tear the kale leaves (with leafy vegetables it’s always better to tear leaves rather than
cut by knife) to 2-3 inches pieces. Soak the kale for 15-20 minutes, then wash & spin dry
the kale leaves. Now toss the dried kale leaves with the olive oil. After that sprinkle the salt,
the sugar and the black pepper. Place the kale leaves in the wire basket and bake for 6-8
minutes (make sure you turn the kale leaves over half way through the cooking process)
until they have taken on the crispiness you desire.
After the kale leaves are cooked and become partly crispy, take them out of the Valcucine Air
Fryer, and while the kale leaves are still warm sprinkle the shaved cheddar cheese over the
kale, on both sides. Let cool and serve.
Alternatively, you could toss in the shredded cheese rst and have the cheese melt with the
heat onto the kale. If you so decide to make the kale chips this way, make sure you check
the cooking time so the kale chips are not burnt because of the shredded cheese. Either
way, it is a great accompaniment to dishes you serve, or just simply as an appetizer or an
after-school snack.
Kale is one of the most nutritious in the green vegetable group. It is full of calcium and
minerals for healthy living.
Note: Should the basket in the air fryer becomes too full for cooking purposes, you might
consider cooking the kale chips in 2 batches for more ecient results.
NUTRITION
Calories: 102 Kcal; Fat: 5g; Carbohydrates: 2g; Fiber: 1.25g; Potassium: 110mg; Calcium:
45mg mg; Iron: 0.6mg; Vitamin A:1750iu; Vitamin C: 23mg
Appetizers & Snacks

Main Course
34 35
1-½ cups elbow macaroni
1 cup water
½ cup heavy cream
8 oz block cheddar cheese, shredded
1 teaspoon dry mustard
½ teaspoon onion powder
Sea salt, to taste
Freshly ground black pepper, to taste
Ingredients
Air Fried Macaroni & Cheese
Preheat the air fryer @ “BAKE” to 360F/180C with “CONVECTION” function.
In a deep, oven safe dish that will t inside your air fryer (a 7-inch glass dish works well) add
the elbow macaroni, water, heavy cream, ½ of the cheese, dry mustard, garlic salt, and black
pepper. Stir to combine
Place the dish with the macaroni in the basket of the air fryer and cook at 360F for 18-20
minutes.
Half way through the cooking process, take the dish of macaroni out of the air fryer and
place the rest of the cheese in the dish, stir and place it back in the oven and continue
cooking.
Once the cooking is nished, carefully remove the macaroni out of the air fryer, stir the
mixture and set aside to cool for a few minutes.
Preheat the air fryer @ “BROIL” to 360F/180C”.
Now if you like to have a crusty nish on your macaroni, spread some breadcrumbs on top
of the nished macaroni and place the glass dish back in the air fryer, under the broiler for 3-5
minutes more.
Once the macaroni is nished, serve immediately.
3 pounds baby back pork ribs
BBQ Dry Rub Recipe
Espresso/Balsamic BBQ Sauce
Ingredients
BBQ Baby Back Pork Ribs
Remove the membrane: Peel o the “silver-skin” from the back of the bibs
Cut the rack of pork ribs into 2-3 sections so that it can t into your “air fryer” basket.
Now make the dry rub from the “Dry Rub” Recipe.
Rinse the pork ribs & pat dry the baby rack pork rib sections. Now sprinkle generously the “dry
rub” compound unto the pork ribs and rub the compound thoroughly into the meat, covering
all the nooks and crannies of the pork. Seal the pork rib sections with cellophane and then a
layer of tin foil. Leave it in the refrigerator for at least 8 hours for the best results, or make it
the night before and leave the ribs in the refrigerator overnight.
When you are ready to cook: Preheat the air fryer @ “ROAST” to 375F/190C; spray the
wire basket with cooking oil spray.
Once the sir fryer has been warmed up, place the pork with the aluminum foil into the wire
basket, meat side down, and cook doe 15 minutes. Now, remove the pork from the foil and
place it in the wire basket. Make sure the air fryer is hot or the meat will stick to the wire
basket and bake for another 10minutes more. Once the 10 minutes are up, ip the pork
over and cook for another 10 minutes. Please check the pork ribs frequently during the last
minutes of cooking in the air fryer so the meat does not become burnt.
While the pork ribs are cooking, you can make the “espresso/balsamic” BBQ sauce.
Once remove the pork ribs from the basket, set the ribs on a plate and let them sit for at 5
minutes let the hot juices redistribute back into the meat. Now it is the time to start brushing
the BBQ sauce over the cook ribs before you serve them.
1 pound of good quality prawns, trimmed
2 pounds of coarse sea salt
Coarse kosher salt
½ lemon
½ teaspoon of honey
½ teaspoon of paprika
Cayenne powder (optional)
½ cup of “home-made” mayonnaise/aioli
Ingredients
Clean the prawns by rinsing them thoroughly and remove the legs and the whiskers on the
head with a good pair of kitchen scissors. Keep the heads of the shrimp, do not remove
them. Place the kosher salt evenly on the metal baking tray & line the prawns on their sides
in a row over the coarse salt.
Preheat to “ROAST” @ 400F/205C. The oven needs to be very hot for this dish.
Cook the prawns in the hot oven for 8 minutes, take the baking tray out of the air fryer, turn
the prawns over and bake for another 7 minutes.
During the cooking process of the prawns, you can make the “paprika mayonnaise” by
adding lemon juice, paprika, honey and cayenne (optional) to the mayonnaise. Mix the
mayonnaise gently and place it in a small container.
Remove the baking tray from the oven, take each shrimp out and clean o the coarse salt
and place them in a small bowl or a plate. If you don’t want diners to fuzz with the prawn
shells, you can remove the middle section of the shell, from the bottom of the head to the
lest section before the shrimp tail.
Eat the prawns by taking the tail section, pull o the meat from the head. You can dip the
prawn in the aioli and savor the complexity of avors.
Salt Baked Prawns
4-6 servings

Main Course
36 37
4 x 5oz (150g) chicken breasts
2 tablespoons olive oil
1 teaspoon lemon juice
1 tablespoon red chili akes
1 teaspoon garlic, minced
½ teaspoon onion powder
½ teaspoon sea salt
¼ teaspoon black pepper
Perforated parchment paper
Ingredients
Air Fried Chili Garlic Chicken Breast
Combine the olive oil, chili akes, garlic, onion powder, salt and black pepper in a large bowl.
Mix well, and add the chicken llets. Marinate for at least two hours.
To make the “perforated parchment paper”, take a piece of baking parchment paper and
poke small holes with a large size pin or a medium size clean nail so that the chicken breast
will not stick to the wire basket during cooking.
Preheat the air fryer @ “ROAST” to 390F/200C with “CONVECTION” function; spray the
wire basket with cooking oil spray. Line the air fryer basket with “perforated parchment”
paper.
To make the “perforated parchment paper”, take a piece of baking parchment paper and
poke small holes with a large size pin or a medium size clean nail so that the sh will not
stick to the wire basket during cooking.
Place the chicken breasts in the wire basket lined with “perforated parchment paper” and
cook for 18-20 minutes or until the chicken breasts are cooked through.
1 x 3oz white sh let
1 egg white
1 sprouted corn tortilla or 1 oz corn
tortilla chips
THM oat ber
1 teaspoon fresh Italian parsley,
medium chopped
2 tablespoons of mayonnaise
(preferably home-made)
Coarse sea salt, to taste
Freshly ground black pepper, to taste
Perforated parchment paper (home-
made)
Cayenne powder (optional)
½ lime, squeezed
¼ teaspoon honey
½ teaspoon chopped cilantro
Perforated parchment paper
Ingredients
Corn Crusted Filet of Fish
Preheat the air fryer @ “ROAST” to 375F/190C with “CONVECTION” function; spray the
wire basket with cooking oil spray. Line the wire basket with “perforated parchment paper”.
Clean the white sh meat (you can use a variety of white sh meat. Such as cod, snapper,
tilapia, catsh, bass, etc.) Remove the sh skin from the meat if there is any and rub lightly
with some good quality olive oil. Sprinkle a little salt & black pepper on both sides. Set
aside.
If you use fresh sprouted corn tortilla, place the tortilla in the wire basket and bake for 10
minutes, or until crispy. Remove the tortilla from the air fryer, set aside and let cool. After it
is cooled, coarsely grind the tortilla with the THM oat ber. Place the grinded tortilla, the oat
ber and the chopped Italian parsley on a plate large enough for dredging.
Place the egg white in a small bowl and whisk it slightly with a small amount of foam. Now
place the whisked egg white on a small plate and set aside.
To make the “perforated parchment paper”, take a piece of baking parchment paper and
poke small holes with a large size pin or a medium size clean nail so that the sh will not
stick to the wire basket during cooking.
Roll the sh in the corn/ber mixture rst and then dip in the egg white. Repeat this process
until the sh has a rm crust on it for cooking.
Air fry the sh for 12 minutes at 375F in the wire basket lined with home-made perforated
parchment paper; when nish, ip the sh over and cook for another 6 minutes.
An easy sauce to make for this recipe is to combine the honey with lime juice, mix well; add
some black pepper or cayenne if you like it spicy. Sprinkle the cilantro over top of the sauce.
To serve, place the sh on a plate, add a few Heirloom tomato, and the lime /honey mixture.
It will be a tasty and satisfying meal.
1 serving
One 8-16 oz beef rib eye steak
1 tablespoon of extra-virgin olive oil
½ teaspoon kosher salt
½ teaspoon freshly ground black pepper
1 clove of garlic
1 sprig of fresh rosemary
Make sure the steak at room temperature.
Season both sides of the steak with the
olive oil rst, then with the salt and black
pepper. Smash the clove of garlic and
the rosemary and add them to the steak.
Cover and set aside.
1 (8-16 oz) Rib Eye Steak (1" to 1.25"
thick)
1/2-1 tsp Kosher Salt
3/4 tsp Pepper
1/2 tsp Garlic Powder (optional)
3/4 tsp Low Sodium Steak Seasoning
(optional)
Ingredients
Instructions
Season both sides of the steak with the spices. Then set aside to come up to room
temperature. This ensures even cooking, and that it will cook in the times given.
Preheat the air fryer for 3 to 5 minutes at 390°. Make sure the air fryer basket is in there.
Quickly set the steak in the air fryer basket, and then quickly close the lid.
Cook a 1 inch thick 8 oz steak at 390° F for 9 minutes. Cook a 1.5 inch thick 16 oz steak for
12 minutes.* Flip halfway through cook time. Thicker or thinner cuts of steak will require a
time adjustment. *Your model of air fryer may give you dierent results.
Take the temperature of the steak. Then move it to a plate, loosely tent it with foil, and let it
rest for 8 minutes before you cut into it.
Recipe Notes
Temperature Guide for Steak:
125°-130° F for Rare
130°-140° F for Medium-Rare
140°-150° F for Medium
150°-155° F for Medium-Well
Air Fried Beef
Rib Eye

Main Course
38 39
4 tablespoons olive oil
500g raw prawns, peeled
4 garlic cloves, nely grated
Crushed chilis, or nely chopped
fresh chilis
1 tablespoon soy sauce
1 tablespoon oyster sauce
1 tablespoon tomato ketchup
Coarse sea salt
Pinch of sugar
1 teaspoon chili powder (optional)
Perforated parchment paper
Ingredients
Garlic & Chili Prawns
Preheat the air fryer @ “ROAST” to 390F/200C with “CONVECTION” function; spray the
wire basket with cooking oil spray. Line the wire basket with “perforated parchment” paper.
To make the “perforated parchment paper”, take a piece of baking parchment paper and
poke small holes with a large size pin or a medium size clean nail so that the sh will not
stick to the wire basket during cooking.
Cleans the prawns if they are from the market and still have the heads on.
Mix together the garlic, soy sauce, oyster sauce, ketchup, sugar and chili (optional) together
in a bowl and mix well until all the ingredients are dissolved and become one sauce.
Toss the prawns in the olive oil and try to coat the shrimps completely with the oil. After the
prawns are coated, toss them in the oyster/soy/ketchup mixture. Now place the prawns in
the wire basket with a metal tray underneath to catch the drippings.
Place the prawns into the air fryer wire basket with a metal tray underneath to catch the
drippings. Cook the prawns on one side for 10-12 minutes; turn the prawns over in the
basket and cook for another 8 minutes on the other side. When the prawns are done,
remove them to a plate and sprinkle with chopped scallion and parsley, and extra chili if you
like them extra spicy. Make certain you do not over-cook the prawns.
Sprinkle some chopped scallion over top, serve immediately.
4-6 servings
2 x Italian pork sausages
1 egg white
1 tablespoon corn our
1 cup Italian breadcrumb
1 teaspoon fresh Italian parsley,
medium chopped
1 teaspoon fresh rosemary, chopped
Coarse sea salt, to taste
Freshly ground black pepper, to taste
1 tablespoon olive oil
½ teaspoon coarse mustard
½ teaspoon sweet mustard
Fresh lemon juice
Ingredients
Pigs in a Crusty Blanket
Make sure the sausages are at room temperature.
Preheat the air fryer @ “ROAST” to 375F/190C with “CONVECTION” function; spray the
wire basket with cooking oil spray.
Place the egg white in a small bowl and whisk it slightly with a small amount of foam. Now
place the whisked egg white on a small plate and set aside.
Roll the sausages in the corn our rst and then dip in the egg white. Now roll the sausages
in the breadcrumb, make sure the sausage is thoroughly covered. Repeat this process one
more time, the sausages should have a rm crust on it for cooking.
Air fry the sausages for 12-15 minutes in the wire basket lined with home-made parchment
paper; when nish, ip the sausages over and cook for another 8 minutes.
An easy sauce to make for this recipe is to combine the coarse mustard and sweet mustard,
add some lemon juice and mix well; add some cayenne if you like it spicy. Sprinkle some
black pepper over top of the mixed mustard.
To serve, place the sausage on a plate, add a few Heirloom tomato and a small amount of
the mustard mixture. It’s a nice way to sample sausages.
4-5 oz of spinach (fresh or frozen)
½ cup skim-milk ricotta cheese
¼ cup Feta cheese, crumbled
1 lemon, & zest
½ tablespoons of fresh fennel, nely
chopped
½ cup white onion, chopped
2 cloves of garlic, minced
2 teaspoon olive oil
Large pinch of ground black pepper
Pinch of sea salt
3 oz of fresh or cooked shrimp,
coarsely chopped
2 oz of sh esh or squid, chopped
(optional)
6 sheets of phyllo
¼ cup of butter, melted
Ingredients
Preheat the air fryer @ “ROAST” to 375F/190C with “CONVECTION” function; spray the
wire basket with cooking oil spray. Line the wire basket with “perforated parchment” paper.
Wash, spin dry and chop the spinach if you are using fresh spinach; if you are using frozen
spinach, squeeze the spinach dry in your hand to remove excess liquid.
Place the spinach in a large bowl with ricotta, feta, lemon zest, dill and black pepper, stir to
mix well.
Heat the olive oil in a sauté pan over medium heat. Add the onions and cook, stirring
occasionally until the onion is tender and slightly translucent, 3-4 minutes. Now add the
garlic and cook for another 25 seconds. Now add the spinach/garlic mixture to the bowl and
mix well together.
If you are using cook the shrimp, now place them in the bowl. If you are using uncooked
shrimp (or sh for that matter), sauté the shrimp and/or the sh until they are just done &
tender. Do not overcook the seafood. Now stir the seafood in the bowl with the spinach &
set aside.
Now remove the phyllo from the package and lay one piece on the work surface, fold one
large piece of phyllo and fold it along the middle seam already in place. Take a sharp knife
and slide along the fold and cut the phyllo sheet in one half. Try to work on one a phyllo
sheet at a time so the sheets do not dry out exposed to air.
Now melt the butter and brush 3 phyllo sheets, one at a time and place one sheet on top
of another until a single stack of sheets is formed. Now spoon a ¼ cup’s worth of seafood
stung onto the phyllo sheets in a continuous roll, with a desired thickness. Now gently fold
both the sides up and begin to roll the phyllo with the stung to form a spring roll. Repeat
this process until you have four (4) long spring rolls. Now brush these spring rolls again with
melted butter over the top and place them in the oven to cook.
Bake for 20-30 minutes, until they are nicely brown in appearance. Remove them from the
oven, cut them diagonally centered from the middle before serving.
Phyllo Seafood
Spring Roll
2-4 servings
This manual suits for next models
1
Table of contents
Popular Oven manuals by other brands

Bakers Pride
Bakers Pride Vantage 100 Series Technical & service manual

Bosch
Bosch HRG7361 1 Series User manual and installation instructions

Kuppersberg
Kuppersberg SGG 663 C Bronze Technical Passport

Vogue
Vogue 310101 installation instructions

Electrolux
Electrolux COMPETENCE 5210 BU Operating and installation instructions

Vees
Vees MO-70FD11F Instructions for use

Frigidaire
Frigidaire PLEB30T8AC Specifications

TECNOEKA
TECNOEKA EKF423 Use and instruction manual

Parmco
Parmco PPOV-9S-48 Installation and operating instructions

Hotpoint
Hotpoint AHP37X Instructions for installation and use

Franke
Franke Frames FS 913 P BK DC TFT AUS installation manual

Whirlpool
Whirlpool 102.259.14 Service information