Wire
Connection
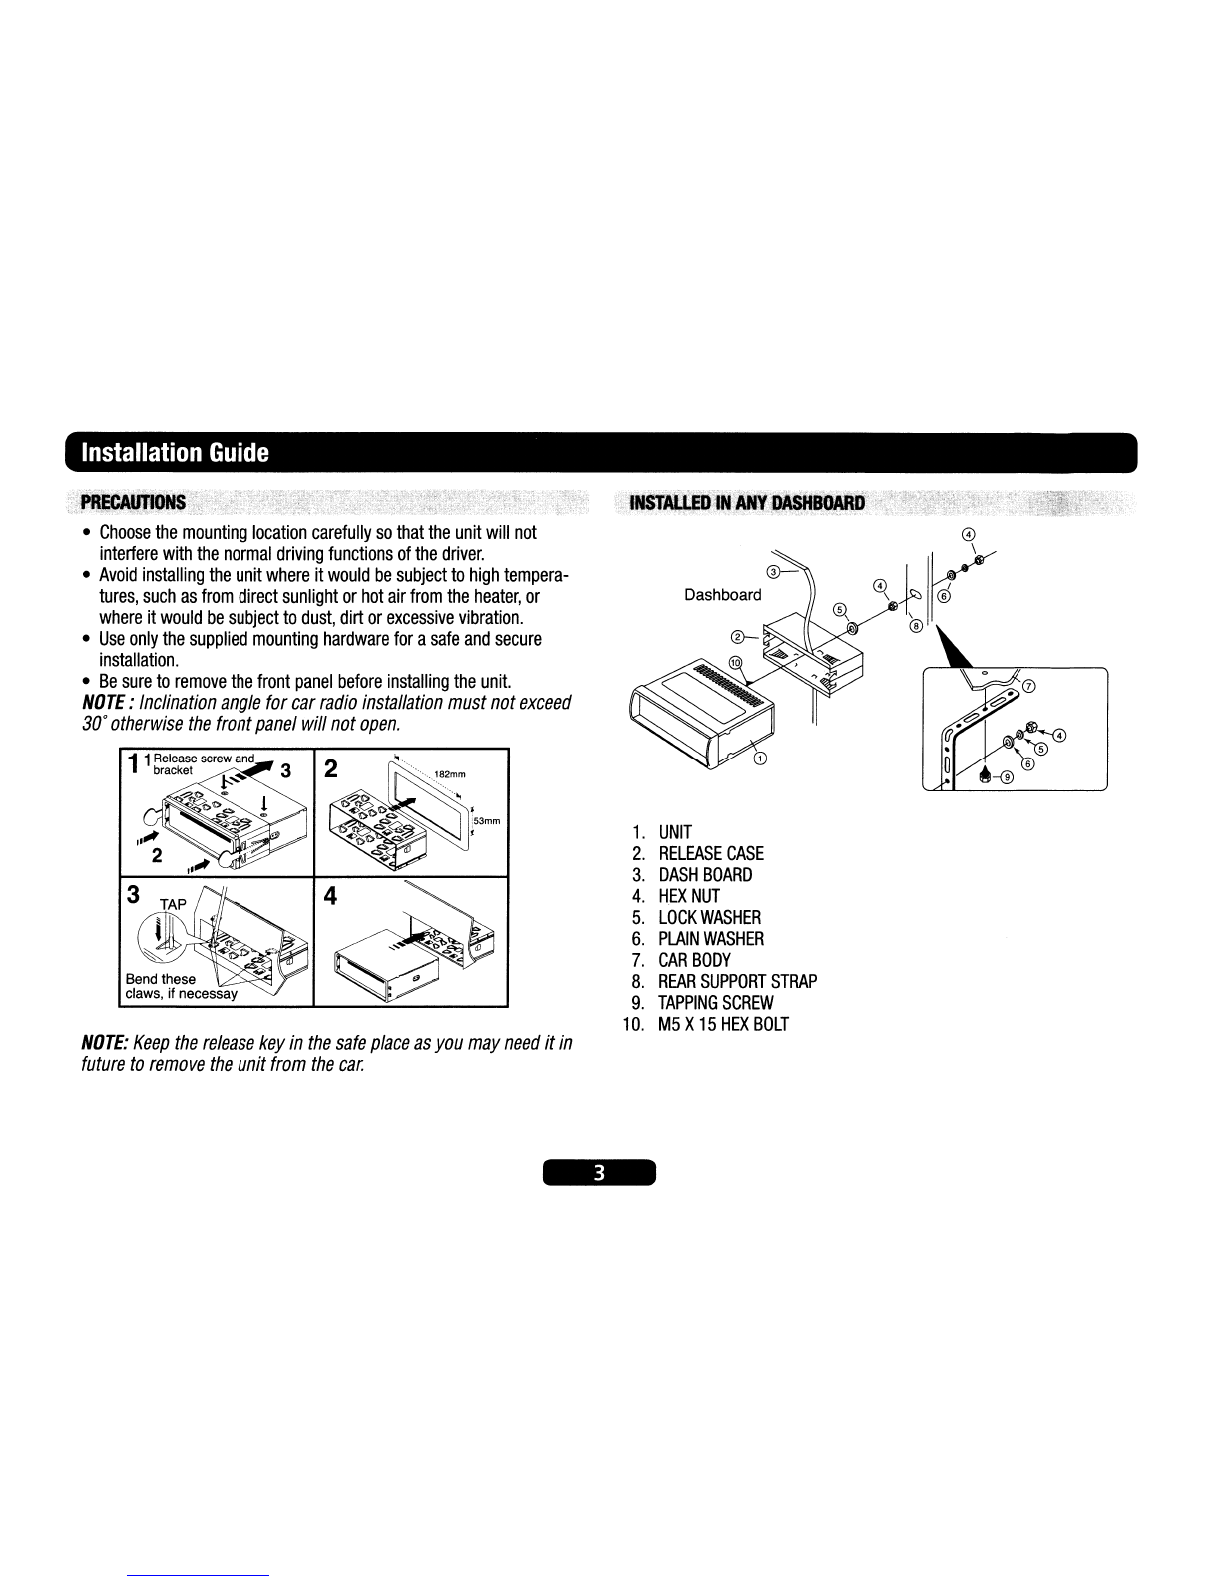
DRIVING
WITH
VIDEO
DISPLAY
By
following
the
installation
below,
video
will
always
be
shown
on
LCD
screen
no
matter
the
car
is
in
motion
or
not.
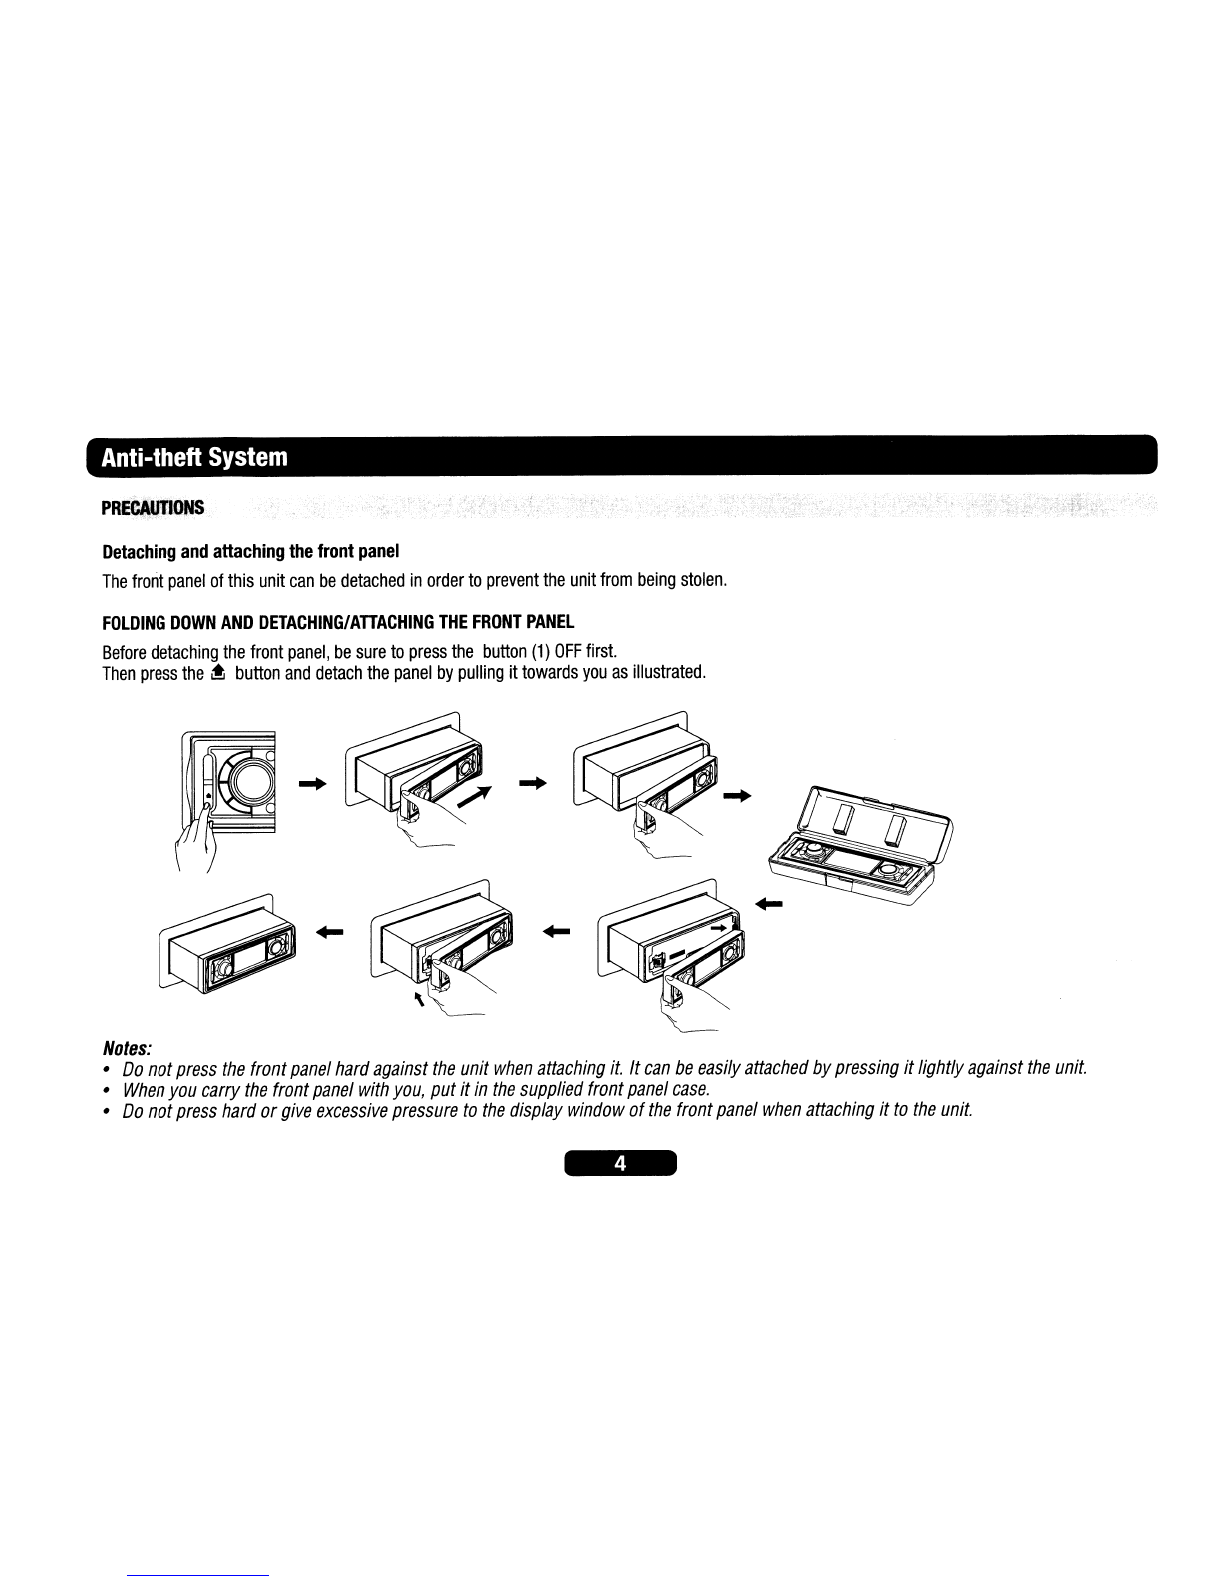
INSTALUNGREAR
CAft'EAAfOR
PARKlNGiREVERSEMQJION
You
can
install
an
separate
camera
at
the
car
rear
end
so
when
doing
parking
or
reverse
motion,
the
unit
will
automatically
switch
the
video
to
the
rear
camera
to
guide
the
driver.
Top
view
~
FRONT
SIDE
~
1~
:::E
L:iD
1BLACK
~..
'-:::::::RE:::D
====:::::::J
~
~
Steps: Connect the GRAY wire to the
~
WHITE wire.
~O
~
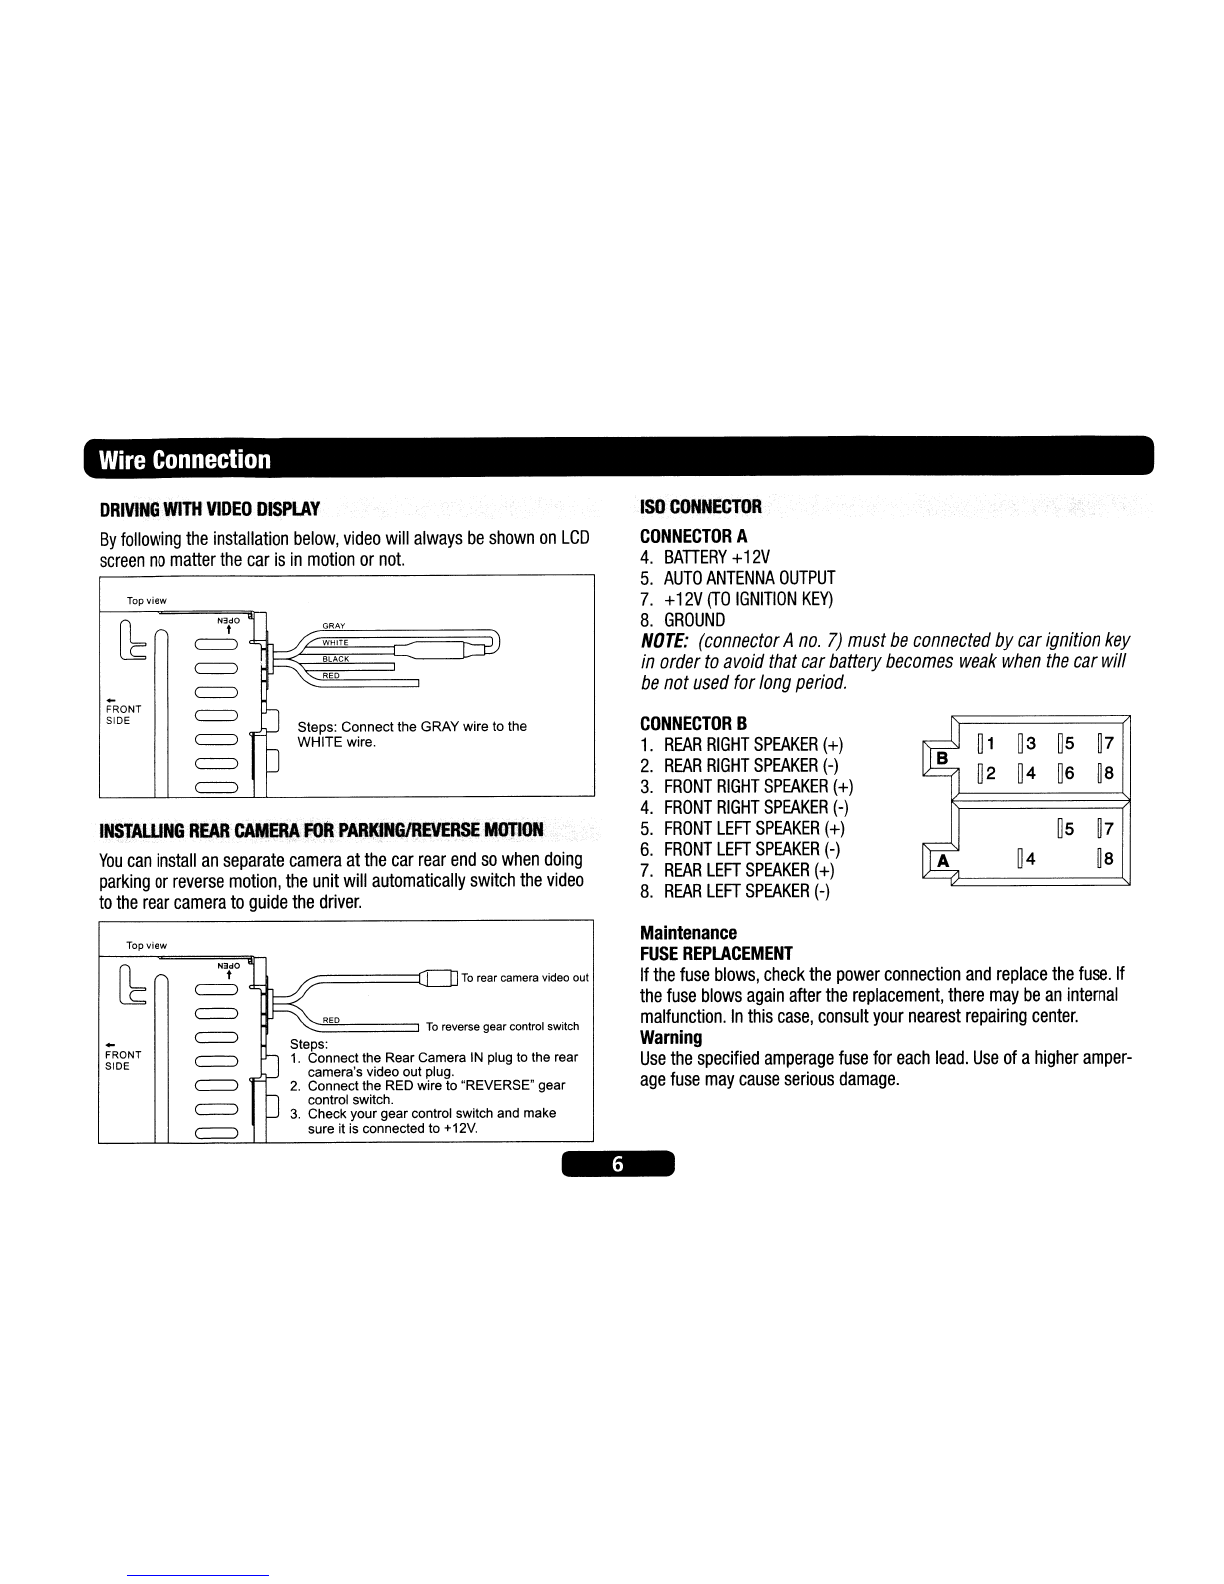
ISO
CONNECTOR
CONNECTOR
A
4.
BATIERY
+
12V
5.
AUTO
ANTENNA
OUTPUT
7.
+
12V
(TO
IGNITION
KEY)
8.
GROUND
NOTE:
(connector
A
no.
7)
must
be
connected
by
car
ignition
key
in
order
to
avoid
that
car
battery
becomes
weak
when
the
car
will
be
not
used
for
long
period.
CONNECTOR
B
1.
REAR
RIGHT
SPEAKER
(+)
~
1
~3
~5
~7
2.
REAR
RIGHT
SPEAKER
(-)
~2 ~4
~6
~8
3.
FRONT
RIGHT
SPEAKER
(+)
4.
FRONT
RIGHT
SPEAKER
(-)
5.
FRONT
LEFT
SPEAKER
(+)
~5
~7
6.
FRONT
LEFT
SPEAKER
(-)
A
~4
~8
7.
REAR
LEFT
SPEAKER
(+)
8.
REAR
LEFT
SPEAKER
(-)
Top view
[b~
~l
~
~"o
III
To
rear camera video out
-
~
To
reverse gear control switch
~
~
Steps:
FRONT
~
1.
Connect the Rear Camera
IN
plug to the rear
SIDE camera's video out plug.
~
2.
Connect the RED wire to "REVERSE" gear
~
ocontrol switch.
3.
Check your gear control switch and make
~
sure it is connected to +12V.
Maintenance
FUSE
REPLACEMENT
If
the
fuse
blows,
check
the
power
connection
and
replace
the
fuse.
If
the
fuse
blows
again
after
the
replacement,
there
may
be
an
internal
malfunction.
In
this
case,
consult
your
nearest
repairing
center.
Warning
Use
the
specified
amperage
fuse
for
each
lead.
Use
of
a
higher
amper-
age
fuse
may
cause
serious
damage.