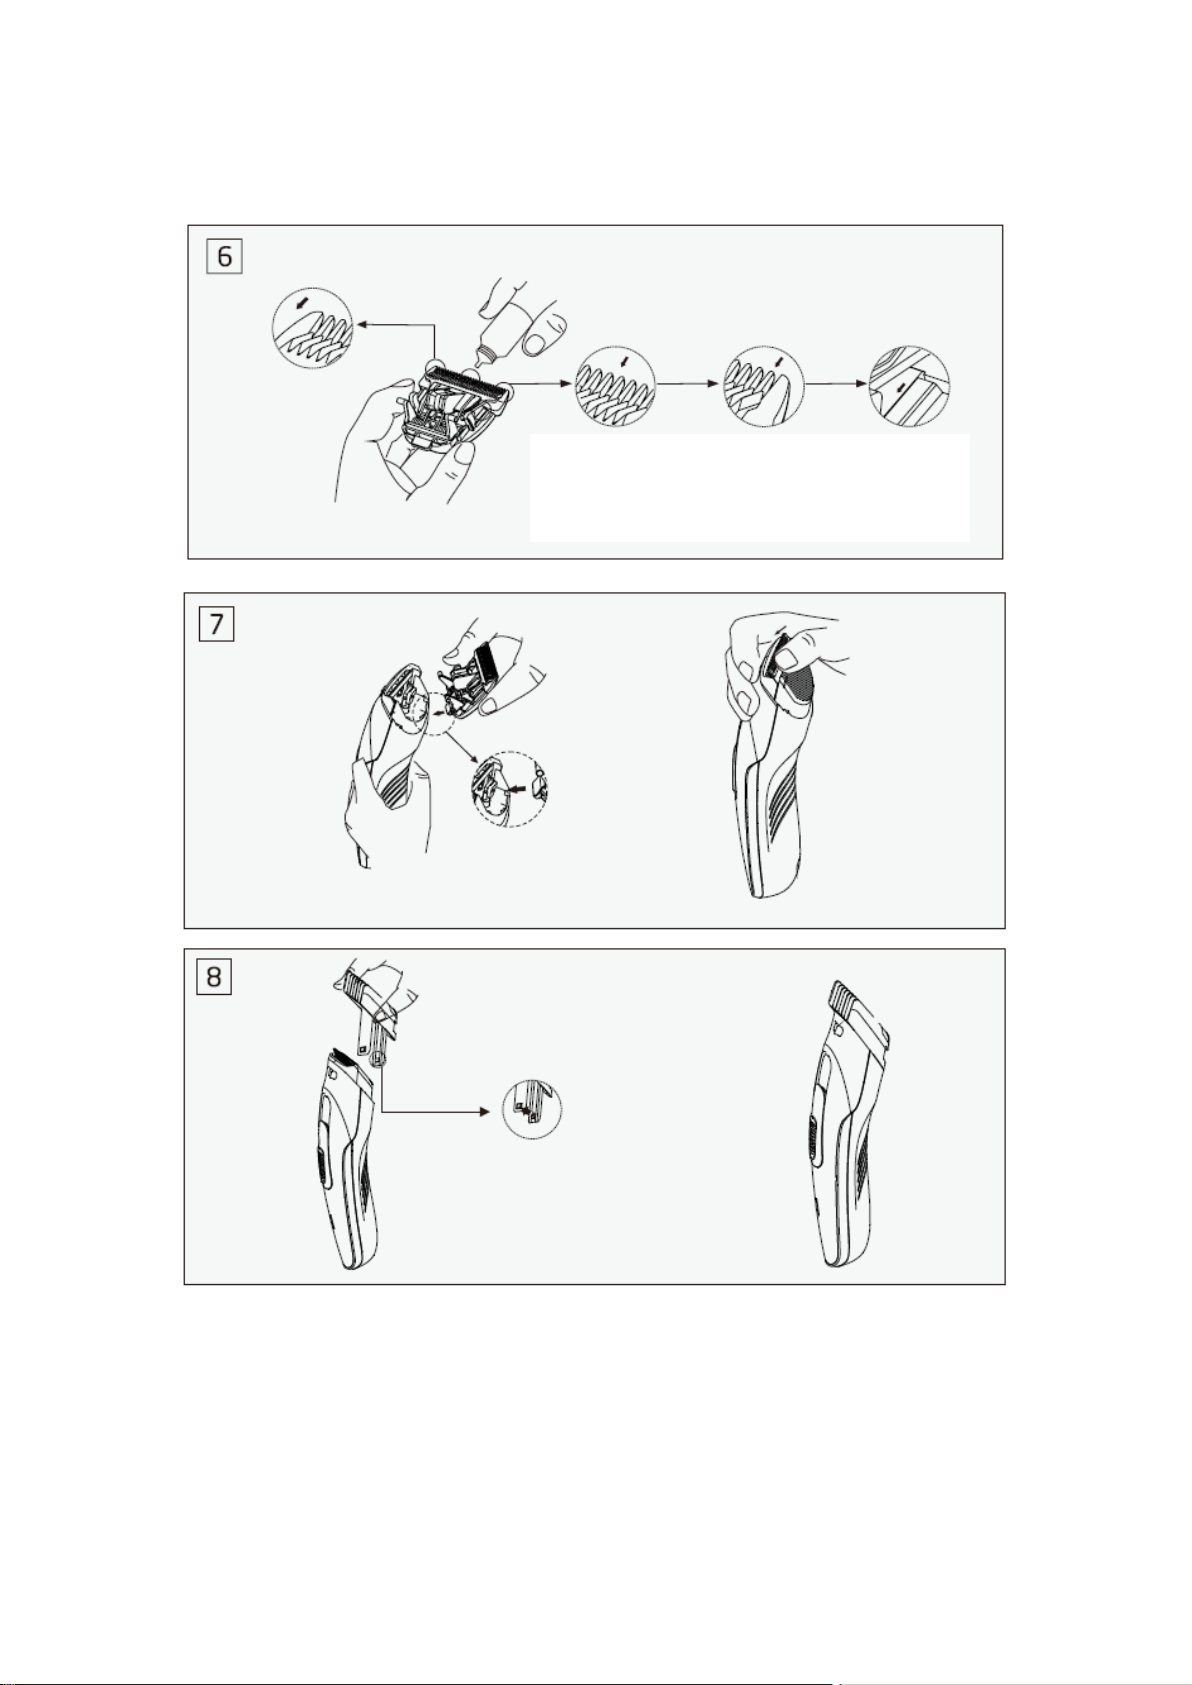
Blade installation (see fig.7)
1. Insert the blade positioning bar into head positioning slot.
2. Hold the blade, and push to head gently.
3. When the blade forward lock buckle piece, and forced into the blade to the
internal pressure. Until you can hear a “click”sound so far.
4. Blades installed.
The installation and use of limit comb (see fig.8)
1. You could install any one as needed.
2. To fix the positioning column to the body’s hole, which is on the limit comb
side, then use your hand to press on the other side of the limit comb, make
the hole to fix to the cutting head, it will hear a “click”sound, then can use it
to do the cut hair.
3. After use, press the handle of the comb and take it out.
Charging (see fig.9)
1. First ensure that the hair clipper is in the halted state prior to charging,
and then connect the hair clipper with the charger, which will start charging
when the indicator lightlights up after being switched on.
2. The longest charging time is stipulated to be 8 hours, so please do not
charge it for over 8 hours, to prevent the battery from aging and thus
avoiding the influence on use.
3. The hair clipper has the plug-and-play function, which means that it can
be used while being charged under the situation of low quantity of
electricity.
4. If you do not intend to take the charger while traveling, please fully
charge it in advance.
Recycling the battery (see fig.10)
Batteries contain substances that may pollute the environment. The batteries
in this clipper is not intended to be replaced by consumers. However, the
batteries may be replaced at an authorized service center.
1. The procedure described below is intended only for removal of the
rechargeable battery for the purpose of proper disposal.
2. Only in the battery completely exhausted before the battery removed.
3. Do not remove the batter during charging.