manuals.online logo
Brands
  1. Home
  2. •
  3. Brands
  4. •
  5. Vauxhall
  6. •
  7. Automobile
  8. •
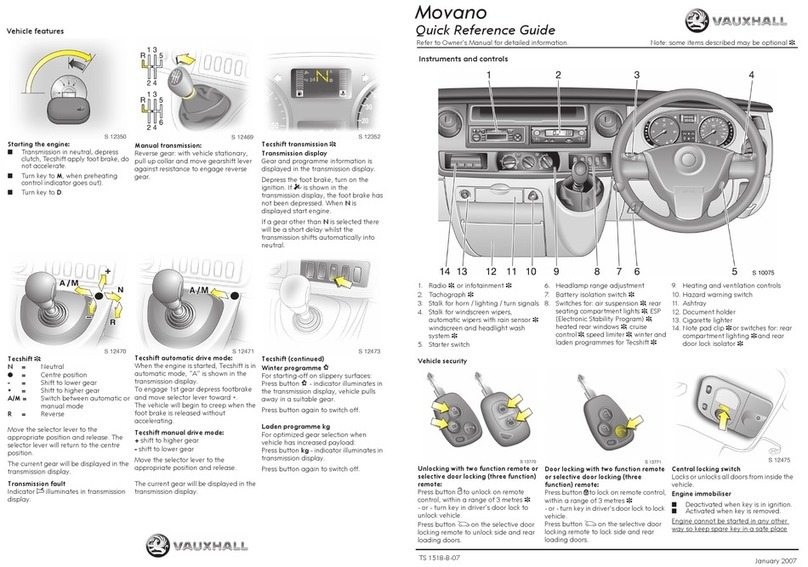
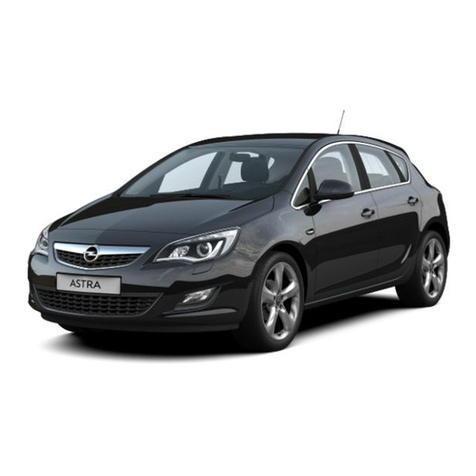
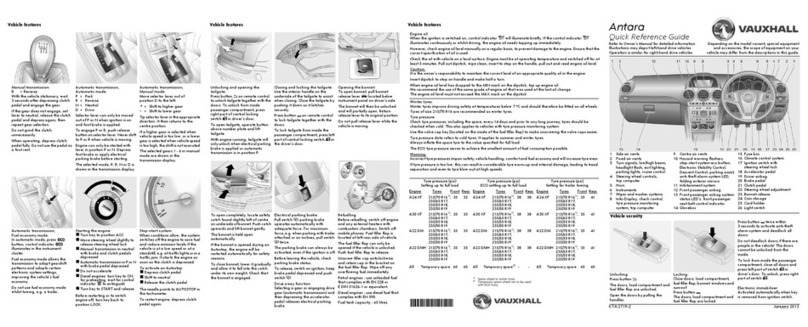
  9. Vauxhall 2010 Astra User manual

Vauxhall 2010 Astra User manual

Vehicle features Astra
Quick Reference Guide
Refer to Owner’s Manual for deta iled information.
Illustrations may depict left-hand drive vehicles.
O pe rati on is simil ar f or right- ha nd dri ve ve hicles.
De pen d ing on the mo del v arian t, spe cial equipm ent
and accessories, the scope of equip ment on your
vehicle may differ from the d escriptions in this guide.
TS 1684-B-11 / KTA 2688-3 December 2010
*KTA-2688-3*
Vehicle features
Art.-Nr. 09 922 21 3
Ve hi cl e fe a tur e s
Unlocking
Press button cto unlock doors,
loa d com par tmen t and f uel flap.
Open doors by pulling the handles.
Locking
Close doors, load compartment
and f uel fi lle r fl ap.
Press button eto lock doors.
Press etw ice wi thi n 15 s econ ds to
deadl ock all doo rs a nd act iv ate
ant i- theft al ar m sy ste m.
Electronic immobiliser is act ivated
automatically when keyisr emoved
fr o m ign i ti o n s wit c h.
If the driver's dooris not closed
pr op e rly , t h e ce n tr al l oc ki n g s ys t em
will not work.
1. Li ght s wi tch, fog l ig hts,
headlig ht range adjustment,
instrument illumination
2. S ide air v ents
3. Tur n si gnal s, he ad li ght fl ash,
low be am, hi gh be am,
exit lighting ,p arking lights
4. Cruise control
5. Instruments
6. Hor n , dr iv er airbag
7. Driver Information Center
8. Steering w heel controls
9. Wiper and w asher systems
10. Centre air vents
11. Infotainment system
12. Info-Disp lay
13. Anti-theft alarm system LED
14. Central locking system,
ha zar d w arni ng fl ash ers,
airbag deac ti vat ion an d
front p assenger seat belt
controlindicators
15. Sport and Tour mode,
Trac ti on Control syst em,
El e ctr o n ic S ta bil i t y C o nt r ol,
ul tr ason ic parki ng assist ,
lane de par ture warni n g
16 . Fr on t pass enge r ai rba g
17. Glovebox
18. Climatecontrol system
19. AUX input, USB i nput
2 0 . S e le ct or le v er
21 . C ig are tt e l ig hte r/po we r o ut let
22 . A c cele ra tor pe dal
23. Ignition switch with
steering wheel loc k
24 . B rak e pe dal
25. Clutch pedal
26. Steering wheel adjustment
27 . Stor age co mpar tme nt,
fusebox
28. Bonnet release lever
Manual transmission:
Reverse: With the vehicle
stat ionary
,
depress
the
cl ut ch peda l
,
press the release button onthe
selector lever and eng age th e gear.
If t h e gear d o es no te ngag e, se t the
lever to neutral, release the clutch
pedal and depre ss aga in; the n
repe at g ear sele ction .
Do n ot g rin d th e cl utc h
unnecessa rily.
When operat ing, de pr ess clutch
pedal f ully. Do not use the pedal as
a foot rest.
Automatic transmissi on:
P=Park
R= Reverse
N=Neutral
D=Drive
The selector lever can only be
moved out of Pwhentheignition is
on and the bra ke p ed al i s appl ied.
To enga ge Por R, p ush t he re l ea s e
butt on on t he sel ec tor le ver.
Automatic transmissi on,
Manual mode:
Move selector l ever from Dto the
left.
+= Hi ghe r gear
-= Lower gear
If a hi gher ge ar i s s el ec ted w hen
vehicle speed is t oo low, or a lower
gear w hen vehicle speed is too
high, the shift is not executed. This
can c ause a message in the Dr iver
Information Center (DIC).
Starting the engine:
Tur n key to p osition 1
Move st eering wheel slightly to
release steering wheell ock
Manual transmission in ne utral
with clutch depressed
Aut omatic transmission in PorN
wi th br ak e pe dal de press ed
Do n ot a cce ler ate
D i e s el en g i ne s : t u rn k e y t o
position2fo r pr ehe at ing a nd
wait for!to ex ti ng u ish
Tur n key to p osition 3 and
release
Stop-Start system:
When conditionsallow, the system
switchesoff the engine to save fuel
and reduce emissi on levels if the
vehic le i s at a low spe ed or at a
stand stil l, e.g . at traf fi cl ig hts or in a
tr affi c j am . It sta r ts th e engi n e a s
soon as th e cl utch is d epresse d.
To ac ti vate a n A uto sto p :
De pr ess cl utc h pedal
S h if t s e le ct o r l ev er t o n e ut ral
R el e as e t h e c l ut c h p e da l
The needle points to AU T O S T O P in
the tac ho mete r. To re start e ngine,
depre ss clu tch aga in.
Dea cti v a te St op -S tar t s y ste m
manually by pressing the eco
butt on on t he in str ume nt p anel.
Man ua l pa rk in g br ake:
Al ways ap ply fi rmly with out
ope ra ting releas e bu tto n a nd
ap ply as fi rmly as poss ibl e o n uph ill
or downhill slopes.
To release, pull lever up slightly,
pr ess r ele ase bu t ton an d l owe r
lever fully.
To reduce the opera ting forces,
depr ess the f oot brake at t he same
time.
Opening the bonnet:
P ul l re le as e le ve r be lo w i n st rum e n t
pane l on dr iver ’s si de and retur n i t
to its original p osition.
Pu sh s afe ty catch to the ri ght a nd
open the bonnet.
Elect r ical par ki ng br ak e:
P ull s wit c h J, par kin g bra ke
operates aut omatical ly wi th
adequate force. For ma ximum
force, e.g. when parking with
tra iler attached or on inclines, pull
switch Jtw ice .
The parking brake can always be
ac t iv at e d, ev en if t h e ig n i ti on i s o f f .
Bef or e le a v in g t h e v eh i cl e , c h ec k
park ing b rake s tatu s.
Torelease,switch onignition, keep
brak e p ed al de pr ess ed an d p us h
switch J.
Drive awa y function
Depre ssi ng clutch p edal or
enga ging d rive ge ar (a utomati c
tra nsmission) and then depressing
the accelerator pedal releases
ele ctric al p ark ing br ake.
Unlocking and opening the
tailgate:
Press button con the re mote
control with the ignitionoff to
unlock the tailgate.
To open the tailgate, pusht he
tou c hpa d sw itc h be l ow th e ta il gat e
handle.
Refuelling:
Before refue lling, swi tc h off en gi ne
and any external heaters wi th
com bus t ion cha m ber s ( iden t ifie d
bysticker on fuel filler flap).
Swi tc h o ff m obi le phon es .
Fuel fi ller fl ap is locate d at right
rear si de of ve hi cl e.
T he f u el f i ll e r f l ap ca n o n l y b e
o pe n ed i f t h e v eh i cl e i s u nlo c ke d .
Push f la p by hand t o release.
The filler cap can be retained inthe
br ack e t on th e f il l er f la p.
Wipe off any over flowing fuel
immediately.
Petrol engines - use unleaded fuel
that complies with DIN EN 228.
D i es e l en gi n e s - u s e d i e s el f ue l
m e e ti ng s p ec if ic ati on s o f
DINEN590.
Fuel tankcapacity - 56litres.
A 1 3 D TE di e s el en g in e w it h
Stop-Start system, reduced
c apac ity - 46 litr es.
Engine oil:
In vehiclesfitted with engine oil
level monitoring, the engine oil level
is ch e ck e d a ut om at ic a ll y a n d a
vehicle message( Code 79)
appear s in the Driv er Informat ion
Center (DIC) to warn t hat the
engine oil needs top ping up
immediately.
However, check engine oil level
manually every 300miles orp rior to
long j ourneys, to preve nt damage
to the en g in e.
Check with vehicle on a level
surfac e. E ngi n e m ust be at
operating temperature and
switched off fo r at l ea st 5 minute s.
Pull out di psti ck, wi pe cl ean , i n sert
to sto p o n the h a nd le, pull ou t a nd
read engine oil level.
Insert dip sti ck t o stop on handl e
and make half a tur n.
Caution:
It is the owner’s responsibility to
m ain t ain t h e c or re ct le ve l of a n
appr opriate quali ty oi l i n the
en gi n e .
Vehicle security
Tyrepressure:
Check t yr e pr essur es, includ ing t he spa re, e very 14 d ays and p rior to any long j ourney; tyres should b e
checked when cold. This also applies to vehicles with tyre pressure monitoring system.
Always inflate t he spar e tyre to the value specified for full load.
Ty re pr ess ure (psi)
Com for t se tti ng for lo ad of
upto 3 p eop le
En gi n e Tyres Fr o nt Re ar
A13DTE, All tyres 32 32
A14XE R,
A14XE L,
A14NET,
A14NEL,
A16XE R
A16LET, A l l e xc ep t be lo w 33 3 3
A20DTH 235/40 R19 35 32
205/60 R16, 36 33
215/50 R17
A17DTJ A l l e xc ep t b e low 33 3 3
205/55 R16, 35 32
215/50 R17,
225/45 R17,
235/40 R19
205/60 R16 36 33
A17DTR A l l e xc ep t b e low 33 3 3
205/55 R16, 35 32
225/45 R17,
235/40 R19
205/60 R16, 36 33
215/50 R17
All Temporary sp are 61 61
Tyre pressur e (psi)
EC O se tti n g1) for l oad of
upto 3 people
Engine Tyres Front Rear
A13DTE, All tyres 39 39
A14XER,
A14XEL,
A14NET,
A14NEL,
A16XER
A16LET, All except below 39 39
A20DTH, 235/40 R19 2) --
A20DTR 205/60 R16 2) - -
215/50 R17 2) - -
A17DTJ, All except below 39 39
A17DTR 205/55 R16 2) - -
205/60 R16 2) - -
215/50 R17 2) - -
225/45 R17 2) - -
235/40 R19 2) - -
All Tempor ary s par e 2) - -
1) The ECO tyre pressure serves to
ac hi eve the small est am ount of fuel
co ns um pt io n po ss ible .
2) D o not use ECO tyre pr essure for this
ty re.
Tyre p ressur e ( psi)
For f ull load
Engine Tyres Fr ont Rear
A13DTE, All tyres 33 39
A14XER,
A14XEL,
A14NET,
A14NEL,
A16XER
A16LET, All except below 35 41
A20DTH 235/40 R19 36 42
205/60 R16, 38 43
215/50 R17
A17DTJ All except below 35 41
205/55 R16, 36 42
215/50 R17,
225/45 R17,
235/40 R19
205/60 R16 38 43
A17DTR All except below 35 41
205/ 55 R16, 36 42
225/45 R17,
235/40 R19
205/60 R16, 38 43
215/50 R17
All Temporary spare 61 61
Vehicle features Ve hi cl e fe a tur e sVehicle features Ve hi cle f eatu res
Lo ngit udi nal se at ad j ustme nt :
Pull handle, slide seat, rel ea se
handle.
Danger:
Do not sit nearer than 25 cm from
the steering wheel, top ermit safe
ai rbag deploy me nt .
Seat backrests:
Pull lever, adjust inclination and
release lever. Allowthe seat to
engage audi bly.
Do not angl e t he ba ckr est too fa r
back. We recommend a maximum
rak e o f appr ox. 25 o.
Seat height:
Le ver pumping motion.
up = seat higher
down = seat lower
Head restraint adjustment:
Pre s s the b utt o n to adj us t h e ight
and en gag e.
Pu l lt h e hea dre st f orw ar ds t o adj u st
t o one of se veral h orizont al
posi tio ns and e ng age .
The upper edge of the head
re st rai n t s ho uld b e l ev el wi th the
t op o f th e h ead .
Se a t be l t :
With dr aw se at be l t from r et rac tor,
guide it unt wisted a cross the body
and insert latch pl ate in belt buck le.
To r el eas e be lt , pr ess red b u tton o n
belt buck le.
Interior mirror :
To redu ce daz zl e, ad jus t t he l ever
on th e u nder sid e of t he m i rro r
housing .
Automa tic anti-dazzle interior
mirror:
Da zzl e from fol low ing v eh icl es at
night is automatically reduced if
the vehiclei s equip ped with an
automatic anti-dazzleinterior
mirror.
The lever will not be present on the
underside of the mirror housing.
Exterior mirrors:
Sele ct t h e rele vant ex te ri or mi rror
by tu r nin g th e con t rol t o le ft (L) or
right (R). Then swivel the control to
ad just t h e mi rr or.
In position 0no mirror is selected.
Li gh t i n g :
Turn light switch:
AUTO= Automatic light control:
Headlight s are switched
on and off automatically
m= Act ivati on or de acti vati on
of au t omati c l ight con tro l
8=Sidelights
9=Headlights
Press li ght switch:
>= F ront f og lights
r= Re ar f og light
Turn thumb wheel:
q= Headlight range
adjustme nt
A= Instrument pa nel
illumination
Automatic light control:
When switching on ignition,
au toma ti c li ght c ontro l i s a cti ve.
When the function is switched on,
with the engine running the system
switches between da yti me running
l ight s a nd automat ic head lights ,
depe nding o n ex te rnal light
conditions.
Daytime running lights:
Increases visibility of t he vehicle
duri ng da yl ight.
Automatic headlight activation:
During poor lig ht conditions the
headlight s are swit ched on.
He ad li ght flas h, hi gh be am an d
low beam
He adlig ht fl ash = P ull lever
Hi gh be am = Pu sh le ve r
Low be am = Pull or push l ever
Fro nt fo g li ghts :
O per ate d w ith th e >but ton.
Light switch in position AUTO :
S witchi ng on f ront f o g ligh ts wi ll
switch headlights onautomatically.
Rearfog light:
O per ate d w ith th e rbut ton.
Light switch in position AUTO :
S witchi ng on r ea r fo g l ig ht wi ll
switch headlights onautomatically.
Light switch in position 8:
Rear f og l i ght can only be swit che d
on with front fog lights.
V ehi cle re ar fog li ght is dea ctiva ted
when towing.
Hea dlight r ange ad jus tment :
To a dapt head ligh t r ange t o the
vehicle load t o prevent dazzling of
other road users, turn thumb
wheel ?to r eq uire d po si ti on .
0 = Fr ont sea ts occ upied
1 = Al l se at s o c cupi ed
2 = Al l se at s o c cupi ed and
l oad c o mpart ment lad en
3 = Dr iv er ’ s se at o ccupie d an d
l oad c o mpart ment lad en
Turn a nd lane -c hange signals:
Lev e r u p = R ig ht t urn s ig nal
Lever down = Left turn signal
If the lev er is moved pa st the
resistance point, the turn signal is
switched on constantly. When the
steering wheel is moved backt he
tur n s ign al is au t omati call y
deactivated.
For three flashes,e.g. when
chang ing lanes, presst hel ever unt il
resistance isf elt and then release.
Move lev er to resist ance poi nt and
hold for longer indica tion.
Switch theturn signaloffmanually
by moving the lever to its original
posi tion.
Ha za rd wa rn in g fla s he rs:
O per ate d w ith th e ¨button.
I n th e ev en t o f an a cc id en t w he r e
the airbags are deployed the
ha zard wa rn in g fla s her s a re
ac tivat e d autom at icall y.
Windscreen w iper:
2=Fast
1=Slow
P= Timed interval wiping
or aut omatic wipi ng with
ra in se nso r
§=Off
For a single wi pe when the
windscreen wiper is off, press the
lever down.
Do not use if the wi ndscreen i s
frozen.
Swi tch off in ca r was he s.
Wind scr een and h eadlight
wa she r:
Pull lever.W asher fluid is sprayed
onto the windscreen and the wiper
wipes a f ew t imes.
If the headlightsare on, washer
fluid is also sprayed onto the
he adlig ht s. Th e h eadl ight was her
systemis then inoperable for
2 minutes.
Heate d rear wi ndow, heat ed
exterior mirrors:
The heating is operated b y
pressing the Übut ton.
Heating work s wit h the engine
running and switches off
aut omatically aft er a short time.
De pend ing on e ng ine ty pe, h eati ng
comes on automatic ally during
driving when the diesel particle
filter is being cleaned.
De misting and d efro sting the
win dows :
Press button V.
Fan autom at icall y swi tc hes t o
hig her sp eed and a ir i s dire cted
towards the windscreen.
Setthetemperature control to the
hig hest l evel.
Switch cooling non.
Switc h heat ed rear w in dow Üon.
Open si de airv ents and direct them
towards the door windows.
Se at po si t ion :
Si t w ith bu tt ock s a s far ba ck
agai nst bac kr est as pos sib le.
Adjust d istance between seat and
pedalsso that legsa re slightly
angl ed w hen de press ing peda ls.
Seat belt height adjustment:
1. Pull belt out slightly.
2. Press button.
3. Adj ust height and e ngage .
Seat inclination:
Lever pumpi ng motion.
up = front end higher
down = fr ont end lower
St eer ing wheel adju stment :
Unlock the lever, adjust the
s t ee ri n g w h e el , th e n en g a g e t h e
l e ve r an d e ns u re it is fu l ly lo c ke d.
Adjust only when vehic le is
st ationary and stee ring wheel lock
is released.
Power windows:
Withtheignitionon, power
windows are operated via the
switches in thed oor.
Front switchesoperate the front
windows a ndr ear swi tc hes op erate
therear windows.
Push switch = Open wind ow
P ull s wit c h = Cl o se wi n do w
Push or pull switch t o the second
detentposition and then release:
Window opens or closes
automatically.
I f t h e w i nd o w g l as s en c o unt er s
resistanc e above themiddle of the
window during aut omatic closing ,
itisimmediately stopped and
opened again.
Operati ng windows from outside:
De pend ing on t h e e quip ment l evel,
the windows can be oper ated
remotely fromoutside the vehicle.
Press and hold button c.or .e.on
the remote control until a ll wi ndows
have opened or closed.
If the wi ndows are repeat edly
ope rat ed wi thi n sh or t i nter val s, the
window operation is disabled for
some time.
F o ld i n g in e x te r i o r m i rr o rs :
Manually:
Appl y sli ght pr essu r e to oute r ed ge
of mirror housing.
Electrically:
Tu rn cont ro l to 0andpush control
down to fold exterior mirrors.
Push again to return t hem t o t heir
original position.
F or pe de stri an s af et y, e xte r ior
mir rors will swing out of their
normal mounting position if they
are struck with sufficient force.
Reposition mirrors before driving.
Rear w ind ow wi per/ washe r:
Presst her ocker sw itch on the end
of the lever to activate the re ar
window wi per.
upper position = c ontinuous
operation
lowe r pos iti o n = i nt e rmit te nt
operation
midd le position = off
Push lever. Washer fluid is sprayed
onto t he rear window and the wiper
wipes a few time s.
Do not use i f the rear window is
froz en.
Switchoff in car washes.
The rear window wa sher sy stem is
deact ivated when the fluid level is
low .

Other manuals for 2010 Astra

18

Other Vauxhall Automobile manuals

Vauxhall NEW INSIGNIA User manual

Vauxhall

Vauxhall NEW INSIGNIA User manual

Vauxhall VIVARO User manual

Vauxhall

Vauxhall VIVARO User manual

Vauxhall MY15 INSIGNIA User manual

Vauxhall

Vauxhall MY15 INSIGNIA User manual

Vauxhall Ampera User manual

Vauxhall

Vauxhall Ampera User manual

Vauxhall INSIGNIA 2017 User manual

Vauxhall

Vauxhall INSIGNIA 2017 User manual

Vauxhall MOVANO User manual

Vauxhall

Vauxhall MOVANO User manual

Vauxhall Meriva User manual

Vauxhall

Vauxhall Meriva User manual

Vauxhall 2013 Combo User manual

Vauxhall

Vauxhall 2013 Combo User manual

Vauxhall Cascada 2014 User manual

Vauxhall

Vauxhall Cascada 2014 User manual

Vauxhall Zafira Tourer User manual

Vauxhall

Vauxhall Zafira Tourer User manual

Vauxhall 2012 Agila User manual

Vauxhall

Vauxhall 2012 Agila User manual

Vauxhall 2013 Corsa Infotainment system User manual

Vauxhall

Vauxhall 2013 Corsa Infotainment system User manual

Vauxhall MOVANO User manual

Vauxhall

Vauxhall MOVANO User manual

Vauxhall 2011 Astra User manual

Vauxhall

Vauxhall 2011 Astra User manual

Vauxhall Meriva User manual

Vauxhall

Vauxhall Meriva User manual

Vauxhall 2013 Corsa Infotainment system User manual

Vauxhall

Vauxhall 2013 Corsa Infotainment system User manual

Vauxhall VIVARO User manual

Vauxhall

Vauxhall VIVARO User manual

Vauxhall Vivaro 2008.5 User manual

Vauxhall

Vauxhall Vivaro 2008.5 User manual

Vauxhall INSIGNIA 2014 User manual

Vauxhall

Vauxhall INSIGNIA 2014 User manual

Vauxhall 2016 Viva User manual

Vauxhall

Vauxhall 2016 Viva User manual

Vauxhall Antara User manual

Vauxhall

Vauxhall Antara User manual

Vauxhall 2013 Adam User manual

Vauxhall

Vauxhall 2013 Adam User manual

Vauxhall 2013 Mokka User manual

Vauxhall

Vauxhall 2013 Mokka User manual

Vauxhall VIVARO User manual

Vauxhall

Vauxhall VIVARO User manual

Popular Automobile manuals by other brands

GMC 2006 Savana manual

GMC

GMC 2006 Savana manual

Ferrari F430 SPIDER owner's manual

Ferrari

Ferrari F430 SPIDER owner's manual

Volvo XC70 2011 quick guide

Volvo

Volvo XC70 2011 quick guide

Mercedes-Benz AMG GT Roadster Operator's manual

Mercedes-Benz

Mercedes-Benz AMG GT Roadster Operator's manual

Chevrolet station wagon 1970 Important operating, maintenance and safety instructions

Chevrolet

Chevrolet station wagon 1970 Important operating, maintenance and safety instructions

MG Midget J1 1933 instruction manual

MG

MG Midget J1 1933 instruction manual

Audi A7 2021 Quick questions and answers

Audi

Audi A7 2021 Quick questions and answers

Mercedes-Benz B-Class 2015 Service booklet

Mercedes-Benz

Mercedes-Benz B-Class 2015 Service booklet

GMC Yukon Denali 2013 owner's manual

GMC

GMC Yukon Denali 2013 owner's manual

Toyota Solara 2001 operating manual

Toyota

Toyota Solara 2001 operating manual

Westfield AeroRace 2008 Build manual

Westfield

Westfield AeroRace 2008 Build manual

Gravely Treker 996122 Owner's/operator's manual

Gravely

Gravely Treker 996122 Owner's/operator's manual

Volvo FMX overview

Volvo

Volvo FMX overview

Dodge 18693 Stratus Coupe owner's manual

Dodge

Dodge 18693 Stratus Coupe owner's manual

Chrysler 2006 Sebring Service manual

Chrysler

Chrysler 2006 Sebring Service manual

Cadillac 1994 Seville Owners literature

Cadillac

Cadillac 1994 Seville Owners literature

Fiat 124 SPIDER ABARTH 2017 user guide

Fiat

Fiat 124 SPIDER ABARTH 2017 user guide

Lexus LS 460 user manual

Lexus

Lexus LS 460 user manual

manuals.online logo
manuals.online logoBrands
  • About & Mission
  • Contact us
  • Privacy Policy
  • Terms and Conditions

Copyright 2025 Manuals.Online. All Rights Reserved.