12
M1 - 2
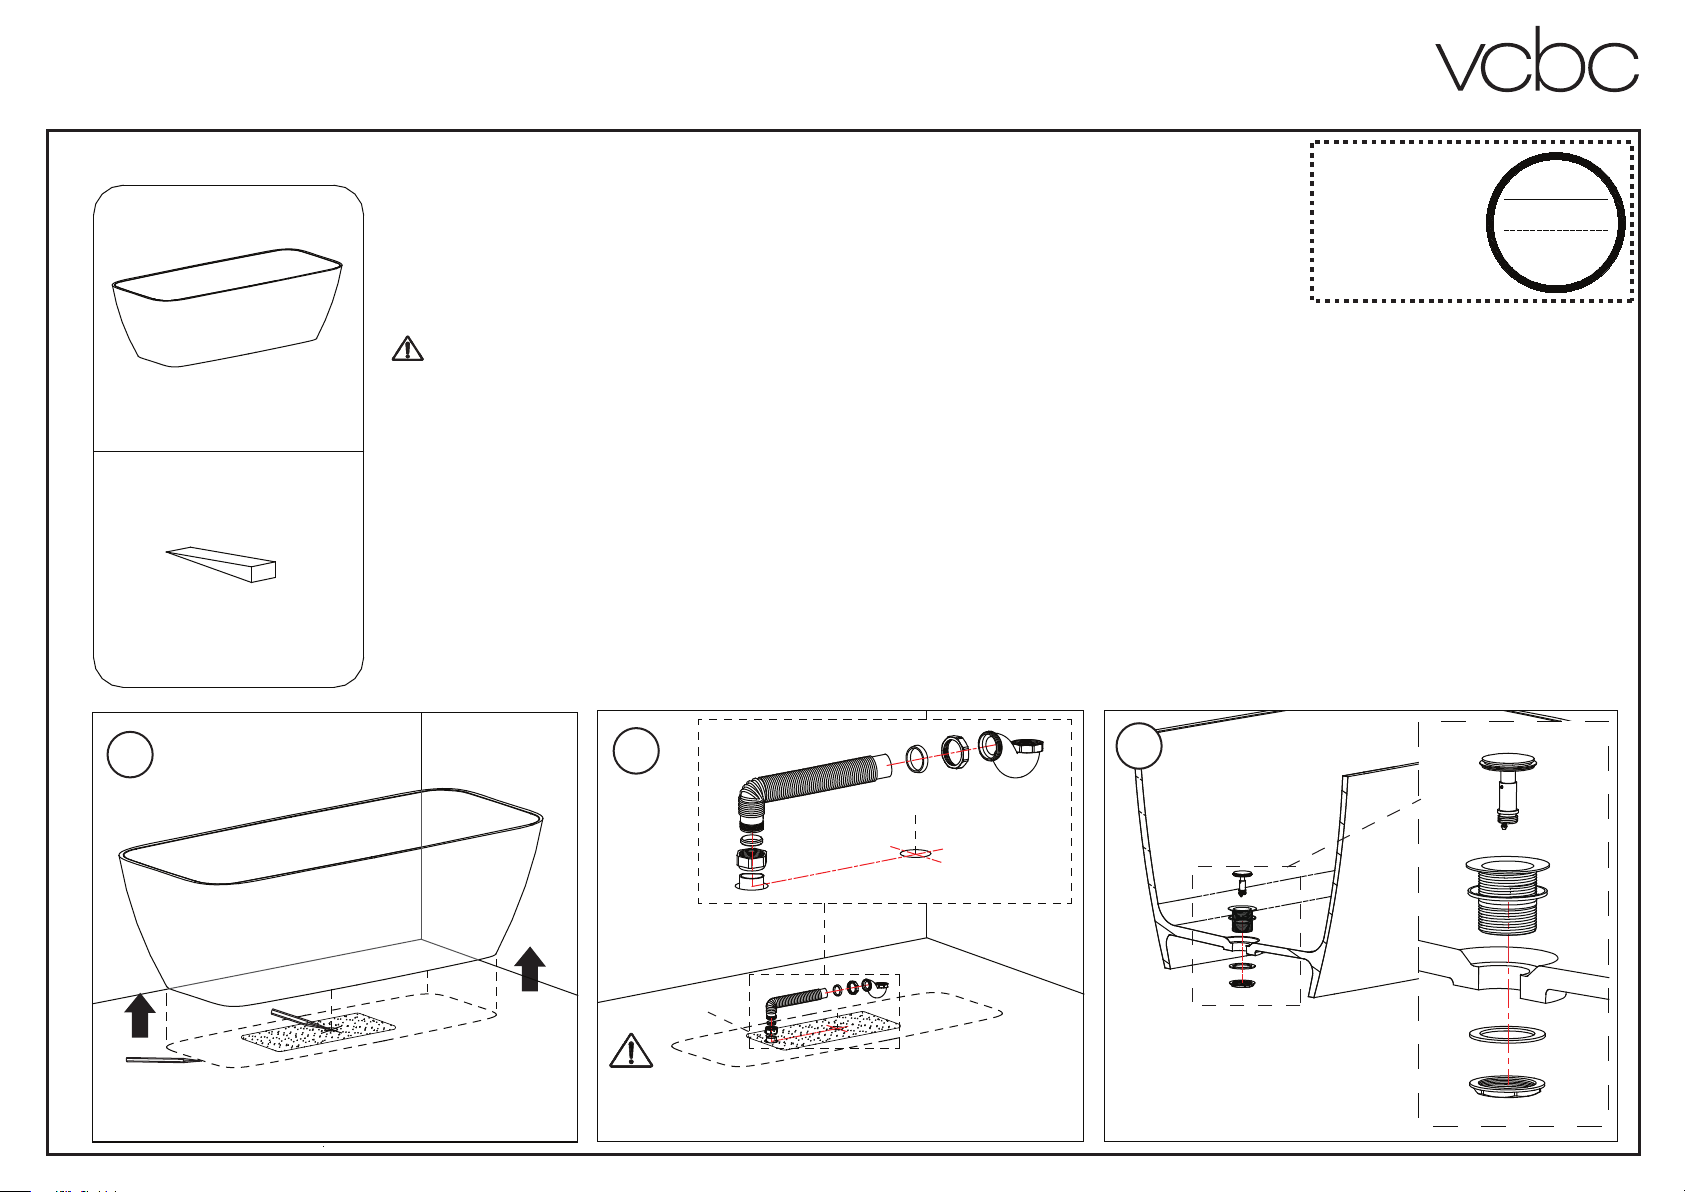
to drainage
Clear Stone Baths
Waste connection is dependant on the site situation; final decision
about installation of waste connection should be taken
by a suitably qualified person.
Under floor access required for plumbing of bath waste.
3
Manufacturers
Identification Number
In the event of after
sales requirements
please quote this
number.
Please place your product
identification number
here and keep this
paperwork in a safe
place as you will
need this if a problem
occurs with your product.
XXXXXXXXXXX
Parts supplied:
1x
4x
Do NOT overtighten the waste as this may cause long termdamage to the bath. We recommend to use a torque wrench to tighten the waste by using
a torque force between 25 Nm and 50Nm.
Important
Please unwrap the bath and check it carefully to ensure it has not been damaged during handling or transport.
Please check that all parts have been supplied.
Assemble bath on a mat to protect against damage to the bath surface.
Store the bath in a safe place until you begin installation.
Any installation should be carried out by a qualified tradesman with knowledge of statutory plumbing requirements in your area.
This installation guide does not include details of waste connection; final decisions about installation of waste connection
should be taken by a suitably qualified person.
Care and Maintenance
The below instruction is for a fine scratch or slight mark on the surface. If the scratch or mark is too deep, then a Clearstone Repair Kit CRK will be necessary. If using the
Repair Kit, follow the instructions supplied with the Repair Kit. For a fine scratch or a slight mark, use a 1500 grade sand paper, gently sand the area with water. For best
results, limit sanding to the smallest possible area around the scratch. Re-polish the surface afterwards using a neutral polishing compound or toothpaste.
It may be possible to polish very fine scratches away without using abrasive papers: scrubbing gently with a soft brush or plastic pad (not metal scouring pad) and a mildly
abrasive cream cleaner. Afterwards scrub the whole area with plenty of clean water and re-polish as before.
Everyday cleaning
We recommend a non-abrasive bathroom cleaner.
Warning
Never use cleaners / bleach products, caustic soda and or ethyl alcohol (for example Lysoform or other specifically manufactured WC bowl cleaners. In case of contact
rinse immediately with water.
Do not drill through the side of the bath for the waste connection, only where the overflow template is provided. Waste pipe is through floor access only.
Please note that hair dye/colouring or oil based colours may discolour your bath. Avoid using any strong dye or colour in or near your bath.
When using underfloor heating please take care not to put the heating pipes/mats underneath the bath area. The bath should not sit on a heated floor.
Bath mat or suction pad might cause damage to the surface over time and must be avoided.
Everyday Cleaning We recommend a non-abrasive bathroom cleaner.
WARNING
• Never use bleach products, caustic soda or ethyl alcohol (for example Lysoform) or other specifically manufactured cleaners. In case of contact, rinse immediately with water.
• Please note that hair dye/colouring or oil based colours may discolour your bath. Avoid using any strong dye or colour in or near your bath.
• Do not drill through the side of the bath for waste connection, only where the overflow template is provided. Waste pipe is through floor access only.
• When using underfloor heating please take care not to put the heating pipes/mats underneath the bath area. The bath should not sit on a heated floor.
• Bath mat or suction mats must be avoided – might cause damage to the surface over time.
CLEARSTONE BATHS
BATHCO.CO.NZ
325.A.21128
325.A.21127
N3BCS
N3ACS
NZECS


