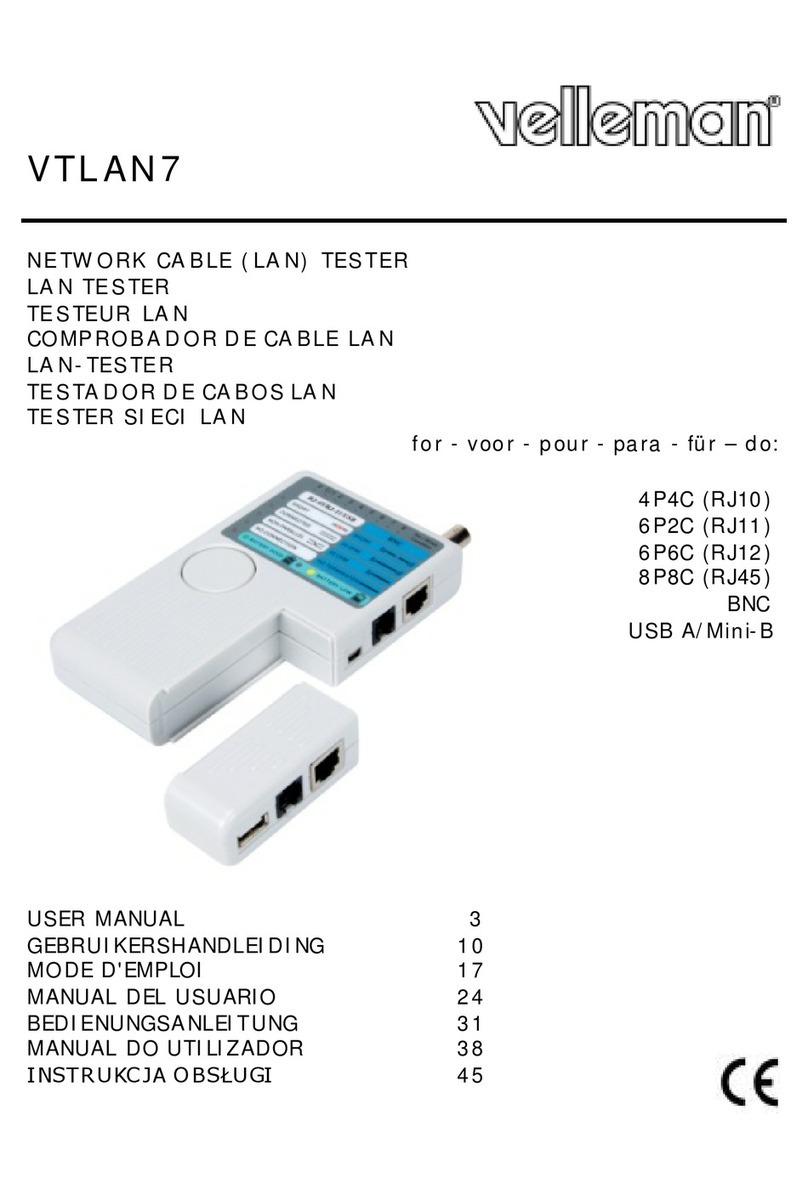
Velleman VTTEST15 User manual

VTTEST15
USER MANUAL 2
GEBRUIKERSHANDLEIDING 5
MODE D’EMPLOI 8
MANUAL DEL USUARIO 11
BEDIENUNGSANLEITUNG 14
INSTRUKCJA OBSŁUGI 17
MANUAL DO UTILIZADOR 20

VTTEST15
V. 02 –23/04/2018 2 ©Velleman nv
USER MANUAL
1. Introduction
To all residents of the European Union
Important environmental information about this product
This symbol on the device or the package indicates that disposal
of the device after its lifecycle could harm the environment. Do
not dispose of the unit (or batteries) as unsorted municipal
waste; it should be taken to a specialized company for recycling.
This device should be returned to your distributor or to a local
recycling service. Respect the local environmental rules.
If in doubt, contact your local waste disposal authorities.
Thank you for choosing Velleman! Please read the manual thoroughly before
bringing this device into service. If the device was damaged in transit, do
not install or use it and contact your dealer.
2. Safety Instructions
Read and understand this manual and all safety signs
before using this appliance.
This device can be used by children aged from 8 years and
above, and persons with reduced physical, sensory or
mental capabilities or lack of experience and knowledge if
they have been given supervision or instruction concerning
the use of the device in a safe way and understand the
hazards involved. Children shall not play with the device.
Cleaning and user maintenance shall not be made by
children without supervision.
3. General Guidelines
Refer to the Velleman®Service and Quality Warranty on the last pages of
this manual.
4. Battery
Warning: Do not puncture batteries or throw them in fire
as they may explode. Do not attempt to recharge non-
rechargeable batteries (alkaline). Dispose of batteries in
accordance with local regulations. Keep batteries away
from children.

VTTEST15
V. 02 –23/04/2018 3 ©Velleman nv
5. Operation
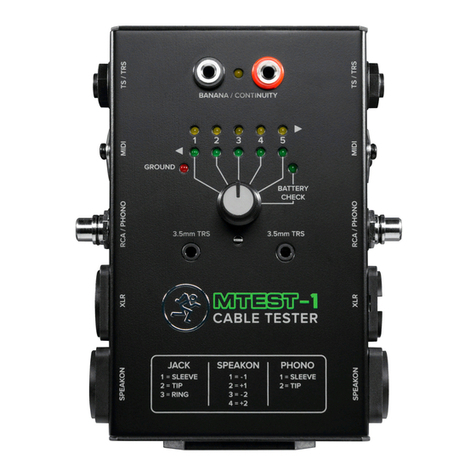
Turn the rotary switch fully clockwise to test the strength of a battery. The
battery LED will light bright green if the internal battery is fully charged.
Plug one end of the cable into the appropriate jack on the left side of your
VTTEST15. Plug the other end of the cable into the appropriate jack on the
right. Now, set the rotary switch to “1” to test the connection of contact “1”
on the plug inserted into the left. If there is a connection, the green LED will
light below “1” while a yellow LED will light above the contact of the plug
connected to the right. If no LED lights, there is no connection: the left
connection will either be floating or open. Set the rotary switch to “2” to test
contact “2” etc. until all contacts have been checked. If the GROUND LED
lights, there is a connection between the corresponding contacts and the
chassis.
To test a cable with banana plugs, just plug each end of the cable into the
banana jacks. The LED will light and the unit will beep if there is a
connection between the plugs. These jacks can also be used for continuity
tests using two probe leads.
Jack
Speakon®
Phono
1 = Sleeve
1 = -1
5 = -3
1 = Screen
2 = Tip
2 = +1
6 = +3
2 = Hot
3 = Ring
3 = -2
7 = -4
4 = +2
8 = +4
¼” TS Mono to ¼” Mono
¼” TRS to ¼” TRS
1 Sleeve
1 Sleeve, 3 Ring
1 Sleeve
1 Sleeve, 3
Ring
2 Tip
2 Tip
2 Tip
2 Tip
3 Ring
1 Sleeve, 3 Ring
(shorted with
sleeve)
3 Ring
1 Sleeve, 3
Ring
XLR Balanced to XLR Balanced
XLR Unbalanced to XLR
Unbalanced
Pin 1
Pin 1
Pin 1
Pin 1, Pin 3
Pin 2
Pin 2
Pin 2
Pin 2
Pin 3
Pin 3
Pin 3
Pin 1, Pin 3
¼” TS Mono to XLR Unbalanced
¼” TRS to XLR Balanced
1 Sleeve
Pin 1, Pin 3
1 Sleeve
Pin 1
2 Tip
Pin 2
2 Tip
Pin 2
3 Ring
Pin 1, Pin 3
(shorted with
sleeve)
3 Ring
Pin 3

VTTEST15
V. 02 –23/04/2018 4 ©Velleman nv
6. Technical Specifications
power supply...............1 x 9 V E-block (order code 6LR61, incl.)
dimensions .............................................. 120 x 210 x 70 mm
total weight .................................................................900 g
Use this device with original accessories only. Velleman nv cannot
be held responsible in the event of damage or injury resulting from
(incorrect) use of this device. For more info concerning this product
and the latest version of this manual, please visit our website
www.velleman.eu. The information in this manual is subject to
change without prior notice.
© COPYRIGHT NOTICE
The copyright to this manual is owned by Velleman nv. All
worldwide rights reserved. No part of this manual may be copied,
reproduced, translated or reduced to any electronic medium or otherwise
without the prior written consent of the copyright holder.

VTTEST15
V. 02 –23/04/2018 5 ©Velleman nv
GEBRUIKERSHANDLEIDING
1. Inleiding
Aan alle ingezetenen van de Europese Unie
Belangrijke milieu-informatie betreffende dit product
Dit symbool op het toestel of de verpakking geeft aan dat, als het na zijn
levenscyclus wordt weggeworpen, dit toestel schade kan
toebrengen aan het milieu. Gooi dit toestel (en eventuele
batterijen) niet bij het gewone huishoudelijke afval; het moet bij
een gespecialiseerd bedrijf terechtkomen voor recyclage. U moet
dit toestel naar uw verdeler of naar een lokaal recyclagepunt
brengen. Respecteer de plaatselijke milieuwetgeving.
Hebt u vragen, contacteer dan de plaatselijke autoriteiten
betreffend de verwijdering.
Dank u voor uw aankoop! Lees deze handleiding grondig voor u het toestel
in gebruik neemt. Werd het toestel beschadigd tijdens het transport,
installeer het dan niet en raadpleeg uw dealer.
2. Veiligheidsinstructies
Lees en begrijp deze handleiding en de
veiligheidsinstructies vóór ingebruikname.
Dit toestel is geschikt voor gebruik door kinderen vanaf
8 jaar, door personen met fysieke, zintuiglijke of
verstandelijke beperkingen, of door personen met gebrek
aan ervaring en kennis, op voorwaarde dat dit onder
toezicht gebeurt van een persoon die verantwoordelijk is
voor hun veiligheid of hun aanwijzingen heeft gegeven,
hoe zij het toestel moeten gebruiken en zich bewust zijn
van de risico's die het gebruik van het toestel met zich
meebrengt.
3. Algemene richtlijnen
Raadpleeg de Velleman® service- en kwaliteitsgarantie achteraan deze
handleiding.
4. Batterij
Waarschuwing: U mag batterijen nooit doorboren of in
het vuur gooien (explosiegevaar). Herlaad geen
alkalinebatterijen. Gooi batterijen weg volgens de

VTTEST15
V. 02 –23/04/2018 6 ©Velleman nv
plaatselijke milieuwetgeving. Houd batterijen buiten het
bereik van kinderen.
5. Gebruik
Draai de draaiknop volledig naar rechts om de batterij te testen. De groene
led voor de batterij licht op wanneer de batterij volledig is geladen.
Steek een kabeleinde in de gepaste aansluiting aan de linkerzijde van uw
VTTEST15. Steek het andere kabeleinde in de gepaste aansluiting aan de
rechterkant. Plaats nu de knop op ‘1’ om de aansluiting met contact ‘1’ op de
plug links te testen. Is er een aansluiting, dan zal de groene led onder ‘1’
oplichten terwijl de gele led oplicht boven het contactpunt van de plug rechts.
Licht geen enkele led op, dan is er geen aansluiting. De aansluiting links is dan
open. Plaats de draaiknop vervolgens op ‘2’ om contactpunt ‘2’ te testen, enz.
tot u alle contactpunten hebt getest. Licht de GROUND-led op, dan is er
aansluiting tussen de overeenkomstig contacten en de behuizing.
Om een kabel met banaanpluggen te testen, steek elk kabeleinde in de
banaaningangen. De led licht op en het toestel zal een geluidssignaal
voortbrengen als er een aansluiting tussen de pluggen is. Deze ingangen kunnen
ook gebruikt worden om de continuïteit te testen met behulp van sondes.
Jack
Speakon®
Phono
1 = Huls
1 = -1
5 = -3
1 = Afscherming
2 = Tip
2 = +1
6 = +3
2 = Hot
3 = Ring
3 = -2
7 = -4
4 = +2
8 = +4
¼” TS mono naar ¼” mono
¼” TRS naar ¼” TRS
1 Huls
1 Huls, 3 Ring
1 Huls
1 Huls, 3 Ring
2 Tip
2 Tip
2 Tip
2 Tip
3 Ring
1 Huls, 3 Ring
(kortsluiting met
huls)
3 Ring
1 Huls, 3 Ring
XLR gebalanceerd naar XLR
gebalanceerd
XLR niet-gebalanceerd naar
XLR niet-gebalanceerd
Pin 1
Pin 1
Pin 1
Pin 1, Pin 3
Pin 2
Pin 2
Pin 2
Pin 2
Pin 3
Pin 3
Pin 3
Pin 1, Pin 3
¼” TS mono naar XLR niet-
gebalanceerd
¼” TRS naar XLR
gebalanceerd
1 Huls
Pin 1, Pin 3
1 Huls
Pin 1
2 Tip
Pin 2
2 Tip
Pin 2
3 Ring
Pin 1, Pin 3
(kortsluiting met
huls)
3 Ring
Pin 3

VTTEST15
V. 02 –23/04/2018 7 ©Velleman nv
6. Technische specificaties
voeding ............... 1 x 9 V E-blok (ordercode 6LR61, meegelev.)
afmetingen .............................................. 120 x 210 x 70 mm
gewicht .......................................................................900 g
Gebruik dit toestel enkel met originele accessoires. Velleman nv is
niet aansprakelijk voor schade of kwetsuren bij (verkeerd) gebruik
van dit toestel. Voor meer informatie over dit product en de laatste
versie van deze handleiding, zie www.velleman.eu. De informatie in
deze handleiding kan te allen tijde worden gewijzigd zonder
voorafgaande kennisgeving.
© AUTEURSRECHT
Velleman nv heeft het auteursrecht voor deze handleiding. Alle
wereldwijde rechten voorbehouden. Het is niet toegestaan om deze
handleiding of gedeelten ervan over te nemen, te kopiëren, te vertalen, te
bewerken en op te slaan op een elektronisch medium zonder voorafgaande
schriftelijke toestemming van de rechthebbende.

VTTEST15
V. 02 –23/04/2018 8 ©Velleman nv
MODE D’EMPLOI
1. Introduction
Aux résidents de l'Union européenne
Des informations environnementales importantes concernant ce
produit
Ce symbole sur l'appareil ou l'emballage indique que l’élimination d’un
appareil en fin de vie peut polluer l'environnement. Ne pas jeter
un appareil électrique ou électronique (et des piles éventuelles)
parmi les déchets municipaux non sujets au tri sélectif ; une
déchèterie traitera l’appareil en question. Renvoyer les
équipements usagés à votre fournisseur ou à un service de
recyclage local. Il convient de respecter la réglementation locale
relative à la protection de l’environnement.
En cas de questions, contacter les autorités locales pour élimination.
Nous vous remercions de votre achat ! Lire la présente notice attentivement
avant la mise en service de l’appareil. Si l’appareil a été endommagé
pendant le transport, ne pas l’installer et consulter votre revendeur.
2. Consignes de sécurité
Lire et comprendre ce mode d'emploi et toutes les
consignes de sécurité avant d'utiliser l'appareil.
Cet appareil peut être utilisé par des enfants âgés de 8 ans
et plus et des personnes manquant d’expérience et de
connaissances ou dont les capacités physiques, sensorielles
ou mentales sont réduites, si elles ont été formées et
encadrées quant à l'utilisation de l'appareil d'une manière
sûre et connaissent les risques encourus.
3. Directives générales
Se référer à la garantie de service et de qualité Velleman® en fin de notice.
4. La pile
Avertissement : Ne jamais perforer les piles et ne pas les
jeter au feu (danger d’explosion). Ne jamais recharger des
piles alcalines. Se débarrasser des piles en respectant la
réglementation locale relative à la protection de
l’environnement. Garder les piles hors de la portée des
enfants.

VTTEST15
V. 02 –23/04/2018 9 ©Velleman nv
5. Emploi
Tourner le bouton rotatif complètement vers la droite pour tester la pile. La
LED verte de la pile s’allume si la pile est entièrement chargée.
Brancher une fiche sur la connexion appropriée sur le côté gauche de votre
VTTEST15. Brancher l’autre fiche sur la connexion appropriée sur le côté
droit. À présent, placer le bouton rotatif sur « 1 » pour tester la connexion
du contact « 1 » sur la fiche insérée dans la connexion gauche. S’il y a
connexion, la LED verte sous « 1 » s’allume et la LED jaune correspondant
au contact de la fiche insérée dans la connexion droite s’allume. Si aucune
LED ne s’allume, il n’y pas de connexion. Placer le bouton rotatif sur « 2 »
pour tester le contact « 2 », etc. jusqu’à ce que tous les contacts soient
testés. Si la LED « GROUND » s’allume, il y a connexion entre le contact
correspondant et le boîtier.
Pour tester des câbles avec des fiches banane, brancher chaque fiche dans
une prise banane. La LED s’allume et l’appareil émettra un signal sonore en
cas de connexion entre les fiches. Utiliser les prises banane pour tester la
continuité à l’aide des deux sondes.
Jack
Speakon®
Phono
1 = Manche
1 = -1
5 = -3
1 = Blindage
2 = Pointe
2 = +1
6 = +3
2 = Point chaud
3 = Bague
3 = -2
7 = -4
4 = +2
8 = +4
¼” TS mono vers ¼” mono
¼” TRS vers ¼” TRS
1 Manche
1 Manche, 3
Ring
1 Manche
1 Manche, 3
Ring
2 Pointe
2 Pointe
2 Pointe
2 Pointe
3 Bague
1 Manche, 3
Bague
(court-circuit
avec manche)
3 Bague
1 Manche, 3
Bague
XLR symétrique vers XLR
symétrique
XLR asymétrique vers XLR
asymétrique
Broche 1
Broche 1
Broche 1
Broche 1,
Broche 3
Broche 2
Broche 2
Broche 2
Broche 2
Broche 3
Broche 3
Broche 3
Broche 1,
Broche 3

VTTEST15
V. 02 –23/04/2018 10 ©Velleman nv
¼” TS mono vers XLR
asymétrique
¼” TRS vers XLR symétrique
1 Manche
Broche 1,
Broche 3
1 Manche
Broche 1
2 Pointe
Broche 2
2 Pointe
Broche 2
3 Bague
Broche 1,
Broche 3
(court-circuit
avec manche)
3 Bague
Broche 3
6. Spécifications techniques
alimentation................1 pile 9 V type E (référence 6LR61, incl.)
dimensions .............................................. 120 x 210 x 70 mm
poids ..........................................................................900 g
N’employer cet appareil qu’avec des accessoires d’origine. La SA
Velleman ne peut, dans la mesure conforme au droit applicable être
tenue responsable des dommages ou lésions (directs ou indirects)
pouvant résulter de l’utilisation de cet appareil. Pour plus
d’information concernant cet article et la dernière version de cette
notice, visiter notre site web www.velleman.eu. Toutes les
informations présentées dans cette notice peuvent être modifiées
sans notification préalable.
© DROITS D’AUTEUR
SA Velleman est l’ayant droit des droits d’auteur pour cette notice.
Tous droits mondiaux réservés. Toute reproduction, traduction, copie ou
diffusion, intégrale ou partielle, du contenu de cette notice par quelque
procédé ou sur tout support électronique que ce soit est interdite sans
l’accord préalable écrit de l’ayant droit.
VTTEST15
V. 02 –23/04/2018 11 ©Velleman nv
MANUAL DEL USUARIO
1. Introducción
A los ciudadanos de la Unión Europea
Importantes informaciones sobre el medio ambiente concerniente a
este producto
Este símbolo en este aparato o el embalaje indica que, si tira las muestras
inservibles, podrían dañar el medio ambiente.
No tire este aparato (ni las pilas, si las hubiera) en la basura
doméstica; debe ir a una empresa especializada en reciclaje.
Devuelva este aparato a su distribuidor o a la unidad de
reciclaje local. Respete las leyes locales en relación con el medio
ambiente.
Si tiene dudas, contacte con las autoridades locales para residuos.
¡Gracias por haber comprado el VTTEST15! Lea atentamente las
instrucciones del manual antes de usarlo. Si el aparato ha sufrido algún
daño en el transporte no lo instale y póngase en contacto con su
distribuidor.
2. Instrucciones de seguridad
Lea y comprenda este manual y todas las instrucciones de
seguridad antes de usar el aparato.
Este aparato no es apto para niños menores de 8 años ni
para personas con capacidades físicas, sensoriales o
mentales reducidas ni para personas con una falta de
experiencia y conocimientos del producto, salvo si están
bajo la vigilancia de una persona que pueda garantizar la
seguridad.
3. Normas generales
Véase la Garantía de servicio y calidad Velleman® al final de este manual
del usuario.
4. La pila
Advertencia: Nunca perfore las pilas y no las eche al
fuego (peligro de explosión). Nunca recargue pilas no
recargables (alcalinas). Respete las leyes locales en
relación con el medio ambiente al tirar las pilas. Mantenga
las pilas lejos del alcance de niños.

VTTEST15
V. 02 –23/04/2018 12 ©Velleman nv
5. Uso
Gire el botón giratorio completamente hacia la derecha para comprobar la
pila. El LED verde de la pila se ilumina si la pila está completamente
cargada.
Conecte un conector a la conexión adecuada del lado izquierdo del
VTTEST15. Conecte el otro conector a la conexión adecuada del lado
derecho. Ahora, ponga el botón giratorio en la posición “1” para comprobar
la conexión del contacto “1” del conector introducido en la conexión
izquierda. Si hay una conexión, el LED verde bajo “1” se ilumina y el LED
amarillo se ilumina encima del contacto del conector derecho. Si ningún LED
se ilumina, no hay conexión. Ponga el botón giratorio en la posición “2” para
comprobar el contacto “2” etc. hasta que todos los contactos hayan sido
comprobados. Si el LED “GROUND” se ilumina, hay una conexión entre el
contacto correspondiente y la caja.
Para comprobar cables con conector banana, conecte cada conector a una
entrada de banana. El LED se ilumina y el aparato emitirá una señal en caso
de conexión entre los conectores. Utilice las entradas banana para
comprobar la continuidad con la ayuda de las dos sondas.
Jack
Speakon®
Phono
1 = Manga
1 = -1
5 = -3
1 = Blindaje
2 = Punta
2 = +1
6 = +3
2 = Punta caliente
3 = Anillo
3 = -2
7 = -4
4 = +2
8 = +4
¼” TS mono a ¼” mono
¼” TRS a ¼” TRS
1 Funda
1 Funda , 3 Anillo
1 Funda
1 Funda , 3
Ring
2 Punta
2 Punta
2 Punta
2 Punta
3 Anillo
1 Funda , 3 Anillo
(cortocircuite con
funda)
3 Anillo
1 Funda , 3
Anillo
XLR equilibrado a XLR
equilibrado
XLR equilibrado a XLR no
equilibrado
Polo 1
Polo 1
Polo 1
Polo 1, Polo
3
Polo 2
Polo 2
Polo 2
Polo 2
Polo 3
Polo 3
Polo 3
Polo 1, Polo
3

VTTEST15
V. 02 –23/04/2018 13 ©Velleman nv
¼” TS mono a XLR no
equilibrado
¼” TRS a XLR equilibrado
1 Funda
Polo 1, Polo 3
1 Funda
Polo 1
2 Punta
Polo 2
2 Punta
Polo 2
3 Anillo
Polo 1, Polo 3
(cortocircuite con
funda)
3 Anillo
Polo 3
6. Especificaciones
alimentación ....................... 1 pila 9 V (referencia 6LR61, incl.)
dimensiones............................................. 120 x 210 x 70 mm
peso ...........................................................................900 g
Utilice este aparato sólo con los accesorios originales. Velleman NV
no será responsable de daños ni lesiones causados por un uso
(indebido) de este aparato. Para más información sobre este
producto y la versión más reciente de este manual del usuario, visite
nuestra página www.velleman.eu. Se pueden modificar las
especificaciones y el contenido de este manual sin previo aviso.
© DERECHOS DE AUTOR
Velleman NV dispone de los derechos de autor para este manual del
usuario. Todos los derechos mundiales reservados. Está estrictamente
prohibido reproducir, traducir, copiar, editar y guardar este manual del
usuario o partes de ello sin previo permiso escrito del derecho habiente.

VTTEST15
V. 02 –23/04/2018 14 ©Velleman nv
BEDIENUNGSANLEITUNG
1. Einführung
An alle Einwohner der Europäischen Union
Wichtige Umweltinformationen über dieses Produkt
Dieses Symbol auf dem Produkt oder der Verpackung zeigt an, dass die
Entsorgung dieses Produktes nach seinem Lebenszyklus der
Umwelt Schaden zufügen kann. Entsorgen Sie die Einheit (oder
verwendeten Batterien) nicht als unsortiertes Hausmüll; die
Einheit oder verwendeten Batterien müssen von einer
spezialisierten Firma zwecks Recycling entsorgt werden. Diese
Einheit muss an den Händler oder ein örtliches Recycling-
Unternehmen retourniert werden. Respektieren Sie die örtlichen
Umweltvorschriften.
Falls Zweifel bestehen, wenden Sie sich für Entsorgungsrichtlinien
an Ihre örtliche Behörde.
Wir bedanken uns für den Kauf des VTTEST15! Lesen Sie diese
Bedienungsanleitung vor Inbetriebnahme sorgfältig durch. Überprüfen Sie,
ob Transportschäden vorliegen. Sollte dies der Fall sein, verwenden Sie das
Gerät nicht und wenden Sie sich an Ihren Händler.
2. Sicherheitshinweise
Lesen und begreifen Sie diese Bedienungsanleitung und die
Sicherheitshinweise vor Inbetriebnahme.
Dieses Gerät kann von Kindern ab 8 Jahren und darüber
sowie von Personen mit verringerten physischen,
sensorischen oder mentalen Fähigkeiten oder Mangel an
Erfahrung und Wissen benutzt werden, wenn sie
beaufsichtigt oder bezüglich des sicheren Gebrauchs des
Gerätes unterwiesen wurden und die daraus resultierenden
Gefahren verstehen.
3. Allgemeine Richtlinien
Siehe Velleman® Service- und Qualitätsgarantie am Ende dieser
Bedienungsanleitung.
4. Batterie
Warnung: Durchbohren Sie nie die Batterien und werfen
Sie diese nicht ins Feuer (Explosionsgefahr). Laden Sie
keine nicht-wiederaufladbare Batterien (Alkaline).

VTTEST15
V. 02 –23/04/2018 15 ©Velleman nv
Entsorgen Sie die Batterien gemäß den örtlichen
Vorschriften. Halten Sie die Batterien von Kindern fern.
5. Anwendung
Drehen Sie den Drehschalter völlig im Uhrzeigersinn um die Stärke einer
Batterie zu prüfen. Die Batterie-LED wird grün aufleuchten wenn die Batterie
völlig aufgeladen ist.
Stecken Sie das Kabel in die geeignete Buchse an der linken Seite des
VTTEST15. Stecken Sie das andere Kabelende in die geeignete Buchse an
der rechten Seite. Stellen Sie jetzt den Drehschalter auf “1” um die
Verbindung des Kontaktes “1” auf dem Stecker angeschlossen an der linken
Seite, zu prüfen. Wenn es eine Verbindung gibt, wird die grüne LED unter
"1” aufleuchten während eine gelbe LED über dem Kontakt des Steckers an
der rechten Seite aufleuchten wird. Wenn keine LEDs aufleuchten, gibt es
keine Verbindung. Der linke Anschluss wird entweder erdfrei oder offen sein.
Stellen Sie den Drehschalter auf “2” um Kontakt “2” usw. zu prüfen bis alle
Kontakte geprüft worden sind. Wenn die GROUND LED aufleuchtet, gibt es
eine Verbindung zwischen den Kontakten und dem Chassis.
Um ein Kabel mit Bananensteckern zu prüfen, schließen Sie jedes Kabelende
an die Bananenbuchsen an. Die LED wird aufleuchten und die Einheit wird
piepsen wenn es zwischen den Steckern eine Verbindung gibt. Diese
Buchsen können Sie auch verwenden zur Durchgangsprüfung mit 2
Messleitungen.
Jack
Speakon®
Phono
1 = Hülse
1 = -1
5 = -3
1 = Abschirmung
2 = Spitze
2 = +1
6 = +3
2 = Hot
3 = Ring
3 = -2
7 = -4
4 = +2
8 = +4
¼” TS Mono auf ¼” Mono
¼” TRS auf ¼” TRS
1 Hülse
1 Hülse, 3 Ring
1 Hülse
1 Hülse, 3 Ring
2 Spitze
2 Spitze
2 Spitze
2 Spitze
3 Ring
1 Hülse, 3 Ring
(gekürzt mit
Hülse)
3 Ring
1 Hülse, 3 Ring
XLR symmetrisch auf XLR
symmetrisch
XLR unsymmetrisch auf XLR
unsymmetrisch
Pin 1
Pin 1
Pin 1
Pin 1, Pin 3
Pin 2
Pin 2
Pin 2
Pin 2
Pin 3
Pin 3
Pin 3
Pin 1, Pin 3

VTTEST15
V. 02 –23/04/2018 16 ©Velleman nv
¼” TS Mono auf XLR
unsymmetrisch
¼” TRS auf XLR symmetrisch
1 Hülse
Pin 1, Pin 3
1 Hülse
Pin 1
2 Spitze
Pin 2
2 Spitze
Pin 2
3 Ring
Pin 1, Pin 3
(gekürzt mit
Hülse)
3 Ring
Pin 3
6. Technische Daten
Stromversorgung ..1 x 9V Batterie (Bestell-Nr. 6LR61, mitgelief.)
Abmessungen........................................... 120 x 210 x 70 mm
Gesamtgewicht.............................................................900 g
Verwenden Sie dieses Gerät nur mit originellen Zubehörteilen.
Velleman NV übernimmt keine Haftung für Schaden oder
Verletzungen bei (falscher) Anwendung dieses Gerätes. Für mehr
Informationen zu diesem Produkt und die neueste Version dieser
Bedienungsanleitung, siehe www.velleman.eu. Alle Änderungen
ohne vorherige Ankündigung vorbehalten.
© URHEBERRECHT
Velleman NV besitzt das Urheberrecht für diese
Bedienungsanleitung. Alle weltweiten Rechte vorbehalten. Ohne
vorherige schriftliche Genehmigung des Urhebers ist es nicht gestattet,
diese Bedienungsanleitung ganz oder in Teilen zu reproduzieren, zu
kopieren, zu übersetzen, zu bearbeiten oder zu speichern.

VTTEST15
V. 02 –23/04/2018 17 ©Velleman nv
INSTRUKCJA OBSŁUGI
1. Wstęp
Przeznaczona dla mieszkańców Unii Europejskiej.
Ważne informacje dotyczące środowiska.
Niniejszy symbol umieszczony na urządzeniu bądź opakowaniu
wskazuje, że utylizacja produktu może być szkodliwa dla
środowiska. Nie należy wyrzucać urządzenia (lub baterii) do
zbiorczego pojemnika na odpady komunalne, należy je
przekazać specjalistycznej firmie zajmującej się recyklingiem.
Niniejsze urządzenie należy zwrócić dystrybutorowi lub lokalnej
firmie świadczącej usługi recyklingu. Przestrzegać lokalnych zasad
dotyczących środowiska
W razie wątpliwości należy skontaktować się z lokalnym organem
odpowiedzialnym za utylizację odpadów.
Dziękujemy za zakup produktu Velleman! Prosimy o dokładne zapoznanie
się z instrukcją obsługi przed użyciem urządzenia. Nie montować ani nie
używać urządzenia, jeśli zostało uszkodzone podczas transportu - należy
skontaktować się ze sprzedawcą.
2. Wskazówki bezpieczeństwa
Przed zastosowaniem urządzenia należy zapoznać się z
niniejszą instrukcją oraz symbolami bezpieczeństwa.
Z niniejszego urządzenia mogą korzystać dzieci powyżej 8
roku życia i osoby o ograniczonych zdolnościach
fizycznych, zmysłowych bądź umysłowych, jak również
osoby nieposiadające doświadczenia lub znajomości
urządzenia, jeśli znajdują się one pod nadzorem innych
osób lub jeśli zostały pouczone na temat bezpiecznego
sposobu użycia urządzenia oraz zdają sobie sprawę ze
związanych z nim zagrożeń. Dzieci nie mogą używać
urządzenia do zabawy. Prace związane z czyszczeniem i
konserwacją nie mogą być wykonywane przez dzieci
pozostawione bez nadzoru.
3. Informacje ogólne
Proszę zapoznać się z informacjami w części Usługi i gwarancja jakości
Velleman®na końcu niniejszej instrukcji.

VTTEST15
V. 02 –23/04/2018 18 ©Velleman nv
4. Bateria
Uwaga: Nie przebijać ani nie wrzucać baterii do ognia,
ponieważ mogą eksplodować. Nie ładować baterii, które nie
są akumulatorami (alkaliczne). Usuwać baterie zgodnie z
lokalnymi przepisami. Baterie należy chronić przed dziećmi.
5. Obsługa
Obrócić pokrętło do końca w prawo, aby sprawdzić stan akumulatora. Gdy
wbudowany akumulator jest w pełni naładowany, dioda LED zapali się na
jaskrawozielono.
Podłączyć jedną końcówkę kabla do odpowiedniego gniazda z lewej strony
urządzenia VTTEST15. Podłączyć drugą końcówkę kabla do odpowiedniego
gniazda z prawej strony. Teraz ustawić pokrętło na „1”, aby przetestować
połączenie styku „1” wtyczki po lewej stronie. Jeżeli jest połączenie, poniżej
„1” zapali się zielona dioda LED, a nad stykiem wtyczki po prawej stronie
zapali się żółta dioda LED. Jeżeli żadna dioda się nie zapali, nie ma
połączenia: lewe połączenie jest pływające lub otwarte. Ustawić pokrętło na
„2”, aby sprawdzić styk „2” itd., aż wszystkie styki zostaną sprawdzone.
Jeżeli zapali się dioda LED uziemienia (GROUND), istnieje połączenie
pomiędzy odpowiadającym stykiem, a obudową.
Aby sprawdzić kabel z wtykami bananowymi, wystarczy podłączyć końcówki
kabla do gniazd bananowych. Jeżeli pomiędzy wtykami jest połączenie,
dioda LED zapali się, a urządzenie wyemituje sygnał dźwiękowy. Gniazd tych
można również użyć do sprawdzania ciągłości za pomocą dwóch
wyprowadzeń sondy.
Wtyk
Speakon®
Phono
1 = Tuleja
1 = -1
5 = -3
1 = Ekran
2 = Końcówka
2 = +1
6 = +3
2 = Przewód gorący
3 = Pierścień
3 = -2
7 = -4
4 = +2
8 = +4
¼” TS Mono / ¼” Mono
¼” TRS / ¼” TRS
1 Tuleja
1 Tuleja, 3
Pierścień
1 Tuleja
1 Tuleja, 3
Pierścień
2 Końcówka
2 Końcówka
2 Końcówka
2 Końcówka
3 Pierścień
1 Tuleja, 3
Pierścień
(zwarty z
tuleją)
3 Pierścień
1 Tuleja, 3
Pierścień

VTTEST15
V. 02 –23/04/2018 19 ©Velleman nv
XLR symetryczny / XLR
symetryczny
XLR niesymetryczny / XLR
niesymetryczny
Wtyk 1
Wtyk 1
Wtyk 1
Wtyk 1, Wtyk 3
Wtyk 2
Wtyk 2
Wtyk 2
Wtyk 2
Wtyk 3
Wtyk 3
Wtyk 3
Wtyk 1, Wtyk 3
¼” TS Mono / XLR
niesymetryczny
¼” TRS / XLR symetryczny
1 Tuleja
Wtyk 1, Wtyk 3
1 Tuleja
Wtyk 1
2 Końcówka
Wtyk 2
2 Końcówka
Wtyk 2
3 Pierścień
Wtyk 1, Wtyk 3
(zwarty z
tuleją)
3 Pierścień
Wtyk 3
6. Specyfikacja techniczna
zasilanie ................ 1 x bateria E-Block 9 V (6LR61, w zestawie)
wymiary .................................................. 120 x 210 x 70 mm
waga całkowita.............................................................900 g
Należy używać wyłącznie oryginalnych akcesoriów. Firma Velleman
nv nie ponosi odpowiedzialności za uszkodzenia lub urazy
wynikające z (niewłaściwego) korzystania z niniejszego urządzenia.
Aby uzyskać więcej informacji dotyczących produktu oraz
najnowszą wersję niniejszej instrukcji, należy odwiedzić naszą
stronę internetową www.velleman.eu. Informacje zawarte w
niniejszej instrukcji obsługi mogą ulec zmianie bez wcześniejszego
powiadomienia.
© INFORMACJA O PRAWACH AUTORSKICH
Właścicielem praw autorskich do niniejszej instrukcji jest firma
Velleman nv. Wszelkie prawa są zastrzeżone na całym świecie.
Żadna część niniejszej instrukcji nie może być kopiowana, powielana,
tłumaczona ani przenoszona na jakikolwiek nośnik elektroniczny (lub w inny
sposób) bez wcześniejszej pisemnej zgody właściciela praw autorskich.

VTTEST15
V. 02 –23/04/2018 20 ©Velleman nv
MANUAL DO UTILIZADOR
1. Introdução
Aos cidadãos da União Europeia
Importantes informações sobre o meio ambiente no que respeita a
este produto
Este símbolo no aparelho ou na embalagem indica que, enquanto
desperdícios, poderão causar danos no meio ambiente. Não
coloque a unidade (ou as pilhas) no depósito de lixo municipal;
deve dirigir-se a uma empresa especializada em reciclagem.
Devolva o aparelho ao seu distribuidor ou ao posto de
reciclagem local. Respeite a legislação local relativa ao meio
ambiente.
Em caso de dúvidas, contacte com as autoridades locais para os
resíduos.
Agradecemos o facto de ter adquirido este aparelho. Leia atentamente as
instruções do manual antes de usar o aparelho. Caso o aparelho tenha
sofrido algum dano durante o transporte não o instale e entre em contacto
com o seu distribuidor.
2. Instruções de segurança
Leia este manual atentamente antes da utilização ou
instalação.
Este aparelho pode ser usado por crianças com idade igual
ou superior a 8 anos e pessoas com capacidades físicas,
mentais e sensoriais reduzidas, ou com falta de experiência
e conhecimentos acerca do aparelho, desde que sejam
supervisionadas e informadas acerca da utilização do
aparelho e possíveis acidentes. As crianças não devem
brincar com o aparelho. A limpeza e manutenção não
devem ser feitas por crianças sem a devida supervisão.
3. Normas gerais
Consulte a Garantia de Serviço e Qualidade Velleman® na parte final deste
manual do utilizador.
Other manuals for VTTEST15
1
Table of contents
Languages:
Other Velleman Cable Tester manuals