Venset 111 User manual

Copyright 2005, VENSET A/S, VENSET®is a registered trademark Page 1/4
Instruction for VENSET electrical window opener
Article no.: 111
Please read the enclosed instructions for use and assembly before installation and use. This instruction
describes the installation of the following articles in combination; Opener no. 111, Control panel no. 112 and
Power supply no. 114.
Contents:
1. Advice on security and warnings
2. Guidelines for use
3. Installation
4. Operation
5. Maintenance
6. Technical data
7. Declaration of conformity
1. Advice on security and warnings
•This product complies with all prescribed security regulations. Inappropriate use can cause damage
to users and product.
•VENSET cannot be held responsible for any damage on the window or other parts of the building,
whether it is caused by ordinary use, wrong installation, unauthorized maintenance or incorrect use.
•Please read the instruction before using the window the first time. It will give you important
directions as to security, use and installation of the window opener, and thus prevent any damage
on both you and the product.
•Electrically operated windows may constitute a risk of squeezing body parts within the window's
functioning area. If this window opener is installed somewhere presenting this risk, we recommend
that you replace the standard control panel with a Security panel, article no. 901, which secures that
the opener is only in motion, as long as the button is activated.
•If the window opener is controlled automatically, situations may occur where the window opener
does not stop, until the window is completely closed. This can cause a squeezing risk, and these
kinds of controls should not be used, if there is any risk of bodily harm, or if the user cannot visually
make sure that there is no such risk.
•This window opener may not be used on windows functioning as emergency exits.
•Please keep this instruction hereafter.
2. Guidelines for use
•This electrical window opener has been designed for installation in most windows opening outwards.
The window's opening range must be at least 20 cm, and it should open with minimal effort.
•The user is responsible for the window opener being properly installed in both frame and sill, and
whether the window is suitable for electrical operation or not.
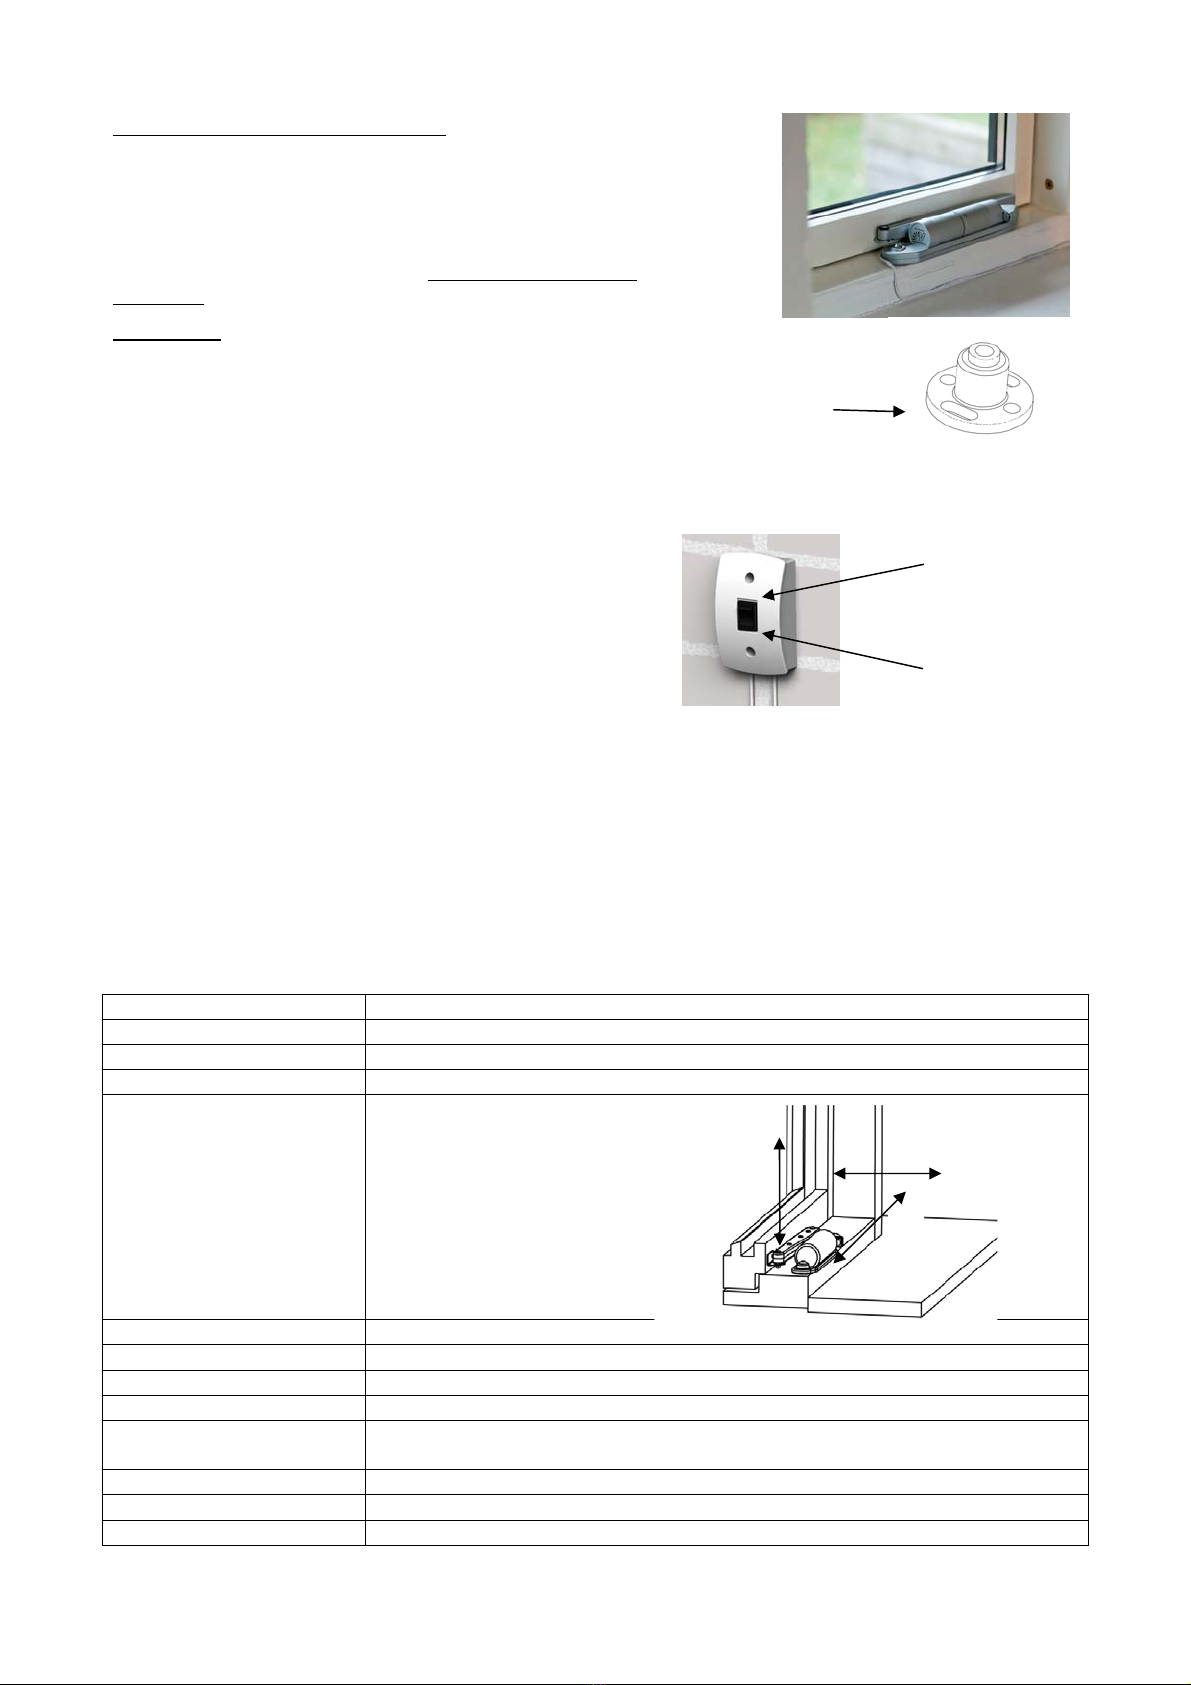
Install the window opener opposite the
hinges of the window. The window opener
takes up at least 30 cm on the sill.
The distance between the hinges of the
window and the sill, where the window
opener is installed must be at least 40 cm.
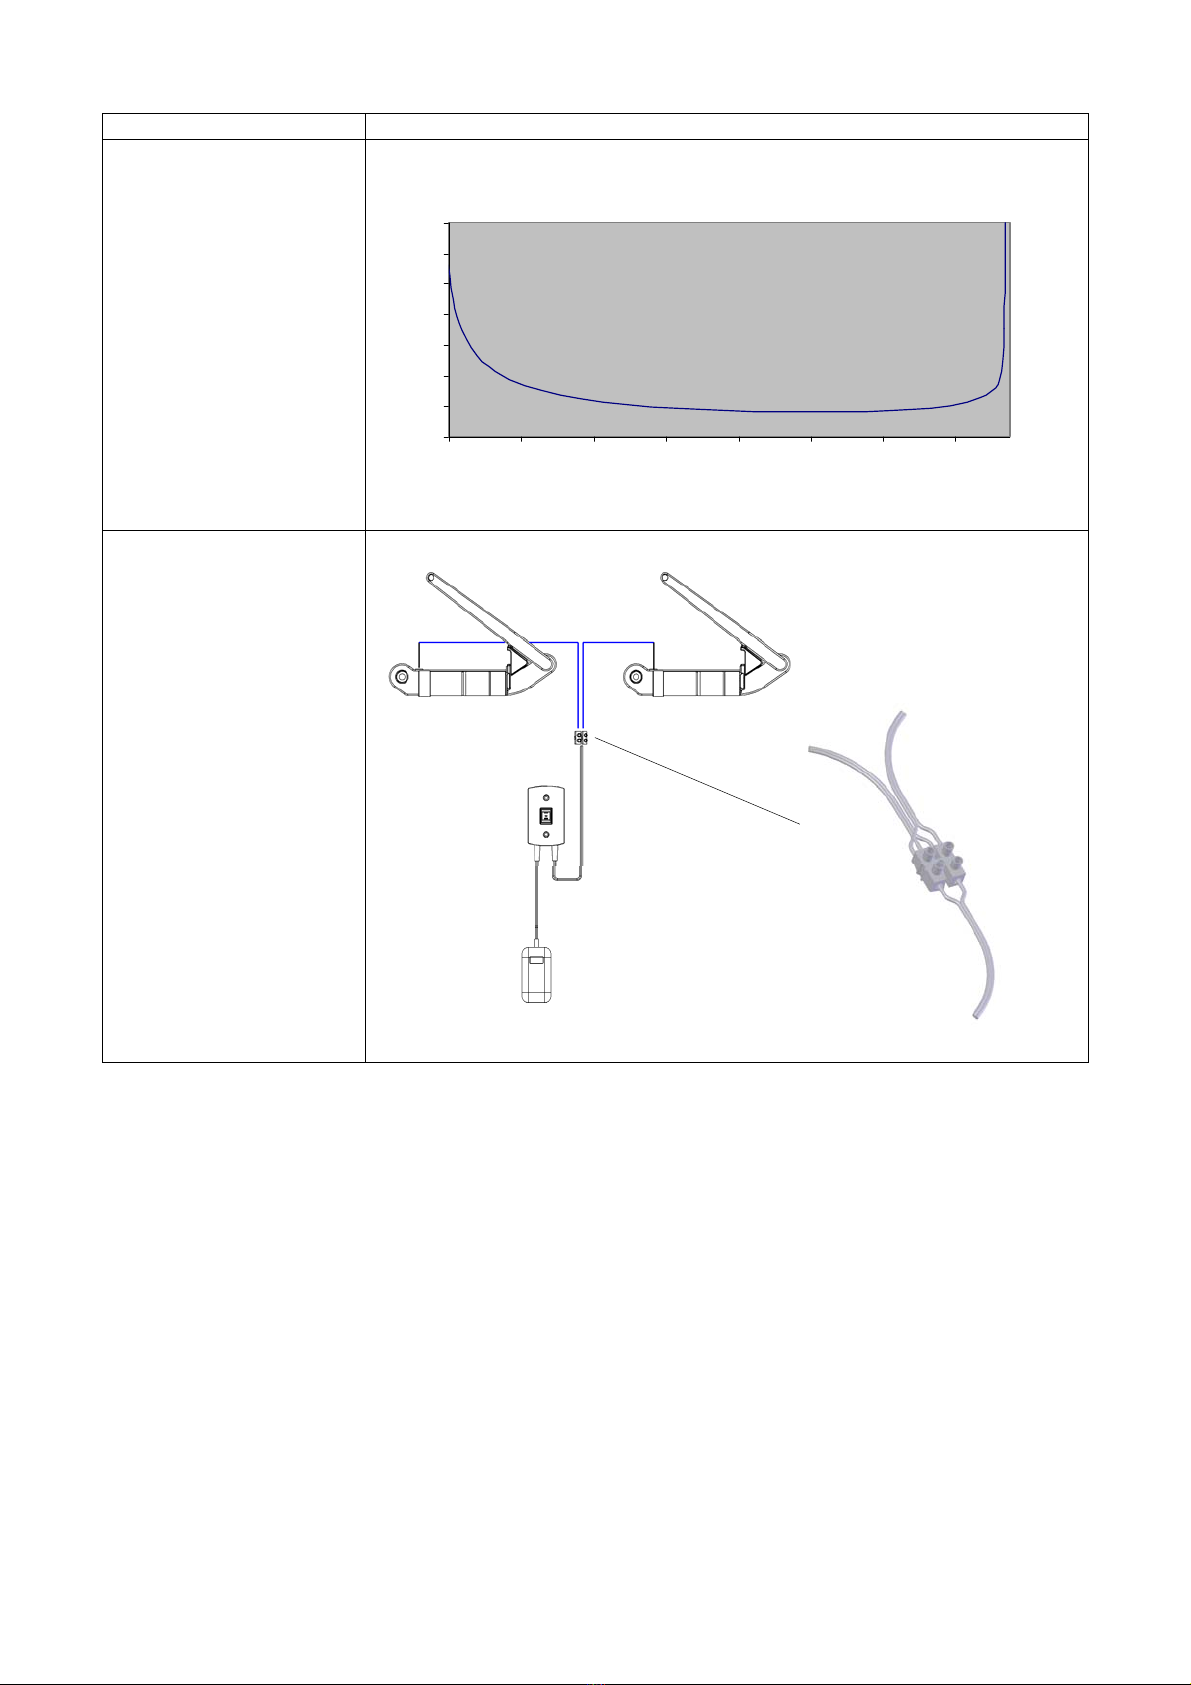
On windows wider than 80 cm we
recommend that you install 2 window
openers. Please note that all
measurements are consultative, and that
maximum and minimum measurements
depend on the construction of the window.
600700.1

Copyright 2005, VENSET A/S, VENSET®is a registered trademark Page 2/4
On the frame you need at least 25 mm and
on the sill at least 50 mm, when the
window is closed.
-If the window opener is to be installed on roof windows, such as Velux or Fakro, you must
use Fitting set A, article no. 812, together with the window opener.
-For the installation in these windows please see the instruction for Fitting set A, article no.
812.
-If the measure 50mm is less, the Fitting set B, article no. 813 should be used.
3. Installation
•Risk of bodily harm: Be careful that the window does not suddenly open or close uncontrollably
during the installation of the window opener.
•The VENSET window opener replaces the ordinary operating and locking devices of the window.
•The hinges of the window must be oiled to make sure that the window open and close with minimal
effort.
•Make sure that the window opener can slide unimpeded over the sill when opening the window.
Installation of fittings on sill and frame:
Close/lock the window as usual.
Install the window opener on the sill opposite the hinges.
On the inner top of the box you find the screw template,
which is used for marking holes in the frame and sill for the
fittings. Make this marking with the window closed/locked
with the original fittings to make sure that the window will
close just as tightly with the window opener as it did before
the installation.
The fittings for frame and sill for the VENSET window opener
are installed as shown on the sketch.
Installation of the window opener:
Open the window and dismantle the present handle. On
delivery the window opener is closed. Open it half way before
the installation; it will make the installation easier. To do this
you need the enclosed power supply and control panel.
Install the window opener on the fittings of frame and sill.
Screw template

Copyright 2005, VENSET A/S, VENSET®is a registered trademark Page 3/4
Installation of cord and control panel:
It is recommended that the cord around the sill is secured
properly by e.g. moulding tape.
Mount the control panel to the wall and connect the wires
between window opener, control panel and power supply.
Wires are connected color to color. System are short-circuit
protected!
Adjustment:
Normally, secondary adjustment is not necessary, but it can
be done by sliding the fitting on the sill back and forth in the
oblong fitting holes.
4. Operation
Before operating the window opener the user should make
sure that neither persons nor objects are blocking the
window. Children should not operate the window opener
without adults present.
Electrically operated windows may constitute a risk of
squeezing body parts or objects within the window's
functioning area. At squeezing risk we recommend Security
panel, article no. 901.
5. Maintenance
•The electrical window opener does not require any maintenance.
•Clean it with a wrung cloth, possibly with a mild cleansing agent.
•To keep it working smoothly it is recommended to oil/maintain the hinges in the window.
6. Technical data
VENSET article no.: 111
VENSET article name: Electrical window opener for windows opening outwards
Material: Aluminium alloy
Colour: Silver, RAL 9006
Outside dimension: L: 25 cm
W: 7 cm
H: 4,5 cm
Weight, net 1,3 kg
Weight, gross 1,5 kg.
Opening Continuously variable until maximum 12 cm
Supply voltage: 24 V DC
Power consumpt. in
operation 0,3 A
Max. power consumption: 0,6 A
Engine control: Built-in electrical end stoppers
IP level 10
Open window
Close window
Fitting holes
H
L
W

Copyright 2005, VENSET A/S, VENSET®is a registered trademark Page 4/4
Closing method: Dynamic opening regulation
Opening/closing power
compared to opening:
Opening/closing power
0
10
20
30
40
50
60
70
13579111315
Opening (cm)
Power (Kg)
Electric Diagram
7. Declaration of conformity
We hereby declare on our own responsibility that the product covered by this declaration complies with the
following directives and other normative documents:
DS/EN 60335-2-103
EN55014-1 and EN61000-3-2.
Referring to the Directive for machinery (98/37/EF) we must point out that:
An electrical window opener is regarded a machine and should not be put into use, until it has been installed
correctly according to the directions in the enclosed instructions for use and assembly.
Manufacturer: VENSET A/S
Nygade 63
Dk-6900 Skjern
www.VENSET.com
connected
color to colo
r
Table of contents
Popular Indoor Furnishing manuals by other brands

Humanscale
Humanscale Float Disassembly instructions

Oxford & Garden
Oxford & Garden DARTMOOR STOOL 204131399 Assembly instructions

Williams-Sonoma
Williams-Sonoma Haven Loft 76 Sofa Assembly instructions

Forte
Forte HVKB01 Assembling Instruction

LYNDON FURNITURE
LYNDON FURNITURE BRATTLEBORO Assembly

Mainstays
Mainstays GSDB21002-1 manual

IKEA
IKEA GRUNDTAL instructions

Desa
Desa C21TP Assembly and installation instructions

Next
Next FINSBURY CABIN STATION 683543 Assembly instructions

Home Decorators Collection
Home Decorators Collection Aberwood DP18020-P Use and care guide

Coalesse
Coalesse Lagunitas installation instructions

ricoo
ricoo FS0117 Assembly instructions