19
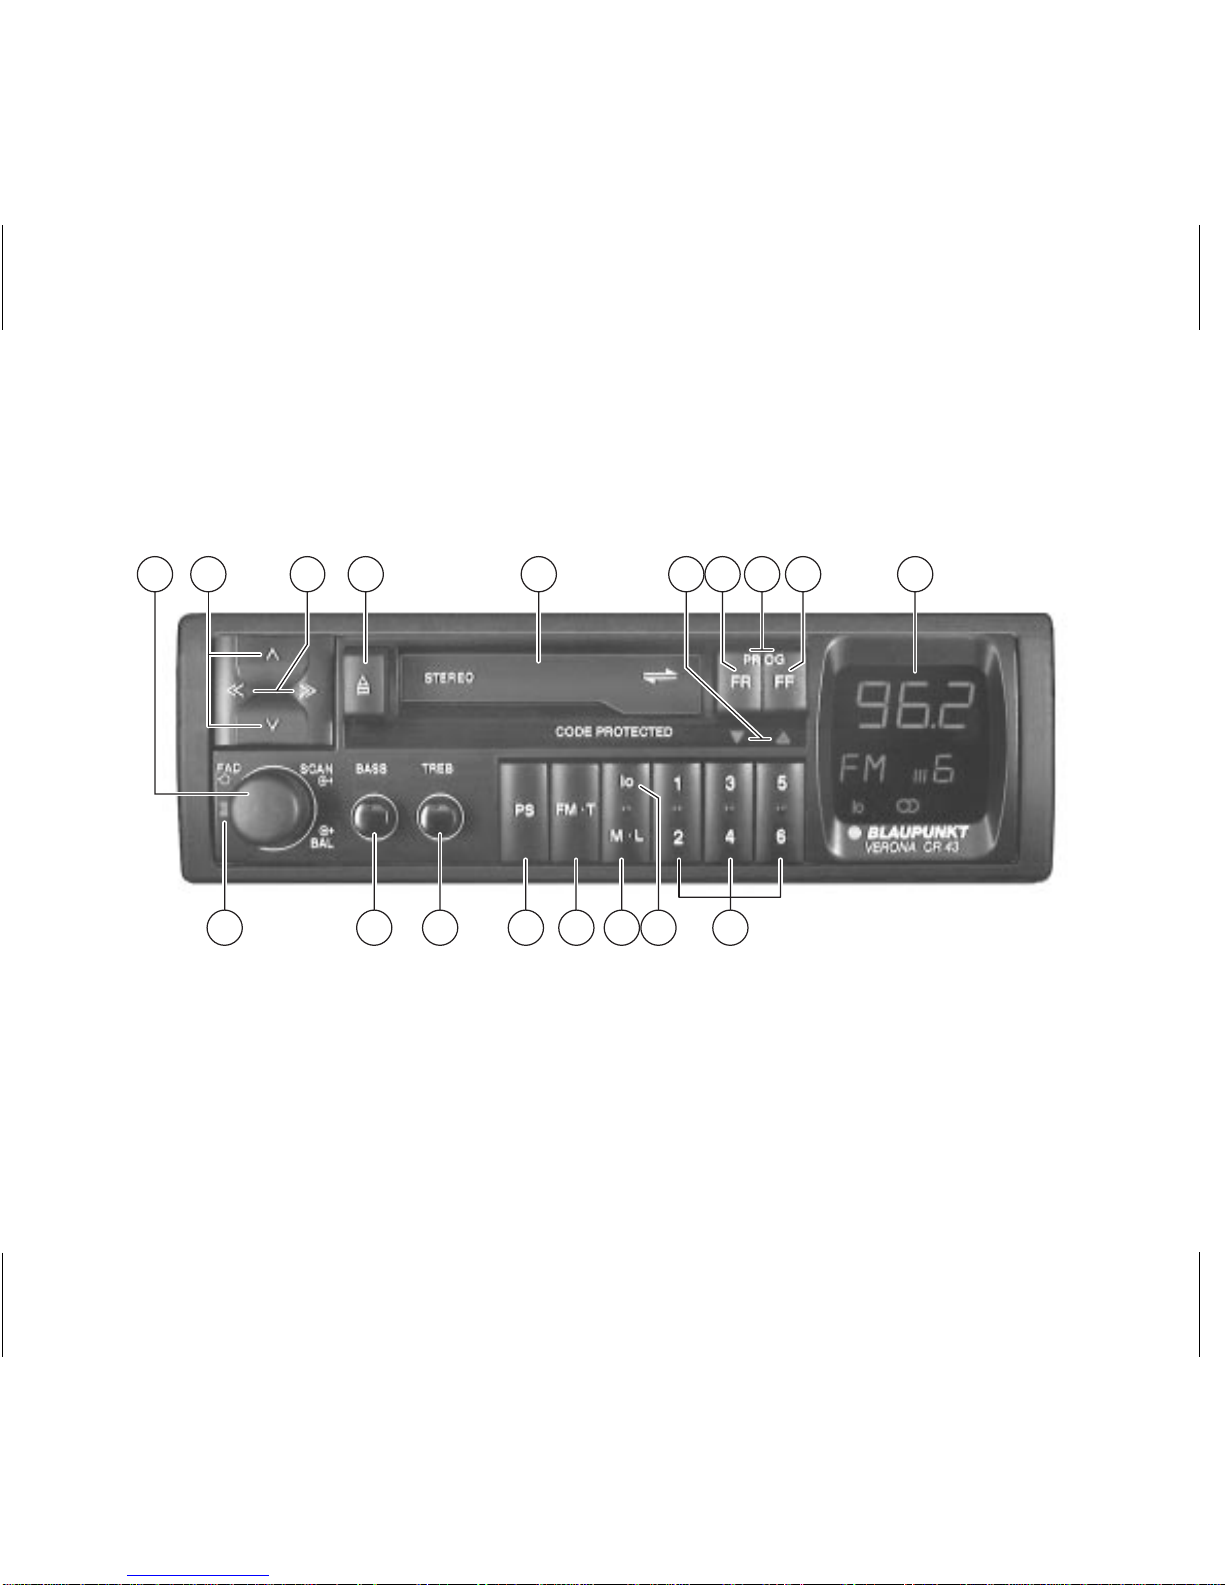
Verona CR 43 - Honda
DEUTSCH
ENGLISH
ITALIANO
PORTUGUES NEDERLAND
ESPAGÑOL SVENSKA FRANÇAIS
Storing a Station
Youcan store oneMW and LWstation and 4
FMstationsoneachofthepresetbuttons;.
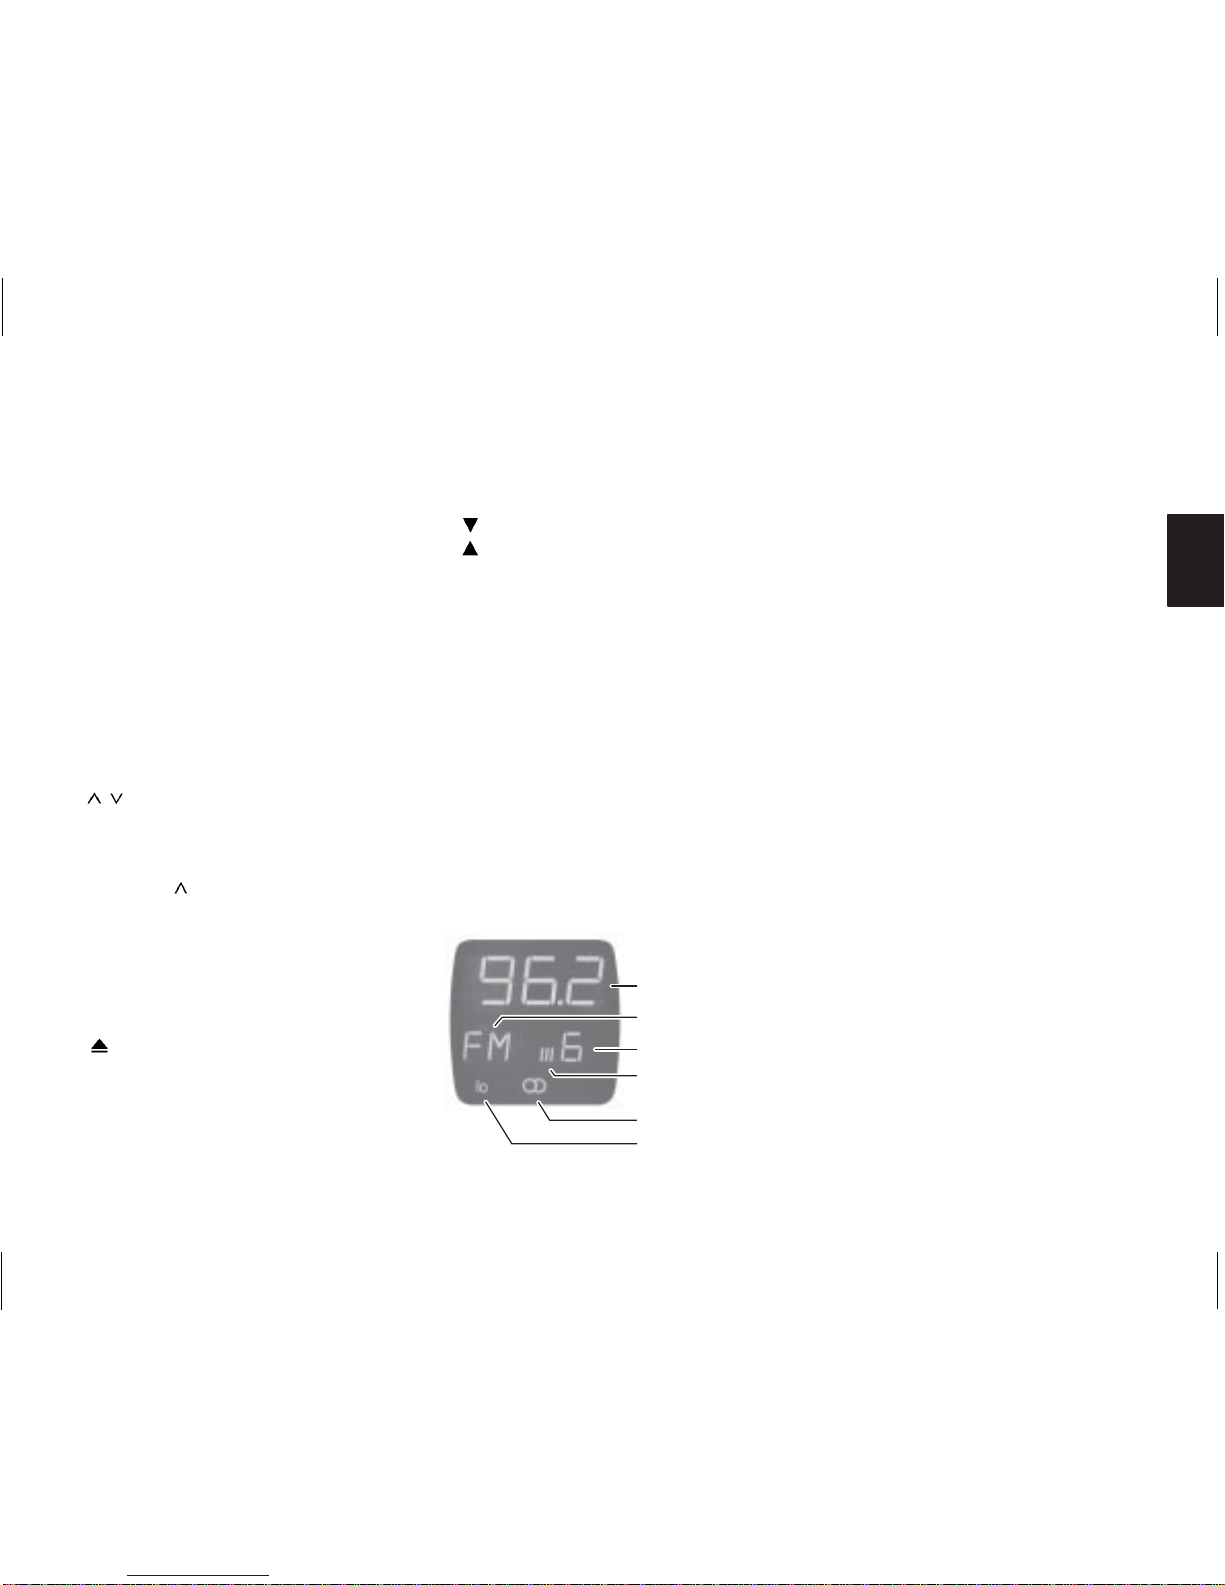
The display will show you the selected wa-
veband (FM, MW or LW) and preset button.
On FM, the display will also give you the
chosen storage level (I, II, III or T).
If you wish to change from one storage level
to another:
●press the FM•T button >.
If you wish to store a station:
●(for FM only) select the storage level.
To achieve this, press the FM•T button
>until I,II,III or T appears in the dis-
play :.
●tune in the station (see chapter Station
Tuning).
●press the desired preset button ;until
the radio resumes play (approx. 2 se-
conds).
The display :indicates which preset
button has been pressed.
The station has now been stored.
Note:
Whentuninginanalready storedstation,the
display :will show the corresponding pre-
set button for approx. five seconds and the
respective storage level.
Automatically Storing the Stron-
gest Stations
(Travelstore)
WithTravelstore,youhavetheopportunityto
automaticallystorethe sixmostpowerful FM
stationsofyourlocalreceptionareaandhave
them sorted according to their frequencies.
Thisfeatureisofspecialusewhile travelling.
●Press the FM•T rocker switch >for at
least two seconds.
The set searches for the next FM stati-
ons and sorts them on the “T” (Travel-
store) storage level. Once the process
is finished, the car radio tunes in to the
first station.
If required, it is also possible to manually
storeastationontheTravelstorelevel.Ifless
than five stations can be received, the free
buttons are represented by dashes for a
short period of time.
Activating a Stored Station
If required, the memorized stations can be
activated at a keystroke.
●Choose the storage level.
For this, press FM•T >until the dis-
play :shows I, II or III, or T.
●Briefly press the required preset button
;.
Briefly Sampling a Station
(Radio Scan)
Starting with the currently tuned in station,
you can have the following ones briefly sam-
pled for approx. eight seconds each.
●Press the knob 1for approx. 1 sec.
If the following station is found, it is
reproduced for approximately eight
seconds.The station’s frequency starts
blinking on display :; if it has already
been memorized, the corresponding
preset button and the storage level indi-
cator starts blinking on display :. Sub-
sequently, the set starts searching for
the next station.
For selecting a sampled station:
●Press the knob 1once again. The
Scan function is off.
After the search operation has been conclu-
ded, and no station has been chosen, the
radio starts playing the station from which
Station Scan was started before.
Sampling Memorized Stations
Allmemorizedstationsofawavebandcanbe
briefly sampled.
●Press the PS rocker switch ?.
One after another, the car radio will
then start introducing all memorized
stations of the selected waveband.