07-02052E 2 VersaClean
Do not pick up anything that is burning or smoking,
such as cigarettes, matches, or hot ashes.
Do not point spray at yourself or in the direction of
others
Do not use this machine for dry vacuuming.
Do not operate machine in standing water.
Immediately unplug power cord from outlet if
machine leaks solution/foam or if machine tips over
while operating.
Release water pressure at accessory tool spray
nozzle before disconnecting solution hose.
Always stop machine on a level surface.
Use extra care when cleaning on stairs. Do not
wheel machine up or down stairs.
Connect to a properly grounded outlet only.
Extension cord must be 12/3 gauge and no longer
than 40 feet. Replace cord if ground plug becomes
damaged.
Do not use additional extension cords with machine.
Do not use machine if not in proper operating
condition.
Do not modify machine from its original design.
Get assistance when lifting machine.
All repairs must be performed by a qualified service
person. Use only manufacturer-supplied or
equivalent replacement parts.
Cautions: Risk of property damage
CAUTION: Protect from freezing. Freezing may
damage internal components and will void warranty.
CAUTION: Do not use with water with over 3 grains
per gallon (51 miligrams per liter) of hardness. Use
with hard water could result in the formation of
mineral deposits inside pumps and fittings. Damage
caused by mineral deposits will void warranty.
CAUTION: Use only to extract moisture. Do not
immerse end of vacuum hose in liquid.
CAUTION: Do not use as a dry vacuum. Dust
particles will damage the vacuum motors. Damage
caused by dry vacuuming will void the warranty.
CAUTION: To prevent the growth of mold and
mildew inside the tanks, always drain waste tank
completely and empty solution tank after use.
WARRANTY
Visit www.VersaCleanSystems.com to register your
purchase. Registration allows us to better assist you with
using, maintaining or servicing your equipment, as well
as to contact you in case we have important safety
information concerning your product.
The warranty is valid from the date of purchase for one
year. This will cover parts and labor at an authorized
VersaClean or Sapphire Scientific distributor. The
warranty is only valid to the orginal purchaser and proof
of purchase is required. Modifying this unit or not
maintaining the machine as outlined in this manual will
void the warranty. See the full Limited Warranty
document for details.
GROUNDING INSTRUCTIONS
This appliance must be grounded. If it should
malfunction or break down, grounding provides a path of
least resistance for electric current to reduce the risk of
electric shock. This appliance is equipped with cords
having equipment-grounding conductors and grounding
plugs. The plugs must be inserted into an appropriate
outlet that is properly installed and grounded in
accordance with all local codes and ordinances.
WARNING! Improper connection of the equipment-
grounding conductor can result in a risk of electric
shock. Check with a qualified electrician or service
person if you are in doubt as to whether the outlets
are properly grounded. Do not modify the plugs
provided with the appliance – if the plugs do not fit
the outlets, have proper outlets installed by a
qualified electrician.
This equipment is for use on a circuit or circuits having a
nominal rating no more than 120V and is factory-
equipped with a specific electric cord and plug to permit
connection to a proper electric circuit. Make sure that the
appliance is connected to outlets having the same
configuration as the plugs. No adaptor should be used
with this appliance. If the appliance must be reconnected
for use on a different type of electric circuit, the
reconnection should be made by qualified service
personnel.
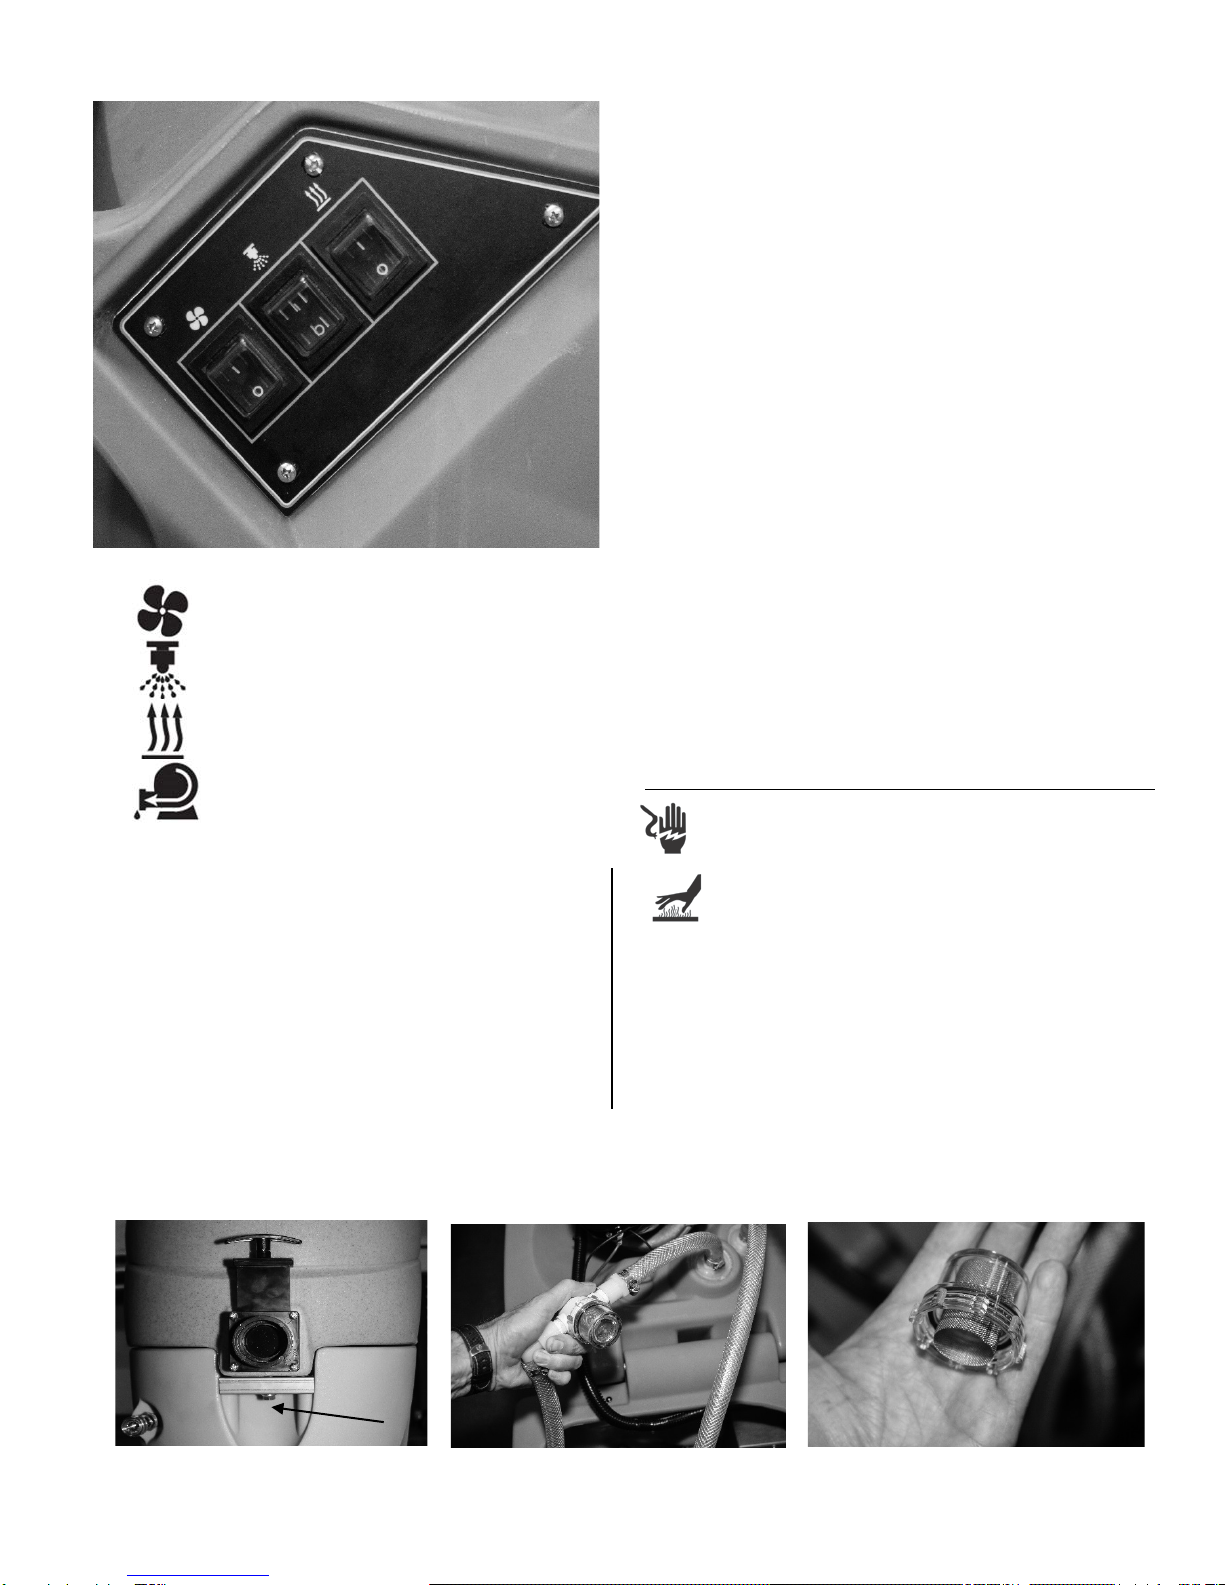
CONTROLS
ON THE CONTROL PANEL (Fig. 3)
Includes rocker-type switches control blower, solution
pump, heat (on select models) and pumpout (on select
models).
ON THE BACK PANEL (Fig. 2H)
Pressure regulator. Select models. Turn clockwise to
increase solution pressure; turn counterclockwise to
decrease solution pressure.
200, 200H, 500 and 500H
OPERATING INSTRUCTIONS
For 1200MS operating instructions, see p. 4.