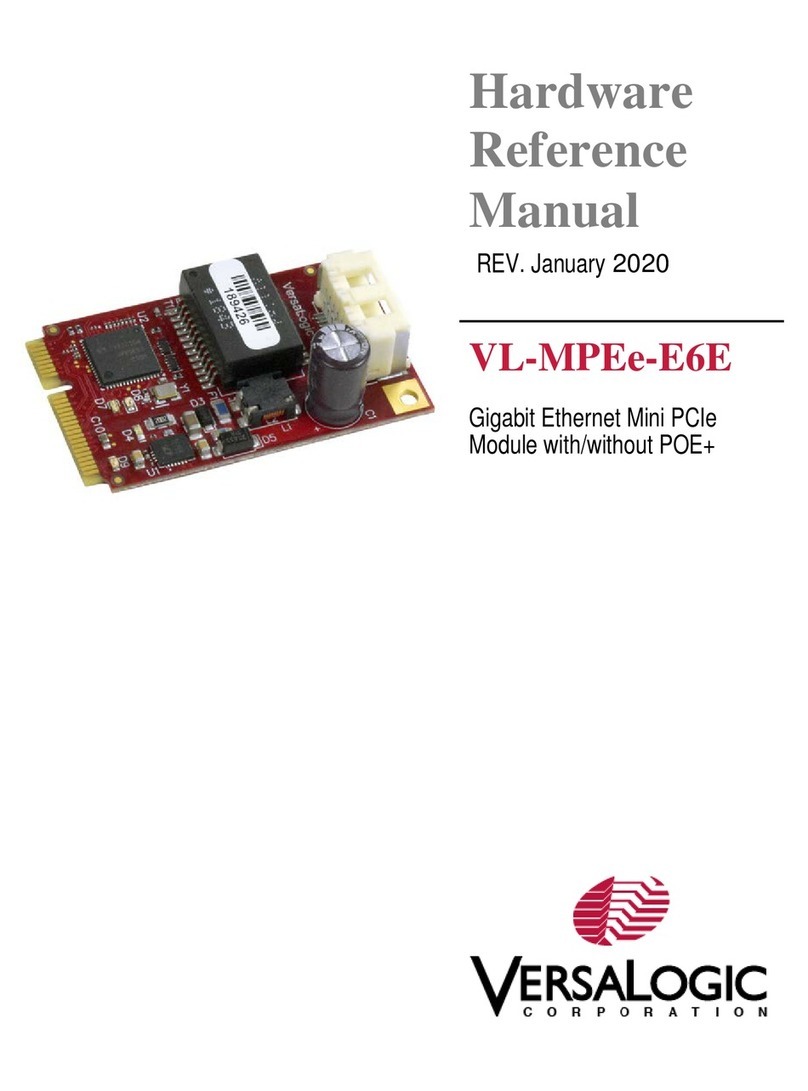
VersaLogic VL-EPMs-M1 User manual

Reference
Manual
DOC. REV. 11/25/2016
VL-EPMs-M1
SUMIT-104 USB and SATA
Module with Optional PCIe Mini
Card or mSATA Socket

VL-EPMs-M1 Reference Manual ii
WWW.VERSALOGIC.COM
12100 SW Tualatin Road
Tualatin, OR 97062-7341
(503) 747-2261
Fax (971) 224-4708
Copyright © 2013-2016 VersaLogic Corp. All rights reserved.
Notice:
Although every effort has been made to ensure this document is error-free, VersaLogic makes no
representations or warranties with respect to this product and specifically disclaims any implied warranties
of merchantability or fitness for any particular purpose.
VersaLogic reserves the right to revise this product and associated documentation at any time without
obligation to notify anyone of such changes.
PC/104 and the PC/104 logo are trademarks of the PC/104 Consortium. SUMIT, ISM, SUMIT-ISM, and the
SUMIT logo are trademarks of the Small Form Factor Special Interest Group (SFF-SIG). All other product
names and trademarks, registered trademarks, or service marks are property of their respective owners.

VL-EPMs-M1 Reference Manual iii
Product Release Notes
Rev 1.01 –Added J6 Pinout.
Rev 1.00 –Commercial Release.
Support Page
The VL-EPMs-M1 support page, at http://www.versalogic.com/private/epmsm1support.asp, contains
additional information and resources for this product including:
Reference Manual (PDF format)
Device drivers
Datasheets and manufacturers’ links for chips used in this product
Photograph of the circuit board
This is a private page for VL-EPMs-M1 users that can be accessed only by entering this URL address
directly. It cannot be reached from the VersaLogic public website.
The VersaTech KnowledgeBase is an invaluable resource for resolving technical issues with your
VersaLogic product.
VersaTech KnowledgeBase

VL-EPMs-M1 Reference Manual iv
Contents
Introduction ...................................................................................................................1
Features...............................................................................................................................1
Technical Specifications.....................................................................................................2
RoHS-Compliance..............................................................................................................3
About RoHS...........................................................................................................3
Warnings.............................................................................................................................3
Electrostatic Discharge..........................................................................................3
Technical Support...............................................................................................................4
Repair Service........................................................................................................4
Physical Description.....................................................................................................5
Dimensions and Mounting..................................................................................................5
Hardware Assembly...............................................................................................7
External Connectors ........................................................................................................... 8
VL-EPMs-M1 Connectors.....................................................................................8
VL-EPMs-M1 Connector Functions and Interface Cables....................................9
Operation.....................................................................................................................10
USB Ports .........................................................................................................................10
SATA Ports.......................................................................................................................11
Configuring a SATA RAID Set........................................................................... 12
PC/104 (ISA) Connector................................................................................................... 12
PCIe Mini Card / mSATA Socket ....................................................................................13
SUMIT-A Bottom Connector ...........................................................................................15
SUMIT-A Top Connector.................................................................................................16
SUMIT-B Top Connector.................................................................................................17
SUMIT-B Bottom Connector ...........................................................................................18
Appendix A –References............................................................................................19

VL-EPMs-M1 Reference Manual 1
Introduction
Features
The VL-EPMs-M1 is an embedded SATA and USB interface module with an optional Mini PCIe
or mSATA socket. Based on the SUMIT-ISM form factor, the VL-EPMs-M1 supports SUMIT
and PC/104 (ISA) stackable expansion buses on a 90 mm x 96 mm (3.55” x 3.78”) footprint.
Configurations and feature sets include:
Model
USB Ports
SATA
Ports
Mini PCIe /
mSATA Socket
Stackable Bus
VL-EPMs-M1A
2 Type A
2 Pin-header
2
No
—
VL-EPMs-M1B
1 Type A
2 Pin-header
2
PCIe Mini Card
SUMIT-AB (Top and
Bottom), ISA (Pass-through)
VL-EPMs-M1C
2 Type A
2 Pin-header
1
mSATA
—
All boards include the following features:
Transient Voltage Suppression
(TVS) devices on I/O interfaces
for protection against power
spikes and surges
Designed to provide -40° to
+85°C operation for reliable use
in harsh environments
Full compliance with EU Directive
2002/95/EC (RoHS) for devices used in
Europe
SUMIT-ISM (Legacy Type 1) form factor
The VL-EPMs-M1 features high-reliability design and construction. All VL-EPMs-M1 boards
are subjected to functional testing and are backed by a limited two-year warranty. Careful parts
sourcing and US-based technical support ensure the highest possible quality, reliability, service,
and product longevity for this exceptional board.
1

Introduction
VL-EPMs-M1 Reference Manual 2
Technical Specifications
Board Size:
PC/104™ standard:
90 mm x 96 mm (3.55” x 3.78”)
Power Requirements:
+5V
3.5W typical (without PCIe wireless card)
15.9W max. (without PCIe wireless card)
16.5W (with PCIe wireless card in use)
Stackable Bus:
SUMIT: SUMIT-A, SUMIT-B*
PC/104*: ISA (pass-through only)
Operating Temperature:
-40° to +85°C
Storage Temperature:
-40° to +85°C
Airflow Requirements:
Free air from -40° to +85°C
USB: Four USB 2.0 ports
USB 0-1 –Type A
USB 2-3 –10-pin header
SATA: One or two SATA 3 Gb/s ports
BIOS Compatibility
BIOS must support Plug and Play (PnP) and
shadowing of option ROMs.
SATA RAID Driver/OS Compatibility:
Windows XP –Compatible
Windows 7, 32-bit –Compatible
Windows 7, 64-bit –Compatible (Windows
forces use of 32-bit driver)
Linux –See KnowledgeBase article VT1689
Storage/Interface Socket:
One optional PCIe Mini Card (Model B) or
one mSATA (Model C) socket
Weight: VL-EPMs-M1A –0.087 lb (0.039 kg)
VL-EPMs-M1B –0.157 lb (0.071 kg)
VL-EPMs-M1C –0.105 lb (0.047 kg)
SUMIT Resources
Form Factor: SUMIT-ISM (Legacy Type 1)
SUMIT
A
SUMIT
B*
PCIe x1
1
1
PCIe x4
–
USB
4
ExpressCard
–
LPC
–
SPI / µWire
–
SMBus / I2C
SMBus
+12V
–
+5V
+5Vsb
–
–
+3.3V
–
–
SUMIT-A Bottom only on VL-EPMs-M1A.
SUMIT-AB Top and Bottom on VL-EPMs-M1B.
SMBus on VL-EPMs-M1B only.
* Optional
Data represents standard operation at +25°C with +5V supply unless otherwise noted.
Specifications are subject to change without notification.

Introduction
VL-EPMs-M1 Reference Manual 3
RoHS-Compliance
The VL-EPMs-M1 is RoHS compliant.
ABOUT ROHS
In 2003, the European Union issued Directive 2002/95/EC regarding the Restriction of the use of
certain Hazardous Substances (RoHS) in electrical and electronic equipment.
The RoHS directive requires producers of electrical and electronic equipment to reduce to
acceptable levels the presence of six environmentally sensitive substances: lead, mercury,
cadmium, hexavalent chromium, and the presence of polybrominated biphenyls (PBB) and
polybrominated diphenyl ethers (PBDE) flame retardants, in certain electrical and electronic
products sold in the European Union (EU) beginning July 1, 2006.
VersaLogic Corp. is committed to supporting customers with high-quality products and services
meeting the European Union’s RoHS directive.
Warnings
ELECTROSTATIC DISCHARGE
Electrostatic discharge (ESD) can damage boards, disk drives, and other components. The circuit
board must only be handled at an ESD protective workstation. If an approved station is not
available, some measure of protection can be provided by wearing a grounded antistatic wrist
strap. Keep all plastic away from the board. Do not slide the board over any surface.
After removing the board from its protective wrapper, place the board on a grounded, static-free
surface, component side up. Use an antistatic foam pad if available.
The board should always be protected inside a closed metallic antistatic envelope during
shipment or storage.

Introduction
VL-EPMs-M1 Reference Manual 4
Technical Support
If you are unable to solve a problem after reading this manual, please visit the VL-EPMs-M1
product support web page (see below). The support page provides links to component datasheets
and device drivers.
The VersaTech KnowledgeBase contains a wealth of technical information about VersaLogic
products, along with product advisories. Click the link below to see all KnowledgeBase articles
related to the VL-EPMs-M1.
If you have further questions, contact VersaLogic Technical Support at (503) 747-2261.
VersaLogic support engineers are also available via e-mail at Support@VersaLogic.com.
REPAIR SERVICE
If your product requires service, you must obtain a Returned Material Authorization (RMA)
number by calling (503) 747-2261.
Please provide the following information:
Your name, the name of your company, your phone number, and your e-mail address
The name of a technical contact if any questions arise
Quantity of items being returned
The model and serial number (barcode) of each item
A detailed description of the problem
Steps you have taken to resolve or recreate the problem
The return shipping address
Warranty Repair All parts and labor charges are covered, including return shipping
charges for UPS Ground delivery to United States addresses.
Non-warranty Repair All non-warranty repairs are subject to diagnosis and labor charges,
parts charges, and return shipping fees. Please specify the shipping
method you prefer and provide a purchase order number for invoicing
the repair.
Note Please mark the RMA number clearly on the outside of the box before
returning. Failure to do so can delay the processing of your return.
VL-EPMs-M1 Support Page
http://www.versalogic.com/private/epmsm1support.asp
VersaTech KnowledgeBase

VL-EPMs-M1 Reference Manual 5
Physical Description
Dimensions and Mounting
The VL-EPMs-M1 complies with the SUMIT-ISM (Legacy Type 1) form factor specification,
which provides for specific mounting hole and stackable bus locations as shown in the diagram
below.
Figure 1. VL-EPMs-M1 Dimensions and Mounting Holes
(Not to scale. All dimensions in inches.)
2
–0.200
0.000
3.150
3.350
0.150
0.000
-0.200
3.575
3.375
3.050
0.125 DIA x4
Use 3 mm or #4
standoffs
+
+
+
+

Physical Description
VL-EPMs-M1 Reference Manual 6
Caution The board must be supported at all four mounting points to prevent excessive
flexing when expansion modules are mated and detached. Flex damage caused by
excessive force on an improperly mounted circuit board is not covered under the
product warranty.
Figure 2. VL-EPMs-M1B Height Dimensions
(Not to scale. All dimensions in inches.)
0.44
0.43
0.06
0.38
0.36
PC/104 (ISA)
Connector
SUMIT
Connectors

Physical Description
VL-EPMs-M1 Reference Manual 7
HARDWARE ASSEMBLY
The VL-EPMs-M1 comes in configurations that use SUMIT-A only, or SUMIT-AB and PC/104
(ISA) connectors. The VL-EPMs-M1B can be added to the middle or top of the stack, above any
SUMIT boards and below any PC/104 boards. The VL-EPMs-M1A and C can be added only to
the top of the stack.
The entire assembly can sit on a table top or be secured to a base plate. When bolting the unit
down, make sure to secure all four standoffs to the mounting surface to prevent circuit board
flexing. Standoffs are secured to the top circuit board using four pan head screws. Standoffs and
screws are available (VL-HDW-105/VL-HDW-106). Note that the standoffs in this kit are 15.24
mm (0.6") and must not be mixed with 15 mm (0.59") standoffs (VL-HDW-100/VL-HDW-101).
An extractor tool is available (part number VL-HDW-201) to separate modules from the stack.
Use caution when using the extractor tool so as not to damage any board components.
Figure 3. Stacking Example (VL-EPMs-M1B)

Physical Description
VL-EPMs-M1 Reference Manual 8
External Connectors
VL-EPMS-M1 CONNECTORS
Figure 4. VL-EPMs-M1 Connectors –Top Side
J2 –SUMIT-A
Model B
J1 –SUMIT-B
Model B
J9 –PC/104 (ISA)
Model B
J8 –SATA 0
J6 –USB 0-1
J3 –SATA 1
Models A & B
J4 –USB 3
J5 –USB 2
Models A & C
J7 –PCIe
Mini Card
Model B
or
mSATA
Model C

Physical Description
VL-EPMs-M1 Reference Manual 9
VL-EPMS-M1 CONNECTOR FUNCTIONS AND INTERFACE CABLES
The following table notes the function of each connector, as well as mating connectors and
cables, and the page where a detailed pinout or further information is available.
Table 1: Connector Functions and Interface Cables
Connector
Function
Mating Connector
Transition
Cable
Cable Description
Pin 1 Location1
x coord. y coord.
Page
J12
SUMIT-B Top
Samtec ASP-129646-01
—
—
1.669
3.322
17
J22
SUMIT-A Top
Samtec ASP-129646-01
—
—
2.712
3.322
15
J3
SATA 1 (Models
A & B)
Standard SATA
VL-CBR-0701
or
VL-CBR-0702
VL-CBR-0401
500 mm 7-pin, straight-
to-straight SATA data,
friction or mechanical
latching
ATX to SATA power
adapter
0.421
2.525
11
J4
USB 3
USB Type A
—
—
3.036
2.592
10
J53
USB 2
USB Type A
—
—
3.036
1.817
10
J6
USB 0-1
FCI 69830-010LF
VL-CBR-1013
Dual USB transition
0.260
0.955
10
J72
PCIe Mini Card
(Model B) or
mSATA (Model C)
—
—
—
1.842
2.854
13
J8
SATA 0
Standard SATA
VL-CBR-0701
or
VL-CBR-0702
VL-CBR-0401
500 mm 7-pin, straight-
to-straight SATA data,
friction or mechanical
latching
ATX to SATA power
adapter
3.129
1.260
11
J92
PC/104 (ISA)
AMP 1375795-2
—
—
0.050
0.200
12
J112
SUMIT-B Bottom
Samtec ASP-129637-01
—
—
1.669
3.317
18
J12
SUMIT-A Bottom
Samtec ASP-129637-01
—
—
2.712
3.317
15
1. The PCB origin is the center of the mounting hole located in the lower left, as oriented in Figure 4.
2. VL-EPMs-M1B only.
3. VL-EPMs-M1A & C only.

VL-EPMs-M1 Reference Manual 10
Operation
USB Ports
The VL-EPMs-M1 includes four USB channels. There are two USB ports with standard USB
Type A connectors, located on the baseboard at locations J4 and J5 (models A and C). The 10-
pin header at location J6 provides two USB channels.
On the VL-EPMs-M1B, the PCIe Mini Card connector at J7 uses one USB channel, leaving three
USB channels available for user I/O. On the VL-EPMs-M1B connector J5 is not installed.
All USB connectors are protected against ESD damage.
The USB interface on the VL-EPMs-M1 is UHCI (Universal Host Controller Interface) and
EHCI (Enhance Host Controller Interface) compatible, which provides a common industry
software/hardware interface.
Table 2: J6 Connector Pinout
J6 Pin
USB Channel
Signal Name
Function
1
0
USBPOWER
+5V (Protected)
2
0
USBP0+
Channel 0 Data +
3
0
USBP0-
Channel 0 Data -
4
0
GND
Ground
5
0
EARTH
Earth / Chassis / Shield
6
1
EARTH
Earth / Chassis / Shield
7
1
GND
Ground
8
1
USBP1-
Channel 1 Data -
9
1
USBP1+
Channel 1 Data +
10
1
USBPOWER
+5V (Protected)
3

Operation
VL-EPMs-M1 Reference Manual 11
SATA Ports
The VL-EPMs-M1 provides one or two serial ATA (SATA) ports, which communicate at a rate
of up to 3.0 gigabits per second. The SATA connectors at location J3 and J8 are standard 7-pin
SATA friction latching connectors (with cable VL-CBR-0701) or mechanical latching (VL-CBR-
0702). These connectors are compatible with true latching SATA cables.
Configuring the SATA RAID set is accomplished by entering the RAID Configuration Utility at
boot. Press F4 or CTRL+S when prompted.
Power to SATA drives is supplied by the ATX power supply. Note that the standard SATA drive
power connector is different than the common 4-pin Molex connector used on IDE drives. Most
current ATX power supplies provide SATA connectors, and many SATA drives provide both
types of power connectors.
Table 3: SATA Port Pinout
J3 or
J8 Pin
Signal Name
Function
1
GND
Ground
2
TX+
Transmit +
3
TX-
Transmit -
4
GND
Ground
5
RX-
Receive -
6
RX+
Receive +
7
GND
Ground

Operation
VL-EPMs-M1 Reference Manual 12
CONFIGURING A SATA RAID SET
To configure a SATA RAID set for two drives, perform the following steps. This procedure
assumes that you have installed the VL-EPMs-M1 on a VersaLogic SBC and attached power and
data cables to two SATA drives.
Warning! Performing these steps will delete any existing data on the drives.
1. Turn on the host computer.
2. Early in the boot cycle, press CTRL+S or F4 to enter the RAID Configuration Utility.
3. From the Main Menu, select "Create RAID set."
4. Select either RAID0 or RAID1, depending on your application.
RAID0 = Striped, combines two hard disks into one
RAID1 = Mirrored, copies the contents of one hard disk to another
5. Select whether you want the RAID set to be automatically or manually configured.
6. If you choose to configure the RAID set manually, the utility will prompt you to input
the settings for the type of RAID set you selected.
7. Type Y when prompted to create the RAID set.
After the RAID set is created, install the operating system from a CD-ROM drive attached to the
CPU board.
PC/104 (ISA) Connector
The PC/104 (ISA) connector (J9) is a pass-through connector only. This connector is present
only on the VL-EPMs-M1B.

Operation
VL-EPMs-M1 Reference Manual 13
PCIe Mini Card / mSATA Socket
The socket at location J7 accepts a full-height PCI Express Mini Card (Model B) or an mSATA
module (Model C).
The PCIe Mini Card interface includes one PCIe x1 lane, one USB 2.0 channel, and the SMBus
interface. The socket is compatible with plug-in Wi-Fi modems, GPS receivers, flash data
storage, and other cards for added flexibility. An Intel WiFi Link 5300 PCI Express Mini Card
(VL-WD10-CBN) is available from VersaLogic. A WiFi antenna (VL-CBR-ANT01) and a 12"
WiFi card to bulkhead RP-SMA transition cable (VL-CBR-0201) are also available. For more
The VL-F29 series of mSATA modules provide flash storage of 8 GB, 16 GB, or 32 GB.
To secure a Mini Card or mSATA module to the VL-EPMs-M1 use two screws (M2 x 5 mm,
Philips, pan head, 4 mm, stainless) and two washers (M2, split lock, OD 4.4 mm, stainless).
Screw and washer sets are available in 10-count packages as part number VL-HDW-107.
Table 4: PCIe Mini Card / mSATA Pinout
Pin
Signal Name
Mini Card Function
mSATA Function
1
WAKE#
Wake
Not connected
2
3.3VAUX
3.3V auxiliary source
3.3V source
3
NC
Not connected
Not connected
4
GND
Ground
Ground
5
NC
Not connected
Not connected
6
1.5V
1.5V power
1.5V power
7
CLKREQ#
Reference clock request
Not connected
8
NC
Not connected
Not connected
9
GND
Ground
Ground
10
NC
Not connected
Not connected
11
REFCLK-
Reference clock input –
Not connected
12
NC
Not connected
Not connected
13
REFCLK+
Reference clock input +
Not connected
14
NC
Not connected
Not connected
15
GND
Ground
Ground
16
NC
Not connected
Not connected
17
NC
Not connected
Not connected
18
GND
Ground
Ground
19
NC
Not connected
Not connected
20
W_DISABLE#
Wireless disable
Not connected
21
GND
Ground
Ground
22
PERST#
Card reset
Not connected
23
PERn0
Lane 0 receive –
Host receiver diff. pair
24
3.3VAUX
3.3V auxiliary source
3.3V source
25
PERp0
Lane 0 receive +
Host receiver diff. pair
26
GND
Ground
Ground
27
GND
Ground
Ground
28
1.5V
1.5V power
1.5V power
29
GND
Ground
Ground
30
SMB_CLK
SMBus clock
Two wire I/F clock

Operation
VL-EPMs-M1 Reference Manual 14
Pin
Signal Name
Mini Card Function
mSATA Function
31
PETn0
PCIe lane 0 transmit –
Host transmitter diff. pair
32
SMB_DATA
SMBus data
Two wire I/F data
33
PETp0
PCIe lane 0 transmit +
Host transmitter diff. pair
34
GND
Ground
Ground
35
GND
Ground
Ground
36
USB_D-
USB data –
Not connected
37
GND
Ground
Ground
38
USB_D+
USB data +
Not connected
39
3.3VAUX
3.3V auxiliary source
3.3V source
40
GND
Ground
Ground
41
3.3VAUX
3.3V auxiliary source
3.3V source
42
LED_WWAN#
Wireless WAN LED
Not connected
43
GND
Ground
Not connected
44
LED_WLAN#
Wireless LAN LED
Not connected
45
NC
Not connected
Not connected
46
LED_WPAN#
Wireless PAN LED
Not connected
47
NC
Not connected
Not connected
48
1.5V
1.5V power
1.5V power
49
NC
Not connected
Not connected
50
GND
Ground
Ground
51
NC
Not connected
Not connected
52
3.3VAUX
3.3V auxiliary source
3.3V source

Operation
VL-EPMs-M1 Reference Manual 15
SUMIT-A Bottom Connector
The table below shows the SUMIT-A Bottom connections to the VL-EPMs-M1. Signals that are
not connected are pass-through only. The +5V and ground signals on this connector are available
to power the VL-EPMs-M1. This connector is present on all models.
Note: SUMIT technology uses an automatic link alignment feature (also known as “lane
shifting”) to eliminate the need for jumpers or switches to identify an expansion
module’s PCIe slot number. Signals are not simply passed straight up from the bottom
connector to the top on SUMIT modules. Links that are used by the expansion module
are automatically selected, and the remaining unused signals are shifted down to the
consumed link’s pins on the top connector for use by the next board. This way all high
speed signals on the SUMIT interface are point-to-point rather than bussed. Both PCIe
and USB signals are subject to auto-alignment. See page 28 of the SUMIT Specification
for an explanation of this feature.
Table 5: SUMIT-A Bottom Connector Pinout
Pin
Signal Name
Function
Pin
Signal Name
Function
1
+5VSB
+5V power standby
2
+12V
+12V power
3
+3.3V
+3.3V power
4
SMB/I2C_DATA
SMBus data
5
+3.3V
+3.3V power
6
SMB/I2C_CLK
SMBus clock
7
EXPCD_REQ#
ExpressCard request
8
SMB/I2C_ALERT#
SMBus interrupt line in
9
EXPCD_PRSNT#
ExpressCard present
10
SPI/uWire_DO
SPI data out from master
11
USB_OC#0/1
USB0-1 overcurrent flag
12
SPI/uWire_DI
SPI data in to master
13
USB_OC#2/3
USB2-3 overcurrent flag
14
SPI/uWire_CLK
SPI clock
15
+5V
+5V power
16
SPI/uWire_CS0#
SPI chip select 0
17
USB3+
USB3 data +
18
SPI/uWire_CS1#
SPI chip select 1
19
USB3-
USB3 data –
20
Reserved
Pass-through
21
+5V
+5V power
22
LPC_DRQ
LPC DRQ
23
USB2+
USB2 data +
24
LPC_AD0
LPC line 0
25
USB2-
USB2 data –
26
LPC_AD1
LPC line 1
27
+5V
+5V power
28
LPC_AD2
LPC line 2
29
USB1+
USB1 data +
30
LPC_AD3
LPC line 3
31
USB1-
USB1 data –
32
LPC_FRAME#
LPC frame
33
+5V
+5V power
34
SERIRQ#
Serial IRQ legacy
35
USB0+
USB0 data +
36
LPC_PRSNT#/GND
LPC card present
37
USB0-
USB0 data –
38
CLK_33MHz
33 MHz clock out
39
GND
Ground
40
GND
Ground
41
A_PETp0
Link A, lane 0 transmit +
42
A_PERp0
Link A, lane 0 receive +
43
A_PETn0
Link A, lane 0 transmit –
44
A_PERn0
Link A, lane 0 receive –
45
GND
Ground
46
APRSNT#/GND
Link A card present
47
PERST#
Reset
48
A_CLKp
Link A clock +
49
WAKE#
Wake
50
A_CLKn
Link A clock –
51
+5V
+5V power
52
GND
Ground

Operation
VL-EPMs-M1 Reference Manual 16
SUMIT-A Top Connector
The table below shows the SUMIT-A Top connections to the VL-EPMs-M1. Signals that are not
connected are pass-through only. The +5V signals on this connector are available to power the
VL-EPMs-M1. This connector is present only on the VL-EPMs-M1B. (See the SUMIT "lane
shifting" note on page 15.)
Table 6: SUMIT-A Top Connector Pinout
Pin
Signal Name
Function
Pin
Signal Name
Function
1
+5VSB
+5V power standby
2
+12V
+12V power
3
+3.3V
+3.3V power
4
SMB/I2C_DATA
SMBus data
5
+3.3V
+3.3V power
6
SMB/I2C_CLK
SMBus clock
7
EXPCD_REQ#
ExpressCard request
8
SMB/I2C_ALERT#
SMBus interrupt line in
9
EXPCD_PRSNT#
ExpressCard present
10
SPI/µWire_DO
SPI data out from master
11
NC
Not connected
12
SPI/µWire_DI
SPI data in to master
13
NC
Not connected
14
SPI/µWire_CLK
SPI clock
15
+5V
+5V power
16
SPI/µWire_CS0#
SPI chip select 0
17
NC
Not connected
18
SPI/µWire_CS1#
SPI chip select 1
19
NC
Not connected
20
Reserved
Pass-through
21
+5V
+5V power
22
Reserved
Pass-through
23
NC
Not connected
24
LPC_AD0
LPC line 0
25
NC
Not connected
26
LPC_AD1
LPC line 1
27
+5V
+5V power
28
LPC_AD2
LPC line 2
29
NC
Not connected
30
LPC_AD3
LPC line 3
31
NC
Not connected
32
LPC_FRAME#
LPC frame
33
+5V
+5V power
34
SERIRQ#
Serial IRQ legacy
35
NC
Not connected
36
LPC_PRSNT#/GND
LPC card present
37
NC
Not connected
38
CLK_33MHz
33 MHz clock out
39
GND
Ground
40
GND
Ground
41
A_PETp0
Link A, lane 0 transmit +
42
A_PERp0
Link A, lane 0 receive +
43
A_PETn0
Link A, lane 0 transmit –
44
A_PERn0
Link A, lane 0 receive –
45
GND
Ground
46
APRSNT#/GND
Link A card present
47
PERST#
Reset
48
A_CLKp
Link A clock +
49
WAKE#
Wake
50
A_CLKn
Link A clock –
51
+5V
+5V power
52
GND
Ground
Table of contents
Other VersaLogic PCI Card manuals
Popular PCI Card manuals by other brands

KanexPro
KanexPro CON-GAMECAPL Quick installation guide

Avermedia
Avermedia DVD EZMaker 7 Quick installation guide

Contec
Contec AD12-64(PCI) user guide

Contec
Contec COM-2PD-LPE user guide

Multitech
Multitech MultiModem ISI5634UPCI-8 quick start guide

Planet
Planet 802.11g Wireless PCI Card WL-8310 user manual