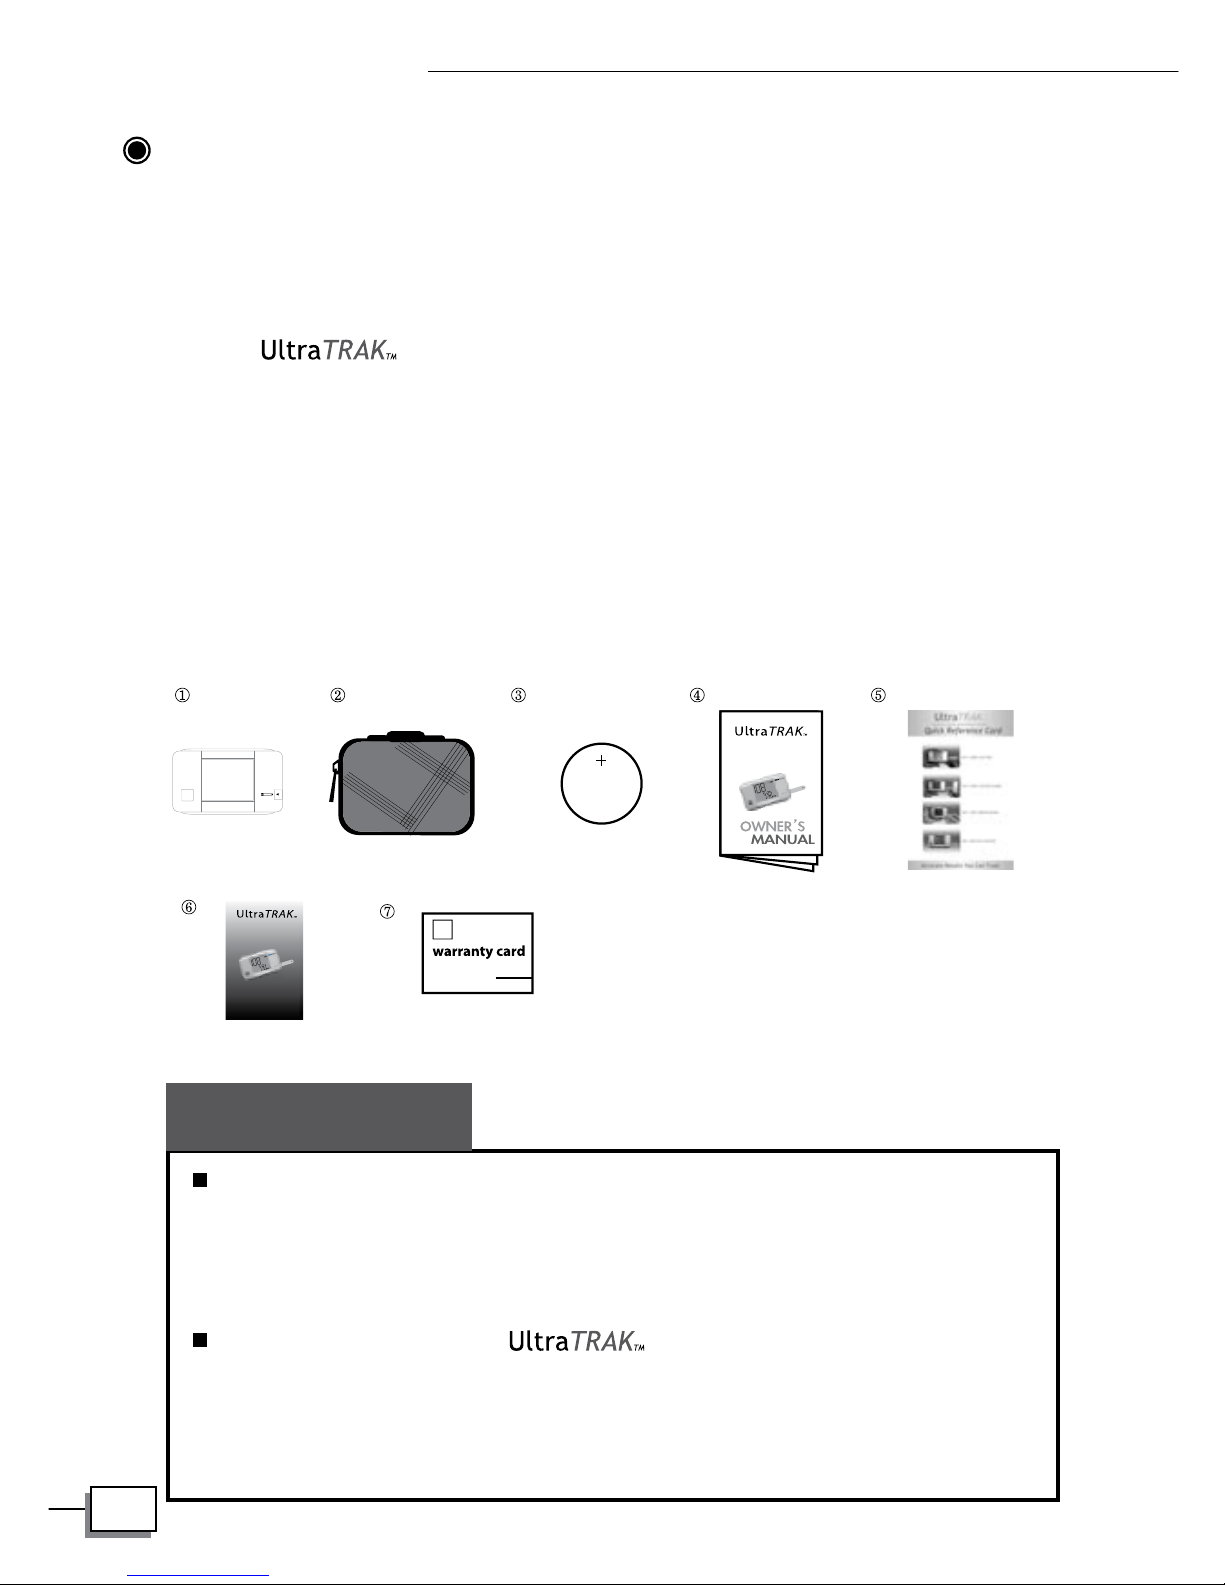
Vertex Diagnostics UltraTRAK User manual

Ver 1.0
2007 10
UltraTRAKTM
UltraTRAKTM

2
UltraTRAKTM
Dear System Owner:
This manual contains important information that you must know about your
system. Please read it carefully and keep it for future reference.
For other questions regarding this system, please contact your local
customer service. At all other times, you should contact your health care
professional for assistance.

3
vertex
diagnostics
IMPORTANT SAFETY INSTRUCTIONS
READ THIS BEFORE USING
The following basic safety precautions should always be taken.
1. Close supervision is necessary when the device is used by, on, or near
children, handicapped persons or invalids.
2. Use the device only for the intended use described in this manual.
3. Do not use strips and control solutions which are not supplied by the
manufacturer.
4. Do not use the device if it is not working properly, or if it has suffered
any damage.
5. Before using any product to test your blood glucose, read all instructions
thoroughly and practice the test. Do all quality control checks as directed
and consult with a diabetes healthcare professional.
KEEP THESE INSTRUCTIONS

4
UltraTRAKTM
TABLE OF CONTENTS
IMPORTANT SAFETY INSTRUCTIONS 03
IMPORTANT INFORMATION 06
ABOUT ATERNATIVE SITE TESTING (AST) 07
INTRODUCTION OF THE SYSTEM 09
Intended Use 09
Principle of Measurement 09
Contents of the System 10
Appearance and Key Function of the Meter 11
Meter Display Segments 12
Appearance of the Test Strip 13
PREPARATION BEFORE USE 14
Battery Replacement 14
Setting the Meter and Deleting the Memory 16
BEFORE TESTING 20
Checking the Display 20
Coding the Meter 20
Checking the System with Control Solutions 22
Important Control Solution Information 23
Doing a Control Solution Test 24
TESTING YOUR BLOOD 27
Testing Procedure 28
Expected Test Results 34
Special Messages 35
COMPARING METER AND LABORATORY RESULTS 36
USING THE METER MEMORY 38

5
vertex
diagnostics
Viewing Results on the Meter 38
Viewing Results on a Personal Computer 40
CARING FOR YOUR METER AND STRIP 41
Cleaning 41
Storage 41
PROBLEM-SOLVING GUIDE 44
Error Message 45
Problem in Operation 46
SPECIFICATIONS 48
SUMMARY OF OPERATION 49

6
UltraTRAKTM
IMPORTANT INFORMATION
Severe dehydration and excessive water loss may cause false low re-
sults. If you believe you are suffering from severe dehydration, consult a
healthcare professional immediately.
Test results below 60 mg/dL*1(3.3 mmol/L) mean low blood glucose (hy-
poglycemia). Test results greater than 240 mg/dL*2(13.3 mmol/L) mean
high blood glucose (hyperglycemia). If you get results below 60 mg/dL
or above 240 mg/dL, and do not have symptoms, rst repeat the test. If
you have symptoms or continue to get results that fall below 60 mg/dL or
above 240 mg/dL, follow the treatment advice of your healthcare profes-
sional.
Apply only capillary whole blood sample to the absorbent hole. Applying
other substances to the absorbent hole will cause inaccurate results.
If you are experiencing symptoms that are not consistent with your blood
glucose test results and you have followed all instructions described in
this owner’s manual, call your healthcare professional.
Inaccurate results may occur in severely hypotensive individuals or pa-
tients in shock. Inaccurate low results may occur for individuals expe-
riencing a hyperglycemic-hyperosmolar state, with or without ketosis.
Critically ill patients should not be tested with blood glucose meters.
Please refer to your test strip package insert for additional important
information.
*1: Kahn, R., and Weir, G.: Joslin’s Diabetes Mellitus, 13th ed. Philadelp
hia: Lea and Febiger (1994), 489.
*2: Krall, L.P., and Beaser, R.S.: Joslin Diabetes Manual. Philadelphia: Lea
and Febiger (1989), 261-263.

7
vertex
diagnostics
ABOUT ALTERNATIVE SITE TESTING (AST)
Important: There are limitations for doing AST.
Please consult your healthcare professional before you do AST.
What is AST?
Alternative site testing (AST) means
that people use parts of the body oth-
er than ngertips to check their blood
glucose levels. This system provides
you to test on the palm, the forearm,
the upper arm, the calf, or the thigh
with the equivalent results to ngertip
testing.
What’s the advantage?
Fingertips feel pain more readily be-
cause they are full of nerve endings
(receptors). At other body sites, since
nerve endings were not so condensed,
you will not feel as much pain as at the
ngertip.
When to use AST?
Food, medication, illness, stress and exercise can affect blood glucose
levels. Capillary blood at ngertip reects these changes faster than capil-
lary blood at other sites. Therefore when testing blood glucose during or
immediately after meal, physical exercise, or any other event, take blood
sample from your nger only.
We strongly recommend you do AST ONLY in the following intervals:
In a pre-meal or fasting state (more than 2 hours since the last meal).
Two hours or more after taking insulin.
Two hours or more after exercise.

8
UltraTRAKTM
Do NOT use AST if:
You think your blood glucose is low.
You are unawareness of hypoglycemia.
Your AST results do not match the way you feel.
You are testing for hyperglycemia.
Your routine glucose results are often uctuating.
You are pregnant.
How to increase the accuracy?
Stimulating blood perfusion by rubbing the puncture site prior to blood ex-
traction has a signicant inuence on the glucose value obtained. Blood
from the site without rubbing exhibits a measurably different glucose con-
centration than blood from the nger. When the puncture site was rubbed
prior to blood extraction, the difference was signicantly reduced.
Please follow suggestions below before getting a drop of
blood:
Rub the puncture site about 20 seconds before penetration.
Use a clear cap (included in the kit) instead while setting the lancing
device.

9
vertex
diagnostics
INTRODUCTION OF THE SYSTEM
Intended Use
The system is intended for use outside the body (in vitro diagnostic use).
It should be used only for testing glucose (sugar) and only with fresh capil-
lary whole blood samples taken from the nger and the alternative sites
including the palm, the forearm, the upper arm, the calf and the thigh. The
system is intended for use in the home and in clinical settings. It should not
be used for the diagnosis of diabetes or for the testing of newborns.
AST in this system can be used only during steady-state blood glucose
conditions described in the section of “About AST”.
Principle of Measurement
The test is based on the measurement of electrical current generated
by the reaction of glucose with the reagent of the strip. The meter mea-
sures the current and displays the corresponding blood glucose level. The
strength of the current produced by the reaction depends on the amount of
glucose in the blood sample.

10
UltraTRAKTM
Contents of the System
The system consists of three main products: the blood glucose meter, test
strips, and two levels of control solution. These products have been de-
signed, tested, and proven to work together as a system to produce ac-
curate blood glucose test results. Use only the same brand-name of test
strips and control solution with the blood glucose meter.
Your system includes:
jA meter Quick Reference Card
kCarrying Case Daily Logbook
lExtra 3V Lithium Battery Warranty card
Owner’s Manaul
Check your system to be sure that it is unopened prior to use
and that it contains all parts listed above. If either of these
conditions occurred, please return your system to the place
of purchase.
There are 3 levels for control solutions: low, normal
and high. Please note that these three levels of control solu-
tion are optional and is not included in the standard kit. Please
ask your local agent for availability.
PLEASE NOTE
UltraTRAKTM
SELF-TEST LOG BOOK
For recording
.
Blood glucose test results
.
Insulin and medication doses
.
Notes
3V

11
vertex
diagnostics
Appearance and Key Function of the Meter
TEST PORT
The test port is where
you insert he test strip
for testing. The meter
will turn on automatically
when you insert a test
strip.
DISPLAY
Your test results are displayed
here. The large, easy-to-read
display guides you through
the test using symbols and
simple messages.
SETTING BUTTON (in the back)
Setting the date, time and unit, located in
the battery compartment.
MAIN BUTTON
The main button in front of the meter
is used to set up the meter, enter the
memory mode, change the value of data
time, unit setting, memory deleting and
turn the meter on and off.

12
UltraTRAKTM
Meter Display Segments
MEASUREMENT UNIT
TEST STRIP SYMBOL
Appears when the meter is on.
TEMPERATURE SYMBOL
Appears with ambient
temperature
after inserting a test strip.
BATTERY SYMBOL
Appears when the battery is low.
KETONE WARNING
When your blood glucose test
result is above 240mg/dL
(1.3mmol/L), this symbol will
appear with " ? " sign on the
display.
TEST RESULT AREA
Test results are displayed here.
(A decimal point appears when
the unit of measurement is
millimoles per litre.)
BLOOD DROP SYMBOL
This symbol tells you when
to apply the sample.
DATE
TIME
MEM
Indicates a test result
stored in memory.
CTL SYMBOL
Appears when in control
solution test. Its result won't
be stored in the memory.
Appears with the test result
either in mg/dL or in mmol/L.

13
vertex
diagnostics
Appearance of the Test Strip
Your system measures the amount of sugar (glucose) in whole blood.
Blood is applied to the absorbent hole of the test strip and is automatically
drawn into the reaction cell where the reaction takes place.
The test strip consists of the following parts:
Contact Bars
Insert this end of the test strip into the meter.
Push it in rmly until it will go no further.
Test Strip Handle
Hold this part to insert the test strip into the slot.
Conrmation Window
This is where you conrm if enough blood
Has been applied to the absorbent hole of the strip.
Absorbent Hole
Apply a drop of blood here,
The blood will be sucked automatically.
See pages 27~35, Testing Your Blood, for complete instructions.

14
UltraTRAKTM
PREPARATION BEFORE USE
Battery Replacement
Your meter comes with one 3.0 V (CR2032) lithium battery that is already
installed.
The meter will alert you when the power is getting low by displaying two
different messages:
Replacing the battery does not affect the meter’s memory (pre-
vious test results stored in memory). However, the time and
date settings may need to be updated.
Batteries might leak chemicals if not used for a long time. Re-
move the battery if you are not going to use the device for an
extended period (i.e. 3 months or more).
PLEASE NOTE
1. The symbol appears with “CHK” and
test strip symbol: the meter is func-
tional and the result remains accurate,
but it is time to change the battery.
2. The symbol appears with the ash-
ing E-b symbol: the battery can not
provide enough power to do a test.
You must change the battery imme-
diately.

15
vertex
diagnostics
To replace the battery, make sure that the meter is turned off.
1. Press the buckle on battery cover and lift up to remove cover.
2. Remove the old battery and replace with one new 3.0 V (CR2032) lithium
battery. Make sure that the positive “+” side is facing up.
3. Close the battery cover. If the battery is inserted correctly, you will hear
a “beep”.
As with all small batteries, the batteries should be kept away from
small children who still put things in their mouths. If they are swal-
lowed, promptly see a doctor for help.
WARNING

16
UltraTRAKTM
Setting the Meter and Deleting the Memory
Your meter comes with the time, date, unit of measurement and unit of
temperature preset. But if you replace the battery, you may need to reset
the meter.
Start with the meter off. Then press the
set button located in the battery com-
partment. The meter is now in the setting
mode. You can start to set up the meter.
STEP 1 Set the Year
The year will appear rst, with the year set-
ting ashing. Press and release the Main
button to advance one year. To move faster,
keep pressing the Main button until the de-
sired number appears. With the correct year
on the display, press the Set button and then
the month segment ashes.
STEP 2 Set the Month
Press and release the Main button until
the correct month appears. To move faster,
hold the Main button down. With the correct
month on the display, press the Set button
and then the day segment ashes.
STEP 3 Set the Day
Press and release the Main button until the
correct day appears. To move faster, hold
the Main button down. With the correct day
on the display, press the Set button and then
the hour segment ashes.

17
vertex
diagnostics
STEP 4 Set the Hour
Press and release the Main button to ad-
vance one hour. To move faster, hold the
Main button down. With the correct hour on
the display, press the Set button and then
the minute segment ashes.
STEP 5 Set the Minutes
Press and release the Main button to ad-
vance one minute. To move faster, hold
the Main button down. With the correct
minute on the display, press the Set button
and then the current unit of measurement
starts ashing.
STEP 6 Select mg/dL or mmol/L
Press and release the Main button to se-
lect the unit of measurement you want to
use. Press the Set button and then the cur-
rent unit of temperature ashes.
The milligram per deciliter (mg/dL) is the standard unit in the United
States. The mmol/L is the standard unit in Canada. Use of the wrong unit
of measure may cause you to misinterpret your blood glucose level, and
may lead to incorrect treatment.
STEP 7 Select ºF or ºC
Press and release the Main button to select
the unit of temperature you want to use.
Press the Set button and the meter will dis-
play “dEL” with ashing “mem” symbol.

18
UltraTRAKTM
STEP 8 Delete Memory and Exit the Setting Mode
With “dEL” and ashing “mem” symbol on the dis-
play:
Press the Main button again to delete all of the memory, following the
meter will display “---“ and “OK” to show that the memory is deleted. Then
press the Set button to turn off the meter.
If you do not want to delete the memory, press the Set button to skip this
step and then the meter will be turned off.
Congratulations! You have nished all settings now!

19
vertex
diagnostics
The time, date, unit of measurement and unit of temperature can
ONLY be changed in the setting mode. Therefore, when you perform
a glucose testing, those parameters are not possible to be changed.
Your meter displays 7-, 14-, 21-, 28-, 60- and 90-day averages which
you can access from the meter memory. These averages are cal-
culated from results obtained during the 7-, 14-, 21-, 28-, 60- and
90-day preceding the current date and time settings. When the date
and time are changed, the 7-, 14-, 21-, 28-, 60- and 90-day averages
may change.
While the meter is in the Setting mode, it will turn off automatically
without any action in one minute.
PLEASE NOTE

20
UltraTRAKTM
BEFORE TESTING
Checking the Display
Each time you insert a test strip into
the meter to turn the meter on, the
meter will display ”CHK” and This
tells you that the system is performing
several self-checks.
If the code number displayed on the meter does not match the
number printed on the vial, test results may be inaccurate.
CAUTION
Coding the Meter
STEP 1 Enter the Code Mode.
Start with the meter turned off. Insert
a test strip to turn on the meter. “CHK”
and will appear. Next, the ambient
temperature and then the code number
will appear.
STEP 2 Match the Code Numbers.
Compare the code number on the meter
display with the code number on the
test strip vial. If the two code numbers
match, you may begin testing. If not,
follow Step 3.
1510
Table of contents
Other Vertex Diagnostics Blood Glucose Meter manuals