Verve PANTERA Specification sheet

Use&Maintenance Manual
Page 1

Please read this owner's handbook carefully before using your Pantera e-bike in order to become thoroughly
familiar with all the correct operations of your controls, its features and capabilities.
Please note that all instructions and notice are subjected to change and updates without notice.
Please visit www.vervecycleworks.com for periodic technical updates.
Page 2

CONTENTS
Page
1GENERAL INFORMATION 4
2LEGAL REQUIREMENTS 6
3DIAGRAM OF PANTERA E-BIKE 7
4UNPACKAGING 8
5GETTING STARTED 9
6ASSEMBLY INSTRUCTION 10
7PRE-RIDE SAFETY CHECKS 24
8OPERATING 26
9GENERAL WARNINGS 33
10 SAFETY 34
11 MAINTENANCE SCHEDULE 37
12 MAINTENANCE DETAILS 38
13 WARRANTY 46
Page 3

1. GENERAL INFORMATION
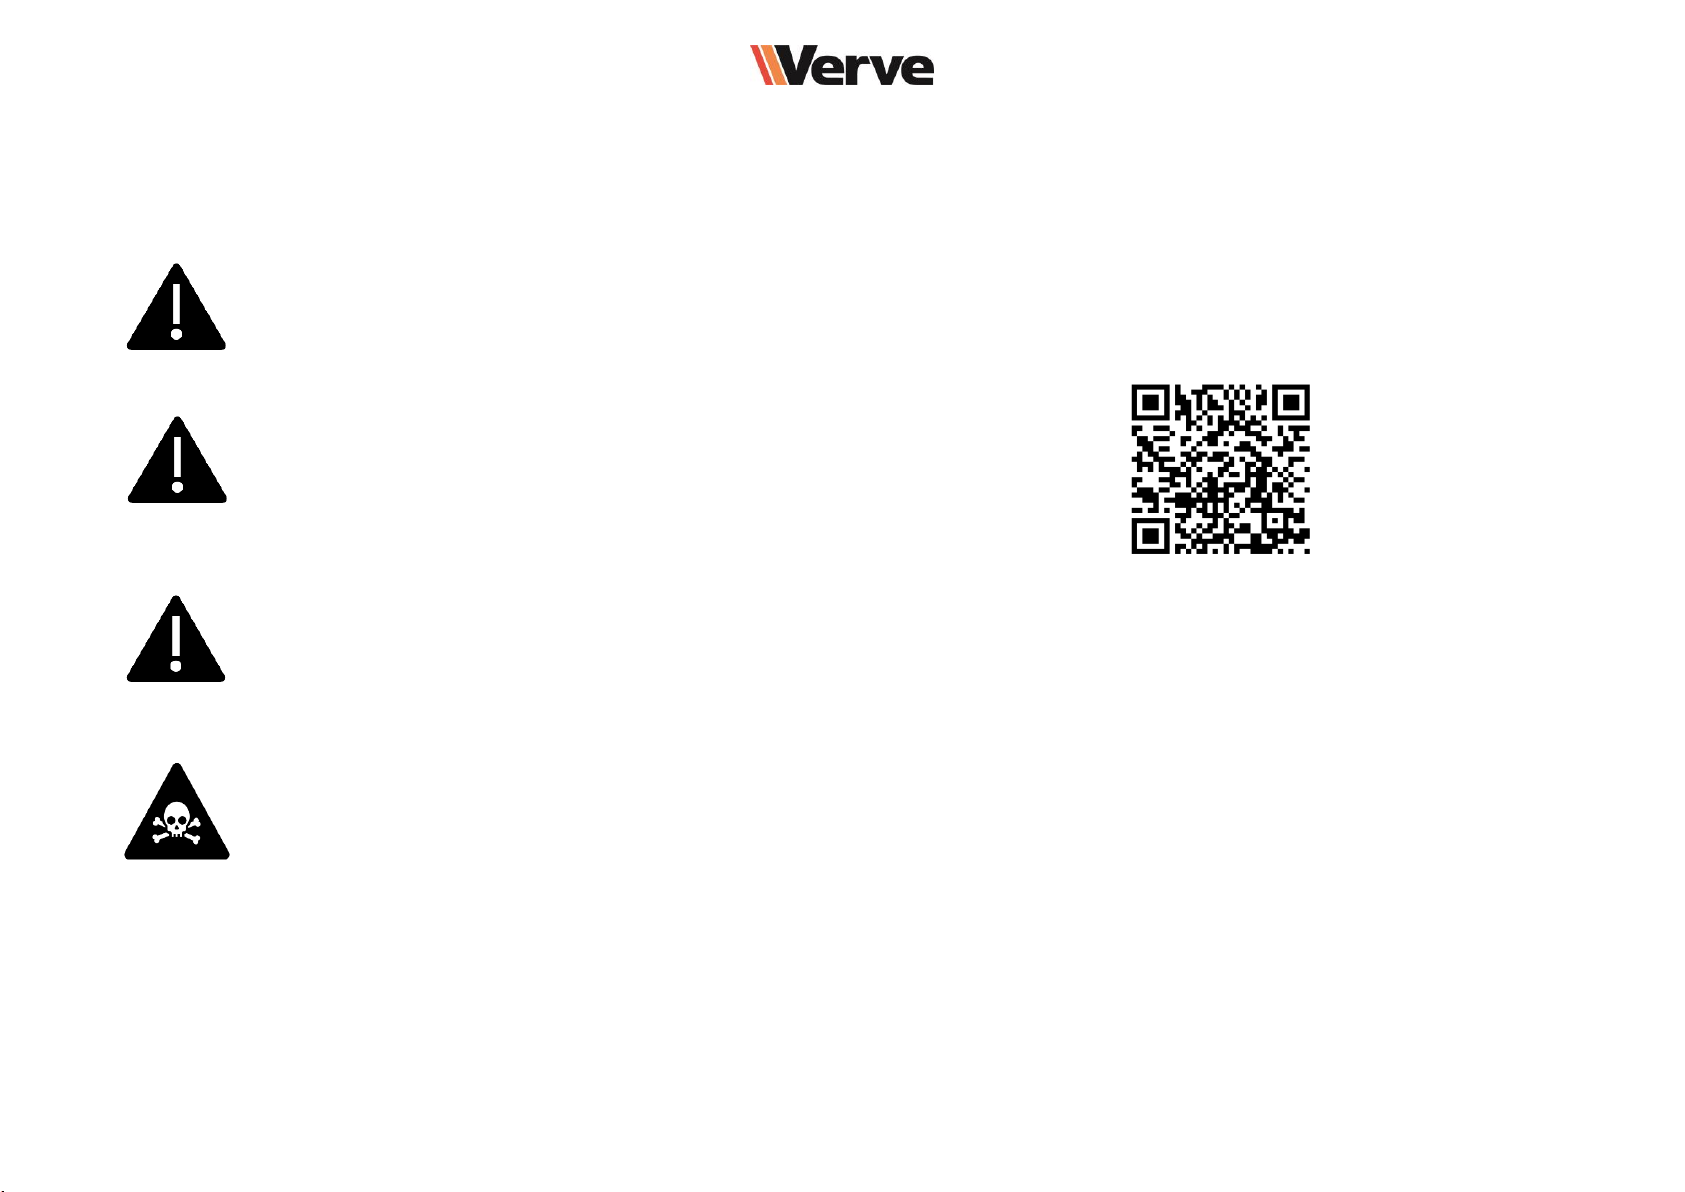
Please note the following symbols:
INFO: This symbol marks sections with tips and information that may help extend the product
lifetime and protects your warranty.
CAUTION! This symbol marks sections of high importance. Neglecting this information may lead to
injury or damages on your Pantera
WARNING! This symbol marks sections of extreme importance. Neglecting of this information may
lead to severe injuries or death.
TOOLS: You must use some tools in order to work on the bicycle.
Page 4

If you feel uncertain about proper configuration after assembling your Pantera according to the provided assembly
instructions, please contact us or visit your mechanic of trust. If any of the instructions are beyond your skill set, we
recommend taking your bike to a certified e-bike specialist or professional cycle mechanic for the assembly process.
Do NOT ride your E-Bike if it has been assembled incorrectly. Riding an incorrectly assembled bike can put your own
safety at risk as well as others, so please visit a specialized bicycle shop if you feel not sure.
Please perform a safety check before each use, as described on in the “Pre-ride Safety Check” section.
Page 5

2. LEGAL REQUIREMENTS
2.1 INTENDED USE
No liability or warranty claim shall be accepted if the use of Pantera deviates, from this intended use, if safety instructions
For the latest information on assembly and maintenance, please visit our website.
Pantera electric bikes are not intended for participations in competitions.
Commercial use does are not part of the intended use.
Operation parameters, maintenance, guidelines, and service instructions are part of this intended use.
Your Pantera electric bike is designed for use on paved paths only. You should therefore never ride on stairs, jump, or perform
dangerous activities like "wheeling", etc.
If the user rides Pantera e-bike beyond its intended use, there may be a risk of an accident, serious injury, or death
for the user and/or those around the user.
Any modification or alterations to the electrical system (tuning) voids all warranty claims.
Please check your country or state regulations on electric bikes before riding. There are variations on age limit, speed,
motor wattage, and road accessibility. In the EU, rules for bicycles also apply to e-bikes with assisted speed up to 25
km/h. However, we invite you to check if different regulations apply in your country.
are not observed, in the event of overloading, or if faults are not properly rectified. Similarly, no liability and warranty claim shall
be accepted in case of assembly errors, willful intent, accidents, and/or if care and maintenance specifications are not followed.
Page 6

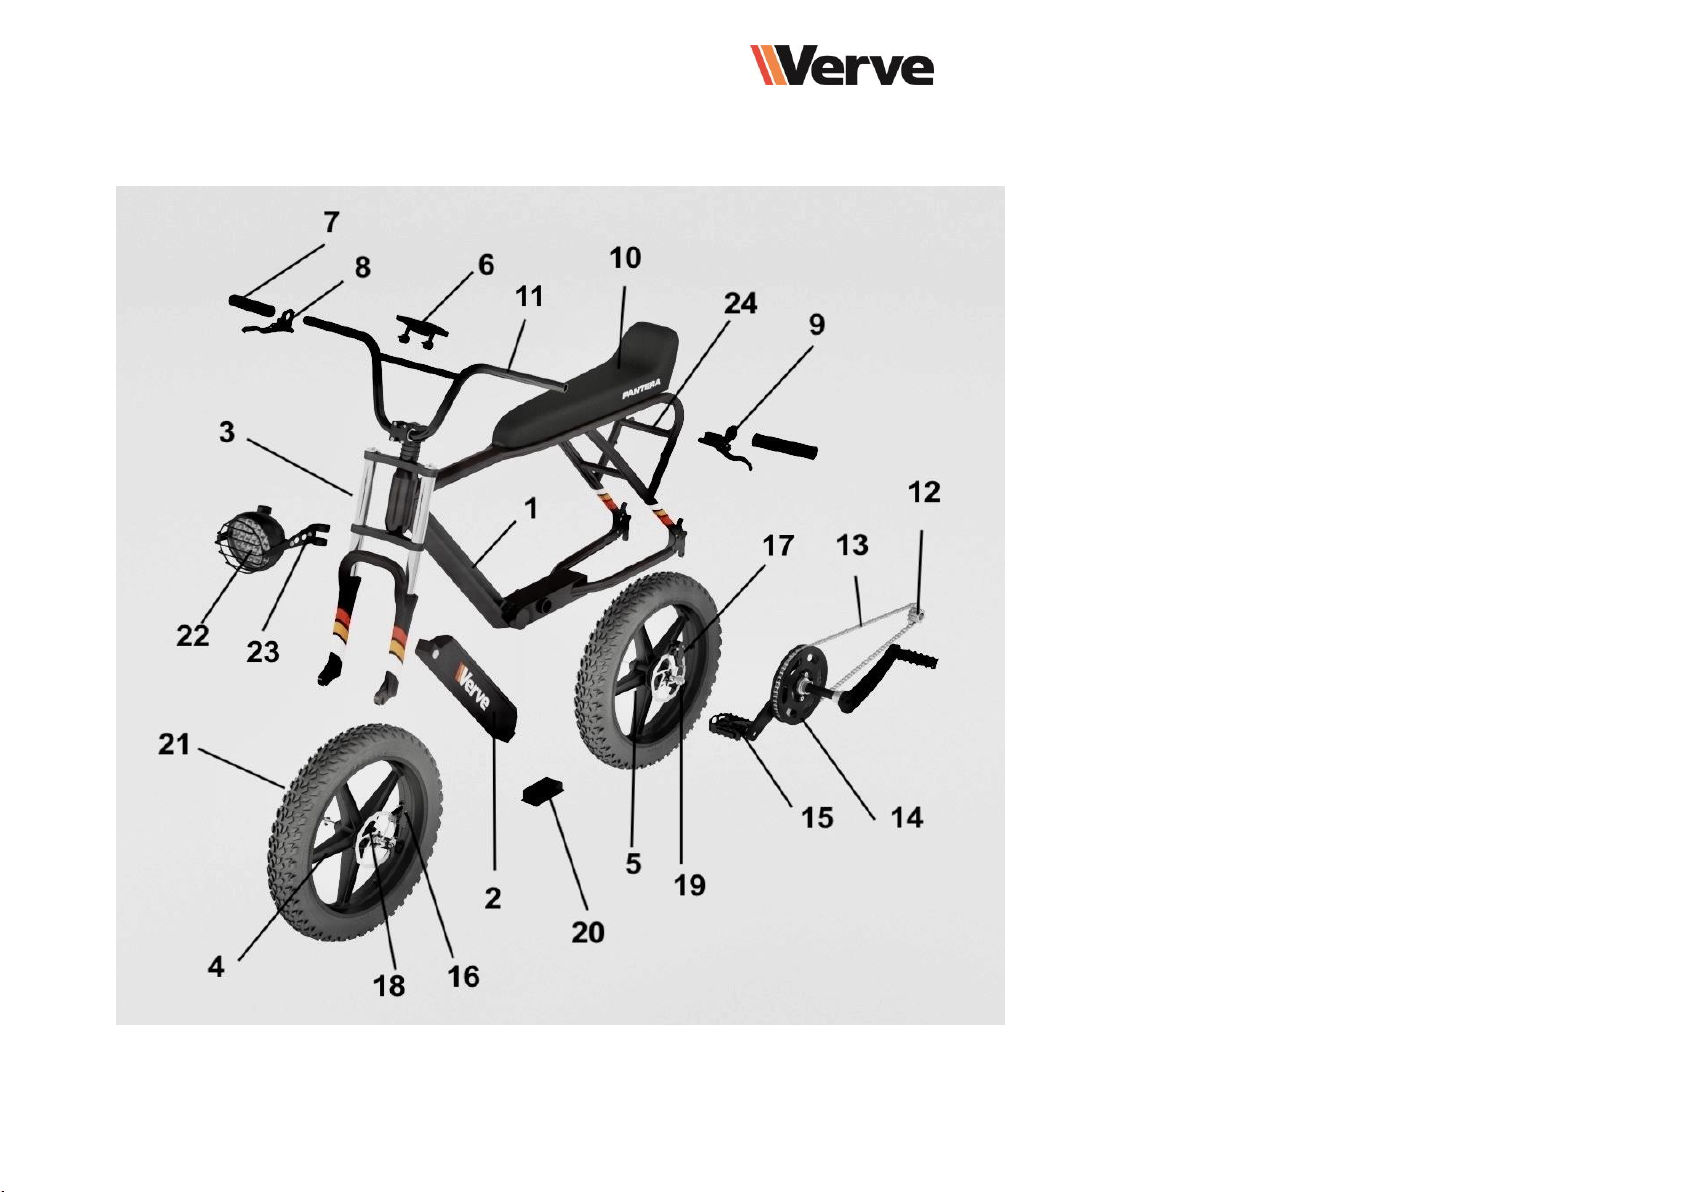
3. DIAGRAM OF PANTERA
1 FRAME
2 BATTERY
3 FRONT FORKS
4 FRONT WHEEL
5 REAR WHEEL
6 DISPLAY
7 GRIP
8 RIGHT BRAKE LEVER
9 LEFT BRAKE LEVER
10 SADDLE
11 HANDLE BAR
12 REAR DÉRAILLEUR
13 CHAIN
14 CRANK SET
15 PEDAL
16 FRONT BRAKE CALIPER
17 REAR BRAKE CALIPER
18 FRONT DISC BRAKE
19 REAR DISC BRAKE
20 CONTROLLER BOX
21 TIRE
22 HEADLIGHT
23 HEADLIGHT BRACKETS
24 REAR LIGHT
Page 7

4. UNPACKAGING
Pantera is shipped to you in a box, some parts are not mounted ad require assembly
The content of the box is:
- 1 x Pantera E-bike
- 1 x saddle
- 1 x Front Tire
- 5 x Tools: (2 x 15mm wrench key - 1 x 10/8mm wrench key - 1 Allen key 8 - 1 Allen key 10)
- 1 x Battery Charger 2A
- 1 x Front Headlight
- 2 x Headlight Brackets
- 2 x Pedals
- 2 x Battery Key
You may need some additional tools, such as:
* Scissors
* Cutter
* Loctite paste medium strength
* Rags
Page 8

5. GETTING STARTED
Watch carefully our assembly video at the link below or scan the QR.
https://www.youtube.com/watch?v=QG2VdJfYdbs&ab_channel=VerveMoto
Before performing any work on your Pantera, turn off the power system and take out the battery.
Involuntary activation of the electric assistance system can cause damage or injury.
Please read the instruction entirely before assembly, to ensure the proper functionality of your Pantera e-bike. If you
don't follow the instruction correctly, you could incur in personal injury or damage to your e-bike.
If any serious damage has occurred to your Pantera please contact us at our website.
We will explain you what do, step by step
Page 9

6. ASSEMBLY INSTRUCTION
CONTENTS:
6.1 OPEN THE BOX
6.2 TAKE OUT THE COMPONENTS
6.3 PLACE THE E-BIKE
6.4 BATTERY REMOVAL
6.5 HANDLEBAR INSTALLATION
6.6 FRONT TIRE
6.7 TIRES INFLATION
6.8 SADDLE
6.9 PEDALS
6.10 HEADLIGHT and DISPLAY
In order to protect your Pantera from damages all the bike has being covered with plastic foam.
DANGER!
Do not ride your Pantera if it has not passed 100% safety checks before each ride, as described in the section called
PRE-RIDE SAFETY CHECK
Page 10

6.1 OPEN THE BOX
Make sure to open the box in the right way.
Follow the direction of the arrow on the side of the box.
The mounting process requires around 30 minutes. Work in a dry place and in a clean area. Avoid any wet surface.
Use a cutter to open the top of the box. Before pulling out the bike, cut with a cutter or a pair of scissors the nylon
cable tie, that connects the front tire to the frame. Take the front wheel out of the box and set it aside. Make sure not
to hurt any surface with the front disc brake. Any damage to the disc will cause assembly problems and potential
safety issues. We suggest to lay the front wheel on a soft rag.
Now carefully take out Pantera from the box. The weight of the bike is 31Kg so if you need a help, ask a friend to give
you a hand. Once the bicycle is out, gently put the bike on the ground. The front wheel is not mounted yet, so in order
to avoid any problems lay the front fork bottom on a soft surface.
Page 11

6.2 TAKE OUT THE COMPONENTS
Once your Pantera is out of the box, take out all remaining components:
1 x saddle (Including screws)
1 x Box with side reflectors, battery charger, and 2 keys
1 x Box with tools to mount your Pantera (see section no.4 of this manual)
1 x Box with front headlight and headlight brackets
6.3 PLACE THE E-BIKE
The required tool for this operation is a cable cutter.
As mentioned in point 6.1, Pantera should be located on a flat surface with a soft material under the front forks. Once it's done,
it's time to remove all the plastic foam from the bike. Please consider to avoid wasting the boxes and all the foam, because, in
case of return, it will be much easier to pack the bike again and send it back..
Please pay attention when you cut the nylon cable ties as they can be hard to cut. We recommend to use a cable
cutter. The use of scissors or knives is highly risky, as in case of a missed cut the knife could get out of control, causing
damage to you and/or people near you.
Page 12

6.4 BATTERY REMOVAL
To remove the battery please follow these simple instructions:
1) Use the supplied key and insert it on the left side if the bike.
2) Turn the key clockwise and pull the battery towards you.
3) Carefully put the battery aside.
As mentioned in section no.5, we recommend you to remove the battery from your e-bike, before you start the assembly.
Page 13

6.5 HANDLE BAR INSTALLATION
Please follow these steps:
1) Use the 5mm hex wrench to remove the bolts of the handlebar clamp.
2) Once the clamp is open, place the lower crossbar of the handlebar in
3) Loosely tighten the handlebar clamp with the 5 mm hex wrench, and adjust the angle of the handlebar to rider's comfort.
Mounting the handlebar is very easy, but you must pay much attention. A screw that is not tightened properly and
left loose can cause serious problems while driving. Be sure to pay close attention when detailing the screws.
4) Cross tighten the handlebar clamp from corner to corner, making sure the clamp is tight and evenly placed and handlebars
do not move.
Page 14

6.6 FRONT TIRE
Place protectors under points A and B to protect these parts
against bump and scratches, then follow the steps below:
2) REMOVE THE BRAKE CALIPER PLASTIC RETAINER. Unlock the
brake caliper by partially unscrewing (just 2 turns) both M6 Allen
screws in the caliper mount, to allow the easy slide of the
disk while inserting the wheel.
In order to mount the front tire we strongly suggest you to turn your
Pantera upside down, as shown in picture.
1) Take out the nut and the retaining washer from both sides of
the wheel, and keep the spacer in place
Page 15

Pay attention not to scratch the front fork paint.
4. Put the retaining washer and the nut on each side of the
front wheel axle.
3) Slide the wheel into the fork. The front wheel has 2 washers, 2
spacers and 2 bolts. Put aside the nut and slide into the from axle,
1 spacer on each side.
5. Use the 2 x 15mm wrench key supplied in the box (20.3NM)
to lock the front tire
Page 16

Required tools for this operations: 1 Allen key 5mm and 2 wrench keys 15mm
Make sure to follow the instructions step by step and to tight the front wheel at the end.
both M6 Allen screws in the caliper mount, while pulling the brake lever. When the screws are tightened, you can release the
brake lever. Check the correct operation of the braking system, at the end of this procedure.
If you don't feel comfortable in doing this operation, please consider the help of a
professional mechanic specialized in electric bicycles
6. Lock again the brake caliper. For this operation, pull the brake lever until the caliper is pressing the disk (braking), tighten
Page 17

6.7 TIRE INFLATION
The e-bike now is in a good position to inflate the tires.
DO NOT TRY to inflate the tires more than 35PSI.
In case of too high pressure the tires may burst.
For transport purposes, tires are packed partially inflated.
Tires must be inflated using a pump with a Schrader valve tip to a
recommended 20-25 psi (1.4-1.7 bar).
2. Once the tire is properly seated, deflate it to a recommended
20-25 psi (1.4-1.7 bar). Ideal tires pressure slightly varies, based on
the weight of rider and type of terrain.
1. Inflate the tube to a maximum pressure of 35 PSI (2,4bar) to
ensure the tire is properly seated in the rim.
Page 18

6.8 SADDLE
For safety reasons the saddle in not mounted on the bike.
Turn the bicycle back in the standard position.
The saddle must be fixed to the frame with 7 Allen screws:
- 1 x 5x50mm (Longer front screw)
- 6 x 5x30mm
Please follow the steps below:
1) Place the saddle on top of the frame
2) Tighten the Allen screws loosely one at a time.
3) Once all the Allen screws have been placed, screw them tightly
DO NOT TIGHTEN all the Allen screws
very hard at this point!
Page 19

6.9 PEDALS
Install and tighten the pedals, using the 15mm open wrench supplied in the box. Look for a letter marking “L” and “R” on each
respective pedal and make sure you install the left pedal on the left crank and the right pedal on the right crank.
Tighten with recommended torque of 29-34Nm for pedals.
The right pedal is screwed on in a clockwise direction.
The left pedal is screwed on in a counter-clockwise direction.
Page 20
Other manuals for PANTERA
1
Table of contents
Other Verve Bicycle manuals