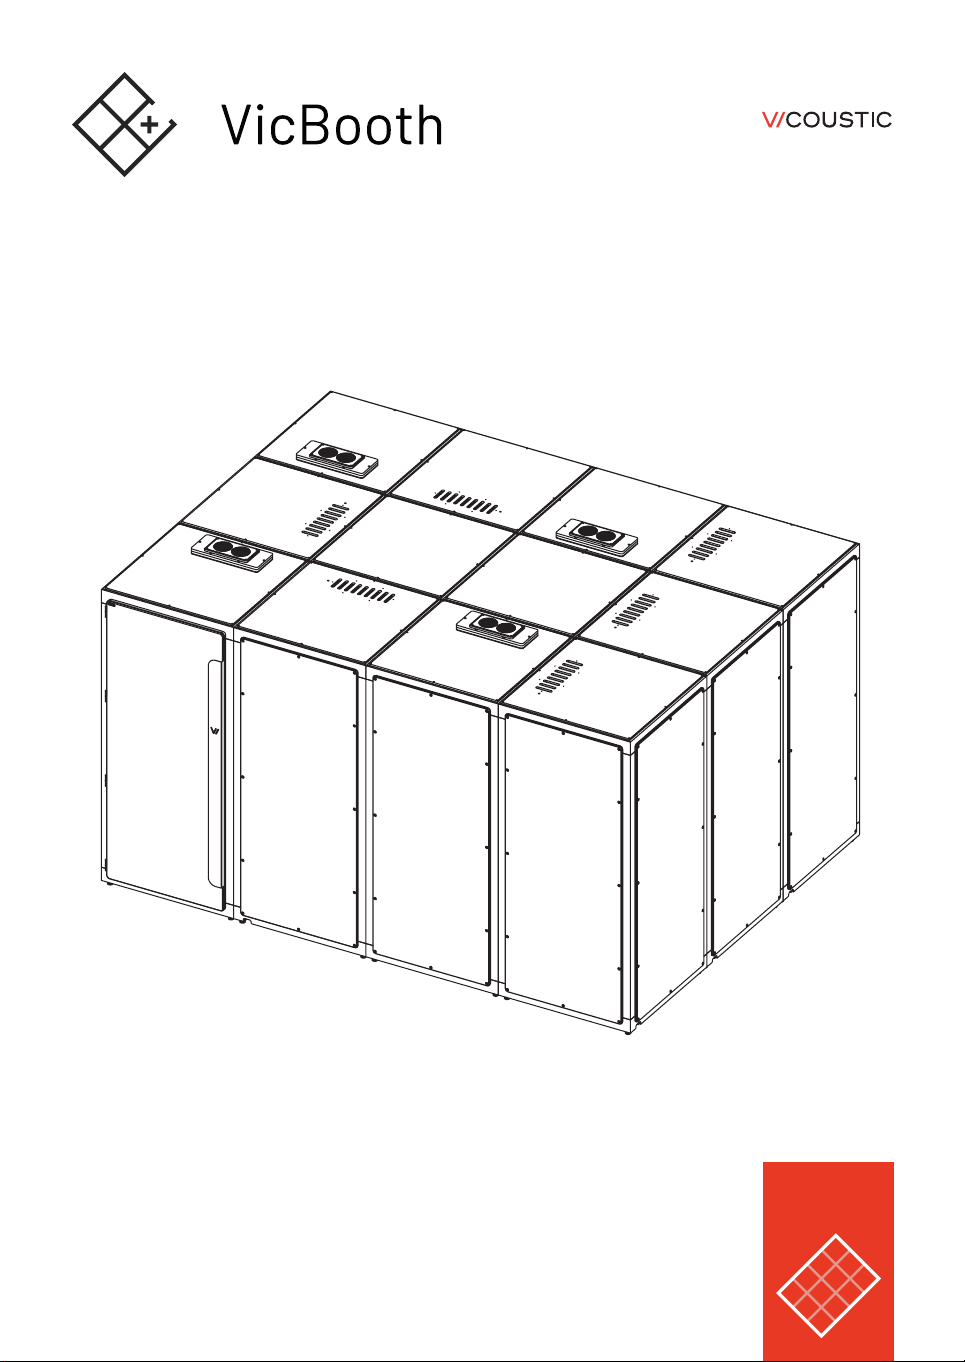
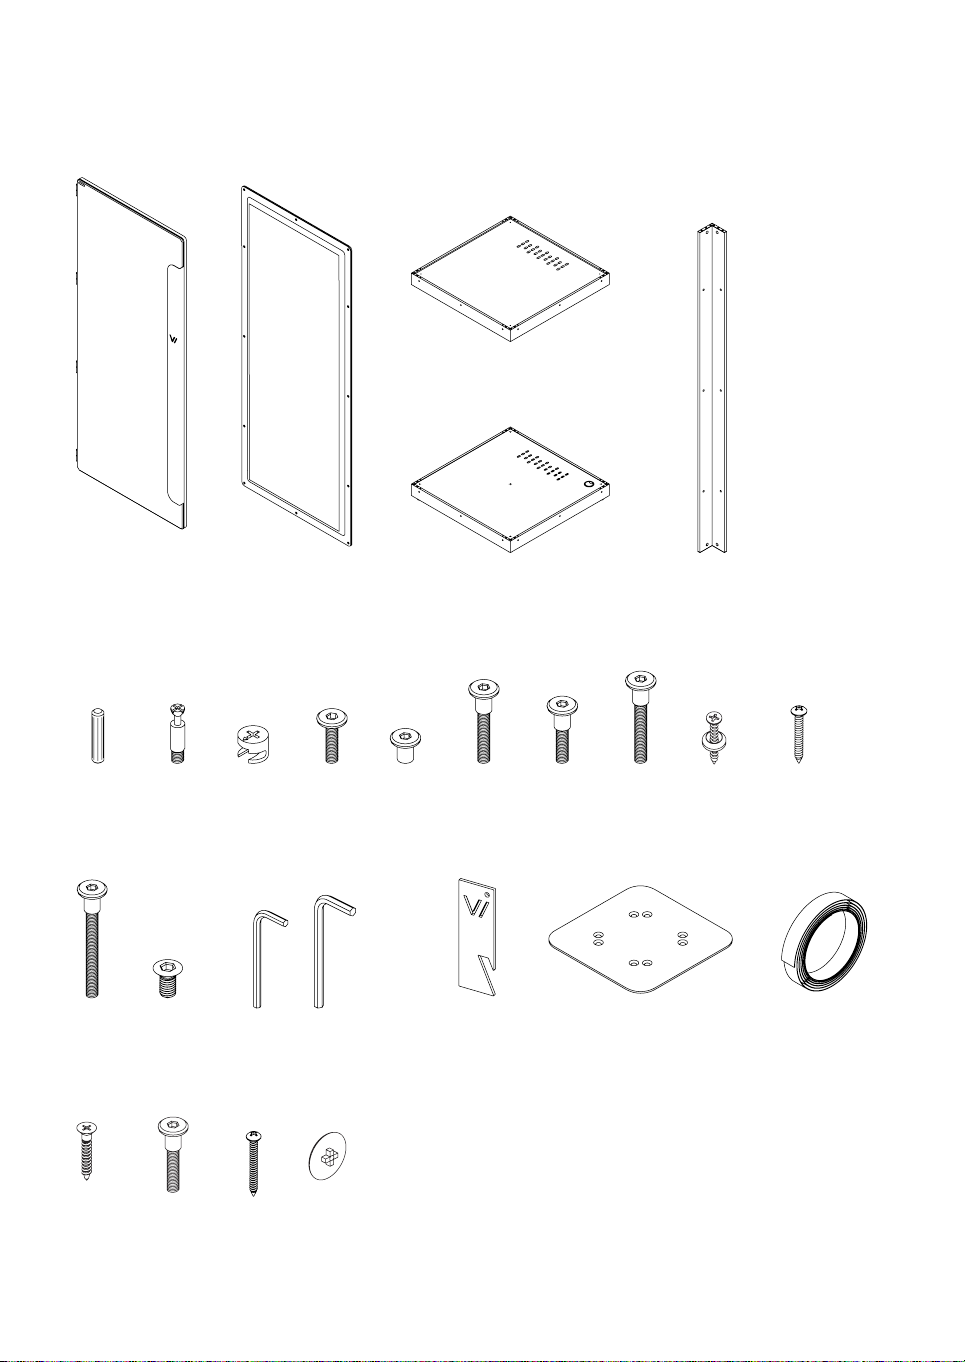
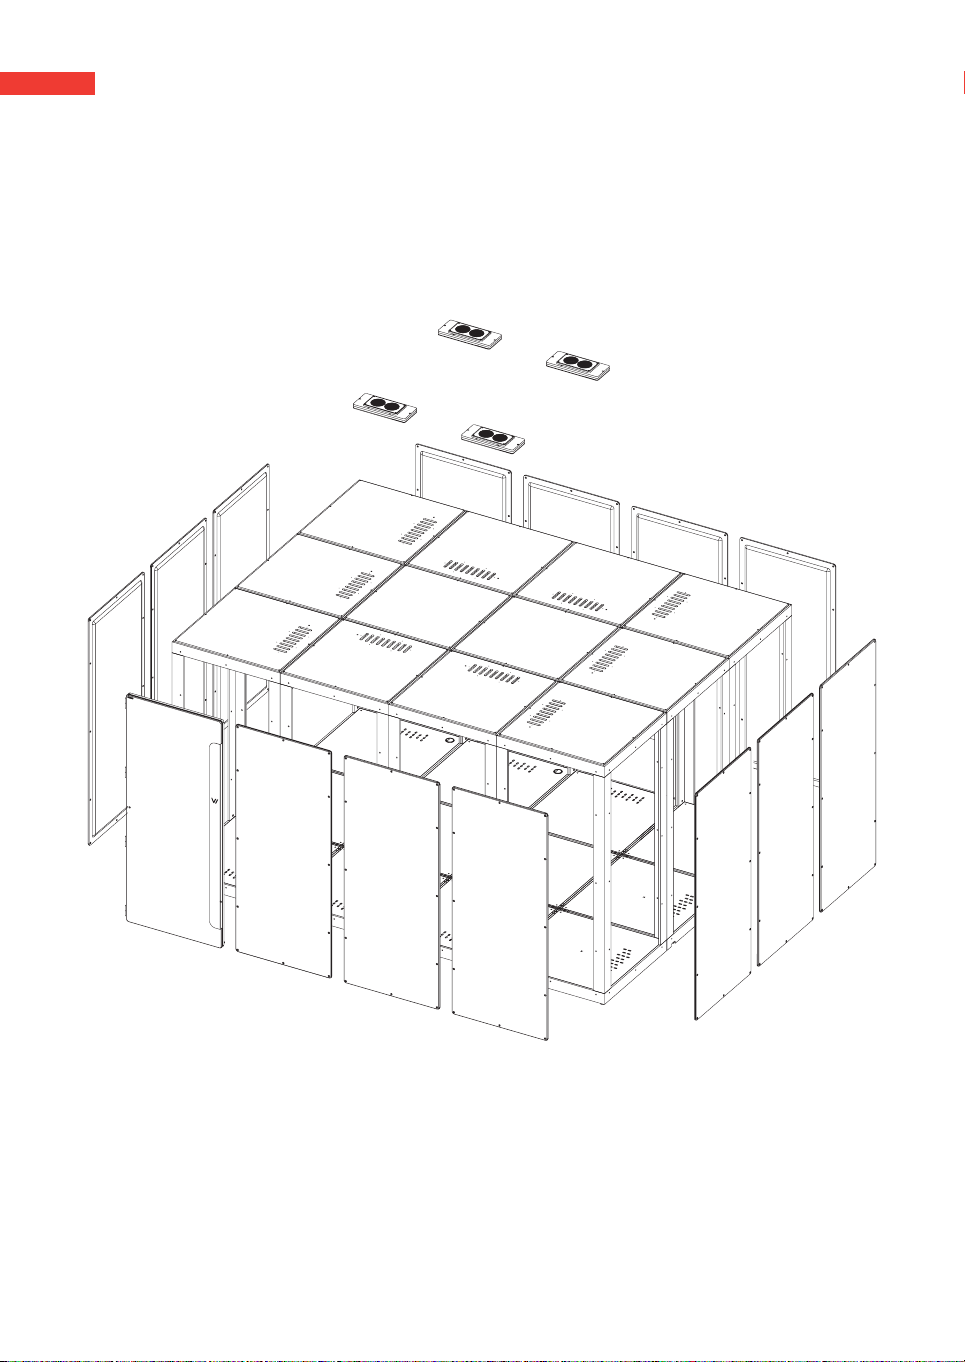
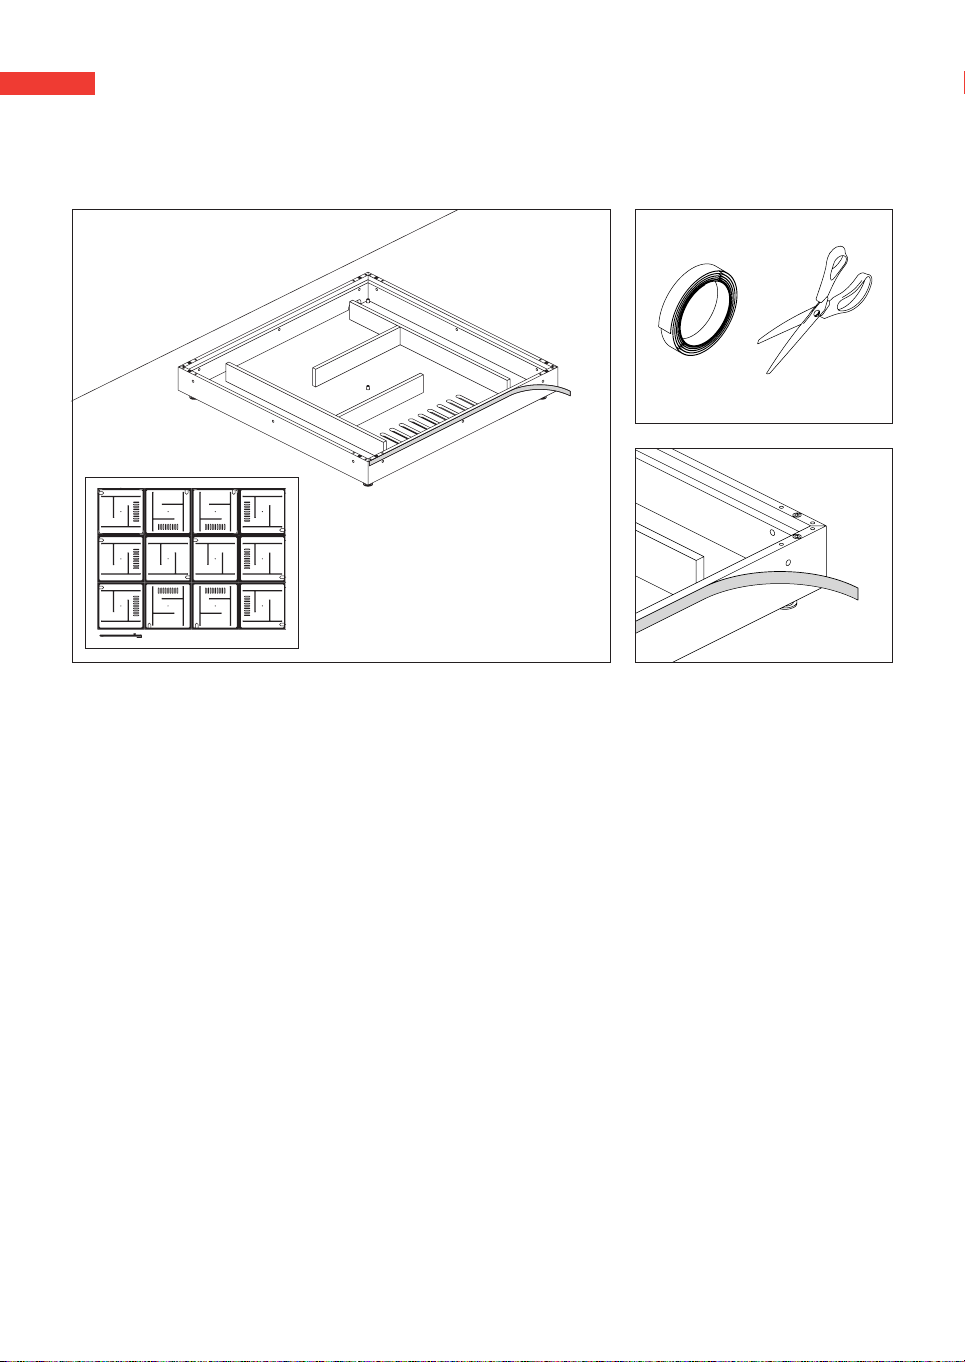
Vicoustic VicBooth Spa User manual

1
3x4
Installation Manual
Spa

2
Included
Material Needed
Lateral | 13 uni.
Door | 1 uni. Floor | 12 uni.
Ceiling | 12 uni.
Structure | 24 uni.
A B C D E F G HJ
192 uni. 96 uni. 96 uni. 78 uni. 312 uni. 78 uni. 36 uni. 6 uni. 96 uni.
K
102 uni. Foam seal
48 uni. 6uni.
V
4 mm | 2 uni. 5 mm | 1 uni.
X
M
48 uni.
I
Q
R
12 uni. 18 uni.
1 uni.
W
24 uni.
P
Y
96 uni.

3
QQ
RR
4 uni. 48 uni. 48 uni.
6 uni.
3 uni.
Not included
Bubble Level Screwdriver | 2 uni.Box Cutter scissors Screwdriver Machine
Ventilation unit | 4 uni.
USB extension cable (0.3m) | 4 uni.
Remote control electrical outlet | 4 uni.USB power adapter | 4 uni.
USB extension cable (3m) | 4 uni. Power Strip | 1 uni.

4
Exploded View

5
1
2
~15mm | 0.59’’
Remove the oor panels and the 3 PET layers from the oor structure.
Unscrew the oor levelers to half their length (about 15 mm - 0.59 in), with exception of the center one, that should
stay fully retracted.
Level the oor structure using the 5mm Hex Key (X) - adjust the center leveler last and make sure it stays in
contact with the oor.
Step’s Material
X5mm Bubble Level
up down
!
The precise leveling of the oor structure is crucial for the correct assembly and operation of the VicBooth - use a
bubble level. Make sure the oor structure is in its nal position - once assembled, the VicBooth should not be moved.
!When walking on top of the VicBooth frame, be careful to only step on the periphery frames.
Avoid placing your feet in the interior of the oor modules.

6
3
scissors
Foam seal
Place the Floor Structures on the ground according to the diagram.
Trim the supplied foam seal to match the base width.
Apply foam seal on one side of the contact surface to ensure an acoustic seal.
Step’s Material

7
4
E
K
E
K
XX
4mm4mm
Step’s Material
Join the oor structures according to the diagram using the 63mm screws (K) and the at heads (E). Use the 4mm
Hex Keys (X).

8
X
5mm Bubble Level
up down
!
5
Step’s Material
Readjust the level of the oor on both axes with the assistance of a bubble level. Once the
structure is levelled on both axes, the center levellers that were collected should be adjusted so that they touch
the oor.
The precise leveling of the oor structure is crucial for the correct assembly and operation of the VicBooth - use
a bubble level. Make sure the oor structure is in its nal position - once assembled, the VicBooth should not be
moved.
!When walking on top of the VicBooth frame, be careful when walking on top of the VicBooth oor, to only
step on the periphery frames. Avoid placing your feet in the interior of the oor modules.

9
A
6
7
B
Insert the wooden dowels (A) in the oor structure according to the diagram.
Screw the metal ttings (B) in the oor structure according to the diagram.
Step’s Material
Step’s Material

10
8Insert the locking cams (C) in the Structure Pillars and insert the wooden dowels (A) in the top end of the
structure pillars.
Step 2
Step’s Material
C
A
1 uni.
Step 1

11
9
Step’s Material
Foam seal
Apply the foam seal on one side of the contact surface of the structure pillars to ensure an acoustic seal.
(only applies on 10 pillars, on the side that is in contact between the parts).

12
10 Fit the structure pillars on the oor structure according to the diagram and rotate the locking cams (C) by hand
using a screwdriver - make sure the beams are completely inserted before rotating the locking cams to the locked
position.
Step’s Material
Y
Screwdriver

13
11
E
XX
4mm4mm
G
Step’s Material
Join the structure pillars using the 31mm screws (G) and the at heads (E). Use the 4mm Hex Keys (X).

14
12 Remove the top covers and the ceiling panels from the ceiling structure - the PET and Vicycle layers stay attached
to the top cover.
B
13 Screw the metal ttings (B) in the ceilling structure according to the diagram.
Step’s Material

15
14
scissors
Foam seal
Trim the supplied foam seal to match the ceilling width.
Apply the foam seal only on the sides of the structure that are in contact with another structure.
Please see the assembly diagrams (step 16) so you can see which sides of the structures are in contact with each
other.
Step’s Material

16
15 Fit the ceiling structure on top of the structure pillars according to the diagram and rotate the locking cams (C) by
hand using a screwdriver - make sure the structures are completely inserted before rotating the locking cams to
the locked position.
Step’s Material
Y
Screwdriver

17
16 Assembly diagrams.
11
22
11
33
11
22
11
22
33
66
55
44
11
22
33
66
55
44
77
88
99
1212
1111
1010
11
22
33
66
55
44
77
88
99

18
18
17
EK
Fit the side panels - this step must be executed by two persons. Make sure the side panels are placed in the
correct position according to the diagram below. Each side is composed by a PET panel and an MDF panel with
melamine.
Step’s Material
Join the ceilling structures using the 63mm screws (K) and the at heads (E) as you add modules, according to the
diagram. Use the 4mm Hex Keys (X). Each ceiling frame junction must be xed by three screws.
i
Please see the VicBooth Spa website for suggestions on installing the panels.

19
Screwdriver
1 | F 4 | F3 | F
8 | D7 | D
10 | D9 | D
12 | D11 | D
6 | F
5 | F 2 | F
D E
FX
4mm
F
E
D
Please follow the order of xing the screws as described in the diagram and the indications concerning the type of
screws to be used. The Side Panels are xed using the 42mm screws (F) on the top and lower ends, and the 28mm
screws (D) on the sides. Use the at heads (E) and the 4mm Hex Keys (X).
Make sure the holes are aligned before placing the screws (You can use two screwdrivers to help align the holes in the
center of the panel). We advise one person to align the panels with the help of the screwdrivers and the other one to
fasten the screws.
Step’s Material
Step’s Material

20
19
20
H
E
G
3 | H 5 | H4 | H
12 | G11 | G
2 | G1 | G
10 | G9 | G
8 | H
7 | H 6 | H
Carefully separate the Door Frame from the Door.
Fit the Door Frame using the 45mm screws (H) on the top and lower ends, and the 31mm screws (G) on the sides.
Use the at heads (E) and the 4mm Hex Keys (X).
E
XX
4mm4mm
GH
Step’s Material
i
If you have purchased a VicBooth with a left door, the installation of the door frame and door will be reversed.
The hinges will work on the right side.
Table of contents
Popular Hot Tub manuals by other brands

M-Spa
M-Spa B-091 Alpine Owner's manual and warranty information

Silvercrest
Silvercrest SFB 120 B2 operating instructions

M-Spa
M-Spa Carlton owner's manual

Aquatic
Aquatic Hotsoak 71 AI9AIR7444HS Specification sheet

BullFrog
BullFrog M Series installation guide

Platinum Hot Tubs
Platinum Hot Tubs Legend owner's manual