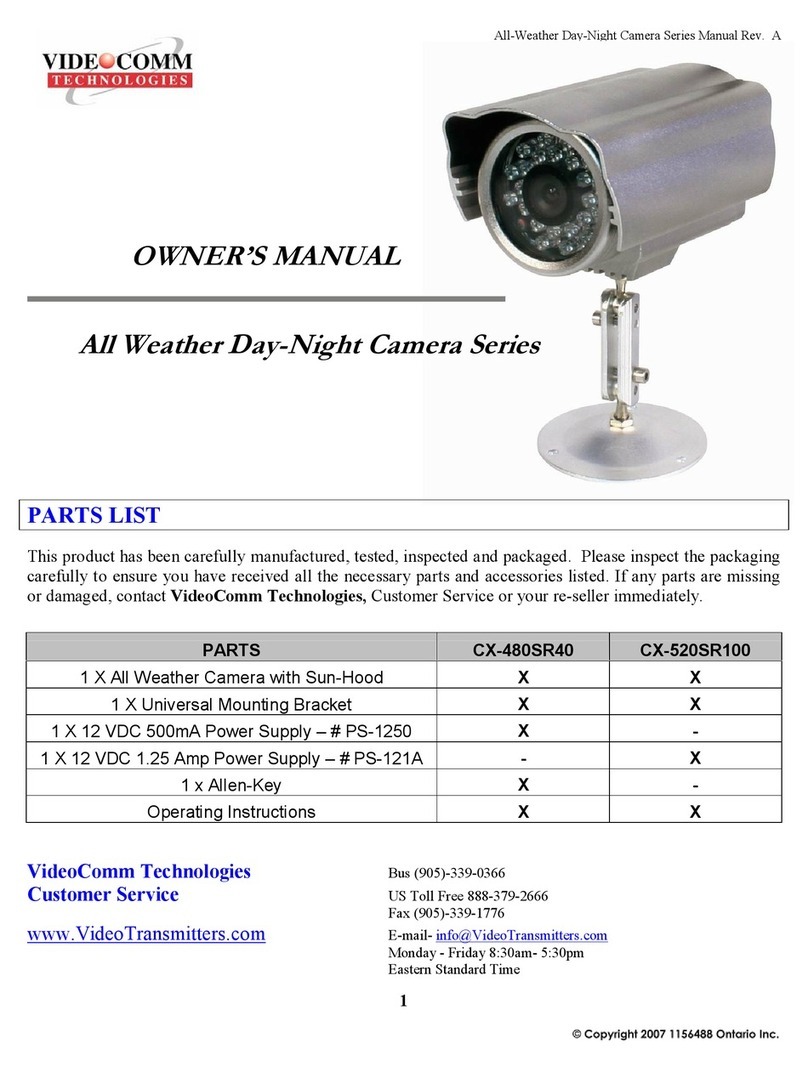
VideoComm Technologies IPC-2MPSR50w User manual

IPC-2MPSR50w Owners Manual Rev.1.0
1
It’s About Real Time
Day-Night All Weather WiFi IP Dome Camera
IPC-2MPSR50w
OWNER’S MANUAL
(888) 379-2666 US Toll Free
(905) 336-9665 Phone
(905) 336-9662 Fax
www.VideoTransmitters.com

IPC-2MPSR50w Owners Manual Rev.1.0
2
TABLE OF CONTENTS
It’s About Real Time...................................................................................................…......1
TABLE OF CONTENTS.........................................................................................................2
INTRODUCTION .................................................................................…..........................…3
Advantages.......................................................................................…….........................….3
PARTS LIST...............................................................................................…...............….....4
Setting a Static IP..............................................................................…….........................….4
CONFIGURING IP CAMERA...........................................................................….............…..5
HARD RESET………………............................................................................….............…..8
INSTALLATION……………............................................................................….............…..9
SPECIFICATIONS…………............................................................................….............….10
NOTES…………..…………............................................................................….............….11
WARRANTY INFORMATION/ TERMS & CONDITIONS..........................………………...12

IPC-2MPSR50w Owners Manual Rev.1.0
3
INTRODUCTION
Economical 2-MegaPixel ONVIF + PoE ready IP all-weather Network camera with WiFi
connection up to 300 Feet. Featuring a 2.8-12.0mm Varifocal lens and infrared night-vision
up to 50 Feet, this all-in-one camera is perfect for day & night surveillance applications
including: Parking lots, offices, schools, hospitals and other high-risk areas where pulling
cable is not possible, convenient or economical.
ADVANTAGES
• High-Performance, Economical IP Network Camera
• Convenient WiFi Network Access up to 300 Feet
• Hi-Def H.264 2-MegaPixels (1920 x 1080) @ 30fps
• True IR Night-Vision Range up to 50 Feet
• Dynamic 2.8mm-12.0mm Varifocal Zoom Lens
• Vandal-Resistant IP-66 Rated All-Weather Design
• ONVIF 2.0 Compliant & PoE Ready for Easy Installation
• Easy to Configure with user-friendly Client-Management Software
• Perfect for Parking lots, offices, schools, hospitals and other high-risk areas
• 100% Performance Guarantee
VideoComm Technologies
Customer Service
Bus (905) 336-9665
US Toll Free 888-379-2666
Fax (905) 336-9662
E-mail- [email protected]
Web Site- www.VideoTransmitters.com
Monday - Friday 8:30am- 5:00pm

IPC-2MPSR50w Owners Manual Rev.1.0
4
Eastern Standard Time
PARTS LIST
The All-Weather IP Camera has been carefully manufactured, tested, inspected and packaged.
Please inspect the packaging carefully to ensure you have received all the necessary parts and
accessories listed. If any parts are missing or damaged, contact your re-seller immediately.
Setting a Static IP Address on your Workstation
Setting a Static IP address on your Workstation (PC or Laptop) is essential for configuration prior to
connecting the IP Camera.
Using Windows XP:
1. Open “Control Panel” & Select “Network and Internet Connections”
2. Select “Network Connections” & Double Click “Local Area Connection”
3. Highlight “Internet Protocol (TCP/IP)” & Click the “Properties” Button
4. Change the IP Address to an available address & Click “OK” when complete
5. You MUST close out of the “Network Connection Properties” screen before the
changes will take effect
Using Windows 7:
1. Open “Control Panel” & Select “Network and Internet Connections”
2. Select “Network and Sharing Center” & Double Click “Local Area Connection”
3. Select “Properties” & Highlight “Internet Protocol Version 4 (TCP/IP V4)” & click
“Properties” button
4. Now Change the IP Address to an available address & Click “OK” when complete
(Figure A)
5. You MUST close out of the “Network Connection Properties” screen before the
changes will take effect
Using Mac OS:
1. Launch System Preferences
2. Click on “Network”
3. Click on the protocol you are using
4. Click on the “TCP/IP” tab
5. click on the drop-down menu next to “Configure IPv4″and select “Using DHCP with
manual address” (you can also use full manual mode)
6. Now Change the IP Address to an available Address
IPC-2MPSR50w Owners Manual Rev.1.0
5
Connecting to Workstation for Configuration
The IP Camera must be connected to a Workstation (PC or Laptop) for configuration.
Connect the included Network Cable to the RJ45 input terminal on the Camera
Connect the other end of the Network cable to the Workstation’s (PC or Laptop) Ethernet Port
Power the Camera using the included 12VDC power supply
Configuring the IP Camera
Using Internet Explorer enter 192.168.1.10 in the address field & click Enter
Select Language, enter the default Username (admin) and click Login – There is no password
*No Password Has Been Assigned – Leave the Password Field Blank*
Open the “DeviceCfg” tab at the top of the browser and double click the
“General Settings” icon to set the Date, Time and Video Standard (NTSC or PAL)
From the General tab, select “Encode” to edit both Network & Remote Mobile
Video Stream Settings

IPC-2MPSR50w Owners Manual Rev.1.0
6
To avoid conflicts within your Network, each IP Camera must have a unique IP Address
Open the “Network” tab and change the last two digits of IP address.
In this example, we have changed the IP address to 192.168.1.88
Network Stream Remote Stream

IPC-2MPSR50w Owners Manual Rev.1.0
7
To access the IP Camera Remotely, open the NetService Icon and change the DDNS Settings
Change the Camera Name by opening the GUI Icon and editing the “CAM Name” field
Example: “Parking Lot A” or “Main Gate”
Easily change the IP Camera’s default parameters by opening the Camera Param.
Icon and adjusting the default settings.

IPC-2MPSR50w Owners Manual Rev.1.0
8
Add and Remove Users by entering the Advanced Settings Tab and modifying the User Accounts
SYSTEM HARD RESET
In the event that you need to reset the system for any reason i.e. Forgetting the IP Address or
Password, OR in an effort to reconfigure your network follow these simple steps.
Select the Default Icon from the Advanced Settings Tab
Select the settings you wish to restore to default and click “OK”
Note: Resetting this camera will permanently clear all settings you have previously made.
Contact VideoComm Technical Support if you require assistance. 888.379.2666

IPC-2MPSR50w Owners Manual Rev.1.0
9
INSTALLATION
NOTE: This WiFi IP Network Camera has a wireless transmission range up to 300 Feet.
Before installation, consider where your access point is located for optimal performance.
Mark the screw hole locations in the ceiling where the camera will be mounted
Attach the included rubber O-Rings to the 4 mounting screws. This will ensure a water-tight
seal and protect the camera from damage. Water Damage will Void the Warranty.
Feed the cables through the ceiling to make your power and or network connections.
Using the included key, remove the three security screws and the dome cover.
Insert all four mounting screws through the base of the camera and into the ceiling.
*Depending on the mounting surface, we recommend using wall plugs.
Replace the dome cover and secure using the three security screws.
WARNING: FOR ALL OUTDOOR INSTALLATIONS, THE INCLUDED RUBBER O-
RINGS MUST BE INSTALLED ON ALL-FOUR MOUNTING SCREWS DURING
INSTALLATION TO PROTECT THE CAMERA FROM WATER DAMAGE.
DO NOT OVER-TIGHTEN -
WATER DAMAGE WILL VOID THE WARRANTY

IPC-2MPSR50w Owners Manual Rev.1.0
10
For a complete wireless system use in tandem with a DeskTop OR Ceiling Mount Wireless
Video Network Access Point.
#VX-241512wc#VX-241505w

IPC-2MPSR50w Owners Manual Rev.1.0
11
LIMITED WARRANTY
VideoComm Technologies herein referred to as “VCT.”
VCT hereby warrants, subject to the conditions here in below, that should this product become defective by reason of improper
workmanship or material defect during the specified warranty period, VCT will repair the same, affecting all necessary parts without
charge for either parts or labor, or replace the unit at VCT option.
Labor: ONE (1) Year from the date of original purchase from authorized reseller. TWO (2) Years for Antennas only.
Parts: ONE (1) Year from the date of original purchase from authorized reseller. TWO (2) Years for Antennas only.
Void Warranty:
Purchaser warranty will be void and purchaser waves any rights to make warranty claim if product has been opened, altered or
modified, repaired or serviced by anyone, other then the service facilities authorized by VCT to render such services. Further, the
seal/serial number on the unit must not have been altered or removed. The unit must not have been subject to accident, misuse,
abuse or operated contrary to the instructions provided. The opinion of VCT with respect to this matter shall be final. This warranty
does not include and is not extended to broken and damaged accessories, batteries and exposed antennas and to parts wearing out
due to normal wear and tear.
Proper Delivery:
Returned products will not be accepted for warranty repair unless accompanied with a valid Return Merchandise Authorization
(RMA) number issued by VCT. RMA numbers issued by VCT are valid for 15 days. Shipments received after 15 days will be
refused. The unit must be shipped, freight prepaid or delivered to the VCT Service facility, in either its original package or similar
package, affording an equal degree of protection and with instructions indicating the location within Canada or the United States to
which the unit will be returned. The repaired unit will be returned to the customer freight prepaid unless the warranty claim is
deemed void or invalid. All accessories included with the unit must be listed individually on the packing slip for the shipping
documentation. VCT will not accept any liability, for loss or damage to such accessories if they are not listed.
Proof of Purchase Date:
This warranty applies and commences to VCT products, from the original date of purchase from an authorized reseller. Proof of
purchase (i.e.: photocopy of invoice), must be included with product when submitting for warranty repair.
Warranty Limitations:
This warranty does not cover maintenance or check-ups, if required. This warranty gives you specific legal rights and you may also
have other rights, which vary from state/province to state/province. Some states/provinces do not allow the exclusion or limitation
of incidental or consequential damages or limitations on how long an implied warranty lasts, therefore the above exclusions or
limitations may not apply to you. VCT is not responsible or liable for indirect, special, incidental or consequential damages arising
out of or in connection with, the use or performance of the product or other damages with respect to loss of property, loss of
revenues
or profit, or cost of removal, installation or reinstallation.
PRODUCT RETURNS
60 Day Product Return Policy: If you are not satisfied with a product, you may return it to VCT within 60 days from original date of
shipment within the following conditions:
Original shipping charges are not refundable unless deemed that VCT shipped incorrect item(s), incorrect quantity (ies) or original
manufacturers defective product (subject to VCT validation).
Returned products will not be accepted unless accompanied with a valid Return Merchandise Authorization Number (RMA).
RMA numbers issued by VCT are valid for 15 days. Shipments received after 15 days will be refused.
Returns must include a copy of original invoice, the completed VCT packing slip, and a detailed statement of reason for return.
Customer is responsible for all freight charges, duties and taxes, if applicable. Product must be properly packaged and shipped,
Prepaid to VCT in its original packaging, or similar packaging that offers an equal degree of protection. VCT will charge the full
replacement cost for any missing components or parts. VCT is not responsible for lost or damaged merchandise. We strongly
recommend insuring products for return shipping.
Return claims are void if manufacturer’s seal is broken and/or products are altered or modified, subjected to an accident, improper
handling, improper installation, misuse and abuse or operated contrary to the operating instructions. Products returned that are not
in “re-saleable” condition will be returned to customer at their expense.
Discontinued items, special or custom-made equipment items (items not carried as stock even though they may appear on price
lists) may not be returned. Returned products will be evaluated at the original purchase price and not at any subsequent price
increase or decrease.
DISCLAIMER
In no event will VCT or any of its affiliates be liable for any indirect, special, punitive, consequential liability, or incidental damages
upon any basis of liability whatsoever even if advised of the possibility of such damages. In addition, VCT does not take any
responsibility or assume any liability for the wiring, installation or placement of the equipment Customer purchases, or for the
activities of any other individual or entity such as Customer’s Company, those who prepare the specifications or any local Authorities
who inspect or approve Customer’s installation.

IPC-2MPSR50w Owners Manual Rev.1.0
12
IT’S ABOUT REAL-TIME
Direct 1+(905)336-9665
Toll Free 1+(888)379-2666
www.VideoTransmitters.com
Table of contents
Other VideoComm Technologies Security Camera manuals

VideoComm Technologies
VideoComm Technologies ZX-480SR40 User manual

VideoComm Technologies
VideoComm Technologies EWC-003 (MXR-5838c ) User manual

VideoComm Technologies
VideoComm Technologies CX-480SR40 User manual

VideoComm Technologies
VideoComm Technologies MX-5842c User manual

VideoComm Technologies
VideoComm Technologies ZX-580SR120 User manual

VideoComm Technologies
VideoComm Technologies ZX-580SR240 User manual

VideoComm Technologies
VideoComm Technologies ZX-522SR40 User manual