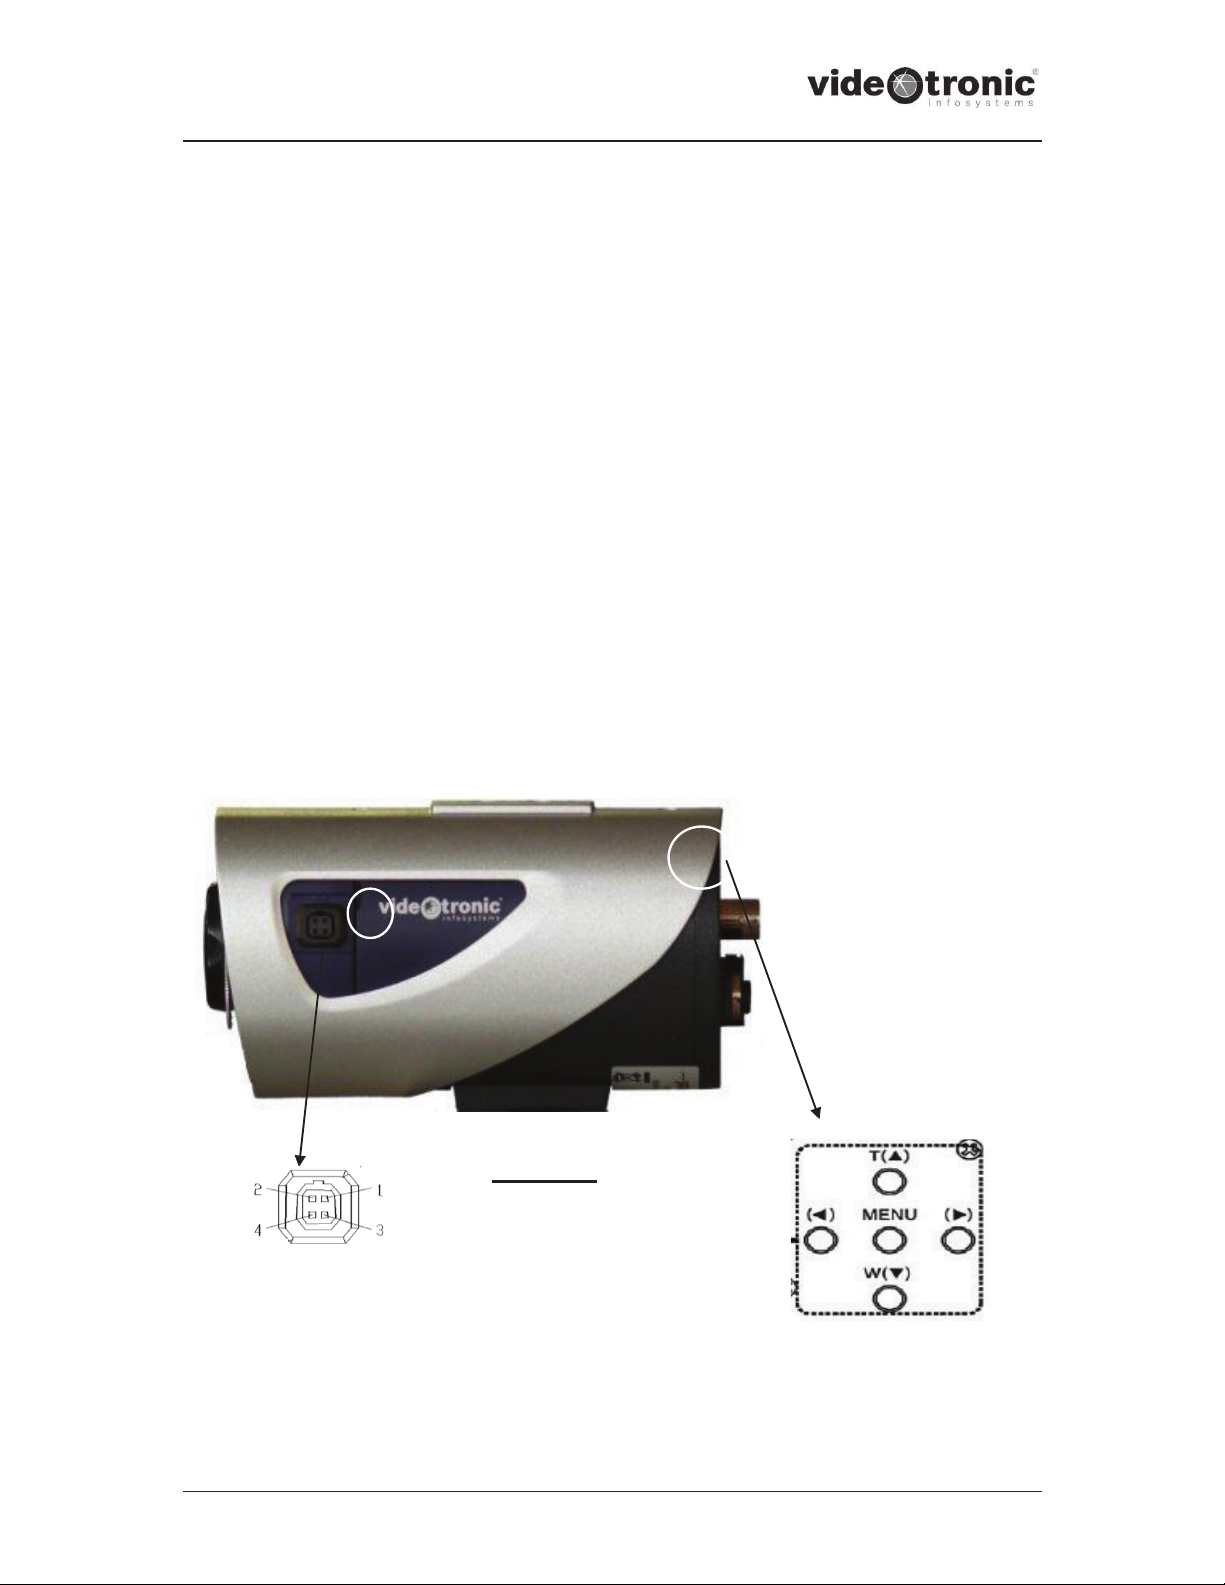
Camera Configuration
Press the menu key on the left side of the camera to open the set up menu. All
settings are accessible from this menu. Set the cursor with the “up Ù” and “down Ú”
keys to the setting you will change. Change the
settings with the “left ×” and “right Ø” keys.
Press the “Menu” Key to enter the sub menu. If a
sub menu is available, the setting parameter is
marked with this arrow .
LENS
In "LENS" you can choose between automatic lenses and manual lenses. With the
automatic lenses either DC or Video is readable on the right side. It depends on the
Video / DC switch position (ref page 8).
If the automatic lenses are activated, you can enter the submenu with the „Menu“
key. You can adjust the picture with the “Left ×and Right Ø“ keys. If the desired
brightness is reached, you can exit the submenu with the "Menu" key
SHUTTER
The following modes are available:
A.FLK: Flickerless (PAL:1/100sec; NTSC 1/120sec)
MANUAL: You can select speed from 1/50sec to 1/120000sec. It is possible to
adjust Sens-Up (x2 ~ x128) mode manually.
ESC: Autoshutter. The shutter values in the „Manual Mode“ and a brightness
adaptation in the „ESC Mode“ are adjustable in the submenu. Activate
with „Menu“, changes with „LEFT, RIGHT“ exit with „SET“.
The shutter values in the „MANUAL“ mode and the brightness values in the „ESC“
mode, will be done in the submenu.
WHITE BAL.
The camera provides three „White Bal.“ Control modes:
ATW (Auto Tracking Whitebalance):
In this mode the white balance is adapted constantly. Colour temperature
1800 ~ 10500K.
AWC (Auto White balance Control):
In this setting the camera is directed upon a white background or a white sheet of
paper and with the "Menu" key the comparison is begun.