Videsur-electronic VSDTCK33M User manual

AlarmClock
InstructionFor Use
TableofContents
Prefaceand QualityAssurance
Usinginstruction forChinesetimesignalclock
DVStructurediagram
DVproduct introduction &handlinginstruction
DVFilestorageinstruction
Relevant parametersofDV
Powersourceand fittings
Troubleshooting
Precautions
Preface
ThisInstruction will guide you howtousethe product. Meanwhileitprovidesthe
necessaryinformation related totheproduct, suchasthe information for operating
and handling. You arerecommended toreadtheInstruction carefullyandunderstand
all contentshereinbefore operating.PleasekeeptheInstruction carefully.Wehope
thisproduct satisfied withyourdemand and severyou better.
ProductAssurance
Thisproduct iswith FCC and CEcertificateand had inspected bytheauthorized
organizationswherewasfound tocomplywiththe recommended indexes.Useris
underoursafetyassurancewhen operatingthisproduct.

InstructionForUseforTime-signalClock
I.Basicfunctions
1. 5buttons: HR, MIN, SET, LIGHT,TALK/SNZ;
2.Thetime&minutecan bedisplayedina3.5bit LCD panel. Time-showing systemof
12 hoursand24 hours isavailable;
3. Multipleringsforchoice: Beep, cock, etc. 5melodiesforoption.
4.Thetimealarmwill betriggered every10 minutesiftheclock ison thesnooze
function. It canalarm6timesmaximally.
5.Twoon-the-houralarmfunctionsforchoice;
6.The ringof Beep”will bebecomeloudergenerally. And it will last 1minute;
7. If adopting the melodyasthe ring, the clock will alarmwhen the melodyends.
II. Functionoperation
1.When switchingthe poweron,the wholeLCD will display;afterthe ringofamelody
ends, the clock will displaytime;
2.Press Set”button undertheTimemode tosetasperthe following sequences(the
displaywill flashsimultaneously):
Timesetting →Alarmsetting →On-the-houralarmsetting
3.Press HR”button undertheTimeSettingmode tosethourand MIN”button toset
minute;
4.Press HR”button underthe AlarmSettingmode (Symbol: )tosethourand
MIN”button tosetminute.Press SNZ”button whenalarming,theclock will re-alarm
every10 minutes, andwillsend alarmby6timesat most;
5. Underthe On-the-hourAlarmSettingmode (the symbolofalarmand the on-the-hour
alarmwillflash):
It willopen and closethe function(Symbol: )bypressingthe HR”button, but send
alarmduringthe timefrom7:00amto9:00pm(Symbol: );itcanactivatetheinactivate
the alarmringbypressing MIN”button (Symbol: ).
6.Underthe TimeMode and ifthe HR”button ispressed,itcan shift the hoursystem
(12/24 hoursystem); bypressing MIN”button, it canselect thealarmring.
7.Underanymodes,itcanturnthe background lightoffbypressingthe LIGHT”button.
8. Underanymodes, it canreport the timebypressingthe TALK”button.

DV UsingInstruction
I.StructureDiagram
Ti
II. ProductIntroduction
Thisproductisahigh-resolution 30-frame(640X480,1280*960)remotevideosurveillanceclock,with
an externalTF Card.Asamultifunctionalhigh-techproduct, theproductisavailablemultiplefunctions,
suchas:video,sound recording,induction video,takeaphoto,cyberchat,electricalarmclockandfile
storage;withthehigh-capacitybattery, itcanlastrecordingforabout12hourscontinuously and audio
recording for25hourscontinuously;besides,theproductcan replacethehigh-resolutionvideowith2
million pixels,soundandfileautomatically,Meanwhile,theproductisdesignedthemultiplelanguagesfor
tellingthetime.Itsupports32GBstorage.ItsTFcardcanbeusedforalong timeand remotecontroller
canbeeasytohandle.Withthebest imperceptibility,thisproductwill beasyouridealassistanttoprevent
theft andgetevidence.
1Alarm Clock
Time-tellingbutton
Rotationalcover
TF card
Lens
Turnoff
Turnon
ElectricClock Function Button
Receiver
2Remotecontroller
Sender
Switchbutton
Video
motiondetection video
Sound recording
Takeaphoto

III.HandlingInstructions
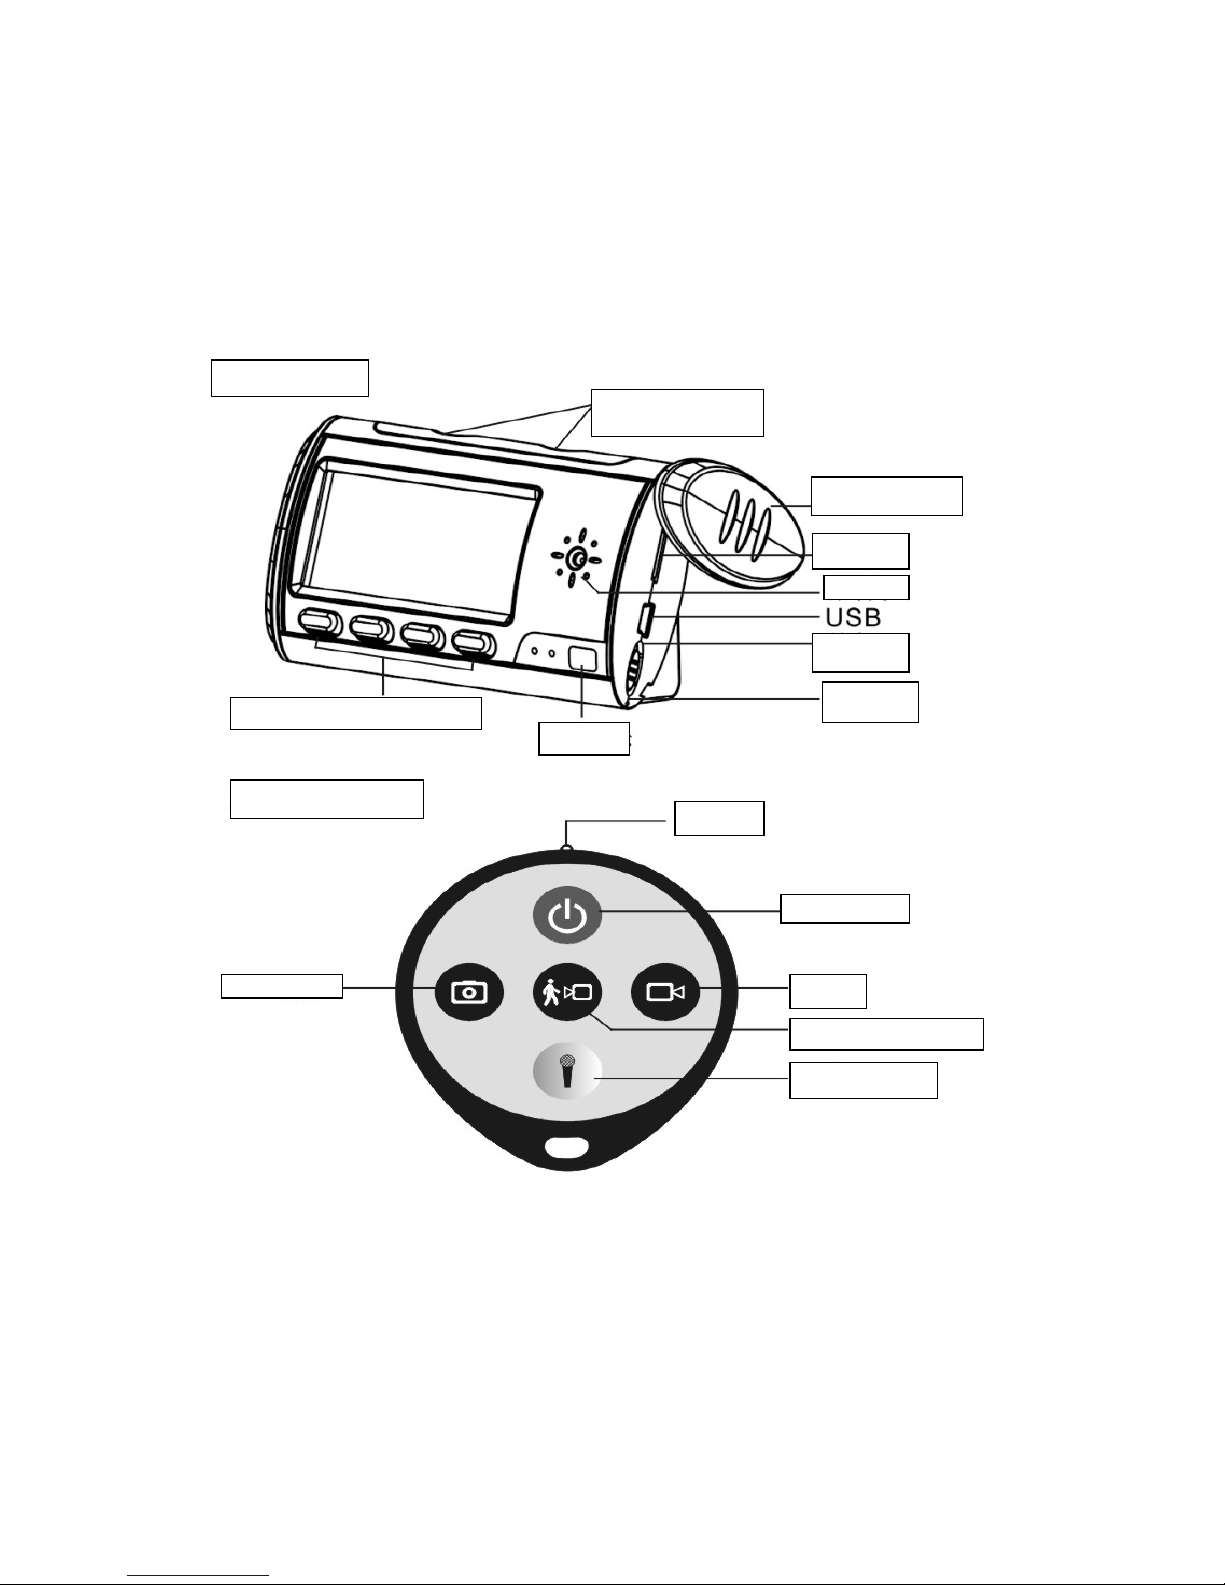
1.Opentherotationalcoverattherightside,inserttheTF cardand turn ON”to getready.
2.Usetheremotecontrollertoaimtothereceiverof theclock andpress" " tostart.Whenthebluelamp
ison and theclockisunderthestandbymode.
3.Press to start recording video.Afterthebluelampflashes3timesandthenturnsoff,itstartrecording.
stop pressing ,itwillsavethevideofileand returntothe holding state”,andthebluelampwillbeon
(thedefault timelengthforvideorecordedis20minutes).
4.Press buttontostart recordingasound;afterthebluelampflashes3timesandturnsoff, itwillbeput
intotheworkingorder;Press again,itwillsavethesoundfileandreturntothe holdingstate”,and
thebluelampwillbeon(thedefaulttimelengthforsoundrecordedis20minutes);
5. Press buttontogetinphototakingmode.Itwilltakeaphotoifpressingthisbuttonagain.When
pressingthisbutton, thebluelampwillflash;aftertakingthephoto,itwill returntothestand by.
6. Press buttontogetinmotiondetectionmode,thenthebluelampwillflashquickly.Ifamovingobject
isdetected,thebluelampwillflashslowlybytwotimesandthe devicewillbestarttorecordvideo. Ifthere
isnomoving objecttobedetected,thebluelampwill returnto Quick-flash: andgetinmotiondetection
mode (the defaultlengthforthevideofileis3minutes);
7.Press button,it willturnthedeviceoff andthebluelampwill beoff.
8.When theswitchis ON”,inserttheUSB cableandthenpress buttonontheremotecontroller,the
devicewill accesstotheU-discmode.
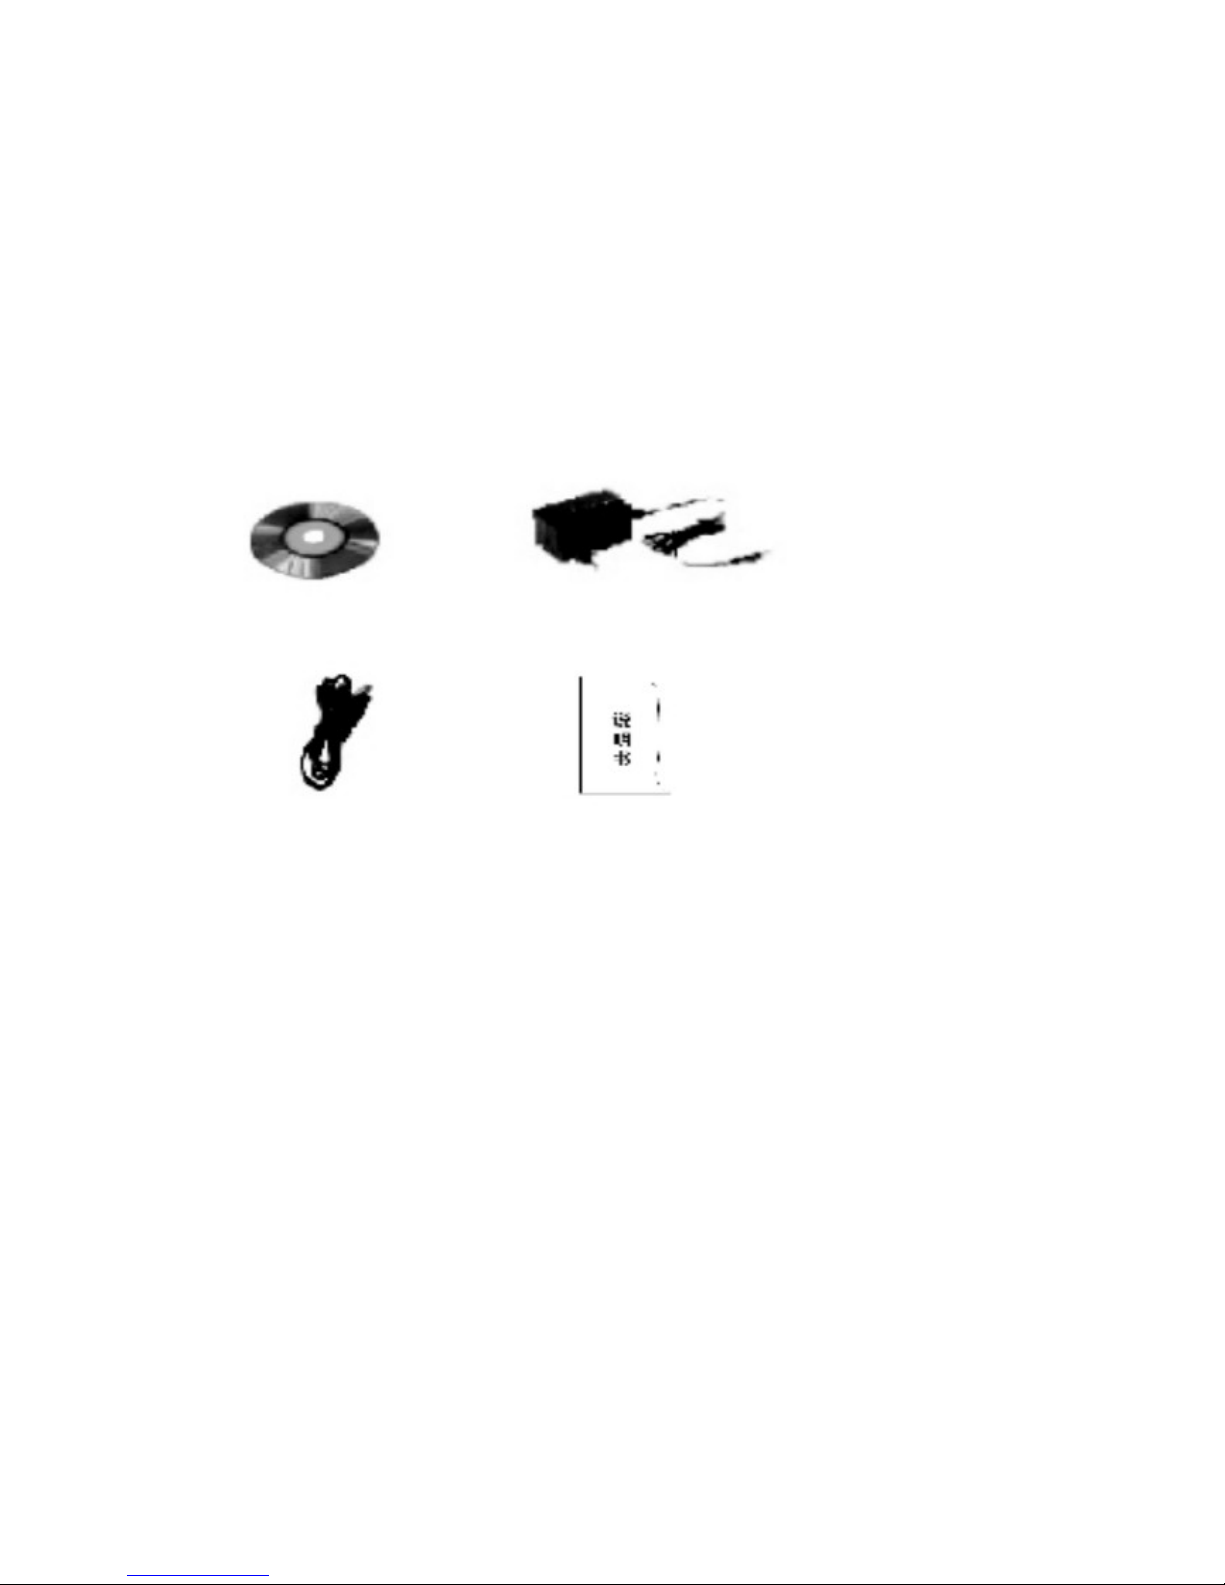
9.PCcamerafunction:PleaseinstallthedriversoftwarewhichissavedintheCompactDiscbefore
operating; Turnonthedevicebypressing on theremotecontrollerwhenthedeviceisunderthemode
of ON”,insert USBcabletoconnectthecomputer;atthistime, it will accesstoPCCAMmode;
10.Charging:Placethechiefswitchto OFF”position,insertUSBadapter,andtheredlampwill beon; When
itisfull,theredlampwill beoff. Youcanchargeittoobyconnectthisdevicetoacomputer ( Please
useonlytheadapterprovidedwiththedevicetogether;ifthedevicegettinghotoroccursother
unexpectedsituationswhilstcharging,pleasedisconnecttheadapter'spowersource);
11.Reset: Iftheproductstopsworkingunderillegaloperationorotherunclearreasons,pleaseplacethe
switchofthedeviceto OFF”position, and thento ON”position. It will resettheproductaccordingly;
12. When thebatteryislowcapacity,thebluelampwillkeepflashingorthescreendisplaywillbeunclear.
Thenpleasechargeit immediately. If itisusedoff,thefilewillbesavedautomatically;
13. Recorderdate:Runthewritertimefile(inCDdisc)whenthecameraconnectwithcomputer.Andthen,the
videotimeisthesamecomputer.
14.Fileupdate:pleaseinstall NetworkInstaller”fromtheinstallation disc;usetheremotecontrollertoopen
theclock,andtheninserttheUSB cablein10seconds;afterwards,thecomputerwillopenan interface
automatically;click ProgramUpgrade”,itwill openadialogue box; afterwardsclick Update”.
When DRAMTiming,select0X35
When ②DRAMSize, select 8M”; afterwards,press OK”toupgrade;severalminuteslater,press
Confirm”button.
15. Whentheprogramislost, pleaseinstallthesoftwarewhichissavedintheCompactDisc,and thenclick
STK02NU ProgrammeUpgrading Tool”, afterwardsclick Update”;
UnderDRAMTiming,select 0X35
Under②DRAMSize, select 8M”;afterwards,press OK”toupgrade;severalminuteslater,press
Confirm”button.
IV. File’sstorageand play
When finishing video-recordingand otheroperations,pleaseplacethe switchto ON”
position, connectittoyourcomputerbyUSB cable,and press on theremote
controller; copythe fileorcut and pasteit tothe yourcomputertoplay; or youcan remove
the TFcardand usethecardreadertoreadthedatainside.
TheMediaplayer/ KMplayerisrecommended.

V.Precautions
Applicationconditions: Pleaseabidebytherelatednationallawsandregulationsstrictly;itisprohibitedto
usetheproductforillegalpurpose, otherwiseyoumustberesponsiblefortheconsequences.
Softwareupgrade:Inordertokeepthedeviceavailableabetterperformance,themanufacturershall
improvetheproductsoftwarecontinuously.Thedeviceisdesignedthefunction toupdatebyuseritself,
pleaseclaimthelatestsoftwareandupgradingmethod towardsyourlocaldealer.
Workingtemperature:Pleaseusethedeviceonlyatthenaturaltemperature;neverusethedeviceatthe
temperaturethathuman bodyfeelsunconformable.
Workinghumidity:Pleaseusethedeviceonlyintheenvironmentalhumiditysuitableforliving;keepthe
devicefarawayfromthewet environment.Thisdeviceisnotdesignedthewater-prooffunction.
Videoluminance:Pleaseusethedevicewhenthesufficientluminanceisavailable;itisprohibitedtouse
thelenstoaimtothesunorotherintensivelightsource; otherwiseit maydamagetheopticalapparatus;
Cleanliness requirement:Pleasedo notusethedeviceinthe environmentfullofdirt;otherwiseitmay
causethelensorotherpartstoattachwithdirtandinfluencevideoeffect. It canusethelenswipingpaper
orglassclothtoclean.
Otherprecautions:
Thisdeviceisaprecisionelectronicproduct;pleasekeepitawayintensiveimpact,shock,intense
magneticfieldorelectricfield.
V.RelevantParameters
Pixel2.0magapixel
Resolution 640*480、1280*960
Video format AVI
Framenumber 30fps
Vision angle 72°
Inductionphotographing6metersforStraight-line distance
Minimalillumination 1LUX
Batterycapacity2200MA
Continuous recording timeOver12 hours
Remoteoperatingdistance15m
Scopeforsound recording40m2
Powerconsumption 130MA/ 3.7V
Storagetemperature-20~80℃
USB data cable
USBport of
compute
r

workingtemperature -10~60℃
workinghumidity15~85%RH
TypeofmemorycardMiniSDcard
Capacityofmemorycard 32GBmaximally
Playersoftware Mediaplayer/ KMplayer
USB Interface USB1.1/2.0
OperatingsystemWIN2000/ XP / Visat32 / 7
Timeconsumed ofstorage 1GB/40 minutes
ChargingtimeAbout 4hours
Troubleshooting
TroubleTroubleshooting
Can notturnon Removethe insulator
lock ofPower,pleasechargeaccordingly;
Batteryisnot contact well, re-start
Can not chargethe electricityReplacethe batteryoradapter
Blue light flashesrapidlyre-startcamera,low-powercharging
reminder,deleteredundantfilesfromthe
card, put inTFCardorreplacingTFCard.
RemotecontrollerishardtouseAlignwiththe receiver’shead,removethe
insulatorofremotecontroller,replace
batteryorwait forreadingthe card
Cannot connectwithcomputerReplacethe datacableorcomputer
Clock’sscreen flashesorcharacteris
displayed incompletely Charging
Sound isrecorded withnoiseorvideo isnot
clear Charging,replaceTFcard
OtherproblemsPleasecontact localseller
PowerSource
Thisproductcanonlybeallowed tocomplythe authorizedpowersourceswiththe
followingmarks, i.e.:
ULmark/ American PowerCertification
CEmark/ UNPowerCertification
CCCmark/ ChinesePowerCertification
BS mark/ BritishPowerCertification
C-TICKmark/ Australian PowerCertification
GSmark/ German PowerCertification

PSE mark/ JapanesePowerCertification
Note:
The powerdevicewill getarising-temperatureon the surfacewhen operating.Thisisan
expected phenomenon. Ifit isamust tobringthe powerdevicewithyou, pleaseremoveit
fromthe powersocket.
NecessaryFittings
Compact DiscSwitchingpowersupply
USB DataCableInstruction ForUse
Table of contents