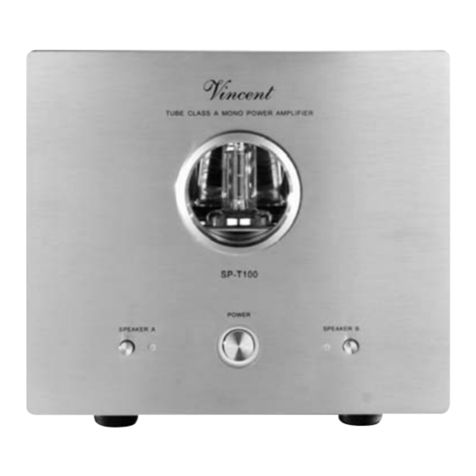
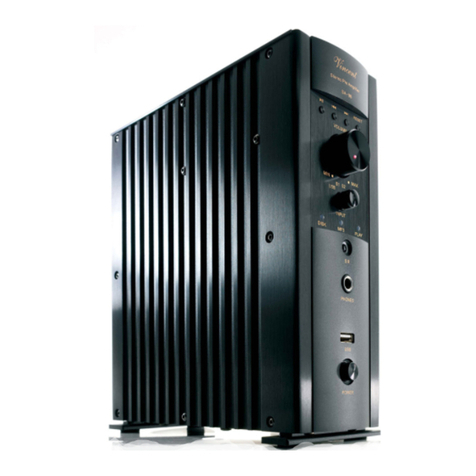
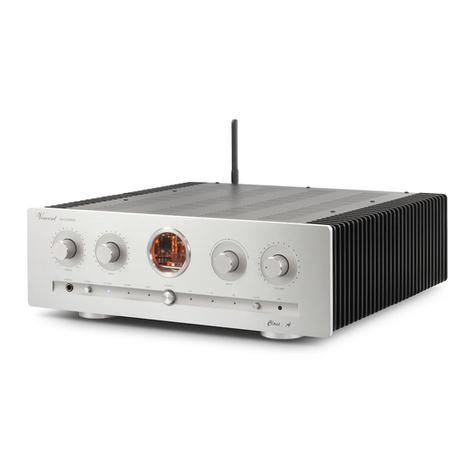
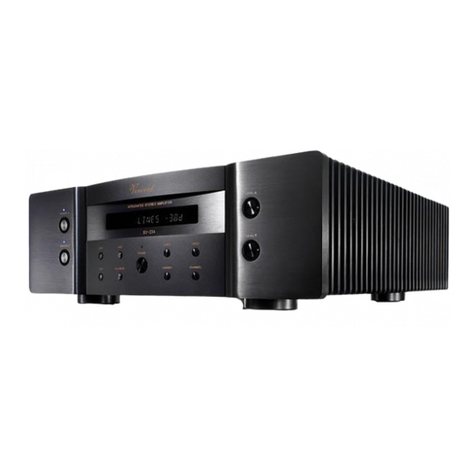
VINCENT SP-995 User manual

Vincent
SP-995
Mono-Endverstärker mit Class-A-Schaltung
Class A Mono Power Amplifier
Amplificateur mono classe A
Bedienungsanleitung deutsch
Instructions for use english
Manuel d‘utilisation français

Vincent
32
Vincent
INHALTSVERZEICHNIS/CONTENTS/SOMMAIRE
Sicherheitshinweise 4
Weitere Hinweise 5
Lieferumfang 6
Beschreibung des Gerätes 6
Installation 9
Bedienung des Gerätes 15
Weitere Tipps 16
Fehlertabelle 17
Technische Daten 18
Lexikon/Wissenswertes 19
Safety guidelines 20
Other instructions 21
Included in delivery 22
Description of the appliance 22
Installation 25
Operating the appliance 31
Tips 32
Search for errors 33
Technical Specifications 34
Glossary 35
Consignes de sécurité 36
Autres consignes 37
Contenu de la livraison 38
Description de l'appareil 38
Installation 41
Utilisation de l'appareil 47
Conseils 48
Résolution de problèmes 49
Caractéristiques techniques 50
Glossaire 51
Sehr geehrter Kunde,
wir danken Ihnen für das Vertrauen, welches Sie uns durch die Entscheidung für dieses hochwertige Audio-
Produkt, das Ihrem hohen Anspruch an Klang- und Verarbeitungsqualität gerecht wird, entgegenbringen.
Auch wenn Sie verständlicherweise sofort beginnen wollen, das Gerät zu verwenden, lesen Sie bitte vor
dem Aufstellen und Anschließen dieses Handbuch sorgfältig durch. Es wird Ihnen bei der Bedienung und
der optimalen Nutzung des Gerätes in Ihrem System helfen, selbst wenn dieses durch Ihren Fachhändler
installiert wurde.
Bitte beachten Sie vor allem die Sicherheitshinweise, auch wenn einige davon offensichtlich erscheinen mögen.
Um Ihnen verwendete Fachbegriffe zu erläutern, ist ein kleines Lexikon im Anhang enthalten. Bei eventuel-
len Fragen steht Ihnen Ihr Fachhändler gern zur Verfügung, er ist auch Ihr Ansprechpartner im Fall der
Garantie-Inanspruchnahme oder für Reparaturen nach dem Gewährleistungszeitraum. Er ist in jedem Fall
interessiert daran, dass Sie ihm Ihre Erfahrungen mit Vincent-Produkten mitteilen.
Viel Freude mit unserem / Ihrem Produkt wünscht Ihnen
Ihr Vincent-Team
Dear Customer,
we thank you for the confidence you prove in purchasing our product. It will match your high demands
towards sound and manufacturing quality. Though it is understandable that you want to plug and play
this product instantaneously, we encourage you to read this manual carefully before installation.
It will help you in handling and operating this machine in your system and obtaining the best possible
performance, even if it was installed by your dealer.
Please follow the security precautions, though some of those things may seem obvious.
In the appendix to this manual you will find a glossary explaining some established technical terms.
If there are open questions your audio specialist dealer will help you. He also represents your contact
person in case of needed warranty service or repairs after the warranty period and is interested to hear
from your experiences with Vincent products.
We wish you plenty of joy with your / our product,
your Vincent-Team
Cher client,
nous vous remercions de la confiance que vous nous témoignez en achetant ce produit de haute qualité.
Il répondra à vos attentes élevées en termes de qualité sonore et de fabrication.
Même si l'on peut comprendre que vous ayez envie d'utiliser immédiatement cet appareil, nous vous prions
de lire soigneusement ce manuel avant son installation et son branchement. Il vous aidera à manier et uti-
liser l'appareil de manière optimale dans votre système, même si celui-ci a été installé par votre revendeur.
Veuillez respecter les consignes de sécurité, même si certaines peuvent vous paraître évidentes.
Vous trouverez à la fin de ce manuel un petit glossaire qui vous explique les termes techniques utilisés.
Votre revendeur est à votre disposition pour répondre à vos questions. Il est aussi votre interlocuteur en
cas de recours à la garantie ou pour les réparations après la période de garantie. Dans tous les cas, vos
expériences avec les produits Vincent l'intéressent, n'hésitez pas à lui en faire part.
Nous vous souhaitons beaucoup de plaisir avec notre / votre produit.
Votre équipe Vincent
english
français
deutsch

4
Vincent Vincent
5
Feuchtigkeit/Hitze/Vibrationen
Der Kontakt elektrisch betriebener
Geräte mit Flüssigkeiten, Feuchtigkeit, Regen oder
Wasserdampf ist für diese Geräte und deren Benut-
zer gefährlich und unbedingt zu vermeiden. Achten
Sie darauf, dass weder Flüssigkeiten noch
Objekte
in das Gerät gelangen (Lüftungsschlitze etc.).
Es muss
sofort vom Stromnetz getrennt und vom Fachmann
untersucht werden, falls dies geschehen ist. Setzen
Sie das Gerät nie hohen Temperaturen (Sonnenein-
strahlung) oder starken Vibrationen aus.
Wärmeentwicklung
Achten Sie darauf, dass um das Gerät ein
Abstand von 5 cm frei bleibt und die Umgebungs-
luft zirkulieren kann (keine Aufstellung in ge-
schlossenen Schränken). Lüftungsöffnungen dürfen
nicht verdeckt werden.
Lautstärke
Die maximal erträgliche Lautstärke wird stets
weit unterhalb der maximal möglichen Einstellung am
Verstärker erreicht. Gehen Sie deshalb vorsichtig mit
der Lautstärkeeinstellung um, damit Hörschäden vermie-
den werden. Damit Sie sich nicht unbeabsichtigt hoher
Lautstärke aussetzen, stellen Sie vor dem Wechsel des
Eingangskanals stets einen niedrigen Wert ein.
Reinigen
Ziehen Sie vor dem Reinigen der Außen-
flächen des Produkts den Netzstecker. Verwenden
Sie möglichst ein weiches, flusenfreies, angefeuch-
tetes Tuch. Verzichten Sie auf Scheuermittel,
Lösungsmittel, Verdünner, entzündliche Chemika-
lien, Polituren und andere Reinigungsprodukte,
die Spuren hinterlassen.
SICHERHEITSHINWEISE
Dieses Gerät wurde unter strengen Qualitätskontrollen gefertigt.
Es entspricht allen festgelegten internationalen Sicherheitsstandards.
Trotzdem sollten folgende Hinweise vollständig gelesen und beachtet
werden, um eine Gefährdung zu vermeiden:
Das Gerät nicht öffnen! Gefahr des elektrischen Schocks!
Es befinden sich keine vom Benutzer zu wartenden Teile im Gerät.
WEITERE HINWEISE
Wartung/Veränderungen
Alle Betriebsmittel, die an die Netzspannung
des Haushalts angeschlossen sind, können dem Be-
nutzer bei unsachgemäßer Behandlung gefährlich
werden. Überlassen Sie die Wartung qualifiziertem
Fachpersonal. Das Produkt ist nur für den Anschluss
an 230Volt/50Hz Wechselspannung, für Schutz-
kontaktsteckdosen und die Verwendung in geschlos-
senen Räumen zugelassen. Durch Veränderungen
im Gerät oder an der Seriennummer erlischt der
Garantieanspruch. Lassen Sie die Gerätesicherung
nach einem Fehlerfall nur von Fachpersonal durch
ein Exemplar gleichen Typs ersetzen.
Netzkabel/Anschluss
Ziehen Sie stets den Netzstecker und nie am Netz-
kabel, wenn Sie die Verbindung zum Stromnetz
trennen wollen. Stellen Sie sicher, dass beim Auf-
stellen des Gerätes das Netzkabel nicht gequetscht,
extrem gebogen oder durch scharfe Kanten beschä-
digt wird. Fassen Sie das Netzkabel nicht mit nas-
sen oder feuchten Händen an. Verwenden Sie das
im Lieferumfang enthaltene oder andere Netzkabel
von Vincent.
Ausschalten
Schalten Sie das Gerät jedes Mal aus,
bevor Sie andere Komponenten bzw. Lautsprecher
anschließen oder entfernen, es vom Stromnetz tren-
nen bzw. daran anschließen, es längere Zeit nicht
benutzen oder dessen Oberfläche reinigen wollen.
Warten Sie danach bei Vollverstärkern, Endstufen
und Receivern ca. eine Minute, bevor Sie Kabelver-
bindungen trennen bzw. herstellen.
ON
OFF
Aufstellen des Gerätes
Die Art der Aufstellung der Anlage hat
klangliche Auswirkungen. Stellen Sie diese deshalb
nur auf eine dafür geeignete, stabile Unterlage. Um
das Klangpotential Ihres Systems optimal auszunut-
zen, empfehlen wir, die Geräte auf Vincent Racks zu
platzieren und nicht aufeinander zu stellen.
Elektronik Altgeräte
Dieses Gerät unterliegt den in der
europäischen Richtlinie 2002/96/EC festgeleg-
ten Bestimmungen, deren gesetzliche Umsetzung
in Deutschland durch das Elektro- und Elektronik-
geräte-Gesetz (ElektroG) geregelt ist. Dies ist
durch das Symbol eines durchgestrichenen Abfall-
eimers auf dem Gerät gekennzeichnet.
Für Sie als Endverbraucher bedeutet das:
Alle nicht mehr verwendeten Elektro- und Elektro-
nik-Altgeräte müssen getrennt vom Hausmüll über
dafür staatlich vorgesehene Stellen entsorgt wer-
den. Damit vermeiden Sie Umweltschäden und
helfen mit, die Hersteller zur Produktion von lang-
lebigen oder wieder verwendbaren Produkten zu
motivieren. Weitere Informationen zur Entsorgung
des alten Gerätes erhalten Sie bei der Stadtver-
waltung, dem Entsorgungsamt oder dem Ge-
schäft, in dem Sie das Produkt erworben haben.
CE-Zeichen
Dieses Gerät erfüllt die gültigen EU-Richt-
linien zur Erlangung des CE-Zeichens und ent-
spricht damit den Anforderungen an elektrische
und elektronische Geräte (EMV-Richtlinien, Sicher-
heitsrichtlinien und den Richtlinien für Niederspan-
nungsgeräte).
Erklärungen/Hinweise
Dieses Dokument wurde verfasst von
Andreas Böer. Es ist ein Produkt der Sintron Vertriebs
GmbH, 76473 Iffezheim und darf ohne ausdrückli-
che und schriftliche Genehmigung weder komplett
noch auszugsweise kopiert oder verteilt werden.
Vincent ist ein eingetragenes Warenzeichen der
Sintron Vertriebs GmbH, 76473 Iffezheim.
Vincent arbeitet ständig an der Verbesserung und Wei-
terentwicklung seiner Produkte. Deshalb bleiben Ände-
rungen an Design und technischer Konstruktion des Ge-
rätes, sofern sie dem Fortschritt dienen, vorbehalten.
Der Inhalt dieser Anleitung hat lediglich Informations-
charakter. Er kann jederzeit ohne vorherige An-
kündigung geändert werden und stellt keine Ver-
pflichtung seitens des Markeninhabers dar. Dieser
übernimmt keinerlei Verantwortung oder Haftung für
Fehler oder Ungenauigkeiten, die möglicherweise in
dieser Bedienungsanleitung enthalten sind.
Aufbewahren der Verpackung
Wir empfehlen Ihnen ausdrücklich, nach Möglichkeit
die Originalverpackung für spätere Transportzweck
aufzubewahren. Transportschäden treten bei unge-
eignet verpackten HiFi-Geräten häufig auf. Dadurch,
dass die Originalverpackung exakt zum Gerät passt,
wird das Risiko einer Beschädigung während eines
notwendigen Transportes gemindert.
Erläuterung der grafischen Symbole
Der Blitz weist Sie darauf hin, dass im Gerät
gefährliche Spannungen vorhanden sind,
die einen Stromschlag verursachen können.
Das Ausrufezeichen macht Sie auf be-
sonders wichtige Hinweise bezüglich
Bedienung und Wartung aufmerksam.
Der Zeigefinger kennzeichnet nützliche
Informationen und Hinweise für den
Umgang mit dem Gerät.

Vincent
76
Vincent
LIEFERUMFANG
BESCHREIBUNG DES GERÄTES
Bitte prüfen Sie den Inhalt der Verpackung, diese sollte zusätzlich zum
Gerät folgendes Zubehör enthalten:
• 1 Netzkabel
• 1 Kabel für die Einschaltsteuerung („POWER CONTROL“)
• dieses Handbuch
Obwohl Vincent auch für Mehrkanaltonanlagen
und Heimkinos langlebige und überlegene Kom-
ponenten herstellt, fühlen sich die Vincent-Ent-
wickler besonders der Stereo-Tradition verpflich-
tet. Besonders in diesem Segment ist der klangli-
che Fortschritt bei Auftrennung in Vor- und Endver-
stärker deutlich. Wir sind der Meinung, dass eine
Verwendung von allzu preisorientiert aufgebauten
Vor- und Endverstärkern diese Bemühungen durch
kompromissbedingt geringere Klangqualität
genau wieder zunichte macht. Aus diesem Grund
stellt Vincent auch bei Monoendverstärkern keine
„Einsteigermodelle“ her. Das ist auch deswegen
sinnvoll, weil unabhängig jeglicher Entwicklung
auf dem Audio-Markt und unabhängig davon,
welche Art Audio-Anlage aufgebaut werden soll,
es eine Gerätekategorie gibt, deren Komponenten
in jeder zukünftig zusammengestellten Anlage
weiterverwendet werden können: die Endver-
stärker! Denn egal, welches die Datenträger oder
Datenformate der Zukunft sind, der Ton muss stets
den Weg zum Lautsprecher finden.
Der SP-995 ist ein vielseitig einsetzbarer Mono-
Endverstärker aus Vincents solidLine. Seine Schal-
tung ist vollsymmetrisch unter Verwendung von 16
SANKEN Feldeffekttransistoren (FET) aufgebaut.
Seine Besonderheit ist die Möglichkeit der Um-
schaltung zwischen den beiden Verstärker-Be-
triebsvarianten „Class A“ und „Class AB“. Im
Class-A-Betrieb gibt eine besonders saubere Über-
tragungskennlinie Verzerrungen keine Chance,
gleichzeitig ist die aufgenommene Leistung des
1. CLASS A:
Betriebsart der Verstärkerschaltung
Dieser Taster wechselt die Verstärkerschaltung
zwischen Class-A-Betrieb und Class-AB-Betrieb.
Nützlich, falls die stärkere Erwärmung des
Gerätes, welche im klanglich interessanteren
Class-A-Betrieb auftritt, vermieden werden soll.
2. POWER: Netzschalter
Dieser Taster schaltet das Gerät ein und in die
Bereitschaft. Ist ein Kabel am Eingang des „POWER
CONTROL“-Anschlussfeldes (7) angesteckt,
Verstärkers ohne Signal (oder bei kleinen Ein-
gangssignalen) viel höher als im Class-AB-Betrieb.
Diese Endstufe kann jederzeit zwischen beiden
Betriebsarten umgeschaltet werden.
Ergebnis von aufwändiger Entwicklungsarbeit und
strenger Bauteileauswahl ist ein Endverstärker,
welcher nicht nur klanglich wenig Konkurrenz hat,
sondern durch überreichliche Leistungsreserven in
den unterschiedlichsten Anschluss-Situationen im
Verbund mit allen Lautsprechern nie die Kontrolle
verliert. Durch die Ausstattung mit sowohl Cinch-
als auch XLR-Eingangsanschluss kann der Verstär-
ker auch symmetrisch angesteuert werden. Weil
zwischen beiden Eingangsanschlüssen umge-
schaltet werden kann, ist es möglich, diesen End-
verstärker in zwei Anlagen gleichzeitig zu inte-
grieren. Höchste Verarbeitungsqualität und ein
hervorragendes Preis-Leistungs-Verhältnis sind
selbstverständlich. Eine weitere Besonderheit die-
ses Gerätes ist die Einschaltsteuerungsfunktion
„POWER CONTROL“, mit welcher das Gerät auf
Ein-/Ausschaltsignale reagieren kann.
An die Seite dieser Endstufen lässt sich ein Stereo-
Vorverstärker (z.B. Vincent SA-93Plus) oder eine
Mehrkanal-Dekodervorstufe (SAV-C-Reihe) stellen.
Zusammen mit CD-Playern, DVD-Playern, Tunern
sowie den Lautsprechern, HiFi-Möbeln und
Lautsprecherkabeln des Vincent-Sortiments können
unter Verwendung dieses Stereo-Endverstärkers
die unterschiedlichsten, perfekt harmonierenden
Systeme aufgebaut werden.
VORDERANSICHT
1 3 2 4
bestimmt das darüber anliegende Schaltsignal, ob
das Gerät eingeschaltet oder in Bereitschaft ist und
der Taster „POWER“ ist ohne Funktion.
3. POWER-LED
Leuchtet, solange das Gerät eingeschaltet und
aktiv (nicht in Bereitschaft) ist.
4. XLR IN: Umschalter für Eingangsanschluss
Hiermit wird gewählt, welcher der beiden
Anschlüsse des Verstärkereingangs an der Geräte-
rückseite (Cinch oder XLR) (6) verwendet wird.

Vincent
98
Vincent
5. SPEAKER:
Lautsprecheranschlussklemmen
Ausgangsbuchsen mit Schraubklemmen zum
Anschluss von einem oder zwei Lautsprechern. Es
können Lautsprecherkabel mit 4mm
Bananensteckern verwendet werden.
6. LINE IN: Eingang für
vorverstärktes Mono-Audiosignal
Einer der beiden Anschlüsse dieses Eingangs wird
mit dem Ausgangsanschluss des Vorverstärkers für
den gewünschten Kanal verbunden. Zum Beispiel
mit „PRE OUT R“, wenn der SP-995 für den
Lautsprecher des rechten Stereo-Kanals verwendet
werden soll. Es kann immer nur einer der beiden
Anschlüsse des Eingangs verwendet werden, der
Umschalter „XLR IN“ (4) an der Gerätevorderseite
muss sich in der richtigen Einstellung befinden.
Keine Hochpegelquelle anschließen!
7. POWER CONTROL: Einschaltsteuerung
Über diese Klinkenbuchsen (3,5 mm) werden die
Signale zur Einschaltsteuerung (POWER CON-
TROL) empfangen und weitergesendet. Sobald
eine „POWER CONTROL“-Verbindung am
Eingang des „POWER CONTROL“-
Anschlussfeldes angebracht ist, bestimmt aus-
schließlich das darüber anliegende Signal, ob
der SP-995 eingeschaltet oder in Bereitschaft ist.
Der Taster „POWER“ (2) an der Gerätevorderseite
ist dann ohne Funktion.
8. Netzbuchse mit Sicherungshalter
Bringen Sie hier das Netzkabel an und verbinden
Sie es mit der Stromversorgung. Das kleine
Kunststoff-Gehäuse an der Unterseite der
Netzbuchse beinhaltet die Gerätesicherung.
Beachten Sie dazu die Sicherheitshinweise.
RÜCKANSICHT
7
65 5
8
Entfernen der Schutzkappen
Vor der ersten Installation müssen von allen ver-
wendeten Anschlüssen an der Geräterückseite die
Kunststoff-Schutzkappen
entfernt werden.
Cinch-Anschlüsse
Das Berühren des mittleren Kontaktstiftes des
Cinch-Steckers mit dem äußeren Kontakt der
Cinch-Buchse kann bei eingeschalteten Geräten
im schlimmsten Fall zur Beschädigung der Geräte
führen. Nehmen Sie deshalb niemals Änderungen
an den Kabelverbindungen vor, während die
Geräte eingeschaltet sind!
Lautsprecheranschluss
Es ist empfehlenswert, konfektionierte Lautspre-
cherkabel zu verwenden, anstatt die Innenleiter
(Litze) der Kabel direkt anzuklemmen. Bananen-
stecker oder Kabelschuhe bieten höhere Sicherheit
gegen Kurzschlüsse und Beschädigung der
Lautsprecher oder des Verstärkers.
Sorgen Sie dafür, dass blanke Lautsprecherdrähte
sich niemals gegenseitig oder das Metall der Ge-
häuserückwand berühren können!
Achten Sie auf korrekten Anschluss der positiven
und negativen Lautsprecherdrähte. Vertauschter
Anschluss macht sich durch verringerte Klang-
qualität bemerkbar.
Verwenden Sie nur Lautsprecher mit einer Nennim-
pedanz von mindestens 4Ω.
XLR-Anschlüsse
Beachten Sie, dass europäische und US-amerika-
nische XLR-Signalbelegung unterschiedlich sind.
Dieses Vincent Gerät verwendet das europäische
System nach dem Standard AES14-1992 der
„Audio Engineering Society“. Der Aufbau des
INSTALLATION
Stellen Sie die Kabelverbindung in der nachfolgend genannten Reihenfolge her. Bringen
Sie erst zuletzt das Netzkabel an und verbinden es mit der Steckdose.
ZUR BESONDEREN BEACHTUNG
Kabels ist in jedem Fall gleich. Solange beide ver-
bundenen Geräte derselben Norm entsprechen, ist
die Signalverbindung richtig. Dies ist immer der
Fall, wenn beide von Vincent hergestellt wurden.
Werden zwei Geräte unterschiedlicher Norm ver-
bunden, wird dadurch das Signal invertiert. In die-
sem Fall muss die Signalbelegung an einer Seite
der Verbindung geändert werden. Ihr Fachhändler
wird Sie dabei unterstützen.
Kabel und Steckverbindungen
Achten Sie darauf, dass alle Steckverbindungen fest
sitzen. Unzureichende Anschlüsse können Stör-
geräusche, Ausfälle und Fehlfunktionen verursachen.
Um das Klangpotential der Komponenten voll auszu-
schöpfen, sollten nur hochwertige Lautsprecher- und
Verbindungskabel, beispielsweise Vincent Kabel,
verwendet werden. Bevorzugen Sie geschirmte
Audio-Kabel. Ihr Fachhändler wird Sie gern diesbe-
züglich beraten.
1. USA System (Pin 2 = COLD, Pin 3 = HOT)
2 1
3
HOT
GND
COLD
2. Europäisches System (Pin 2 = HOT, Pin 3 = COLD)
2 1
3
HOT
GND
COLD
- Falsch - - Richtig -
1 2
OU
OUTPUT

Vincent
1110
Vincent
ANSCHLUSS EINES VORVERSTÄRKERKANALS
Dieser Endverstärker ist mit einem Audio-Eingang „LINE IN“ (6) versehen, an welchem das Gerät das vor-
verstärkte Signal eines Audio-Kanals (R, L, CENTER o.ä.) erwartet. Dies ist die Audio-Information, welche der
SP-995 für einen oder zwei Lautsprecher aufbereitet.
Hinweis:
An diesen Eingang darf keine Quelle mit Standard-Hochpegelsignal („LINE OUT“) angeschlossen wer-
den. Er ist nur für vorverstärkte Signale (z.B. „PRE OUT“) vorgesehen.
Dieser Audio-Eingang ist mit zwei Anschlüssen ausgestattet, wodurch der Vorverstärker mittels Cinch-
und/oder XLR-Verbindung an den SP-995 angeschlossen werden kann. Wenn Ihr Vorverstärker beide
Möglichkeiten bietet, bevorzugen Sie XLR. Es ist zu jeder Zeit nur einer der beiden Anschlüsse eingestellt. Mit
dem Umschalter „XLR IN“ (4) wird bestimmt, welcher Anschluss momentan als Eingang verwendet wird. Soll
der Vorverstärkerkanal am Cinch-Eingang wiedergegeben werden, so ist die Funktion „XLR IN“ (4) abzu-
schalten (benachbarte LED erloschen). Soll der Vorverstärkerkanal am XLR-Eingang wiedergegeben werden,
so ist die Funktion „XLR IN“ (4) einzuschalten (benachbarte LED leuchtet).
Verbinden Sie den gewünschten Anschluss des SP-995 mit einem der Vorverstärkerausgangsanschlüsse (z.B.
„PRE OUT R“ oder „OUTPUT R“, falls der SP-995 für den rechten Kanal eines Stereo-Systems zuständig sein
soll). Verwenden Sie eine Cinch- oder XLR-Verbindung:
Beide „LINE IN“-Anschlüsse dürfen gleichzeitig belegt sein und es ist so möglich, zwei Vorverstärker
gleichzeitig anzuschließen und nach Bedarf auf den gewünschten „LINE IN“-Eingangsanschluss umzu-
schalten. Bevor Sie dies tun, stellen Sie sicher, dass die Lautstärke des jeweiligen Vorverstärkers nicht zu
hoch eingestellt ist.
KABELVERBINDUNGEN FÜR DIE
EINSCHALTSTEUERUNG (POWER CONTROL)
Viele AV-Systeme bestehen aus einer Vielzahl von Einzelkomponenten. Um diese nicht vor und nach jedem
Gebrauch einzeln ein- und auszuschalten, haben manche Hersteller die Geräte mit einer so genannten „POWER
CONTROL“-Schaltung, auch „TRIGGER“ oder „Einschaltsteuerung“ genannt, ausgestattet. Vor allem für Vor- und
Endstufen wird diese Art der ferngesteuerten Standby-Schaltung verwendet, weil Endverstärker oft auch fern der übri-
gen Geräte in der Nähe der Lautsprecher platziert werden. Um diese Funktion verwenden zu können, müssen
Kabelverbindungen direkt oder indirekt zwischen dem Vorverstärker/Vollverstärker und allen Geräten, welche die
„POWER CONTROL“-Funktion unterstützen, hergestellt werden. Die Funktion „POWER CONTROL“ bewirkt, dass
jedes Ein- bzw. Ausschalten eines Gerätes des Systems (üblicherweise des Vor-/Vollverstärkers) automatisch das
Ein-/Ausschalten aller daran angeschlossenen Geräte, die diese Funktion unterstützen, auslöst. Beachten Sie, dass
alle Geräte, welche auf die Einschaltsteuerung reagieren, im Ausschaltzustand nicht vom Netz getrennt, sondern in
Bereitschaft geschaltet sind. Als Verbindungskabel finden zweiadrige, mit 3,5 mm Klinkenstecker (mono) versehene
Leitungen Verwendung. Für die Verbindung zwischen jeweils zwei Geräten wird eins dieser Kabel benötigt. Wenn
sich also der Endverstärker SP-995 automatisch mit dem Vorverstärker ein-/ausschalten soll, müssen die nachfolgend
beschriebenen Kabelverbindungen für die Einschaltsteuerung richtig vorgenommen werden. Ist die hier beschriebe-
ne Arbeitsweise nicht erwünscht, reicht es, die in diesem Abschnitt beschriebenen Kabelverbindungen wegzulassen.
Der SP-995 besitzt einen Eingangsanschluss und einen Ausgangsanschluss für die Einschaltsteuerung. Damit kann
er auf das Schaltsignal eines anderen Gerätes reagieren und bei Bedarf dieses Signal an weitere Komponenten
einer Anlage weiterleiten. Auch an den meisten anderen Geräten kann einer der beiden „POWER CONTROL“-
Anschlüsse als Signaleingang und der andere als Signalausgang verwendet werden. Auf diese Weise können theo-
retisch unendlich viele Geräte mit den Schaltimpulsen des steuernden Gerätes versorgt werden. Diese Methode, das
Signal durch Ein- und Ausgänge der Geräte durchzuschleifen und diese somit zu verketten, wird auch als „daisy
chaining“ bezeichnet. Verbinden Sie einen mit „POWER CONTROL OUTPUT“ oder „TRIGGER OUTPUT“ markier-
ten Ausgang des steuernden Gerätes mit dem Schaltsignaleingang des SP-995 (dem mit „IN“ beschriftete Anschluss).
Ist das „POWER CONTROL“-Kabel zu diesem Gerät angeschlossen, dient der zweite Klinkenanschluss des SP-995
dem Weitergeben des Schaltsignals (zum Beispiel zum Endverstärker des anderen Kanals) oder bleibt frei. Dieser
Endverstärker kann das Schaltsignal für weitere Komponenten einer Anlage nicht selbst erzeugen!
SP-995
Stereo-Vorverstärker
z.B. 2. SP-995
Power-Control-Kabel
Achtung:
SP-995
Vorverstärker
Cinch-Verbindung
1 2
OUTPUT
BALANCE
SP-995
Vorverstärker
XLR-Verbindung
1 2
OUTPUT
BALANCE
Viele der Geräte, welche durch ein Schaltsignal gesteuert
werden können (nicht Vorverstärker oder Vollverstärker),
besitzen zwei Anschlussbuchsen, welche nicht als Ein- oder
Ausgang gekennzeichnet sind. In diesem Fall kann einer
der beiden beliebig gewählt werden. Auch an einigen
Geräten, welche das Schaltsignal ausgeben (Vor- und
Vollverstärker) fehlen diese Beschriftungen. In dem Fall kann
davon ausgegangen werden, dass es sich um Signal-
ausgänge handelt.
„POWER CONTROL“-Anschlüsse mehrerer Vor- oder
Vollverstärker dürfen niemals untereinander verbunden
werden! An alle anderen Geräte darf direkt oder indirekt
nur ein Vor- oder Vollverstärker über „POWER CON-
TROL“-Verbindung angeschlossen sein! Wenn ein
„POWER CONTROL“-Kabel an einem der beiden Ein-
gänge angeschlossen ist, kann der Endverstärker nicht
mehr durch den Taster „POWER“ ein- oder ausgeschaltet
werden. Dies gilt auch für den Fall, dass das „POWER
CONTROL“-Kabel nur am SP-995 und nicht am anderen
Kabelende in ein Gerät eingesteckt ist. Wenn die
Funktion der Einschaltsteuerung nicht erwünscht ist, müs-
sen deswegen die Schaltsignalkabel entfernt werden!

Vincent
1312
Vincent
ANSCHLUSS DER LAUTSPRECHER
Wenn ein Lautsprecher im „Bi-Wiring“ angeschlossen werden soll, können beide Lautsprecher-Klem-
menpaare verwendet werden. Anders als beim Anschluss der Lautsprecher mit je einem
Lautsprecherkabel wird bei Bi-Wiring der dafür geeignete Lautsprecher über zwei getrennte zweiadri-
ge Lautsprecherkabel oder ein vieradriges Lautsprecherkabel an das Ausgangsklemmenpaar des
Endverstärkers angeschlossen. Dabei verdoppelt sich der Verkabelungsaufwand, für viele
Kombinationen aus Lautsprechern und Verstärkern verbessert sich dadurch die Klangqualität.
Vor der Umrüstung auf Bi-Wiring müssen die im Normalbetrieb am Doppelanschluss des Lautsprechers
angebrachten Metallbrücken entfernt werden. Nur Lautsprecher mit diesen Bi-Wiring-Terminals sind geeig-
net. Die Filterung des gesamten Frequenzbereiches findet in den nun aufgetrennten Weichen der
Lautsprecher statt. Für jeden Lautsprecher wird ein Kabel mit dem für die höheren, das andere mit dem für
die niedrigeren Frequenzen vorgesehenen Lautsprecheranschluss verbunden. Achten Sie auf die richtige
Polung. Ihr Fachhändler wird Ihnen mit Rat und Tat zur Seite stehen.
Wenn Sie konfektionierte Lautsprecherkabel mit 4 mm Bananensteckern verwenden, brauchen Sie nur die
zwei Stecker eines jeden Lautsprecherkabels mit den zwei zugehörigen Klemmen zu verbinden. Die
Schraubkappe der Klemme sollte im Uhrzeigersinn festgedreht werden.
Sollen Kabelschuhe verwendet werden, muss an jeder Klemme der Schraubkopf im Gegenuhrzeigersinn
gelöst, der Kabelschuh daruntergeschoben und die Schraubkappe im Uhrzeigersinn festgedreht werden.
Stellen Sie zur Vermeidung von Schäden sicher, dass der Anschluss fest sitzt und kein blankes Metall von
den Kabelschuhen die Rückwand oder einen anderen Anschluss berührt.
ANSCHLUSS DER LAUTSPRECHER
Sie haben die Möglichkeit, an den Endverstärker SP-995 einen oder zwei Lautsprecher auf normale Weise
(durch ein zweiadriges Lautsprecherkabel) anzuschließen. Für jeden Lautsprecher finden Sie am Gerät (5)
zwei Lautsprecherklemmen (positiv + und negativ –), von denen jeweils ein Paar mit einer Seite eines zwei-
adrigen Lautsprecherkabels verbunden wird. Beide Klemmenpaare (die zwei oberen und die zwei unteren
Anschlüsse) sind parallel geschaltet und bekommen dasselbe Monosignal. Am Lautsprecher gibt es gleichar-
tige oder ähnliche Anschlüsse, auch hier ist markiert, welcher Anschluss zu welchem Pol (+ oder –) gehört.
Hier wird das andere Ende des dem Lautsprecher zugeordneten Lautsprecherkabels angeschlossen. Durch
das Lautsprecherkabel müssen jeweils gleichartige Anschlüsse eines Klemmenpaares miteinander verbunden
werden: die mit „+“ markierte Klemme am Verstärker muss zu einem mit „+“ markierten Anschluss des
Lautsprechers führen. Der SP-995 kann nur das Audiosignal eines Kanals verarbeiten, für den/die weiteren
Kanäle (meist L oder R, manchmal aber auch CENTER etc.) wird eine weitere Endstufe bzw. werden weite-
re Endstufen benötigt. Die Skizze zeigt die Anschlüsse bei Verwendung eines Lautsprechers.
Wird der Lautsprecher ganz normal mit einem doppeladrigen Lautsprecherkabel verbunden, so müssen
bei einem Lautsprecher mit Doppelanschluss (vier Lautsprecherklemmen) die (meist mit den Lautsprechern
gelieferten) Kontaktbrücken (meist kleine Metallplättchen oder kurze Kabelstückchen) jeweils zwischen
den beiden Klemmen gleicher Polung (z.B. beide mit „+“ beschriftete Klemmen) angebracht werden. Der
obere, mit „+“ markierte Lautsprecheranschluss des Endverstärkers wird mit einem der mit „+“ markierten,
gebrückten Anschlüsse des Lautsprechers verbunden. Der obere, mit „–“ markierte Anschluss des Endver-
stärkers wird mit einem der mit „–“ markierten, gebrückten Anschlüsse des Lautsprechers verbunden.
Soll ein zweiter Lautsprecher angeschlossen werden, so wird dieser auf ähnliche Weise mit den Klemmen
der unteren Anschlussreihe „SPEAKER“ verbunden. Dies ist nur zulässig, wenn beide Lautsprecher eine
Nennimpedanz von mindestens 8Ωaufweisen!
Es besteht aber auch die Möglichkeit, einen Lautsprecher im Bi-Wiring anzuschließen.
Lautsprecher
Lautsprecherkabel
Lautsprecher
Lautsprecherkabel
Prüfen Sie, ob die Stromversorgung Ihres Haushalts für das Gerät geeignet ist. Benötigte Spannung und
Frequenz sind auf der Geräterückseite neben der Netzbuchse abzulesen. Wenn die Stromversorgung
geeignet ist, drücken Sie den Kaltgerätestecker des mitgelieferten Netzkabels fest in die Netzbuchse an
der Geräterückwand. Verbinden Sie das andere Ende des Netzkabels mit einer Netzsteckdose.
ANSCHLUSS DES NETZKABELS
SP-995
SP-995

14
Vincent Vincent
15
BEDIENUNG DES GERÄTES
Aktion Taste(n) Beschreibung
Ein- und Ausschalten POWER (2)
Das Gerät wird an diesem Taster der Gerätevorderseite ein- und ausge-
schaltet. Dies ist nicht möglich, wenn ein Kabel an einen der Anschlüsse im
Feld „POWER CONTROL“ (7) eingesteckt ist. Wenn dies der Fall ist, rea-
giert der SP-995 nur noch auf ein über anliegendes Schaltsignal und der
Taster „POWER“ ist ohne Funktion. Im ausgeschalteten Zustand ist das
Gerät nicht vollständig vom Stromnetz getrennt. Vor dem Einschalten sollte
vorsichtshalber die Lautstärkeeinstellung des Vorverstärkers reduziert wer-
den. Nach dem Einschalten blinkt die LED an der Gerätevorderseite für
fünf Sekunden. Dies ist die Zeit in welcher eine Schutzschaltung aktiv ist
und der Endverstärker stummgeschaltet ist. Im Normalbetrieb leuchtet diese
LED dauerhaft als Kontrollleuchte.
Eingangsanschluss
wählen
XLR IN (4)
Hier stellen Sie ein, ob dem Endverstärker das vorverstärkte Eingangssig-
nal am XLR- oder dem Cinch-Anschluss an der Geräterückseite zur Verfü-
gung gestellt wird. Ist die Funktion „XLR IN“ eingeschaltet (LED leuchtet),
so kann der SP-995 ein am Cinch-Anschluss anliegendes Signal nicht ver-
arbeiten, sondern erwartet das Signal über den XLR-Anschluss.
Verstärker-Betriebsart
wählen
CLASS A (1)
Dieser Taster wechselt die Verstärkerschaltung zwischen Class-A-Betrieb
und Class-AB-Betrieb. Somit kann vom klanglich besseren Class-A-Betrieb
auf den stromsparenden und mit weniger Abwärme verbundenen Class-
AB-Betrieb umgeschaltet werden, zum Beispiel zur Beschallung einer Party,
bei welcher es nicht auf absolute Reinheit des Klanges ankommt.
ANSCHLUSS DER LAUTSPRECHER
Wenn an das Lautsprecherkabel keine Steckverbinder angebracht werden sollen, entfernen Sie ein ca. 1
cm langes Stück der Isolierung von jedem Endstück des Lautsprecherdrahtes. Verdrillen Sie die blanke
Litze, um Kurzschlüsse zu vermeiden. Drehen Sie den Knopf der Lautsprecherklemme im Gegen-
uhrzeigersinn, um ihn zu lösen und führen Sie das blanke Drahtende in das nun freiliegende Klemmenloch
ein. Drehen Sie den Knopf nun im Uhrzeigersinn, um den Draht in der Lautsprecherklemme festzuklem-
men. Achten Sie darauf, dass die Verschraubung fest ist.
Achtung:
Der verwendete Lautsprecher muss eine Nennimpedanz von mindestens 4Ωaufweisen. Wenn zwei
Lautsprecher angeschlossen werden, müssen beide eine Nennimpedanz von mindestens 4Ωbesitzen.
Achten Sie auf die richtige Polung der Lautsprecherkabelanschlüsse. Der positive Kontakt ist meist rot und
oft mit „+“ markiert. Die markierte Leitung des Lautsprecherkabels muss mit dem positiven Anschluss ver-
bunden werden.

Vincent
17
FEHLERSUCHE
Symptom Mögliche Fehlerursache Abhilfe
Keine Funktion nach
Drücken des Tasters
„POWER“
Netzkabel nicht an eine betriebsbereite
Steckdose angeschlossen.
Netzkabel nicht fest in die Steckdose und die
Gerätebuchse (8) gesteckt oder defekt.
An einem Anschluss für die „POWER CON-
TROL“ an der Geräterückseite ist ein Kabel
eingesteckt. In diesem Fall ist der Taster
„POWER“ (2) ohne Funktion.
Gerätesicherung oder Gerät ist defekt.
Stellen Sie eine Verbindung zu einer funktio-
nierenden Steckdose mit der geeigneten
Netzspannung her.
Prüfen Sie das Netzkabel, tauschen Sie es
gegebenenfalls gegen ein geeignetes Kaltge-
rätekabel aus und drücken Sie dessen Stecker
fest in die Steckdose und auf der anderen
Seite in die Netzbuchse des Gerätes.
Entfernen Sie das „POWER CONTROL“-
Kabel oder schalten Sie das Gerät ein, wel-
ches das Einschaltsignal ausgibt.
Kontaktieren Sie Ihren Fachhändler.
Kein Ton, obwohl
Gerät eingeschaltet
und aktiv (LED (3)
leuchtet)
Das momentan am Vorverstärker eingestellte
Quellgerät gibt kein Signal aus.
Ausgang des Quellgerätes nicht oder falsch
bzw. nicht mit dem gewünschten Eingangs-
anschluss des Vorverstärkers verbunden.
Falscher Eingangskanal am Vorverstärker gewählt.
Lautstärke am Vorverstärker zu niedrig eingestellt.
Der Vorverstärker ist stummgeschaltet (Mute-
Funktion).
Ausgang des Vorverstärkers nicht bzw. falsch
mit dem Eingangsanschluss (6) des SP-995
verbunden.
Die Einstellung des Eingangsumschalters „XLR
IN“ (4) an der Gerätevorderseite wurde
falsch getroffen.
Die Lautsprecherkabel sind nicht richtig mit
den Anschlussklemmen des SP-995 (5) ver-
bunden oder defekt.
Starten Sie die Wiedergabe der angeschlos-
senen Signalquelle.
Korrigieren Sie den Anschluss der
Signalquelle.
Korrigieren Sie die Eingangswahl.
Erhöhen Sie vorsichtig die Lautstärke.
Deaktivieren Sie die Stummschaltung (Taste
„MUTE“ des Vorverstärkers).
Korrigieren Sie den Anschluss des
Vorverstärkers.
Stellen Sie an diesem Umschalter den richti-
gen Eingangsanschluss ein.
Prüfen und befestigen Sie die Lautsprecher-
kabel an den Klemmen des Verstärkers und
an den Lautsprecheranschlüssen.
Schlechte Tonqualität
Anschlüsse der Kabelverbindungen sind lose, die
Anschlüsse verschmutzt oder ein Kabel defekt.
Ein Plattenspieler wurde ohne zwischenge-
schaltete Entzerrervorstufe (Phonovorstufe) an
einen der Hochpegeleingänge des
Vorverstärkers angeschlossen.
Ein Gerät mit Hochpegelausgang (z.B. CD-
Player) wurde an den Endstufeneingang
„LINE IN“ (6) angeschlossen.
Prüfen Sie die Audio-Anschlüsse.
Schließen Sie eine Phonovorstufe zwischen
Plattenspieler und Vorverstärker an.
Verwenden Sie Quellgeräte mit Hochpegel-
ausgängen nur an den Eingängen des
Vorverstärkers.
Tiefton- Brummen
zu hören
Siehe Abschnitt „Netzbrummen“ im Kapitel
„Weitere Tipps“.
Siehe Abschnitt „Netzbrummen“ im Kapitel
„Weitere Tipps“.
16
Vincent
Einspielzeit / Aufwärmen
Ihre Audio-Geräte benötigen eine gewisse Zeit bis
sie ihre klangliche Höchstleistung erreichen. Die-
ser Zeitraum ist für die verschiedenen Komponen-
ten Ihres Systems sehr unterschiedlich. Bessere und
gleichförmigere Leistung erhalten Sie während der
Zeit, die das Gerät eingeschaltet bleibt.
Nutzen Sie die Erfahrung Ihres Fachhändlers!
Netzbrummen
Bestimmte Quellgeräte können im Verbund mit dem
Verstärker zu einem über die Lautsprecher hörbaren
Brummgeräusch führen, dessen Lautstärke sich mit
dem Lautstärkeregler beeinflussen lässt. Dies ist kein
Hinweis auf einen Mangel eines Ihrer Audio-Pro-
dukte, muss aber durch entsprechende Maßnahmen
verhindert werden. Generell kann jedes an den Ver-
stärker angeschlossene, ebenfalls netzbetriebene
und mit dem Schutzleiter des Stromnetzes verbunde-
ne Gerät dieses Problem hervorrufen.
Dieses Phänomen wird erfahrungsgemäß entweder
durch den Antennenanschluss des Tuners bzw. Fern-
sehers oder in Verbindung mit Personalcomputern,
elektrostatischen Lautsprechern, Subwoofern, Platten-
spielern oder Kopfhörerverstärkern hervorgerufen,
sofern eine Audioverbindung zum Verstärker besteht.
WEITERE TIPPS
Eine weitere mögliche Quelle für Brummstörungen
stellt die elektromagnetische Einstrahlung des
Netzteiles anderer Geräte (z.B. Verstärker, Receiver,
CD-Player, Tuner usw.) auf das Tonabnehmersystem
eines angeschlossenen Plattenspielers dar. Solche
Fehlerursachen kann man leicht selbst ermitteln, in-
dem man die Aufstellung des Plattenspielers gegen-
über den anderen Geräten verändert.
Das Massepotential aller Signale ist in fast jedem
elektrischen Gerät an einem zentralen Punkt zusam-
mengefasst. Dort finden sie genau einmal eine
gemeinsame Verbindung. Sollte ein Schutzleiter vor-
handen sein, hat er immer an einer strategisch gün-
stigen Stelle eine unlösbare Verbindung mit dem
Gehäuse und beide werden meist auch genau ein-
mal am zentralen Massepunkt mit angeschlossen.
So wird auch die abschirmende Wirkung des Ge-
häuses erzeugt. Manche Geräte besitzen einen
Masse-Trennschalter (GND SWITCH) an der Ge-
räterückseite. Wenn dieser eingeschaltet ist (sich in
der Position „ON“ befindet), sind Schutzleiter und
Gehäuse gemeinsam vom Massepunkt abkoppelt.
Dies kann helfen, das Netzbrummen zu beseitigen.
Die Schutzleiterwirkung bleibt erhalten.
Ist das Brummgeräusch durch eigene Versuche nicht zu
beseitigen, wird Ihnen Ihr Fachhändler weiterhelfen.
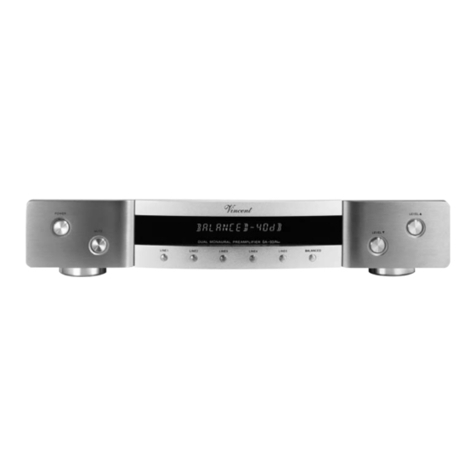
Vincent
1918
Vincent
Eingangsempfindlichkeit
Begriff für die kleinste Eingangsspannung, die bei
maximaler Lautstärkeeinstellung des Verstärkers die
maximale Ausgangsleistung bewirkt. Beispiele:
100 mV bis 500 mV (Millivolt) bei Hochpegel-
eingängen, 2 mV bis 5 mV am Phono-MM-Eingang
oder 0,1 mV bis 0,5 mV am Phono-MC-Eingang.
Pegel
Eine Art der Darstellung jeder physikalischen Größe
und ein gebräuchliches Maß für Signalspannungen
und Lautstärke. Wird in Dezibel (dB) angegeben.
Als Spannungen „auf Line-Pegel“ werden
Signalspannungen unterhalb 1V bezeichnet, die als
Musik-Signale für Verstärker-Eingänge geeignet sind.
Eingänge des Verstärkers (in der Regel als Cinch-
Buchse ausgeführt), die für Signale des CD-Players,
Kassettenrecorders, DVD-Players usw. vorgesehen
sind, werden auch als „Line-Level-Eingänge“ oder
„Hochpegel-Eingänge“ bezeichnet.
RCA/Cinch
RCA ist die amerikanische Bezeichnung für die
koaxialen Cinch-Steckverbindungen als Abkür-
zung für „Radio Corporation of America“, den
Namen einer US-amerikanischen Firma. Sowohl
Stecker als auch verwendete Kabel bestehen aus
einem stabförmigen Innenleiter und einem zylin-
derhüllenförmigen Außenleiter. Damit lässt sich
ein Mono-Audiosignal oder ein Videosignal über-
tragen. Im Vergleich mit der XLR-Steckverbindung
wird diese Verbindungsart auch „unsymmetrische
Signalverbindung“ („unbalanced“) genannt.
XLR
Auch: „symmetrische Verbindung“ oder „balan-
ced“. Eine Steckverbindung für Audiogeräte. Sie
ist rund, hat einen Durchmesser von etwa 1,5 cm
und besitzt meist drei Kontaktstifte. XLR ist eine
alternative Verbindung zu Cinch für NF-Signale im
professionellen Audiobereich. Ihr Vorteil ist die
zusätzliche Übertragungsmöglichkeit desselben
Signals mit negativem Spannungshub (deswegen
drei Anschluss-Stifte), so dass bei entsprechender
Signalaufbereitung im empfangenden Gerät die
auf dem Signalweg durchs Kabel eingestreuten
elektromagnetischen Störungen beseitigt werden
können. Des Weiteren wird mit einem höheren
Pegel übertragen. Dadurch ist diese Art der
Audiosignal-Übertragung störsicherer.
LEXIKON/WISSENSWERTES
Frequenzgang: 20 Hz - 20 kHz ±0,5 dB
Nennausgangsleistung pro Kanal an 8Ω(Class A/AB): 100 W (Dauerausgangsleistung)
Nennausgangsleistung pro Kanal an 4Ω: 200 W (Dauerausgangsleistung)
Eingangsempfindlichkeit: 800 mV
Klirrfaktor:
< 0,1% (20Hz – 20kHz, 8 Ω, Nennausgangsleistung)
Signal-Rausch-Abstand: >90 dB
Eingangsimpedanz: 47 kΩ
Netzanschluss: 220V – 240V/50 Hz (max. 300W)
Eingänge: 1x Cinch Main Input mono,
1x XLR Main Input mono,
1x POWER CONTROL (3,5 mm Klinkenbuchse)
Ausgänge: LS-Klemmen für bis zu 2 Lautsprecher,
1x POWER CONTROL (3,5 mm Klinkenbuchse)
Maße (B x H x T): 430 x 150 x 435 mm
Gewicht: 19,5 kg
Farbe: silber / schwarz
TECHNISCHE DATEN

Vincent
2120
Vincent
SAFETY GUIDELINES
This appliance was produced under strict quality controls.
It complies with all established international safety standards.
Nonetheless, the following instructions should be fully read and
observed in order to prevent any hazard:
Setting up the appliance
How the system is set up has an effect on the
sound quality. Therefore only place it on a suitab-
le, stable surface. To make the most of your
system’s sound quality, we recommend placing the
equipment on Vincent racks and not putting them
on top of each other.
Old electronic equipment
This appliance is subject to the conditions set out
in the European Directive 2002/96/EC. This is
identified by the symbol of a crossed out waste bin
on the appliance.
What this means for you as a consumer: All old
electrical and electronic equipment that is no lon-
ger used must be disposed of separately from
domestic waste using places provided by the aut-
horities. By doing so you can prevent damage to
the environment and help to encourage manufac-
turers to produce more durable or reusable pro-
ducts. For further information about disposing
your old appliance, please consult your local aut-
hority, waste disposal agency or the shop where
you bought the product.
CE sign
This appliance complies with the current EU direc-
tives about attaining the CE mark and thus meets
the requirements for electrical and electronic
equipment (EMC regulations, regulations and
regulations for low voltage equipment).
Declarations
This document was written by Andreas Böer. It is
a product of Sintron Vertriebs GmbH, 76473
Iffezheim and may not be copied or distributed
partly or in full without express, written consent.
Vincent is a registered trademark of Sintron Vertriebs
GmbH, 76473 Iffezheim.
Cleaning
Pull out the plug before cleaning the outside of the
product. Whenever possible, use a soft, lint-free
cloth that has been dampened. Do not use abrasi-
ves, solvents, thinners, flammable chemicals, polis-
hes and other cleaning products that leave marks.
Maintenance/Alterations
All equipment that is connected to the domestic
mains voltage can be dangerous to the user if not
handled properly. Leave maintenance work to
qualified professionals. The product is only per-
mitted for connection to AC 230Volt/50Hz, for
earthed sockets and use in enclosed areas.
Altering the product or manipulating its serial num-
ber voids the warranty. After a fault, leave the
appliance’s fuse to be replaced only by a profes-
sional with one of the same kind.
Power Cable Connection
Always pull the plug and never the power cable if
you want to disconnect the appliance from the
mains power. Make sure when setting up the
appliance that the power cable is not squashed,
severely bent or damaged by sharp edges.
Do not touch the power lead with wet or damp
hands. Use the power cable supplied or another
one from Vincent.
Switching Off
Switch the appliance off every time before you
connect or remove other components or loudspea-
kers, disconnect or connect it to the mains power,
leave it unused for a longer period or want to
clean its outside. On all amplifiers and receivers,
wait approx. 1 minute after this before disconnec-
ting or reconnecting the cable.
Moisture/Heat/Vibration
Contact of electrically operated equipment with
liquids, moisture, rain or water vapour is dange-
rous for such equipment and the user and must be
avoided without fail. Take care that no liquids or
objects get inside the appliance (ventilation slots
etc.). It must be disconnected from the mains power
immediately and examined by a professional if
this happens. Never expose the appliance to high
temperatures (direct sunshine) or strong vibration.
Heat Build-up
All amplifiers generate heat as part of their
design. Make sure that a gap of 5 cm remains
around the appliance and that the surrounding air
can circulate (do not install in enclosed cupbo-
ards). Vents must not be covered up.
Volume
The maximum tolerable volume is always reached
well below the maximum possible setting on the
amplifier. Be careful with the volume setting, there-
fore, in order to prevent damage to hearing. So that
you do not expose yourself to high volumes uninten-
tionally, always set to a low level before changing
the input channel.
ON
OFF
Do not open the appliance! Risk of electric shock!
There are no parts in the appliance that require maintenance by the user.
OTHER INSTRUCTIONS
Vincent is a registered trademark of Sintron Vertriebs
GmbH, 76473 Iffezheim.
Vincent works continually to improve and develop
its products. Therefore, the appearance and techni-
cal design of the appliance are subject to changes,
as long as they are in the interest of progress.
The content of these instructions is for information
purposes only. It can be changed at any time wit-
hout prior notice and does not constitute any obli-
gation on the part of the trademark’s owner. The
latter assumes no responsibility or liability for
errors or inaccuracies, which may be included in
these operating instructions.
Storage of the packaging
We strongly recommend that you keep the original
packaging in case you need to transport the equip-
ment again at a later date. Transport damages are
mainly caused by improper packaging of the HiFi-
devices. Because the original packaging fits the
equipment accurately it will reduce the risk of
damage if transport is necessary.
Explanation of the symbols
The lightening bolt tells you that dange-
rous voltages are present in the applian-
ce, which can cause an electric shock.
This symbol brings your attention to par-
ticularly important information regarding
operation and maintenance.
This symbol identifies useful information
and advice about how to handle the
appliance.

Vincent
2322
Vincent
INCLUDED IN DELIVERY
DESCRIPTION OF THE APPLIANCE
Please check the contents of the packaging, which in addition to the
appliance should contain the following accessories:
• 1 power cable
• 1 cable for the POWER CONTROL
• this manual
Although Vincent also manufactures long-lasting
and high-class components for multi-channel
audio units and home cinemas, Vincent’s devel-
opers feel especially dedicated to the stereo tradi-
tion. In this segment in particular, the progress in
sound that a separation into preamplifiers and
main amplifiers brings is apparent. We think that
it is precisely the use of all-too price-conscious
design in preamplifiers and main amplifiers that
undermines these efforts with lower sound quality
resulting from compromises. For this reason
Vincent does not manufacture “entry level models”
for stereo preamplifiers and stereo main ampli-
fiers. This also makes sense because, irrespective
of any development in the audio market and irre-
spective of what kind of audio system is to be
built, there is one category of devices whose com-
ponents can continue to be used in any system put
together in the future: the main amplifiers! That is
because it doesn't matter what the data media or
data formats of the future are, the sound will
always have to find its way to the loudspeaker.
SP-995 is a versatile mono power amplifier from
Vincent’s solidLine. Its circuitry is fully symmetrical,
using 16 SANKEN field effect transistors (FET). It
is characterized by the ability to switch between
amplifier modes “Class A” and “Class AB”. In
1. CLASS A: amplifier circuitry mode
This button toggles between Class A and Class
AB modes. Helpful, if the warming of the unit
during better sounding Class A mode is to be
avoided.
2. POWER: mains switch
This button turns the unit on and into standby
mode. If a cable is connected to the “POWER
CONTROL” connector panel (7), the connected
breaker signal determines if the unit is switched
on or in standby mode and the “POWER” button
is inoperable.
Class A mode an especially clean characteristic
transmission curve leaves no chance for distorti-
ons, at the same time the input power of the ampli-
fier is without signal (or at low input signals) much
higher than in Class AB mode. This power amplifier
can be toggled between both modes at any time.
The result of extensive development and strict com-
ponent selection is a power amplifier not only with
little sound competition, but never losing control
by overabundant power reserves in the various
connection alternatives in combination with all
speakers. By featuring RCA as well as XLR inputs
the amplifier can also be controlled symmetrically.
With the alternative to toggle between both inputs
it is possible to integrate this amplifier in two
systems simultaneously. The highest manufacturing
quality and excellent value for money can be
taken for granted. A further characteristic of this
unit is the “POWER CONTROL”, allowing it to
respond to turn-on and turn-off signals.
A stereo preamplifier (SA-93Plus) or a multi-channel
decoder preamplifier (SAV-C series) can be used
alongside it. In combination with CD players, DVD
players, tuners, hifi furniture, loudspeakers and loud-
speaker cables from the Vincent range, the most
various, perfectly harmonised systems can be built
with the use of this stereo output amplifier.
FRONT VIEW
1 3 2 4
3. POWER indicator LED
This LED is illuminated while after switching on the
tubes are being warmed up.
4. XLR IN: push button for the
type of input connection
Here is selected, which of the two amplifier inputs
at the rear of the unit, RCA or XLR (6) is used.

Vincent
2524
Vincent
5. SPEAKERS: Loudspeaker terminals
At these output sockets with threaded terminals
one or two loudspeakers can be connected.
Speaker cable with 4 mm banana plugs can be
used. Please take note of the information given in
the section “Installation”, if two loudspeakers will
be connected to the amplifier.
6. LINE IN:
Input for preamplified mono audio signal
One connector of this input must be connected
with the output connector of the preamplifier for
the desired channel. For example, connected with
“PRE OUT R”, if the SP-995 is to be used for the
loudspeaker of the right-hand stereo channel.
Only one of the two input connectors can be used
at any time. The setting “XLR IN” (4) must have
been chosen correctly. Do not connect any line
level sources!
7. POWER CONTROL: ON/OFF control
These jack connectors (3.5 mm) receive and for-
ward the signal for the standby control (12V
Trigger). As soon as a “POWER CONTROL” con-
nection is made at the “POWER CONTROL” con-
nector panel only the connected breaker signal
determines if the SP-995 is turned on or in stand-
by mode. The button “POWER”(2) on the front
panel is inoperable.
8. AC power connector and fuse holder
To establish the power supply, connect the plugs
of the power cable to the device and to the AC
wall outlet. The small plastic housing beneath the
plug opening holds the fuse. Refer to the security
precautions.
REAR VIEW
7
65 5
8
Protective caps
Prior to the first installation the protective plastic
caps must be removed from all the connections
used at the rear of the unit.
RCA connections
Contacting the middle pin of the RCA plugs with
the outer ring of the RCA chassis jack may lead to
damages to the main amplifier if it is switched on!
To avoid this hazard, connect or disconnect only
in switched-off state and more than one minute
after deactivating!
Speaker cable connections
The use of ready-made loudspeaker cables is recom-
mended instead of connecting the cable’s central
wire (strand) directly to the terminals. Banana plugs
or cable lugs ensure high security from short-circuits
and damage to loudspeakers or amplifier.
Ensure that bare loudspeaker wires are never able
to come into contact with each other or with the
metal on the back of the housing.
Make sure that the positive and negative loud-
speaker wires are connected correctly. You will
notice a reduced sound quality if the connections
are the wrong way round.
Only use loudspeakers with a nominal impedance
of at least 4Ω.
XLR connections
Please note that European and US-American XLR
signal assignments for the connector pins are dif-
ferent. This Vincent preamplifier uses the European
system following the standard AES14-1992. The
cable structure is the same in any case. As long as
both the preamplifier and the power amplifier
satisfy the same standard, the signal connection is
INSTALLATION
Set up the cable links in a sequence as follows. Connect the power cable between device
and power supply only after all other connections have been made.
DURING INSTALLATION PLEASE OBSERVE
THE FOLLOWING ADVICE:
correct. This is always the case if both units were
made by Vincent. If two units from different stan-
dards are connected, this inverts the signal. In this
case the signal assignment on one side of the con-
nection has to be changed. Your audio specialist
dealer will support you with this.
Cable connections
Make sure that all plugs fit tightly. Inadequate con-
nections can cause noise interference, failures and
malfunctions.
To make the most of the components’ sound poten-
tial, only high quality loudspeakers and connecting
cables, for example Vincent cables, should be
used. Your local stockist will be glad to advise you
about this.
- wrong - - correct -
1. USA System (Pin 2 = COLD, Pin 3 = HOT)
2 1
3
HOT
GND
COLD
2. Europäisches System (Pin 2 = HOT, Pin 3 = COLD)
2 1
3
HOT
GND
COLD
US System
European System
1 2
OU
OUTPUT

Vincent
2726
Vincent
CONNECTING THE PREAMPLIFIER
This main amplifier is equipped with a mono audio input “LINE IN” (6) on which the unit awaits the pream-
plified signal of an audio channel (for example “PRE OUT R” or “Front R”). This is the audio information that
the SP-995 provides for one or two loudspeakers. This audio input is equipped with two connectors with
Please note:
No source with a standard line level signal (“LINE OUT”) must be connected to this input. It is only
intended for preamplified signals (e.g. “PRE OUT”).
which the preamplifier can be connected as desired by means of either the RCA or XLR connection on the
SP-995. If your preamplifier offers both options, XLR is preferable. Only one of the two connectors may be
used at any given time. The setting of the switch “XLR/RCA” determines which connector is currently used as
the input. If the preamplifier is connected with an RCA cable, then the setting “XLR IN” (4) must be switched
off (LED is not lit). If the preamplifier is connected with an XLR cable, then the setting “XLR IN” must be swit-
ched on (LED is lit).
Connect the selected audio input connector to the output connector (“PRE OUTPUT” or “OUTPUT”) of a pre-
amplifier. If the SP-995 is to supply one channel of a stereo system, connect the input connector of the SP-
995 with a preamplifier output socket that is usually labelled “PRE OUT R” or “PRE OUT L”.
Summarizing, you will use an RCA connection and/or an XLR connection:
Both “LINE IN” inputs can be connected to preamplifiers at the same time and in this way it is possible to
connect two preamplifiers simultaneously and toggle between the desired “LINE IN” modes. Ensure the
volume of the respective preamplifier is not set too high before switching on.
CONNECTIONS FOR THE STANDBY CONTROL
(POWER CONTROL)
Many AV-Systems consist of a multitude of individual components. To avoid the necessity of switching them on
and off before and after every use, many manufacturers have equipped their devices with what is known as
“POWER CONTROL” circuit or “TRIGGER”. This kind of remote-controlled standby circuit is used primarily for
preamplifier and power amplifiers. Particularly for preamplifiers and main amplifiers this kind of remote stand-
by control is utilized, as power amplifiers are often placed far from other devices near the speakers. To employ
these functions, direct or indirect cable connections must be made between the preamplifier (or integrated
amplifier) and all the devices which support this function. The “POWER CONTROL” function operates in such
a way that each switching on or off of one device in the system (usually the preamplifier) automatically brings
about the switching on or off of all the connected devices which support this function. Please keep in mind that
all devices which respond to the power control are not disconnected from the mains network when switched
off. They are set to a standby state instead. For connecting cables, two-core cables with 3.5 mm jack plugs
(mono) are used. For each connection between two devices one of those cables is needed.
If the SP-995 main amplifier is to be switched on/off automatically with the preamplifier, then the cable con-
nections for power control described below must be made correctly. If you don't wish to use this function or if
the other components do not support it, all you have to do is leave out these cable connections.
The SP-995 is equipped with one input connector and one output connector for the power control. In this way
it can respond to the signal of a different unit and relay the signal to further components of a system, if requi-
red. All other HiFi components that accept power control signals are equipped with one power control input
as well as one power control output in the same fashion. Thus, in theory it is possible to provide an infinite
number of HiFi components with the power control signal. This approach, to loop a signal through a chain of
components, is commonly referred to as “daisy chaining”.
Connect a “POWER CONTROL OUTPUT” or “TRIGGER OUTPUT” of the controlling or relaying unit with the
SP-995 input (“IN”). If the “POWER CONTROL” cable is connected to this device, the second jack connector
serves to pass on the switch signal (for example to the main amplifier of the other channel) or it remains free.
This main amplifier cannot generate the switching signal for other components on its own!
SP-995
Preamplifier
z.B. 2. SP-995
power control cable
SP-995
Preamplifier
RCA connection
1 2
OUTPUT
BALANCE
SP-995
Preamplifier
XLR connection
1 2
OUTPUT
BALANCE
Many devices which can be controlled by a switching
signal (not preamplifiers or integrated amplifiers),
have two terminals which do not differentiate between
input and output. In this case either of the two can be
selected. Even some devices that transmit the switch
signal (preamplifiers and integrated preamplifiers)
lack this marking. In this case it may be assumed that
they both are signal outputs.
“POWER CONTROL” sockets of preamplifiers or integrated
amplifiers must not be interconnected! All receiving devices must
not be connected to more than one preamplifier or integrated
amplifier (directly or indirectly)!
As soon as a power control cable is connected to one of the
“POWER CONTROL” inputs, this main amplifier cannot be
turned on or off via the “POWER” button, even if the
“POWER CONTROL” cable is only connected to the SP-995
and not to another device on the other side of the cable.
Attention:

Vincent
29
CONNECTION OF THE LOUDSPEAKERS
If a loudspeaker is to be connected with “bi-wiring”, both pairs of loudspeaker clamps may be used at
the same time. In contrast to connection of the loudspeakers with one loudspeaker cable each, with bi-
wiring a suitable loudspeaker is connected via two separate two-wire loudspeaker cables or one four-wire
loudspeaker cable to the pair of output clamps on the main amplifier. This doubles the cabling required
but for many combinations of loudspeakers and amplifiers this improves the sound quality.
Before changing the system to bi-wiring, the metal bridges fitted to the loudspeaker’s double connector in
normal operation must be removed. Only loudspeakers with these bi-wiring terminals are suitable. Filtering
of the entire frequency range occurs in the now separated loudspeaker crossover networks. One cable is
to be connected to the loudspeaker’s sockets provided for the higher frequencies (treble) and the other with
the ones for the lower frequencies (bass) for each loudspeaker. Make sure that the polarity is correct. Your
specialist dealer will provide you with advice and assistance.
If you are using ready made loudspeaker cables with 4 mm banana plugs, all you need to do is connect
the two plugs on each loudspeaker cable end to the two associated speaker connectors. Turn the connec-
tor screws clockwise to fasten them.
If you want to use speaker cables equipped with spade lug connectors, every connector screw must be
opened by turning counterclockwise. After that, the lug must be moved under the screw head. Then, turn
the screw clockwise to fasten the lug to the connector. To avoid damages to the amplifier, make sure the
connection is tight and no bare metal from the cable lug connector makes contact with the rear panel or
with another terminal.
loudspeaker
speaker cable
SP-995
28
Vincent
CONNECTION OF THE LOUDSPEAKERS
You can connect one or two loudspeakers the usual way (via a 2-core speaker cable) to the power ampli-
fier SP-995. For each speaker the unit provides two speaker terminals (5)(positive + and negative -), each
of which is connected to a pair of 2-core speaker cables. Both terminal pairs (the two upper connectors
and the two lower connectors) are parallel and receive the same mono signal. At the loudspeaker con-
nection terminal there are similar connector screws or connectors. There, the polarity of each screw (+ or
-) can be identified as well and the other side of the speaker cable associated with this loudspeaker must
be attached. Make sure only connector screws of the same polarity will be connected by each speaker
cable wire: a knob marked “+” in the amplifier's terminal must be connected with a speaker's connector
screw marked “+” as well. SP-995 can only process the signal of one individual channel, for further chan-
nel(s) (mostly L or R, but sometimes CENTER etc.) additional main amplifiers are needed. The diagram
shows the connections for one speaker.
If every speaker is connected in a conventional way (a two core speaker cable for each loudspeaker) and
you own loudspeakers that are equipped with Bi-Wiring terminals (four connector screws) you have to
make sure that the metal brackets (contact pieces consisting of small metal plates or short pieces of cable
which are supplied with the speakers) are applied to the terminal and that each one connects the two
knobs of the same polarity (e.g. both connectors marked “+”). The upper connector screw labelled “+”
at the amplifier's backside must be connected to one of the bridged, labelled “+” connectors of the loud-
speaker. Accordingly, the upper connector screw labelled “-” at the amplifier's backside must be connec-
ted to one of the bridged, labelled “-” connectors of the loudspeaker.
If a second loudspeaker is to be connected, then the clamps in the bottom row of the output terminals
“SPEAKER” are connected in a similar fashion to the additional loudspeaker. However, this is only per-
mitted if both loudspeakers have a nominal impedance of at least 8Ω!
You have the alternative to connect one speaker in bi-wiring.
Check that the electricity supply to your home is appropriate to the device. The required voltage and fre-
quency can be read on the back of the device beside the socket for the mains. If the electricity supply is
appropriate, push the inlet connector of the supplied mains cable firmly into socket for the mains on the
back of the device (15). Connect the other end of the mains cable to a mains socket.
CONNECTION OF THE POWER CABLE
loudspeaker
speaker cable
SP-995

Vincent
3130
Vincent
OPERATING THE APPLIANCE
Operation Button(s) Description
Switch on and off POWER (2)
The amplifier is switched on and off using this button at the front panel.
That is not possible, if a cable is plugged into one of the jack sockets
“POWER CONTROL” (7) at the rear panel of the appliance. In this case,
the SP-995 reacts only to the power control signal via this cable, and the
push-button “POWER” has no function. When switched off the device is
not internally separated from the AC power. As a precaution, before swit-
ching on, the volume setting of the preamplifier should be reduced. After
switching on, the LED on the front panel is blinking for about five seconds.
In this time a protection circuit mutes the loudspeakers and thus prevents
switching noise.
Select an input
XLR IN (4)
Here you can select if the power amplifier is provided with the preamplifed
input signal at the XLR or the RCA connectors at the rear of the unit. If set
to “XLR IN” (LED on), the SP-995 cannot process a signal connected to the
RCA connector, but expects the signal via the XLR connector.
Select amplifier mode
CLASS A (1)
This button toggles between Class A and Class AB modes. In this way you
can switch from the better sounding Class A mode to the energy-saving
Class AB mode with less waste heat, for instance for sound reproduction
for a fête, where absolute high fidelity is not always necessary.
CONNECTION OF THE LOUDSPEAKERS
If no connector is to be used, remove approximately 1 cm length of insulation from each end of the spea-
ker wire. Twist the braid in order to avoid short circuits. Turn the fastener on the loudspeaker terminal coun-
terclockwise to loosen it and introduce the bare wire end into the exposed connector hole. Then turn the
fastener clockwise so that the wire is firmly clamped. Make sure the connection is pretty tight.
Attention:
If you intend to connect two speakers, both loudspeakers must have a nominal impedance of at least 8Ω.
If only one speaker is used, every type of loudspeakers with a minimal nominal impedance of 4Ωcan
be utilised.
Consider correct polarity, the positive contact is mostly marked red or with “+”. The side of the speaker
cable that has to be connected with the positive socket has a marking.

Vincent
3332
Vincent
SEARCH FOR ERRORS
Symptom Possible Cause Countermeasure
Unit does not work
after pressing the
power button
Mains cable is not connected to a suitable
mains wall outlet.
Mains cable has not been firmly inserted into
wall power socket and the device’s socket
(8). Otherwise it may be defective.
A cable is connected to “POWER CON-
TROL” at the rear of the unit. In this case the
“POWER” (2) button is inoperable.
Unit fuse or unit is defective.
Connect to a functioning socket using a suit-
able mains voltage.
Check the power cable. If necessary,
exchange it with a suitable mains cable and
push its plug firmly into wall socket and the
device's power connector.
Disconnect the “POWER CONTROL” cable
or turn on the unit outputting the signal.
Contact your dealer.
No sound, appliance
is switched on (the
LED (3) on the front
of the device is lit)
The audio source currently selected at the
preamplifier is giving no signal.
The output of the source device is not connec-
ted or is wrongly connected e.g. not connec-
ted to the selected input channel terminal of
the preamplifier.
Wrong input channel has been selected at
the preamplifier.
Volume setting of the preamplifier is set too low.
The preamplifier has been muted (MUTE-
Function).
Output of the preamplifier not connected or
incorrectly connected to the input connector
of the SP-995.
The setting of the toggle switch “XLR IN” (4)
on the front panel is not correct.
The speaker cable is not properly connected to
the main amplifier's terminals (5) or is defective.
Switch on the source unit and begin play-
back.
Correct the connection.
Set the preamplifier to the input that your
desired source is connected to.
Carefully increase the volume of the preamplifier.
Deactivate the MUTE function at the preampli-
fier after, as a precaution, reducing the volu-
me level.
Correct the connection to the preamplifier.
Set the selector to the correct input.
Check and tighten the speaker cables at the
main amplifier and the speakers.
Poor sound quality The cable connections are not tight, the con-
nectors are dirty or a cable is defective.
A record player has been connected to a line
level input of the preamplifier without using a
phono preamplifier.
An audio source with standard line level out-
put (example: CD player) is connected to the
power amplifier direct input “LINE IN” (6).
Check the cables and cable connections.
Interconnect a phono preamplifier.
Do not connect line level audio sources at the
inputs “LINE IN” (6).
Humming low frequen-
cy noise is audible,
even as no audio sour-
ce is playing back
See section “Net frequency noise” in the
chapter “Tips”.
See section “Net frequency noise” in the
chapter “Tips”.
Burn in/ Warm up
Your audio components need a certain time
period until they reach maximum performance.
The duration of this “warm up” time is very diffe-
rent for the various elements of your audio system.
Higher and homogeneous sound quality is achie-
ved while keeping the device switched on.
Your audio specialist dealer has enough experi-
ence to give you more information.
Net frequency noise
Some audio source devices may in combination
with the amplifier cause a humming noise at power
line frequency audible from your speakers. Usually,
its volume varies with the volume setting of the
amplifier. This is no sign of a defect or fault of your
audio products but has to be eliminated.
Generally, every wall-powered device connected
to the ground wire of the power plug can cause this
problem when connected to the amplifier.
Experience shows that this problem is mainly cau-
sed by antenna-connected components (as TV-sets
or Tuners), personal computers, electrostatic loud-
speakers, subwoofers, record players or headpho-
TIPS
ne amplifiers that are connected to the audio
inputs of the amplifier. Another possible reason for
humming noise is electromagnetic interference of
other components’ power supplies with pick-up-
systems of record players (change the place of the
record player for a test).
In most electric devices the ground potentials of all
signals are connected to each other at one central
point, where they have one common connection.
If the device uses the protective conductor of the
wall outlet, the corresponding wire of the line cord
is connected intractably to the metal housing of
the device. This is the mostly the point where the
central grounding point is attached to. By doing
this the housing is able to shield all signals from
external radiated noise. Some main amplifiers are
equipped with a “Ground Lift”-switch. If it is acti-
vated, ground potential of the chassis and the pro-
tective ground wire are being separated from the
central signal ground point. The protective ground
wire keeps its function. Sometimes this helps pre-
vent noise caused by errors in grounding.
If the problem occurs and cannot be solved by
yourself your audio specialist dealer will help you.

Vincent
3534
Vincent
Input sensitivity
Term for the smallest average (RMS) input voltage
which causes the maximum output power at the
maximum volume setting on the amplifier.
Examples: 100 mV to 500 mV (Millivolts) on high
level inputs, 2 mV to 5 mV on the phono MM input
or 0.1 mV to 0.5 mV on the phono MC input.
dB level
This is a way of describing any physical quantity;
it is a common measurement for signal voltages
and the volume. It is given in decibels (dB).
Alternating signal voltages below 1V (RMS) are
described as “line level” voltages, which are suit-
able as music signals for amplifier inputs. Inputs
on amplifiers (mostly represented by RCA sockets)
which are designed for signals on the CD player,
tape recorder, DVD player etc. are also referred to
as “line level inputs” or “high-level inputs”. Thos
signal inputs must not be confused with inputs that
accept preamplified signals.
RCA
RCA is the American name for a type of coaxial
connectors and sockets, originally the abbreviati-
on for “Radio Corporation of America”, the name
of a United States company. Both the plug and
cable consist of a rod-shaped inner lead and a
cylindrical-shaped outer lead. This enables a
mono audio signal or a video signal to be trans-
mitted. Compared to the XLR plug connector, this
type of connection is also called “unbalanced
signal connection”.
XLR
Also: “Symmetrical Connection” or “balanced”. A
plug-and-socket connection for audio devices. It is
round (with approx. 1.5 cm in diameter) and
mostly has 3 contacts/pins. XLR is an alternative
connection to RCA used to transmit NF-Signals in
professional audio equipment. The advantage is
one additional transmission path for the same but
phase inverted signal. If the receiving device can
process this, all inducted noise received in the
cable screen can be eliminated. The signal volta-
ge level used for this type of transfer is higher, so
it is a more robust less sensitive signal path.
GLOSSARY
Frequency response: 20 Hz - 20 kHz ±0.5 dB
Nominal Output Power per channel at 8Ω(Class A/AB): 100 W (continuous)
Nominal Output Power per channel at 4Ω: 200 W (continuous)
Input sensitivity: 800 mV
Total Harmonic Distortion: < 0.1% (20Hz – 20kHz, 8Ω,
at nominal output power)
Signal to Noise Ratio: > 90 dB
Input Impedance: 47 kΩ
AC power connection type: 220V – 240V/50 Hz (max. 300W)
Inputs: 1x RCA Main Input mono,
1x XLR Main Input mono,
1x POWER CONTROL (3.5 mm jack)
Outputs: connectors for up to 2 loudspeakers,
1x POWER CONTROL (3.5 mm jack)
Dimensions (W x H x D): 430 x 150 x 435 mm
Weight: 19.5 kg
Colour: black / silver
TECHNICAL SPECIFICATIONS

Vincent
3736
Vincent
CONSIGNES DE SECURITE
La construction de cet appareil a été soumise à des contrôles de
qualité très stricts. Il répond à toutes les normes internationales de
sécurité. Il est cependant nécessaire de lire entièrement les
consignes suivantes et de les appliquer pour éviter tout danger :
Montage de l'appareil
Le site de montage de l'appareil a une
incidence sur le son. Posez l'appareil uniquement
sur une surface appropriée et stable. Pour profiter
pleinement du potentiel sonore de votre système,
nous vous recommandons de placer les appareils
sur des racks Vincent et de ne pas les poser l'un
sur l'autre.
Appareils électroniques usagés
Cet appareil est soumis aux dispositions
fixées dans la directive européenne 2002/96/
CE
. L'identification est fournie sur l'ap
pareil par le
symbole représentant une poubelle rayée.
Pour le consommateur, cela signifie :
Tous les appareils électriques ou électroniques qui
ne sont plus utilisés ne doivent pas être éliminés
avec les déchets ménagers, mais dans les déchet-
teries prévues. Vous éviterez ainsi de polluer l'en-
vironnement et contribuerez à motiver les fabri-
cants dans la production d'appareils à longue
durée de vie ou réutilisables. Pour toute informati-
on complémentaire sur la mise au rebut de l'an-
cien appareil, veuillez vous adresser à votre mai-
rie, au service de déchetterie ou au magasin où
vous l'avez acheté.
Sigle CE
L'appareil répond aux directives UE pour
l'obtention du sigle CE et par conséquent aux exi-
gences concernant les appareils et électroniques
(directives CEM, directives de sécurité et directives
des appareils à basse tension).
Explications/Remarques
Le présent document a été rédigé par
Andreas Böer. Il s'agit d'un article de la société
Sintron Vertriebs GmbH, 76473 Iffezheim qui ne
doit être ni copié, ni distribué dans sa totalité ou en
partie sans accord explicite et écrit.
Nettoyage
Débranchez le connecteur avant de
nettoyer les surfaces extérieures du produit.
Utilisez de préférence un chiffon doux, non pelu-
cheux et humide. Evitez les produits abrasifs, les
solvants, les diluants, les produits chimiques, les
produits à polir et tous les autres nettoyants qui
laissent des traces.
Entretien/Modifications
Tous les moyens d'exploitation raccordés
au secteur du foyer peuvent représenter un danger
pour l'utilisateur en cas d'usage non conforme. Faites
toujours effectuer l'entretien par un personnel qualifié.
Ce produit n'est autorisé que pour être branché que
sur un courant alternatif de 230Volt/50Hz, les prises
de courant de sécurité et destiné à être employé dans
des pièces fermées. La présente garantie ne s'appli-
que si le produit a été modifié par l'acheteur ou le
numéro de série du produit a été modifié ou suppri-
mé. Après une défaillance, faites remplacer le dispo-
sitif de sécurité de l'appareil uniquement par un exem-
plaire de même type et par un spécialiste.
Câble d'alimentation/Branchement
Lorsque vous débranchez l'appareil du secteur, reti-
rez-le en le tenant par la prise, mais jamais en tirant
sur le câble. Lors du montage de l'appareil, assu-
rez-vous que le câble n'est pas écrasé, plié à l'ex-
trême ou endommagé par des arêtes tranchantes.
Ne saisissez pas l'appareil avec les mains mouillés
ou humides. Utilisez le câble fourni ou un autre
câble de Vincent.
Arrêt
Arrêtez chaque fois l'appareil avant de
raccorder ou de retirer d'autres composants ou les
haut-parleurs, de le débrancher du secteur ou de le
raccorder au secteur, si vous ne l'utilisez pas pendant
une longue période ou si vous voulez nettoyer sa sur-
face. Attendez environ une minute avant de brancher
ou de débrancher les jonctions de câble des amplifi-
cateurs, des niveaux maxi et des récepteurs.
Humidité/Chaleur/Vibrations
Le contact d'appareils électriques
avec des liquides, l'humidité, la pluie ou la vapeur
d'eau représente un risque pour les appareils et
leurs utilisateurs et doit donc être absolument évité.
Faites attention à ce qu'aucun liquide ou objet ne
pénètre dans l'appareil (fentes d'aération etc.). Si
cela a été le cas, il doit immédiatement être débran-
ché du secteur et contrôlé par un spécialiste.
N'exposez jamais l'appareil à des températures
élevées (insolation) ou à de fortes vibrations.
Développement de chaleur
Tous les amplificateurs génèrent de la
chaleur de par leur construction. Veillez à respecter
une distance de 5 cm pour que l'air ambiant puisse
circuler (ne pas monter l'appareil dans un placard
fermé). Les orifices d'aération ne doivent pas être
couverts.
Puissance sonore
La puissance sonore maxi supportable est
atteinte largement en-deçà du réglage possible de
l'amplificateur. Agissez avec prudence avec le réglage
du son pour ne pas vous exposer à des dommages
auditifs. Réglez le son sur une valeur moindre avant de
changer de canal d'entrée pour ne pas être exposé
sans le vouloir à une plus forte puissance sonore.
ON
OFF
Ne pas ouvrir l'appareil! Danger de décharge électrique!
Aucune pièce à entretenir par l'utilisateur ne se trouve dans l'appareil.
AUTRES CONSIGNES
Vincent est une marque enregistrée de la société
Sintron Vertriebs GmbH, 76473 Iffezheim.
Vincent travaille en permanence à l'amélioration et
au développement de ses produits. Pour cette rai-
son, des modifications de design et de construction
technique liées au progrès sont possibles.
Le contenu de ces instructions a uniquement un
caractère d'information. Il peut être modifié à tout
moment sans information préalable et n'a pas valeur
d'obligation pour le propriétaire de la marque. Ce
dernier n'assume aucune responsabilité pour les
erreurs ou les imprécisions pouvant y être contenues.
Conservation de l’emballage
Nous vous recommandons vivement de ne pas
jeter l’emballage d’origine de l’appareil afin de
pouvoir le réutiliser pour un éventuel autre trans-
port. Des dommages de transport se produisent
fréquemment sur des appareils Hi-Fi lorsqu’ils sont
emballés dans des emballages non adaptés.
Comme l’emballage d’origine est parfaitement
adapté à l’appareil, le risque de détérioration pen-
dant le transport est fortement réduit.
Explication des symboles graphiques
L'éclair indique que l'appareil peut générer
des tensions dangereuses pouvant provoquer
une décharge électrique.
Ce symbole a pour but d'attirer l'attention
sur les consignes particulièrement importan-
tes concernant la commande et l'entretien.
Ce symbole caractérise des informations et
des consignes utiles concernant la manipu-
lation de l'appareil.

Vincent
3938
Vincent
CONTENU DE LA LIVRAISON
DESCRIPTION DE L'APPAREIL
Veuillez contrôler le contenu de l'emballage. Les accessoires suivants
doivent être joints à l'appareil :
• 1 câble de distribution
• 1 câble avec fiches Jack 3,5 mm
• le présent manuel
Bien que Vincent fabrique aussi pour des installa-
tions audio multicanal et de home cinéma des
composants de qualité supérieure et à longue
durée de vie, les développeurs de Vincent se sen-
tent plus particulièrement engagés dans la stéréo
traditionnelle. C’est particulièrement dans ce seg-
ment, quand on sépare les fonctions préamplifica-
tion et amplification de puissance, que le progrès
en matière de qualité de son est le plus évident.
Nous pensons que la fabrication de préamplifica-
teurs et d’amplificateurs à bas prix oblige à des
compromis ayant forcément une influence négati-
ve sur la qualité du son et qui neutralisent ainsi les
bonnes intentions premières. C’est la raison pour
laquelle, Vincent ne fabrique pas de préamplifica-
teur et d’amplificateur stéréo de « bas de gamme ».
Ce choix est également judicieux, parce qu’indé-
pendamment de tout développement futur du mar-
ché audio et quelle que soit l’installation audio à
construire, il y a une catégorie d’appareils dont
les composants continueront toujours à être utilisés :
c’est l’amplificateur de puissance ! Car quelques
soient les supports de données ou formats de don-
nées de l’avenir, le son devra toujours trouver son
chemin jusqu’au haut-parleur.
Le SP-995 est un amplificateur mono et multifoncti-
onnel de la solidLine de Vincent. Le circuit utilise
totalement 16 transistors FET de SANKEN. Ce qui
fait la spécificité de cet appareil, c’est la possibi-
lité de basculer entre ses deux modes de fonction-
nement : « Classe A » et « Classe AB ». Il existe,
en mode Classe A, un système de transmission
impeccable qui empêche toute distorsion du son.
1. CLASSE A:
Mode d'opération de l’amplificateur
Ce bouton permet de changer le mode de l’am-
plificateur entre Classe A et Classe AB. Très utile
pour éviter l’échauffement plus forte de l'appareil
en mode Classe A, qui est le mode su son le plus
intéressant.
2. POWER: Interrupteur du secteur
Ce bouton permet de démarrer l’appareil et de le
mettre en état de fonctionnement. Lorsqu’un câble
est connecté à l’entrée de la prise de connexion
« POWER CONTROL » (7), le signal de mise en
marche indique si l’appareil est allumé ou en
cours de démarrage. Le bouton « POWER » est
désactivé.
Par ailleurs, la puissance absorbée de l’amplifica-
teur sans signal (ou avec l’émission de petits
signaux d’entrée) est plus élevée qu’en mode
Classe AB. A cet amplificateur, il est possible de
basculer à tout moment entre ces deux modes de
fonctionnement.
Résultat conjugué d’un travail de recherche dis-
pendieux et d’une sélection rigoureuse de ses
composants, cet amplificateur fournit une tonalité
impeccable qui fait de cet appareil un produit
sans rival, doté de réserves de puissances incom-
mensurables qui permettent de ne jamais perdre
le contrôle avec tous les types des haut-parleurs.
En plus, grâce à l’équipement avec raccords d’en-
trée XLR et RCA, l’amplificateur peut également
être connecté de façon symétrique. Le fait qu’il
soit possible de commuter entre les deux raccords
d’entrée permet à l’ampli d’être intégré simultané-
ment dans deux arrangements. Une qualité de
finition supérieure et un excellent rapport prix-per-
formance vont de soi. Une autre particularité de
cet appareil est la fonction de commande du
démarrage « POWER CONTROL » grâce à
laquelle l’appareil peut réagir aux signaux
Marche/Arrêt.
On peut installer à ces côtés un préamplificateur
stéréo (SA-93Plus) ou un préamplificateur déco-
deur multicanal (Série SAV-C). Avec les lecteurs
CD, lecteurs DVD, tuners et meubles HiFi, haut-
parleurs et câbles du programme Vincent, vous
pouvez composer des systèmes parfaitement har-
monieux en utilisant cet amplificateur de puissan-
ce stéréo.
FACADE AVANT
1 3 2 4
3. VOYANT LED
Ce voyant s’allume tant que l'appareil est allumé
et en marche (pas en cours de démarrage).
4. XLR IN:
Commutateur pour le raccord d’entrée
Cette commande vous permet de choisir entre les
deux raccords d’entrée de l’amplificateur à l’arriè-
re de l’appareil (RCA ou XLR) celui que vous allez
utiliser.
Table of contents
Languages:
Other VINCENT Amplifier manuals

VINCENT
VINCENT SA-93 PLUS User manual

VINCENT
VINCENT SP-998 User manual

VINCENT
VINCENT SP-332 User manual

VINCENT
VINCENT SV-129 User manual

VINCENT
VINCENT SA-94 User manual

VINCENT
VINCENT SP-331 User manual

VINCENT
VINCENT SV-237MKII User manual

VINCENT
VINCENT SV-800 User manual

VINCENT
VINCENT KHV-1 User manual

VINCENT
VINCENT KHV-111MK User manual

VINCENT
VINCENT SP-996 User manual

VINCENT
VINCENT SAV-C1 User manual

VINCENT
VINCENT SV-237MK User manual

VINCENT
VINCENT SV-500 User manual

VINCENT
VINCENT SP-994 User manual

VINCENT
VINCENT PHO-111 User manual

VINCENT
VINCENT SV-700 User manual

VINCENT
VINCENT SP-331MK User manual

VINCENT
VINCENT SA-31 User manual

VINCENT
VINCENT SA-32 User manual