STEP 11
STEP 12
⑭
D
D
D×4
G×2
A×8
G
J×8
⑴
⑵
⑶
⑷
A1×10
A2×20
A2
A2
A2
A2
A2
⑯
⑰
⑮
A2
A1
A1
A2
⑲
JJ
JJ
⑱
ASSEMBLY>MANUAL support@vingli.com
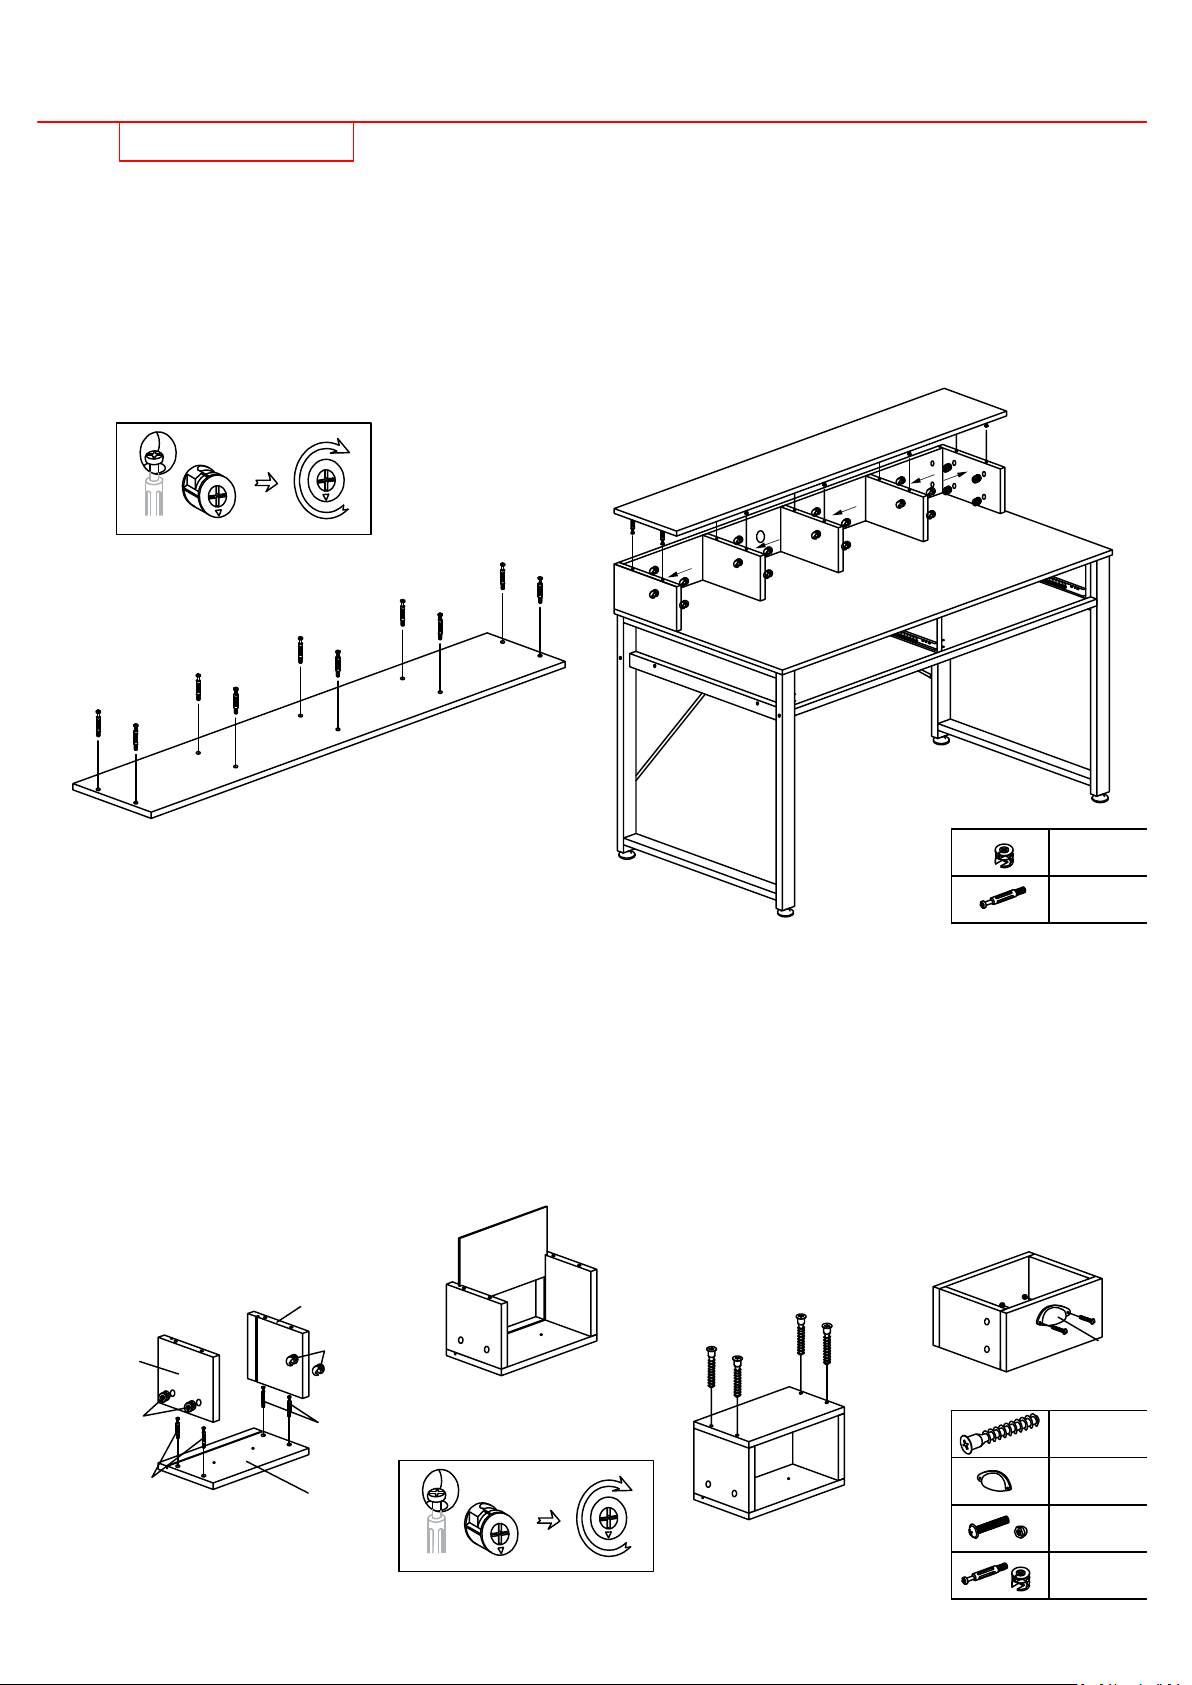
ASSEMBLY STEPS
Screws ten bolts(A1) into hutch top board(14) and make sure the bolts are
tighten enough.Then attach hutch top into part from STEP 10.Insert twenty
cams(A2) to boards(11)(12)(13),make sure the arrows are facing the smaller
holes which the bolts go into,with a screwdriver turn the cams about 1/2 turn
clockwise to lock into place.CAUTION: Do not overtighten cams.
First,screws four bolts(A1) into drawer front boards(15),attach drawer side
boards(16)(17) to boards(15) by aligning the bolts and cams(A).
Second,insert drawer bottoms (19) into grooves. Align groove in drawer back
boards(18) with drawer bottom. Attach drawer back (19) to left and right
drawer boards using four bolts (J).
Then attach drawer handles(G) to drawer using two bolts(D).
Repeat above steps to assemble second hutch drawer.
A2
A2
A2
A2
A2
⑭