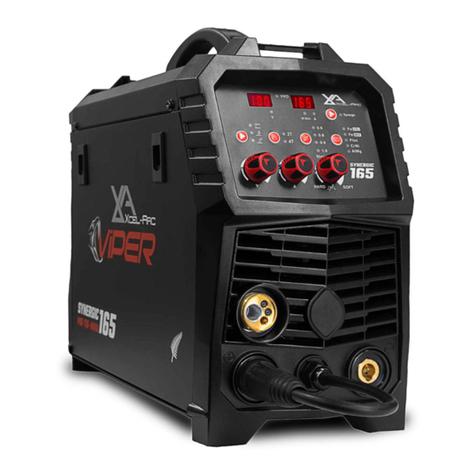
Viper Xcel-Arc User manual

Please read and understand this instruction manual carefully
before the installation and operation of this equipment.
© Xcel-Arc 2020
VIPER 120 SYNERGIC
Operating Manual | XA-MIG120V
YEA
R
MACHINE
WARRANTY
1
1
YEAR
MACHINE
WARRANTY

Thank you for your purchase of your VIPER Welding Machine.
We are proud of our range of plasma cutting and welding equipment that has a proven track record of innovation, performance and reliability.
Our product range represents the latest developments in Inverter technology put together by our professional team of highly skilled engineers. The
expertise gained from our long involvement with inverter technology has proven to be invaluable towards the evolution and future development of our
equipment range. This experience gives us the inside knowledge on what the arc characteristics, performance and interface between man and machine
should be.
Within our team are specialist welders that have a proven history of welding knowledge and expertise, giving vital input towards ensuring that our
machines deliver control and performance to the utmost professional level.
We employ an expert team of professional sales, marketing and technical personnel that provide us with market trends, market feedback and customer
Xcel-Arc welders and plasma cutters are manufactured to be compliant with - AS/NZ 60974-1, guaranteeing you electrical safety and performance.
WARRANTY
• 1 Year from date of purchase.
•
• This Warranty does not cover freight or goods that have been interfered with.
• All goods in question must be repaired by an authorised repair agent as appointed by this company.
• Warranty does not cover abuse, misuse, accident, theft, general wear and tear.
• New product will not be supplied unless ESSETI New Zealand Limited has inspected product returned for warranty and agrees to replace product.
• Product will only be replaced if repair is not possible
• Please view full Warranty term and conditions supplied with machine or at www.XcelArc.nz/warranty-terms/ or at the back of this manual.
ATTENTION! - CHECK FOR GAS LEAKAGE
At initial set up and at regular intervals we recommend to check for gas leakage
Recommended procedure is as follows:
1. Connect the regulator and gas hose assembly and tighten all connectors and clamps.
2. Slowly open the cylinder valve.
3.
4. Close the cylinder valve and pay attention to the needle indicator of the contents pressure gauge on the regulator, if the needle drops away towards
zero there is a gas leak. Sometimes a gas leak can be slow and to identify it will require leaving the gas pressure in the regulator and line for an
after a minimum of 15 minutes.
5. If there is a gas loss then check all connectors and clamps for leakage by brushing or spraying with soapy water, bubbles will appear at the leakage
point.
6.
IMPORTANT! - We strongly recommend that you check for gas leaks prior to operation
of your machine. We recommend that you close the cylinder valve when the machine is
not in use.
Esseti NZ Ltd, authorised representatives or agents of Esseti NZ Ltd will not be liable or
responsible for the loss of any gas.
2
WARRANTY

REGISTER YOUR MACHINE ONLINE TO RECEIVE AN
ADDITIONAL 6 MONTHS ON YOUR WARRANTY
Visit XcelArc.nz/warranty-registration/ to register your machine.
WARRANTY 2
SAFETY 4
7
8
9
11
13
14
20
21
22
23
24
3
CONTENTS

Welding and cutting equipment can be dangerous to both the operator and people in or near the surrounding working area, if the equipment is not
correctly operated. Equipment must only be used under the strict and comprehensive observance of all relevant safety regulations.
Read and understand this instruction manual carefully before the installation and operation of this equipment.
Machine Operating Safety
•
•
contact with the work piece.
•
Electric shock: It can kill. Touching live electrical parts can cause fatal shocks or severe burns. The electrode and work circuit is
installed or improperly grounded equipment is dangerous.
• Connect the primary input cable according to Australian and New Zealand standards and regulations.
• Avoid all contact with live electrical parts of the welding/cutting circuit, electrodes and wires with bare hands.
• The operator must wear dry welding gloves while he/she performs the welding/cutting task.
• The operator should keep the work piece insulated from himself/herself.
• Keep cords dry, free of oil and grease, and protected from hot metal and sparks.
• Frequently inspect input power cable for wear and tear, replace the cable immediately if damaged, bare wiring is dangerous and can
kill.
•
•
•
Fumes and gases are dangerous. Smoke and gas generated whilst welding or cutting can be harmful to people’s health. Welding
• Keep the working area well ventilated, use fume extraction or ventilation to remove welding/cutting fumes and gases.
•
•
•
form highly toxic and irritating gases.
•
not weld/cut these materials unless the area is very well ventilated, and or wearing an air supplied respirator.
Arc rays: harmful to people’s eyes and skin. Arc rays from the welding/cutting process produce intense visible and invisible ultraviolet
and infrared rays that can burn eyes and skin.
welding/cutting operation is performed.
•
4
SAFETY

Fire hazard. Welding/cutting on closed containers, such as tanks,drums, or pipes, can cause them to explode. Flying sparks from the
•
•
•
•
Gas Cylinders.
•
• Insure cylinders are held secure and upright to prevent tipping or falling over.
• Never allow the welding/cutting electrode or earth clamp to touch the gas cylinder, do not drape welding cables over the cylinder.
• Never weld/cut on a pressurised gas cylinder, it will explode and kill you.
• Open the cylinder valve slowly and turn your face away from the cylinder outlet valve and gas regulator.
Gas build up.
gases use in welding/cutting are invisible and odourless.
• Shut off shielding gas supply when not in use.
•
Electronic magnetic elds.
•
•
cutting or heating operation.
Noise can damage hearing. Noise from some processes or equipment can damage hearing.
• Wear approved ear protection if noise level is high.
Hot parts. Items being welded/cut generate and hold high heat and can cause severe burns.
and clothing to handle hot parts and prevent burns.
5
SAFETY

CAUTION
1. Working Environment.
i.
ii.
should be maintained within -10°C to +40°C.
iii. Keep this equipment 30cm distant from the wall.
iv. Ensure the working environment is well ventilated.
2. Safety Tips.
i. Ventilation
This equipment is small-sized, compact in structure, and of excellent performance in amperage output. The fan is used to dissipate heat
importance for the normal performance and service life of this equipment.
ii. Thermal Overload protection.
Should the machine be used to an excessive level, or in high temperature environment, poorly ventilated area or if the fan malfunctions the
keep the built-in fan working to bring down the temperature inside the equipment. The machine will be ready for use again when the internal
temperature reaches safe level.
iii. Over-Voltage Supply
compensation, which enables the maintaining of the voltage range within the given range. In case that the voltage of input power supply
amperage exceeds the stipulated value, it is possible to cause damage to the components of this equipment. Please ensure your primary
power supply is correct.
iv.
MAINTENANCE
Exposure to extremely dusty, damp, or corrosive air is damaging to the welding/cutting machine. In order to prevent any possible failure or fault of this welding/
cutting equipment, clean the dust at regular intervals with clean and dry compressed air of required pressure.
Please note that:
representative of the manufacturer.
TROUBLE SHOOTING
Caution:
Shock, please observe all safety notes and precautions detailed in this manual.
6
SAFETY

Features
■
■
- Synergic single knob control
- Excellent welding with COgas
■1 kg Spool size
■Incredibly small size, very portable
■
■Solid case construction
■Thermal overload protection
■
■
■Tolerant to variable power supply
Product Code: XA-MIG120V
Overview
the synergic function of this machine makes it an excellent choice for those users who might be wanting a welding machine for one
a wide range of applications including light fabrication, body repair, farming and whatever else a Kiwi bloke might be working on in his
Technical Data
Power Supply
Rated Input Power 4.56
I
i
as per AS/NZ60974-1 6.0 Amps
as per AS/NZ60974-1
Power factor 0.65
Insulation Class F
Wire Spool Capacity 1 kg
Easy Set Synergic Single Knob Control
230V Single Phase 120 Amp DC MIG Welder
Approved Domestic 10 Amp Plug Power Supply
MIG - 120 Amp DC Inverter Welder
Welds: Steels, Stainless
10 AMP
XA-MIG120V
Standard Package
7
VIPER 120 SYNERGIC FEATURES

1.
2.
3.
4. Positive Output
5. Polarity Cable
6. Negative Output
7.
8. Power Cable
9. Power Switch
10.
11.
12. Wire Feed Assembly
1
7
9
10
1112
2
3
4
6
8
5
8
MACHINE PARTS LAYOUT

(3)
Flux Core wire.
(4) Place wire onto spool holder - (spool retaining nut is
tube into the drive roller.
(5) Feed wire over the drive roller into the outlet guide
tube, Push the wire through approx 150mm.
1 (+)
2 (-)
1.
2.
9
GASLESS MIG INSTALLATION

(11)
to suit work piece.
(6) Close down the top roller bracket and clip the
pressure arm into place. Apply a medium amount of
pressure to the drive roller.
(9) Fit the correct size contact tip over the wire and
fasten tightly into the tip holder.
(7) Remove the gas nozzle and contact tip from the
(10) Fit the gas nozzle to the torch head.
(8) Press and hold the Torch Trigger to feed the wire
down the torch cable through to the torch head.
10
GASLESS MIG INSTALLATION

2 (+)
1 (-)
3
1.
2.
3.
(4)
(5) Place wire onto spool holder - (spool retaining nut is
tube into the drive roller. NOTE: not
suitable to weld Aluminium as it is a Synergic Welding
(6) Feed wire over the drive roller into the outlet guide
tube, Push the wire through approx 150mm.
11
MIG WITH GAS INSTALLATION

(13)
to suit work piece.
(7) Close down the top roller bracket and clip the
pressure arm into place. Apply a medium amount of
pressure to the drive roller
(10) Fit the correct size contact tip over the wire and
fasten tightly into the tip holder.
(8) Remove the gas nozzle and contact tip from the
(11) Fit the gas nozzle to the torch head.
(9) Press and hold the Torch Trigger to feed the wire
down the torch cable through to the torch head.
(12) Carefully open the valve of the gas cylinder, set the
12
MIG WITH GAS INSTALLATION

The correct installation of the wire spool and the wire into the wire feed unit is critical to achieving an even and consistent wire feed. A high percentage
NOTE: VIPER MIG 120 is not suitable to weld Aluminium as it is a Synergic Welding Machine programmed for Solid Mild Steel wire and Flux Cored (Gasless) wires only.
(1) Remove the spool retaining nut.
(4) Snip the wire carefully, be sure to hold the wire to
prevent the spool uncoiling. Carefully feed the wire into
the inlet guide tube of the wire feed unit.
(7) Press and hold the Torch Trigger to feed the wire
down the torch cable through to the torch head.
(2)
pin.
(5) Feed the wire through the drive roller and into the
outlet guide tube of the wire feeder.
(8) A simple check for the correct drive tension is to
bend the end of the wire over hold it about 100mm
from your hand and let it run into your hand, it should
coil round in your hand without stopping and slipping
at the drive rollers, increase the tension if it slips.
(3)
locating pin into the location hole on the spool. Replace
the spool retaining nut tightly
(6) Lock down the top pressure roller and apply
a medium amount of pressure using the tension
(9) The weight and speed of the wire spool turning
creates an inertia that can cause the spool to run on
and the wire loop over the side of the spool and tangle.
If this happens increase the pressure on the tension
spring inside the spool holder assembly using the
13
WIRE INSTALLATION & SET UP GUIDE

1
23
4
5 6
1. MIG Torch - 2. Work Piece - 3. Power Source - 4. Wire Feeder - 5. Wire Spool - 6. Gas
MIG (Metal Inert Gas) Welding
Denition of MIG Welding - MIG
semi-automatic or automatic arc welding process in which a continuous and consumable wire electrode and a shielding gas are fed through a welding
power supply, an electrode wire, and a shielding gas supply. Short circuit transfer is the most common used method whereby the wire electrode is fed
continuously down the welding torch through to and exiting the contact tip. The wire touches the work piece and causes a short circuit the wire heats up
and begins to form a molten bead, the bead separates from the end of the wire and forms a droplet that is transferred into the weld pool. This process is
repeated about 100 times per second, making the arc appear constant to the human eye.
MIG Circuit Diagram
14
MIG WELDING GUIDE

The wire approaches the work piece and
touches the work creating a short circuit
between the wire and the base metal,
because there is no space between the wire
and the base metal there is no arc and current
resistance builds up and the wire becomes
hot and weak and begins to melt
begins to pinch the melting wire forming it
into droplet
Wire heating
Magnetic
eld pinches
wire
Short circuit
The pinch causes the forming droplet to
separate and fall towards the now creating
weld pool.
An arc is created at the separation of the
droplet and the heat and force of the arc
The heat of the arc melts the end of the wire
slightly as it feeds towards the base metal
The wire feed speed overcomes the heat of
the arc and the wire again approaches the
work to short circuit and repeat the cycle.
Droplet
separates
Arc attens
the droplet
Cycle
repeats
MIG (Metal Inert Gas) Welding
Short Circuit Transfer - Short circuit transfer is the most common used method whereby the wire electrode is fed continuously down the welding torch
through to and exiting the contact tip. The wire touches the work piece and causes a short circuit the wire heats up and begins to form a molten bead, the
bead separates from the end of the wire and forms a droplet that is transferred into the weld pool. This process is repeated about 100 times per second,
making the arc appear constant to the human eye.
15
MIG WELDING GUIDE

Basic MIG Welding
Good weld quality and weld profile depends on gun angle, direction of travel, electrode extension (stick out), travel speed, thickness of base
metal, wire feed speed (amperage) and arc voltage. To follow are some basic guides to assist with your setup.
Gun Position - Travel Direction, Work Angle
Push Technique
The wire is located at the leading edge of the weld pool and pushed towards the un-melted work surface. This technique offers a better view of the weld
Perpendicular Technique
generally higher and a deeper penetration is achieved.
Drag Technique
The gun and wire is dragged away from the weld bead. The arc and heat is concentrated on the weld pool, the base metal receives more heat, deeper
10°
Wire pointed ahead of bead Wire pointed back into bead
Travel direction Travel direction Travel direction
(A) Push Technique (B) Gun Perpendicular (C) Drag Technique
10°
penetration
even penetration
more penetration
16
MIG WELDING GUIDE

Angle 5°- 15° Not enough angle Angle more than 20°
Good level of control over the
weld pool, even at weld
Less control over the weld pool
More spatter
Poor control, unstable arc, less
penetration, lots of spatter
Correct angle Not enough angle Too much angle
Good level of control over the
weld pool, even at weld
Less control over the weld pool
more spatter
Poor control, unstable arc, less
penetration, lots of spatter
Normal stick out Too short Too long
Even arc, good penetration
even fusion, good nish
Unstable arc, spatter, over
heat contact tip
Unstable arc, spatter, poor
penetration and fusion
5-10mm
Travel Angle
Travel angle is the right to left angle relative to the direction of welding. A travel angle of 5°- 15° is ideal and produces a good level of control over the
Angle to Work
The work angle is the forward back angle of the gun relative to the work piece.
Stick Out
Stick out is the length of the unmelted wire protruding from the end of the contact tip.
will cause an unstable weld pool, produce spatter and over heat the contact tip. Too long stick out will cause an unstable arc, lack of penetration, lack of
fusion and increase spatter.
17
MIG WELDING GUIDE

Cold lap
Lack of fusion
Lack of joint penetration
Porosity
Large wide bead
Too Slow Travel Speed
Good toe fusion
Good penetration
Good side wall fusion
Even shaped bead
Correct Travel Speed
Spatter
Undercut
Lack of joint penetration
Lack of fusion
Porosity
High narrow bead
Too Fast Travel Speed
Correct Travel Speed
and wetting out of the weld pool producing a weld deposit of good quality.
Too Slow Travel Speed
A too slow travel speed produces a large weld with lack of penetration and fusion. The energy from the arc dwells on top of the weld pool rather than
penetrating the base metal. This produces a wider weld bead with more deposited weld metal per mm than is required resulting in a weld deposit of poor
quality.
Travel Speed
needs to match the amperage and will decrease as the material thickness and amperage increase.
Too Fast Travel Speed
18
MIG WELDING GUIDE

Wire types and sizes
capability of you machine.
As a guide refer to the “Welding Wire Thickness Chart” below.
Gas selection
heated to a molten state will react with the air in the atmosphere, without the protection of the shielding gas the weld produced would contain defects
Argon Co2 Co2
Penetration Pattern for Steel
19
MIG WELDING GUIDE

VIPER 120 SYNERGIC CONTACT TIPS
Part-No Description Material QTY
Ecu QTY10
Ecu QTY10
Ecu QTY10
Ecu QTY10
Ecu QTY10
VIPER 120 SYNERGIC TIP HOLDER
Part-No Description Tip Thread Material QTY
VIPER 120 SYNERGIC GAS NOZZLE
Part-No Description Type Bore Ø Material QTY
Cylindrical 16.0mm Copper
XA1530 Conical Copper
XA1531 Tapered 10.5mm Copper
Copper
XA1533 Spot Weld 16.0mm Copper
VIPER 120 SYNERGIC NOZZLE SPRING
Part-No Description QTY
XA1504 XA15 Nozzle Spring
25.0
Ø 6.0
M6 x 1.0
Bore
Ø 12.5
53.0
Ø 18.0
42.0
M6 x 1.0
M8 x 1.0-L
FRONT END CONSUMABLES
20
XA15 MIG TORCH & SPARES
Table of contents
Other Viper Welding System manuals
Popular Welding System manuals by other brands

Miller
Miller Migmatic 175 owner's manual

Leister
Leister FUSION 3 operating instructions

WIELANDER+SCHILL
WIELANDER+SCHILL Inverta Puls IP6-2 ACT Operation manual

SUNSTONE
SUNSTONE Orion c Series user manual

Chicago Electric
Chicago Electric MIG 170 Owner's manual & safety instructions

ASKAYNAK
ASKAYNAK 201 TIG PFC user manual