• Carefully inspect your work area for possible hazards, such as moist floors, worn-out power cords,
ungrounded power extension cords, and missing safety grounds.
• Operate the device within marked electrical ratings and product usage instructions.
• To ensure that the router and the FRUs function safely and correctly, use the specified cables and
connectors, and make certain they are in good condition.
Prepare for Router Installation
This article provide guidelines and requirements for preparing your site to install the vEdge 100b router.
Site Preparation Guidelines
Efficient operation of your vEdge 100b router requires proper site planning and proper layout of your equipment
rack or wiring closet:
• Ensure that the area around the router is kept free of dust and conductive material.
• Follow appropriate airflow guidelines so that the cooling system functions normally.
• Follow ESD prevention procedures to avoid any damage to the router.
• Install the router in an enclosed, secure area allowing only authorized personnel to access the device.
Environmental Requirements
Install the vEdge 100b router in a dry, clean, temperature-controlled, and well-ventilated environment:
• Maintain ambient airflow for the router to operate normally. The ambient intake air temperature should
be in the range 0°C to 40°C (32°F to 104°F). If the airflow is blocked or if the air intake is too warm,
the router can get overheated.
• Avoid temperature extremes. Ensure that the router is operating at an ambient temperature not more that
40°C (104°F) at sea level. For higher altitudes, a derating of 1.50°C per 1,000 feet applies.
• High humidity conditions can cause moisture to penetrate into the chassis. The device supports 10% to
85% humidity levels, non-condensing.
Rack Requirements
You can mount the vEdge 100b router in a two-post or a four-post rack. Table 1 provides the rack requirements
for the router.
Table 5:
GuidelinesRack Requirement
Use a two-post or a four-post rack that meets the size requirements for the router,
provides bracket holes or hole patterns spaced at 1 U (1.75 in. or 4.45 cm)
increments, and is strong enough to support the weight of the router.
Rack type
Ensure that the holes in the mounting brackets are spaced at 1 U (1.75 in. or 4.45
cm). This allows you to mount the router in any location in the rack.
Mounting brackets
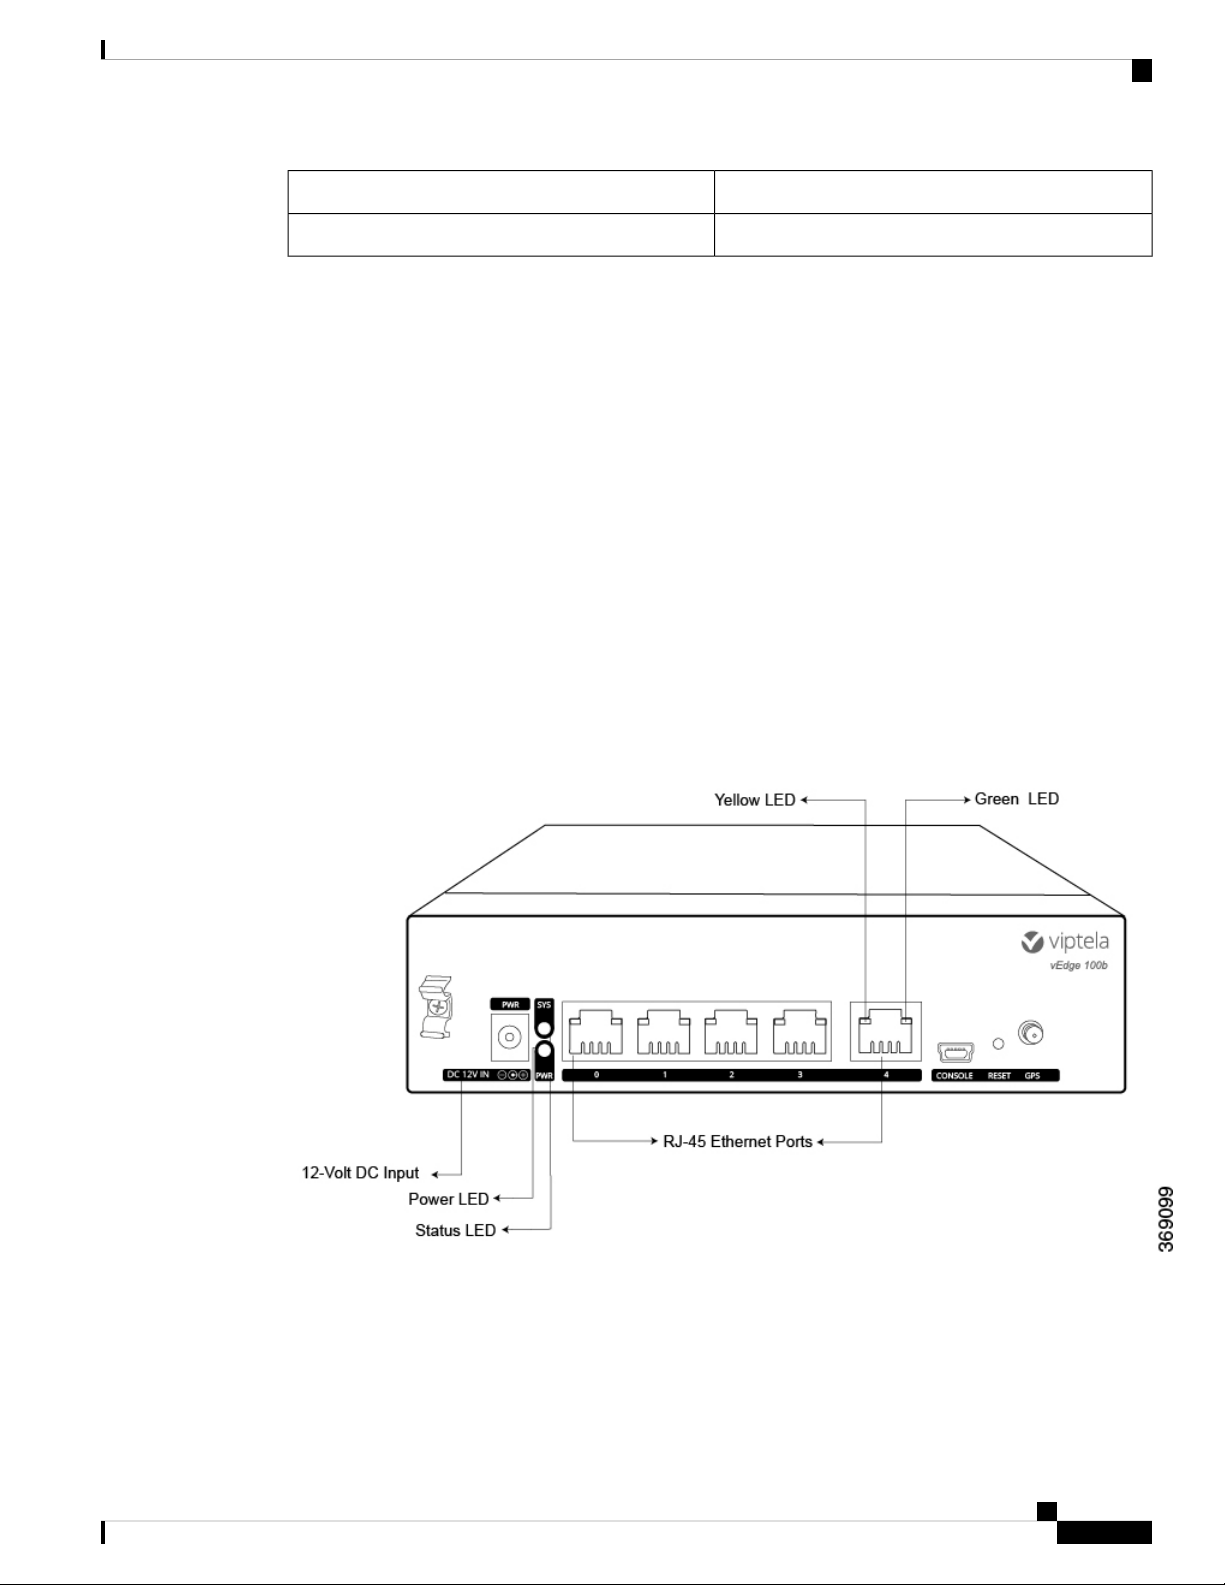
vEdge 100b Router
9
vEdge 100b Router
Prepare for Router Installation