Visart Technologies 10.4 PORTABLE TV with built-in multimedia Card... User manual

OPERATION INSTRUCTIONS
10.4 PORTABLE TV with built-in multimediaCard Player

Check List
1. Introduction
2. Safety Precautions
3. Installation Instructions
3.1 Single Frame
3.2 Double Frame
4. Remote Control Guide
5. Setup Menu
5.1 SETUP MENU- MAIN PAGE
5.2 SETUP MENU- PHOTO
5.3 SETUP MENU- MUSIC
5.4 SETUP MENU- SLIDE SHOW
5.5 SETUP MENU- MOVIE
5.6 SETUP MENU- PREFERENCES PAGE
6. OSD SetupGuide
6.1 AV Mode
6.1.1 VIDEO ADJUST
6.1.2 OSD ADJUST
6.1.3 INPUT SELECT
6.1.4 AUDIO
6.1.5 LANGUAGE SELECT
6.1.6 EXIT
6.2 TV ModeSettings
6.2.1 TV FUNCTION
6.2.2 TV MODE
7. TV Operation
7.1 AUTO CHANNELSEARCH
7.2 CHANNEL SELECTION
7.3 DISPLAY CHANNEL
7.4 CHANNEL RECALL
8.
Specifications
5.7 SETUP MENU- EXIT SETUP
AV Input/Output User Instruction
9. Product
1
1
1-4
1-3
3-4
4-6
6-11
6-7
7
8
8-9
9
9-11
11
11-15
11-13
11-12
12
12-13
13
13
13
14-15
14
15
15-16
15
15
16
16
16
17
Table of Contents
Dear Customer:
Welcome to the splendidPortable TV. Now youmay enjoy new visual experiences
and surprises fromthe marriage of advanced digital technologyand new lifephilosophy.
To fullyapply the product,please read the manual carefully andkeep it forlater reference.

Check List
1)Portable TV (1)
2)TVStand (1)
3)Remote Control (1)
4) AV Cable (1)
5) CATV Cable (1)
6)Headphone (1)
7)Power Supply (1)
8) Warranty Card (1)
9) User Manual(1)
Introduction
10.4 Portable TVsupports:
JPEG picture file.
WMA, MP3 soundfiles.
MPEG1, MPEG2 videofiles.
Background sound playing
13 different pictureplaying Modes.
CF, SM, MS, MSPRO, SD, MMC,IBM MICRODRIVE seven types of memorycards.
AV Input/Output
TV
Remote control support.
Safety Precautions
Please be awareof the following precautions.
1.Handle itcarefully. Placemachine on asoft cloth or surface before installationin order to
prevent for scratches.
2.Spray a littleof cleaner on soft cloth andwipe the panel.
3.Do not blockthe vent to prevent overheating.
4.Never disassemble orperform self-maintenance andrepair, sinceopening or removing
cover plate maycause high-voltage electricshock or otherdangers. Have aqualified
technician perform allproduct maintenance.
Installation Instructions
3.1 SINGLE FRAME
When you openthe box, make sure the followingcomponents are notmissing.
If you haveany questions, please contact the retailer.
- 1 -

- 2 -
Fig. 1
2. Top View(Fig. 2):
Fig. 2
3. Back View(Fig. 3):
Fig. 3
Fig. 4
Input/output Introduction(Fig. 4):
Hanging Hole
Stand
TV
Remote Sensor
1. Front View(Fig. 1):
Two slotsfor CF, SM, MS,MS PRO, SD,MMC, IBM MICRODRIVE: 7 types of memory
cards supports.
WallHanging: can installonto the surfaceof a wall.Table Stand: use the stand to support
the Portable TVfor weight support.
Signal Switch
AVConnector
DC 12V

Fig. 5
4. Button Instructions(Right-hand side)(Fig. 5):
3.2 DOUBLE FRAME
1. Front View(Fig. 6):
Fig. 6
Frame
LCD
Remote Control Sensor
2. Side View(Fig.7):
MENU
lTV cable :Connect CATV cable orTVAntenna Cable toTV terminal.
l: Headphone Input(Sound export),can connect toheadphone.
lAV input: Connectswith AV cable andmatch the cable with the correctcolor input.
lSignal switch: switchAUDIO andVIDEO signal input/output.
lDC12V: Powerinput,install the powercord into the DC12V input.
Power
MODE
Instruction:
lPower: on/off switch.
lMODE: Mode change,can switch TV、MEDIA PLAYER、AV.
lAdd、Subtract: Multifunction support
1.Before selectingany option, press Add andSubtrac buttons forvolume control
2.Under TV, the buttonsare for TVchannel switch.
3.Under OSDmenu, the buttons are for selectingmenu options andadjustments.
lMENU: Highlight OSDmenu.
Add and Subtract
- 3 -

- 4 -
Power
MENU
MODE
Add/Subract
Fig. 7
4. Back View(Fig.8):
Fig. 8
Remote Control Guide
:Headphone Input (Soundexport), can connect to headphone.
lAV input: Connectswith AV cable andmatch the cablewith the correct color input.
lSignal Switch: switchAUDIO and VIDEO signal input/output.
lDC12V: Powerinput,install the powercord into theDC12V input.
lTV cable: ConnectCATVcable or TVAntenna Cableto TV terminal.
Hanging Hole
TV
Two slotsfor CF, SM, MS,MS PRO, SD,MMC, IBM MICRODRIVE: 7 types of memory
cards supports.
Buttons instruction pleasego back to Single FrameAlbum instruction.
3.DigitalAlbum display setup: (Review Single FrameAlbum forinstallation
instruction)
lWall setup:(hang horizontally)Able to hangon the wall
lTable setup:same as the Single FrameAlbum.
DC 12V
AVConnector
Signal Switch

1 POWER Pressit to turn the machine onor off
2 MUSIC Inselection menu, press the“MUSIC”key will selectthe music
files. If donot select any files, then systemwill automatically play
the first musicfile. (Media Player Mode)
3 PHOTO Inselection menu,press the“PHOTO”key will selectthe
picture files. Ifdo not select any files, thenthe system will
automatically play thefirst picture file.(Media Player Mode)
4 MOVIE Inselection menu, press the“MOVIE”key will selectthe movie
files. If donot select any files, then thesystem will automatically
play the firstmovie file. (Media Player Mode)
5 SETUP Pressfor setup menu. Press setup againto exit thesetup menu.
(Media Player Mode)
6 MENU Pressit to setup the System.
7 ZOOM Underthe play selection, if the picturesize does notmatch with the
frame, then usethe “ZOOM”button to enlargethe picture. Press
once for doublethe size, twice for triple thesize, three timesfor
four times thesize, and four times for theoriginal size.After
enlarging the picture,use the“”for surface adjustments.
8 ROTATE Under the playselection, use the “ROTATE”key for picture
rotation. Rotate keyonly works underPHOTO menu.
9 PLAY 1.Play andpause function. (Media Player Mode)
2.When playinga picture and a music atthe same time.Press once
to stop playingthe picture, press twice to stopboth picture and
music playing, andpress three times to restore playing.
11 STOP Under play mode,press on the“STOP”button to stop playing.
(Media Player Mode)
12 MODE SwitchPicture display modes. There are 13different display modes.
10/18 UP/DOWN In OSDmenu, up and down switch.(
13/15 LEFT/RIGHT InOSD menu, leftand right switch.( ), Insetting, press for
increase and decreaseadjustment.
)
1
2
3
4
5
6
7
8
9
10
11
12
13
14
15
16
17
18
19
20
21
22
23
24
POWER
MUSIC
PHOTO
MOVIE
SETUP
MENU
ZOOM
ROTATE
PLAY
UP
STOP
MODE
LEFT
ENTER
RIGHT
MUTE
0
DOWN
VOLUME
VOLUME
NUMBER KEY
REPEAT
DISPLAY
GOTO
- 5 -

14 ENTER Selectan option from a menu.
16 MUTE Mute(Sound off).
19/20 VOLUME Volume control.
17/21 NUMBER Numbers:from 0 to 9.
Under media playselection, can press the number toselect
files, such asMP3, JPEG, WMA,MPEG files.
Under TVmode, use thenumbers for channel selection.
Press Enter forinstant channel change. (Or wait 2seconds
for auto channelchange)
22REPEAT Under mediaplay selection, press REPEATto have MP3,
MPEG or picturefiles repeat its play function.
23DISPLAY Under mediaplay selection, use the DISPLAY key to have
picture and musicto play at the same time(Background
music).
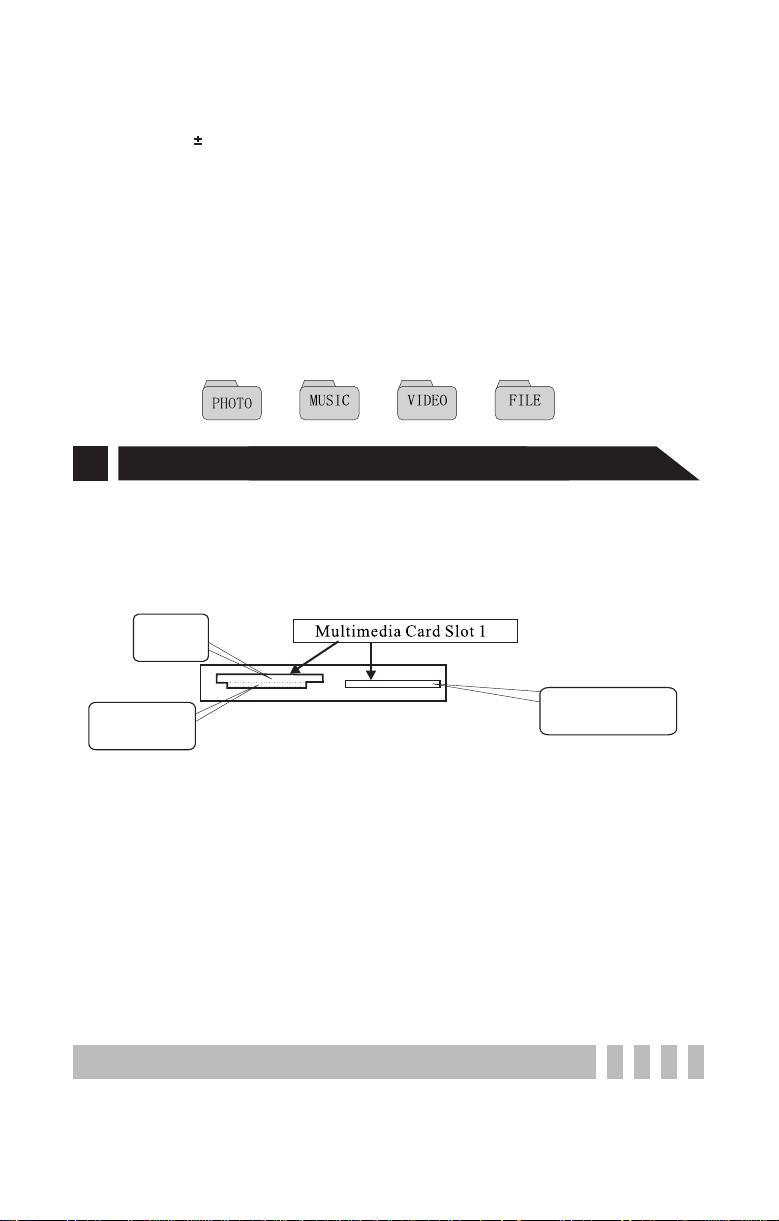
24GOTO InPhoto, music, video,or file, usercan switch between these
4 modes.As shown under the picture below.
5Setup Menu
Fig. 9
Playing multimedia Files
1.Go back toproduct description for instruction on howto insert memorycard onto the
slots.
Reminder:Support CF, SM, MS,MS PRO, SD, MMC, IBM MICRODRIVE: 7 different
types of memorycards.
2.display photo:press PHOTO key,and enter the photo menu. Usenumber keys (1-9)
for photo selectionand press ENTER to select the photo.
3.display music:press MUSIC key, andenter music menu.Controlling instruction isthe
same as above.
4.display movie:press MOVIE key,and enter moviemenu. Controlling instructionis
the same asabove.
5.When playing theabove media, press PLAY to pause andpress again to continue. Press
STOP to stop playing.
6.Background music(Can play musicand photo atthe same time):
1)Under PHOTOmenu display mode,press DISPLAYcan play photoand music at the
same time. Thefirst music andthe first picturewill be played at the sametime.
2)Under MUSICmenu display mode, press DISPLAY and same instructionas above.
3)When musicand photo is playing at thesame time. Press PLAY once to stop playing
photo, twice forboth music and photo, and threeto continue playingboth.
7.For other userinstruction please go to Remote Controlinstruction.
SM
SD、MMC、MS
MS PRO
CF
IBM MICRODRIVE
/2
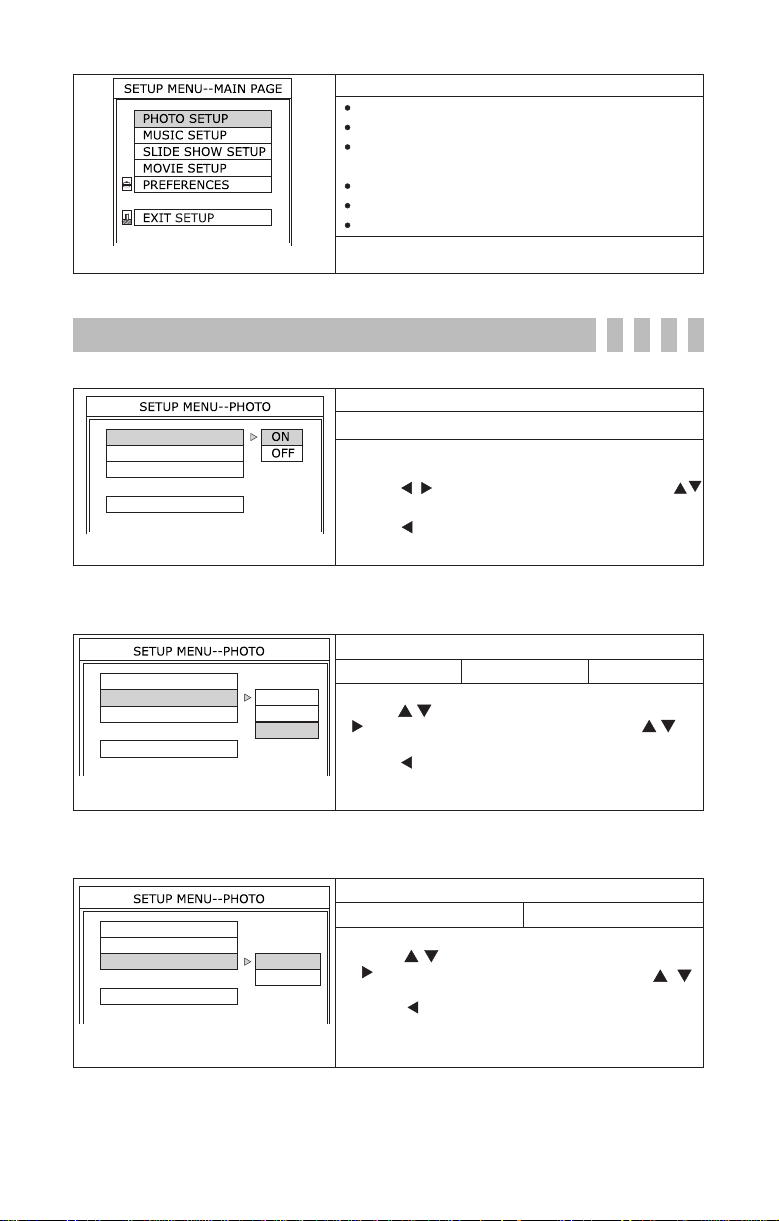
5.1 SETUP MENU-MAIN PAGE
- 6 -

- 7 -
SETUP MENU-MAINPAGE
Press SETUPkey on remotecontrol to open
SETUP MENU.
PHOTO SETUP(Change Photo settings)
MUSIC SETUP(Change Music settings)
SLIDESHOW SETUP(Change Slideshow
settings)
MOVIE SETUP(Change Movie settings)
PREFERENCES (Change Menusettings)
EXIT SETUP(Exit MAIN PAGE)
MAIN PAGE
GENERAL SETUP
5.2 SETUP MENU-PHOTO
PHOTO transition modefunction setup
FAST NORMAL SLOW
1.Enter PHOTOSETUP menu.
2.Press ( 、) to highlightORIENTATION,press
( )to show submenuon the right. Press( 、)to
select desired item.Press (ENTER)to save.
3.Press( ) to return toprevious menu. Select
MAIN PAGE then press(ENTER)to return to
previous menu.
THUMBNAIL DIGEST
TRANSITION MODE
ORIENTATION
MAIN PAGE
TRANSITION MODE
PHOTO-TRANSITION MODE
FAST
NORMAL
SLOW
PHOTO Orientation FunctionSetup
THUMBNAIL DIGEST
TRANSITION MODE
ORIENTATION
MAIN PAGE
ORIENTATION
PHOTO-ORIENTATION
DEFAULTS
IGNORE
DEFAULTS IGNORE
PHOTO ThumbnailDigest Function Setup
1.Enter MAINPAGE.
2.Press ENTER key to entersubmenu PHOTO
3.Press ( , ) tohighlight item to change, press
to highlight yourchoice, press ENTER to save.
4.Press ( )to go back to upper menu. then
highlight MAIN PAGE to goback to previousmenu.
THUMBNAIL DIGEST
TRANSITION MODE
ORIENTATION
MAIN PAGE
SETUP MENU--PHOTO
PHOTO-THUMBNAIL DIGEST
ON: Turn the function on OFF: Turn this function off
1. Enter PHOTOSETUP menu.
2. Press( 、)to highlight ORIENTATION,press
( )to show submenuon the right.Press( 、 )
to select desireditem. Press (ENTER)to save.
3. Press( ) to return to previous menu. Select
MAIN PAGE then press(ENTER)to return to
previous menu.

SETUP MENU--MUSIC
REPEAT MODE
MAIN PAGE
SETUP MENU--MUSIC
MUSIC-REPEATMODE
ONE
ALL
OFF
ONE: Repeat onemusic file.(MP3)
ALL: Repeat allmusic files.
OFF: TurnRepeat function off.
SETUP MENU--SLIDE SHOW
SLIDESHOW MODE
FOLDER REPEAT
INTERVAL TIME
TRANSITION
AUTO START
MAIN PAGE
SLIDESHOW MODE
SLIDE SHOW-SLIDESHOW MODE
MANUAL
AUTO
SLIDE SHOW PlayingFunction Setup
MANUAL: Slide showplays manually.
AUTO: Slide showplays automatically.
SETUP MENU--SLIDE SHOW
SLIDESHOW MODE
FOLDER REPEAT
INTERVAL TIME
TRANSITION
AUTO START
MAIN PAGE
FOLDER REPEAT
SLIDE SHOW-FOLDERREPEAT
ON
OFF
SLIDE SHOW FolderRepeat Function Setup
ON: TurnFolder Repeat function on.
OFF: TurnFolder Repeat function off.
SETUP MENU--SLIDE SHOW
SLIDESHOW MODE
FOLDER REPEAT
INTERVAL TIME
TRANSITION
AUTO START
MAIN PAGE
INTERVAL TIME
SLIDE SHOW-INTERVAL TIME
ONE SECOND
THREE SECONDS
FIVE SECONDS
TEN SECONDS
SLIDE SHOW IntervalTime Setup
ONE SECOND
THREE SECONDS
FIVE SECONDS
TEN SECONDS
5.4 SETUP MENU-SLIDE SHOW
5.3 SETUP MENU-MUSIC
- 8 -
MUSIC Repeat FunctionSetup
Instruction same as above

SETUP MENU--SLIDE SHOW
SLIDESHOW MODE
FOLDER REPEAT
INTERVAL TIME
TRANSITION
AUTO START
MAIN PAGE
TRANSITION
SLIDE SHOW-TRANSITION
SLIDE SHOWTransition functionSetup
FULL SCREEN
FULL SCREEN
TOP->BOTTOM
BOTTOM->TOP
T/B->CENTER
CENTER->T/B
BLIND: T/B
LEFT->RIGHT
RIGHT->LERT
L/R->CENTER
TOP->BOTTOM
BOTTOM->TOP
T/B->CENTER
CENTER->T/B
BLIND:T/B
LEFT->RIGHT
RIGHT->LEFT
L/R->CENTER
From top tobottom
From bottom totop
From top/bottom tocenter
From Center toTop/bottom.
Blinder
From left toright
From right toleft
From left/right tocenter
SETUP MENU--SLIDE SHOW
SLIDESHOW MODE
FOLDER REPEAT
INTERVAL TIME
TRANSITION
AUTO START
MAIN PAGE
AUTO START
SLIDE SHOW-AUTO START
ON
OFF
SLIDE SHOWAuto Start FunctionSetup
ON: TurnAUTO START on.
OFF: TurnAUTO START off.
INTERVAL TIME
REPEAT MODE
MAIN PAGE
INTERVAL TIME
MOVIE-INTERVAL TIME
SETUP MENU--MOVIE
FAST
NORMAL
MOVIE INTERVAL Time Function Setup
FAST
NORMAL
INTERVAL TIME
REPEAT MODE
MAIN PAGE
REPEAT MODE
MOVIE-REPEATMODE
SETUP MENU--MOVIE
OFF
ONE
ALL
MOVIE Repeat ModeSetup
OFF: TurnRepeat function off.
ONE: Repeat onemovie file.
ALL: Repeat allmovie file.
5.5 SETUP MENU-MOVIE
5.6 SETUP MENU-PREFERENCES PAGE
- 9 -

PREFERENCES PAGE
TV TYPE
VIDEO OUTPUT
OSD LANG
OSD MESSAGE
DEFAULTS
MAIN PAGE
SET TV TYPE
PREFERENCES PAGE-TV TYPE
MULTI SYSTEM
NTSC
PAL MULTI.SYSTEM: Change TVsystem
(Media Player) automatically.
NTSC: For U.S.,Japan and Korea
PAL:For countries adoptingPALsystem.
PREFERENCES PAGE
TV TYPE
VIDEO OUTPUT
OSD LANG
OSD MESSAGE
DEFAULTS
MAIN PAGE
SET VIDEO OUTPUT
S-VIDEO
YPBPR
RGB
PREFERENCES PAGE-VIDEO OUTPUT
YPBPR: YPBPRsignal output.
RGB: RGB signaloutput.
Attention: Don tchange this item.
PREFERENCES PAGE
TV TYPE
VIDEO OUTPUT
OSD LANG
OSD MESSAGE
DEFAULTS
MAIN PAGE
SET OSD LANGUAGE
ENGLISH
CHINESE
PREFERENCES PAGE-OSD LANG
PREFERENCES PAGE
TV TYPE
VIDEO OUTPUT
OSD LANG
OSD MESSAGE
DEFAULTS
MAIN PAGE
OSD MESSAGE
ON
OFF
PREFERENCES PAGE OSD MESSAGE
Setup
PREFERENCES PAGE-OSD MESSAGE
PREFERENCES PAGE
TV TYPE
VIDEO OUTPUT
OSD LANG
OSD MESSAGE
DEFAULTS
MAIN PAGE
OSD DEFAULTS
RESET
PREFERENCES PAGE DEFAULTS Setup
RESET: Restoremanufacturer's defaults
settings.
PREFERENCES PAGE-DEFAULTS
PREFERENCES PAGETV Type function
Setup
PREFERENCES PAGE VIDEO OUTPUT
Setup
S-VIDEO:S-Video signaloutput.
ENGLISH: OSD inEnglish.
CHINESE: OSD inChinese.
ON: TurnOSD MESSAGE on.
OFF: TurnOSD MESSAGE off.
PREFERENCES PAGE OSD Language Setup
- 10 -

Note:
PREFERENCES PAGE DEFAULTS is activeonly in initialstatus by press SETUP key.
If not, pleasepress GOTO keyto return to initial status.
6
6.1 AV Mode
OSD Setup Guide
COLOUR TEMPERATURE
RESET
RETURN
6.1.1 VIDEO ADJUST
MAIN PAGE
GENERAL SETUP
Press( 、 )to highlight EXITSETUP
Press ENTER to exit OSDmenu.
MAIN PAGE EXIT SETUP
5.7 SETUP MENU-EXIT SETUP
Remote Control Operation
Press MENU to highlight theOSD setting, press ,to select submenu, press ,to
select aimed variable,then press toadjust numerical variable; If the variableis not
numerical ( suchas TV , VIDEO ), press to selectaimed variable, then press
ENTER to confirm. PressRETURN button at the submenu to returntill exit OSD,or you
can wait forOSD exit automatically (please reference thedetail OSD menu closing time
setting).
Tips: Youcan also press ENTER、MENU buttons on remote control or OSD on the
machine to returntill exit the OSD setting.
VIDEO and MEDIA PLAYER Mode
The Specific Menus:
The specific ofMenus are differentfor each modeof VIDEO、TV、MEDIA PLAYER,
However, thesame for VIDEOand MEDIA PLAYER Menus.
Select Menu:
VIDEO ADJUST
OSD ADJUST
INPUT SELECT
AUDIO
LANGUAGE SELECT
EXIT
- 11 -

TIMER SET
RETURN
VIDEO
TV
MEDIA PLAYER
RETURN
H-POSITION
V-POSITION
TIMER SET
6.1.3 INPUT SELECT
Move horizontally
Move vertically
Timer function
6.1.2 OSD ADJUST
OSD-OFF TIME
OSD-TRANSPARENT
RETURN
OSD auto off time setup
OSD Transparency
Return to Menu
TIMER SET isto set upthe clock's On/Offtime. It appearsin the upper right corner ofthe
screen. Timeris in function only "Timer On" is selected.Press or toturn TIMER on
or off. Press or to switchbetween ON, OFF, TIME, TIMER ON and TIMEROFF.
When timer ison, three selections will be displayedon the screen,including ON (On
Time) 、OFF (OffTime) and TIME(Current Time).Press numbered keys to adjust tothe
correct time. Ifthe current time is 13:15:41, press1, 3, 1,5, 4, 1 as the arrowflashes.
Confirm it aftertime adjust.
ON: System isoff, internal clockstill runs, whenit's time tostart, system willbe
automatically turned on
Off: System ison, when it's time toshut down, systemwill be automaticallyturned off.
TIME: Current time
When Timeris set to NO , auto-timeris off.
1.Press ENTER /MENU to enter submenu, then pressENTER / MENUto enter OSD
ADJUST (orpress )
2.Press 、 to highlight yourchoice.
3.Then press ENTERto highlight, press 、 to change settings. Or Press ENTERfor
options
Note: To ease the operation, the secondfunction of multifunctionbuttons will be used
(up, down, left,right at menu setting),representing by : 、 、 、
Operation under highlightingthe variable
BRIGHTNESS reduce/increase the variable
CONTRAST reduce/increase the variable
SHARPNESS reduce/increase the variable
SATURATION reduce/increase the variable
HUE reduce/increase the variable
COLOR
TEMPERATURERreduce/increase the variable
RESET defaults recall
RETURN return to Menu
- 12 -

VOLUME
BASS
ENGLISH
CHINESE
RETURN
6.1.5 LANGUAGE SELECT (LANGUAGE SETTING)
1.Press MENU to enter submenu,then press ENTER to open LANGUAGE SELECT
menu
2.Select a language,then press ENTER to confirm.
ENGLISH CHINESE
6.1.6 EXIT
press ENTER/MENU to quit OSDadjust.
1.Press MENU to enter submenu,then press ENTER to open AUDIO menu .
2.Press 、to highlight yourchoice.
3.Press ENTER to open andpress 、 to change the settings. Or pressENTER for
options
RETURN
6.1.4 AUDIO (AUDIO SETTING)
(Or press )
TREBLE
BALANCE
VIDEO
TV
1. Press MENU to enter submenu, then press ENTER to enter INPUT SELECT .
2. Highlight yourselection, press ENTER to confirm.
MEDIA PLAYER
RETURN
For VIDEO input signal
For TV signal
For Media Player
Return to menu
- 13 -

VIDEO ADJUST
OSD ADJUST
INPUT SELECT
TV FUNCTION
TV MODE
AUDIO
LANGUAGE SELECT
EXIT
Menu:
The Operation forVIDEO ADJUST、OSD ADJUST、INPUT SELECT、AUDIO、
LANGUAGE SELECT、EXIT are thesame for VIDEO、MEDIA PLAYER mode are
same, here arethe details of TV function and TV mode setting.
AUTO SCAN
MANU SCAN
FINE TUNE
PRESET PROGRAMS
SKIP PROGRAMS
SELECT PROGRAMS
MANU SCAN
AUTO SCAN
FINE TUNE
PRESET PROGRAMS
SKIP PROGRAMS
SELECT PROGRAMS
Auto search channels
Manual search channels
Covering manually fullchannel width, to the highest levelof
performance.
Able to changechannels' sequence.
This function forskip a channel, on remote controlto select
a skip channel.
This function forselect channel on the machine buttons, on
machine to selectchannels.
1.Press remotecontrol direction key to select, andpress ENTER / MENU to confirm
2.Select PRESET PROGRAMS setup selection, press to adjust theaimed channel
in the mid-bottomof OSD menu,press ENTER /MENU to realize presetfunction
6.2.1 TV FUNCTION
6.2 TV MODE SETTINGS
TV Function Menu
- 14 -

6.2.2 TV MODE
NTSC
PAL B/G
PAL I
PAL D/K
RETURN
TV MODE
NTSC
PALB/G
PAL I
PALD/K
US, Japan, SouthKorea
Germany, Italy, Spain, Saudi Arabia and
other countries adoptingPALB/G
Hong Kong, UK.
China
1. Select ENTER / MENU to enter submenu,press button onremote control.
2.Then press ENTER / MENU to confirm.
7TV Mode Control Menu
7.1 AUTO CHANNELSEARCH
First time useor TV moved to newarea, needs to process auto channelsearch.
1.In TVPlaying mode, pressMENU to entersubmenu.(Please compare system setting
part in thefront page.)
2.Press on theremote control to TV Menu, then press ENTER to enter setting.
3.Press on theremote control to Auto ChannelScan, press ENTER to enter Auto
Channel Scan . After autoscan finished, therewill be autoplay first channel, and
channels can bewatch normally.
4.To stopAuto Scan,press ENTER Key to quit.
7.2 CHANNEL SELECTION
TV MODE
To selectchannels, press orenter number ofa channel on the remote control, then
press ENTER to confirm. Also Channel Selection can be found in the submenu for select
channels.
- 15 -

7.3 DISPLAY CHANNEL
While TVis in playingmode,press DISPLAYto shown channelnumber on thetop right
corner screen.
7.4 CHANNEL RECALL
While TVis in playingmode, press ENTER to go backprevious channel.
8AV Input/Output User Instruction
This product hasAV Connection. AV Device candirectly connect withDVD, VCD player
(PS. AV M statusneeds to changeto, whichAV input turnson)
User Instruction below:
AV Input &Output can be control by theswitch.
AV Input: VIDEO Input (ConnectDVD/VCD AV Output),AUDIO Input (ConnectDVD
/VCD AudioOutput) , needs to switch status to IN, thendigital frame playingmode switch
to Video mode, thenAV signal canbe play.
Instruction:
First ThingAV Signal Cableconnected follow by color:
1.TakeDVD, VCD's VIDEO(Yellow)Connect to AlbumTV's VIDEOAV.
2.TakeDVD, VCD'sAUDIO(Red、White)Connect to Album TV's AUDIOAV.
Then switch Digitalframe's mode to VIDEO:
1. Press MENU into OSD systemmenu.
2. Press switch to INPUT SELECT screen.
3. Select VIDEO input mode, ENTER to confirm VIDEOinput mode.
Finished Instruction abovewill be able to watching DVD,VCD.
AV Output StatusDescription: SystemAV Signal canbe output, needto connectAV input,
then can play media fromAlbum TV. Let Video Input/output switch to Out, alsodigital
frame playing modechange to MEDIAPLAYER,then it willbe able to play.
- 16 -

9Specifications
Panel: 10.4 TFTLCD
Active Area: 211.2 mm(H)*158.4(V)mm
Resolution: 640(W)*480(H)
Horizontal frequency (H):30-80KHZ
Vetical frequency (V): 60/75HZ
Lamp Lifetime: 50,000Hours
Brightness: 330cd/m
Contract Ratio: 250 : 1
View Angle: Vertical110 /Horizontal 140
Input Power: DC 12V, 1.5A
Power Consumption: 25W
Supported Multimedia File:MPEG 1, MPEG 2
MP3, WMA
JPEG
Supported Memory card:CF, SM, SD, MMC,MS, MS PRO,IBM MICRODRIVE
2
- 17 -

Shanghai VisartTechnologiesCo., Ltd.
Room 906 HongcaoBuilding, 421 Hongcao Road
Shanghai, China, P. R.
200233
Tel:86-21-64955920
Fax: 86-21-64955921
VISART USACorporation
1211 JohnReed Court,
City of Industry, CA91745
Tel:1-626-855-3486
Fax:1-626-855-1145
Tollfree: 1-866-4-VISART
Http://www.visart.com
Table of contents