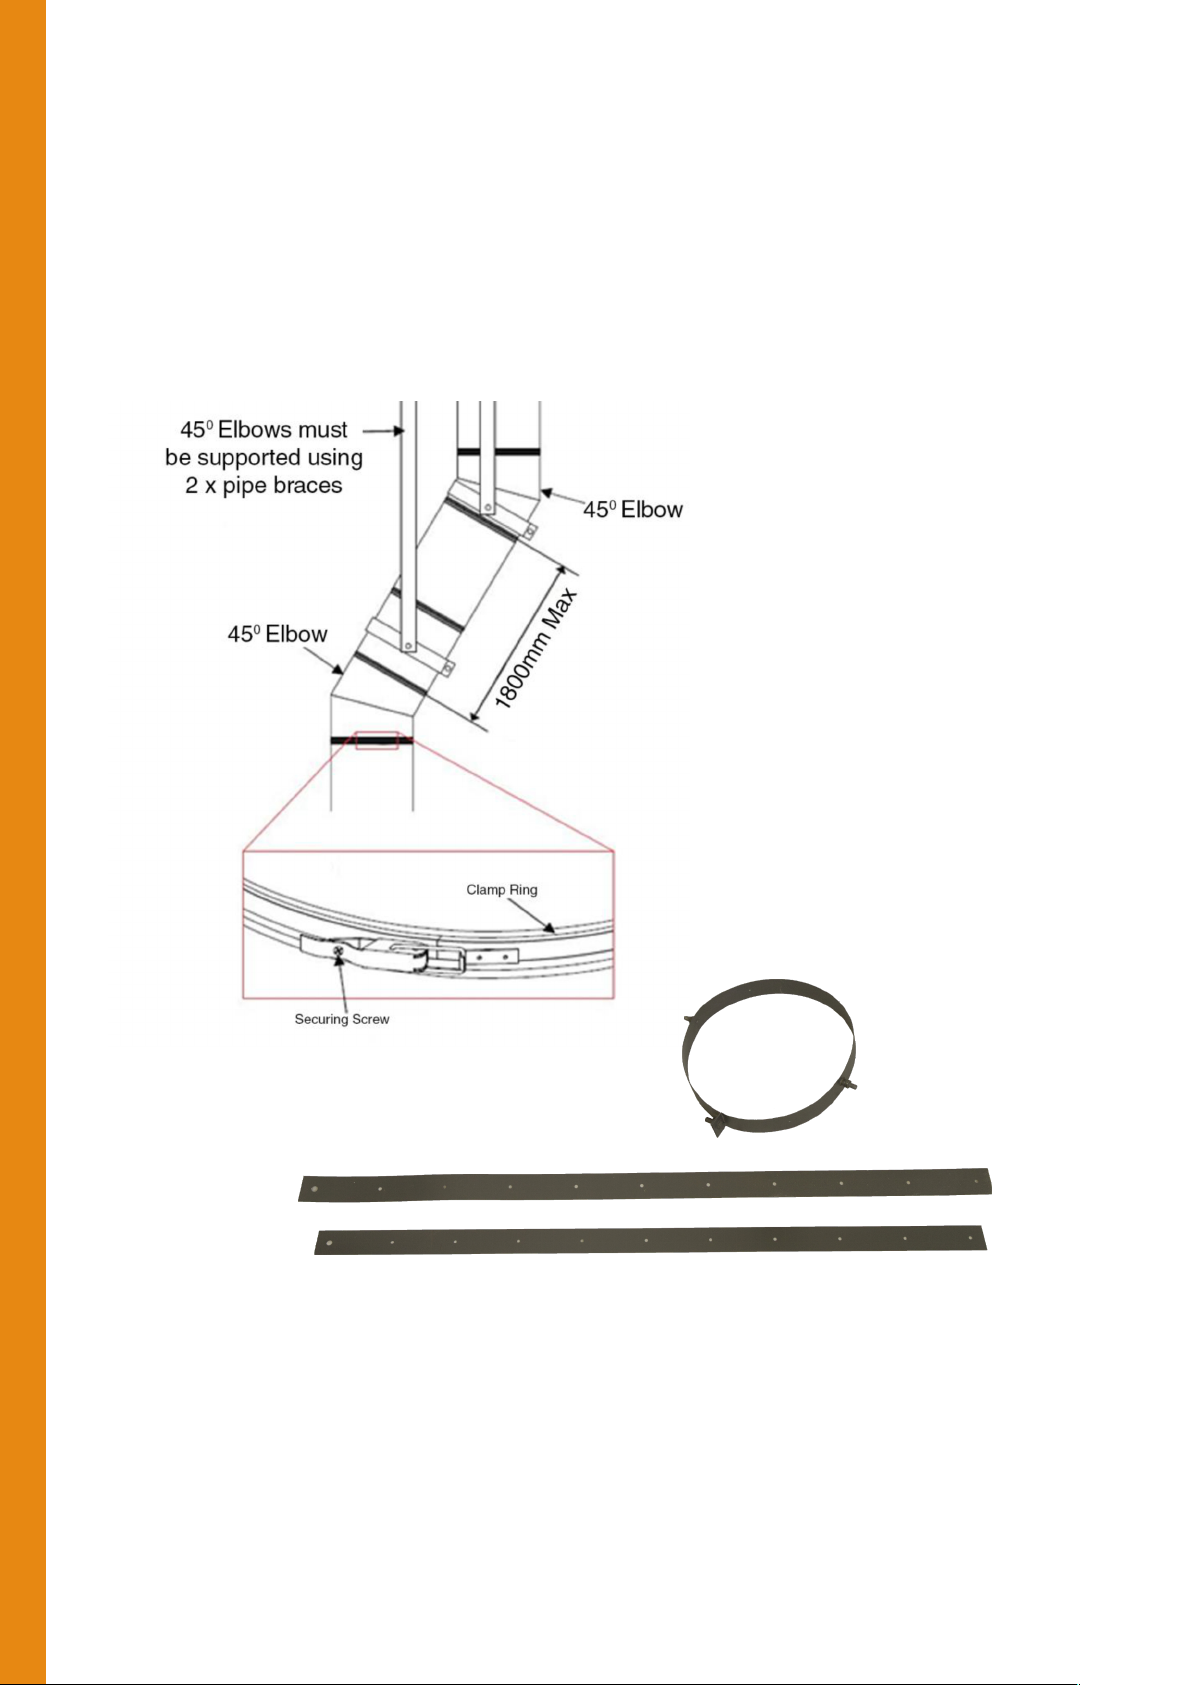
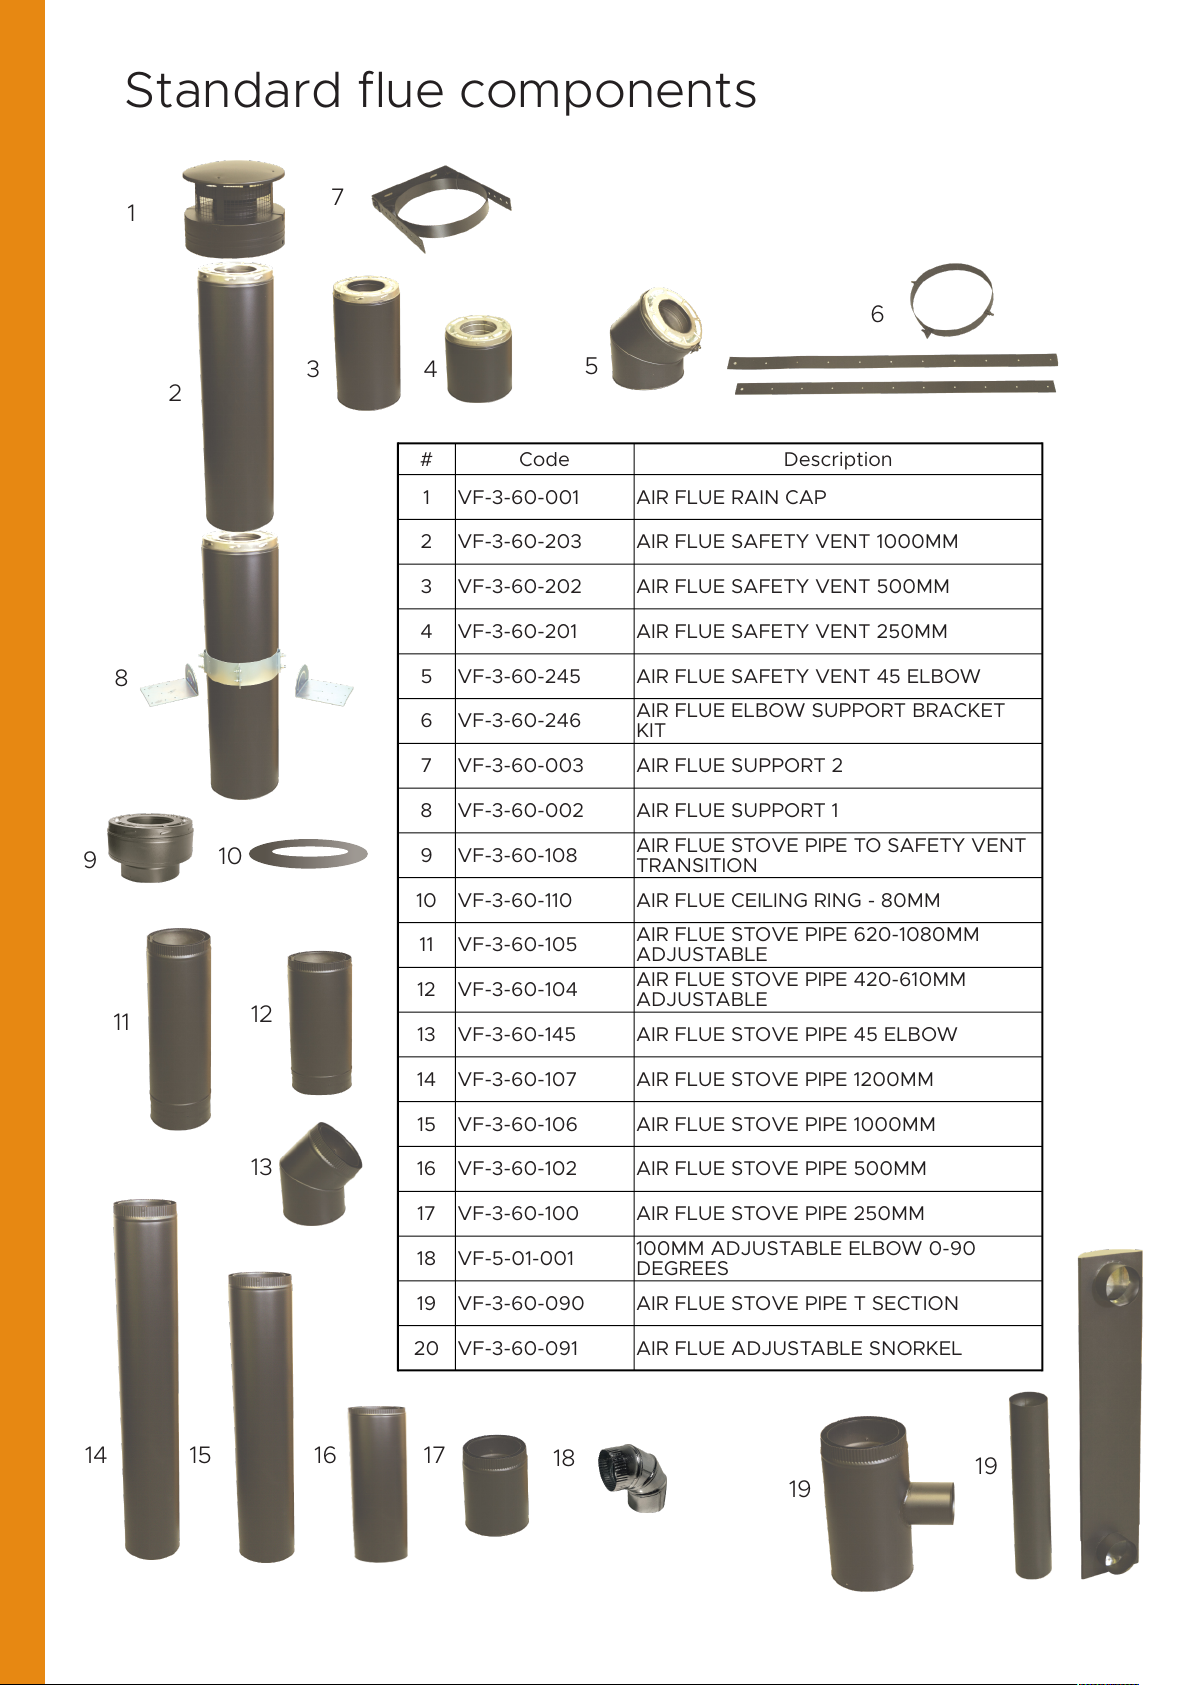
visionLINE Safety Vent AIR User manual


Popular Fireplace Accessories manuals by other brands

kozy heat
kozy heat NCK-SP34L-D manual

Lennox Hearth Products
Lennox Hearth Products Elite Series installation instructions

Travis Industries
Travis Industries 4237 quick start guide

OFYR
OFYR Fire Guard Ring 100 manual

Empire Comfort Systems
Empire Comfort Systems DFB20CCBL-1 installation instructions

IN & OUT HOUSE
IN & OUT HOUSE MT374C Assembly instructions

Superior
Superior EDGE TRIM KITS installation instructions

Town & Country Fireplaces
Town & Country Fireplaces TC30 Black Diamond instructions

Travis Industries
Travis Industries shield 6015 quick start guide

pleasant hearth
pleasant hearth Log Hoop LS932-HP quick start guide

Twin-Star International
Twin-Star International 23DM537 Assembly instructions

SHM
SHM Savanna Oak SCVFR18N OWNER'S OPERATION AND INSTALLATION MANUAL

kozy heat
kozy heat NCK-SL42-D instructions

Petromax
Petromax cshov40 user manual

SHM
SHM SVFM18NG OWNER'S OPERATION AND INSTALLATION MANUAL

Desa
Desa Wall Mantel and Base with Trim W32WP Assembly and installation instructions

Valor
Valor LEGEND G3.5 installation manual

Jøtul
Jøtul PF 721 V2 JT Installation, operation and maintenance manual