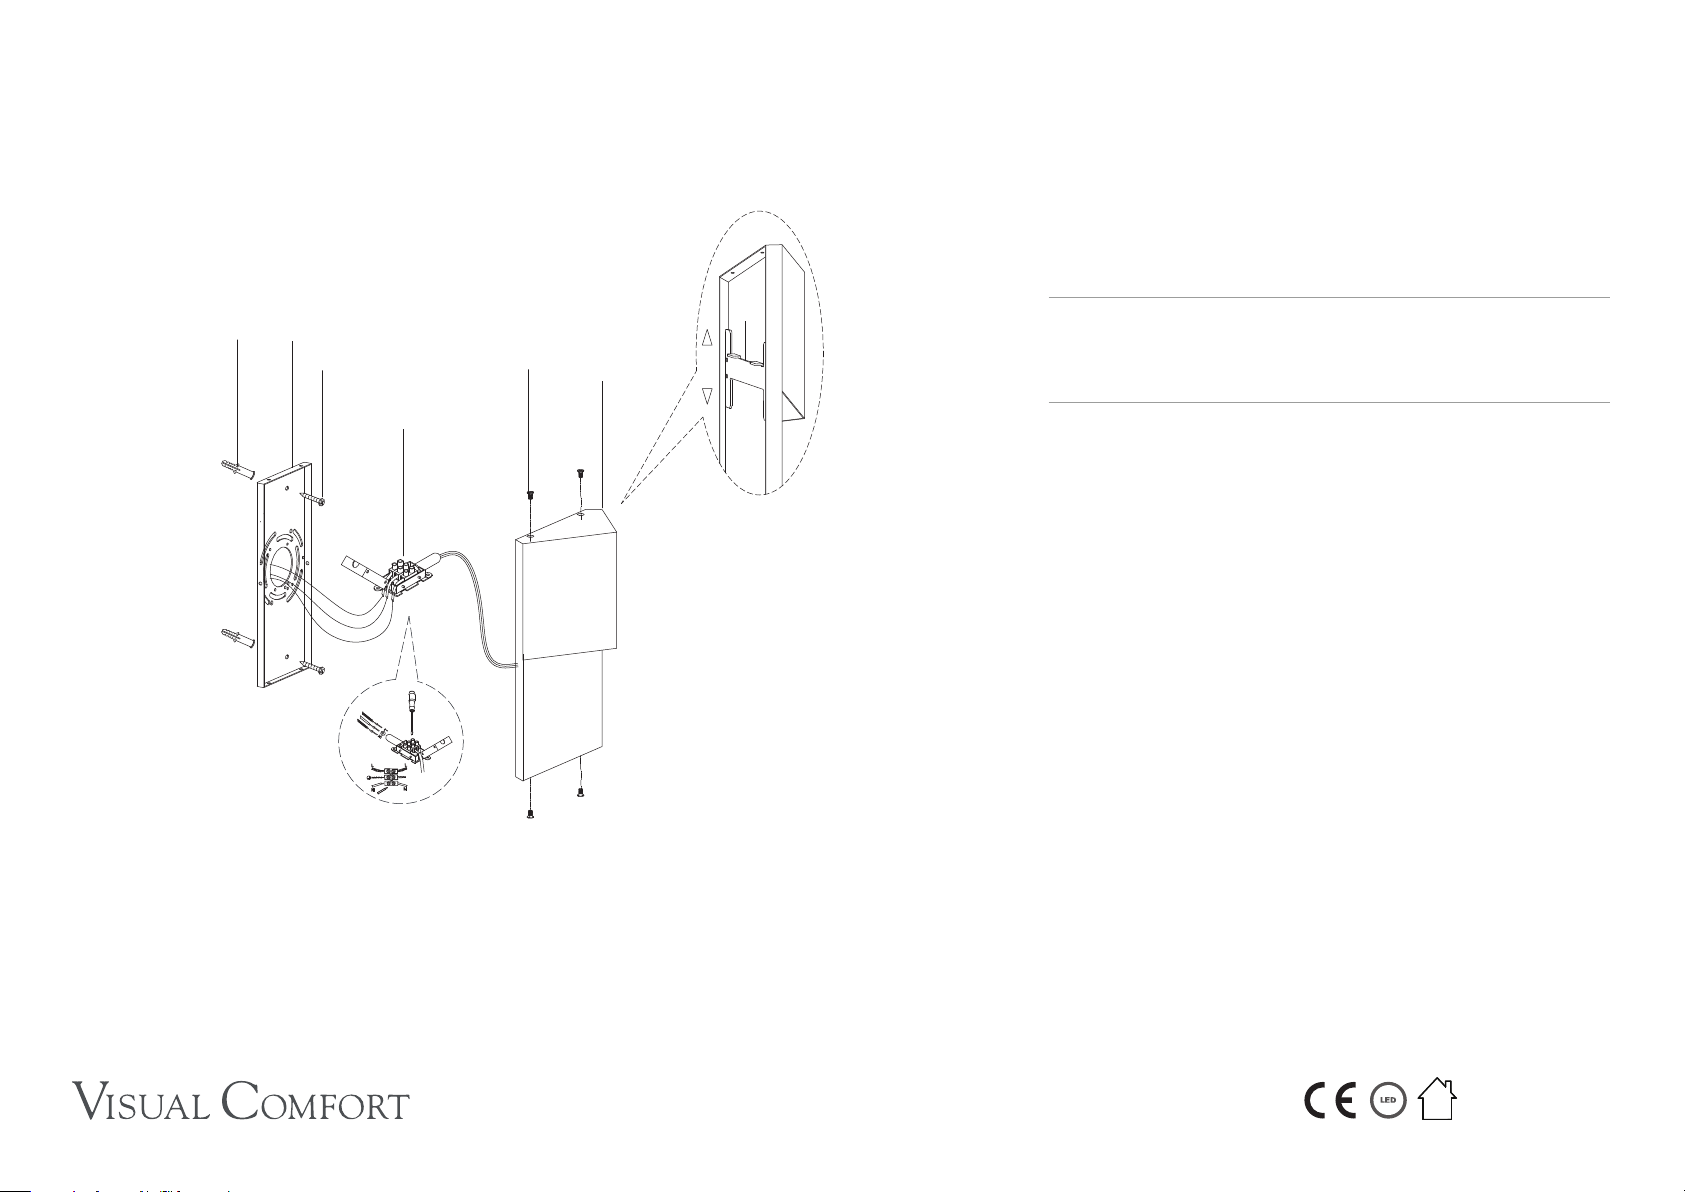
1. Carefully remove all parts from the box. Place on a clean, soft surface.
2. Remove mounting plate (B) from fixture (F) by removing screws (E).
3. Using mounting plate (B) as a guide, line up with the wall and mark
anchor positions.
4. Using a drill bit slightly smaller than the anchor, drill holes in the
marked positions. Install anchors (A) into the holes using hammer.
5. Install mounting plate (B) to wall and secure with wood screws (C)
to anchors (A).
6. To adjust angle of light spread, slide light source (G) up or down to
desired position. (See diagram 1)
7. Open terminal block (D) to prepare for installation of electrical wires.
Use diagram 2 to reference electrical installation steps below.
8. Connect fixture ground (green) and supply ground (usually green or
yellow) to terminal block (D) and secure with screws.
NOTE: It is imperative that the fixture is grounded.
9. Connect neutral wires (blue) to terminal block (D) and secure with
screws.
10. Connect hot wires (brown) to terminal block (D) and secure with
screws. Close terminal block (D).
CAUTION: Do not reverse the hot and neutral connections.
11. Install fixture (F) to mounting plate (B) and secure with screws (E).
Rega 12” Wide Sconce
Item # KW2781EU
ASSEMBLY INSTRUCTIONS
This light fixture should be installed in accordance with all applicable,
local installation codes, and by a person familiar with the construction
and operation of it, as well as the hazards involved. Inspect item and
contents carefully. If any damage or defect is found, do not install.
Retain all packaging material until installation is complete and approved.
TOOLS REQUIRED (NOT INCLUDED):
Phillips Screwdriver Slotted Screwdriver Drill
Pencil Hammer
NOTICE:
For outdoor use only
A
F
C
B
E
D
Diagram 1
G
Diagram 2


