Before you begin using your new air conditioner, make sure to familiarize yourself with its remote
control. The following is a brief introduction to the remote control itself. For instructions on how to
operate your air conditioner, refer to the How to Use Basic Functions section of this manual.
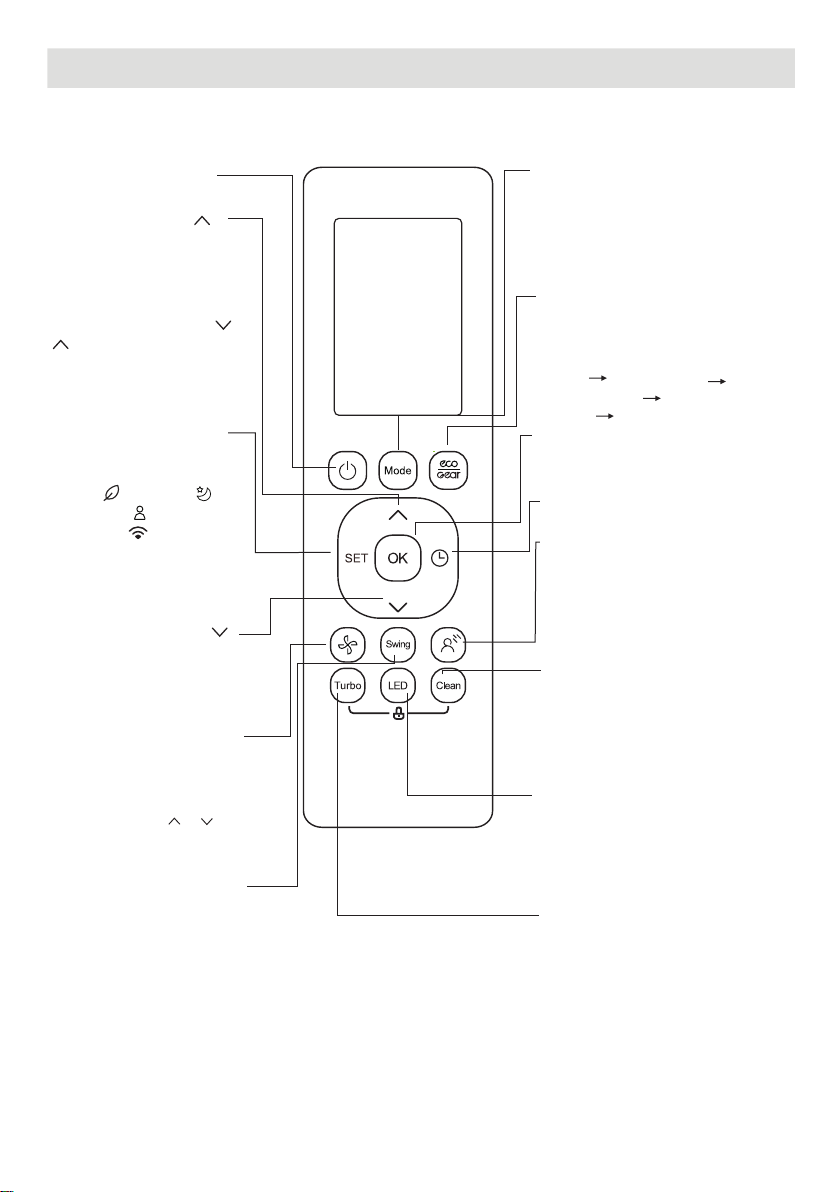
Buttons and Functions
ON/OFF
SET
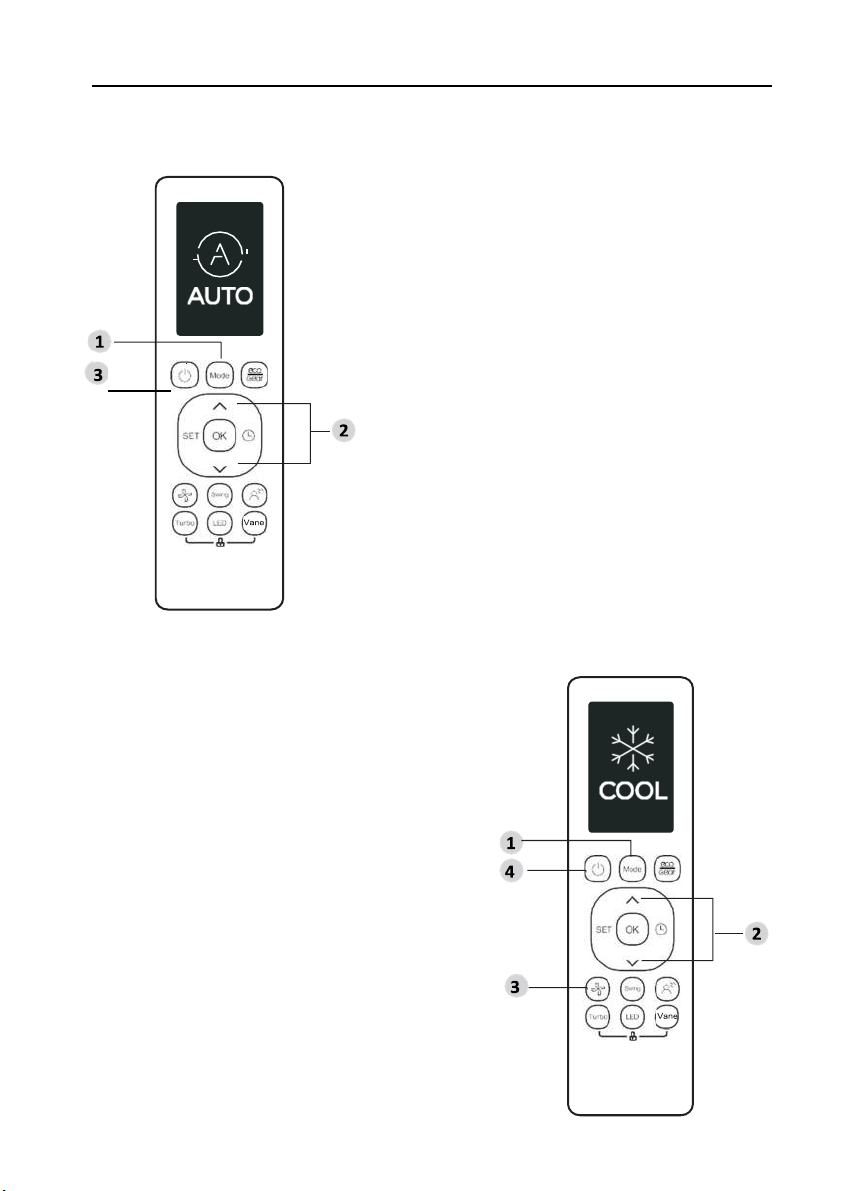
Turns the unit on or off.
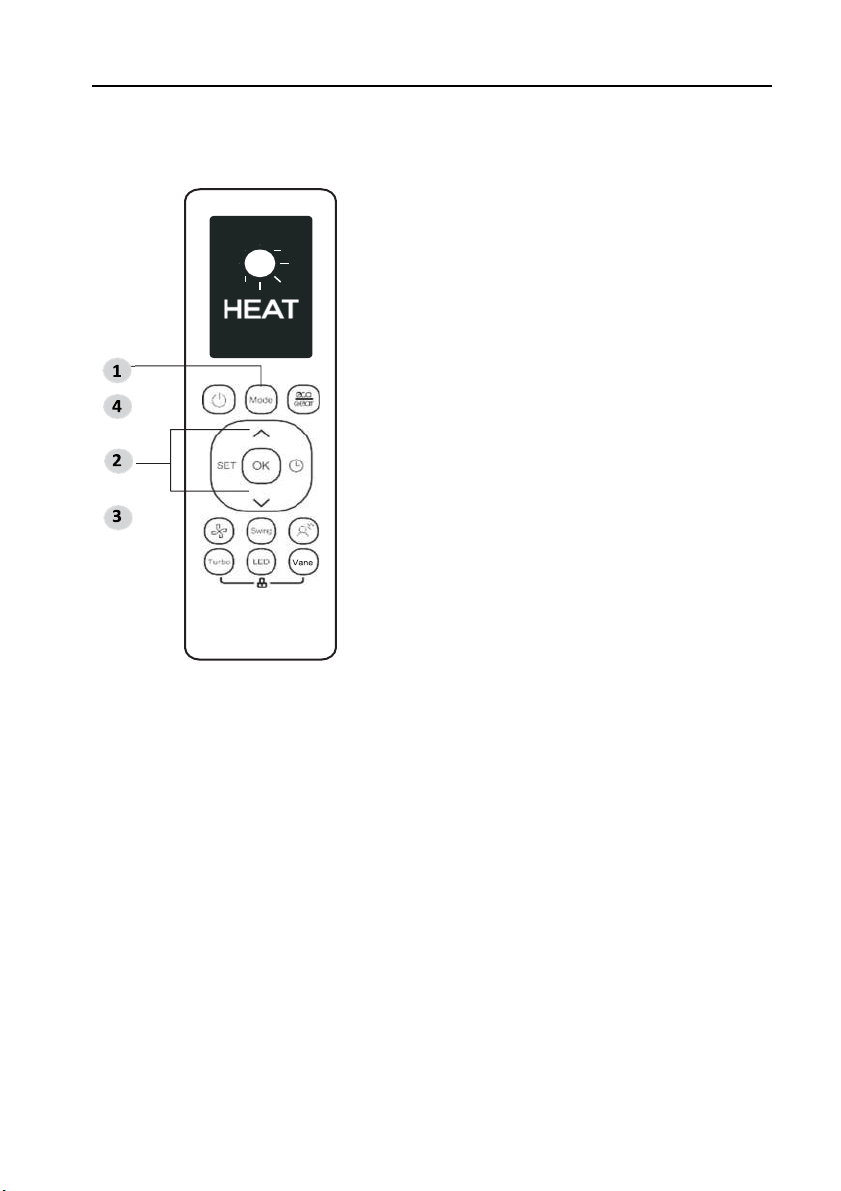
MODE
OK
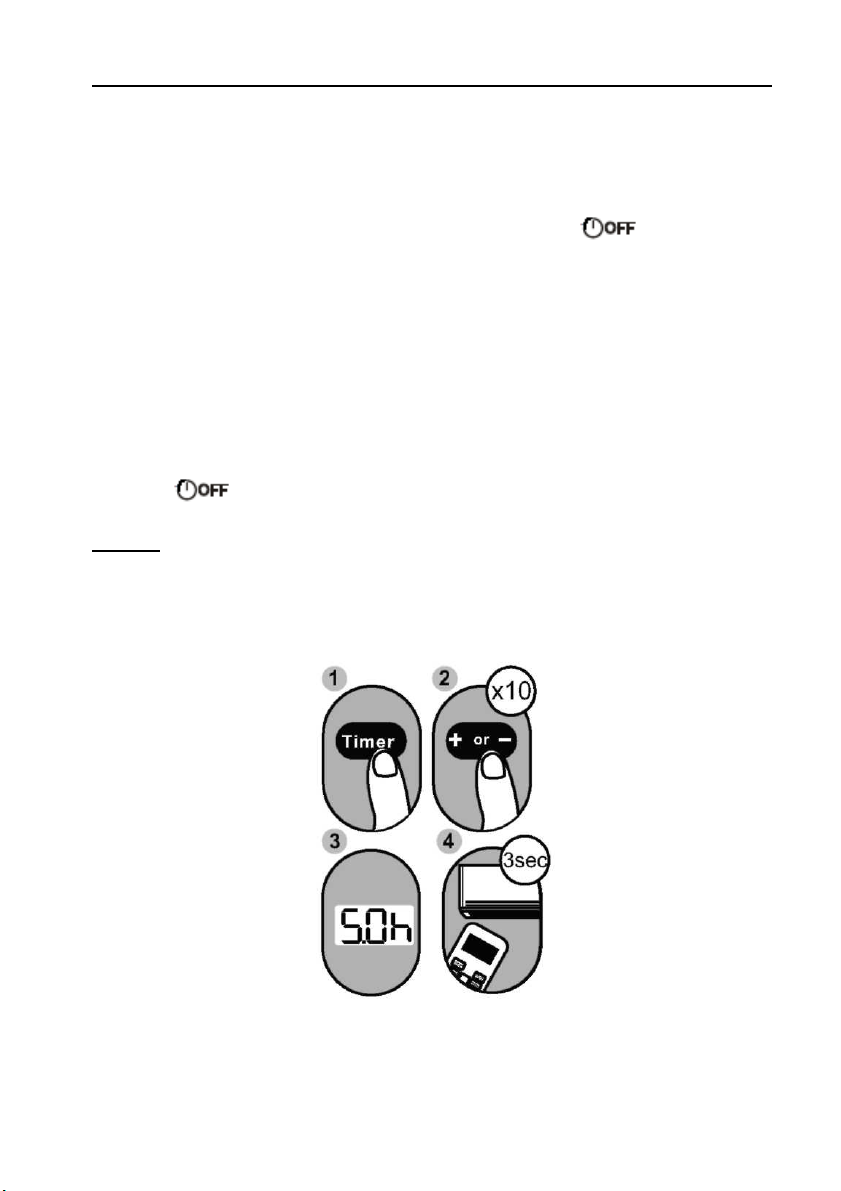
TIMER
BREEZE AWAY
CLEAN
LED
Turbo
ECO/GEAR
Scrolls through operation modes
as follows: AUTO
COOL
DRY HEAT FAN
FAN SPEED
SWING
Model:
Increases temperate in
1°C (1°F) increments.
Max. temperature is
30°C (86°F).
NOTE: Press together &
buttons at the same time
for 3 seconds will alternate
the temperature display
between the °C & °F.
TEMP
TEMP
RG10A2(D2S)/BGEFU1,RG10Y2(D2S)/BGEF
RG10A10(D2S)/BGEF(20-28 C/68-82 F)
RG10A(D2S)/BGEF & RG10A(D2S)/BGEFU1(Fresh feature is not available)
RG10A2(D2S)/BGCEFU1 & RG10A2(D2S)/BGCEF
(Cooling only models, AUTO mode and HEAT mode are not available)
Used to confirm the selected
functions
Decreases temperature
O O
in 1 C(1 F) increments.
Min. temperature is
O
OO
O
16 C(60 F).
Starts and stops the horizontal
louver movement. Hold down
for 2 seconds to initiate vertical
louver auto swing feature.
This feature avoids direct air flow
blowing on the body and makes
you feel indulging in silky coolness.
NTOE: This feature is available
under cool, Fan and Dry mode only
Set timer to turn unit on or off
NOTE: HEAT mode is not supported
by the cooling only appliance.
ECO GEAR(75%)
GEAR(50%)
mode ECO ......
Scrolls through operation
functions as follows:
Fresh( ) Sleep( )
Follow Me( )
AP mode( ) Fresh...
The selected symbol will
flash on the display area,
press the OK button to
confirm.
Selects fan speeds in the
following order:
AU
20%
60%40% 80% 100%.
Press the TEMP or button
to increase/decrease the fan
speed in 1% increments.
Enables unit to reach preset
temperature in shortest
possible time
Previous setting
Used to start/stop the Self
Clean or Active Clean function.
(Model dependent, please refer
to the USER’S OPERATION &
INSTALLATION MANUAL).
Turns indoor unit’s LED display
and air conditioner buzzer on and
off (model dependent), which
create a comfortable and quiet
environment.
Press this button to enter the
energy efficient mode in a
sequence of following: