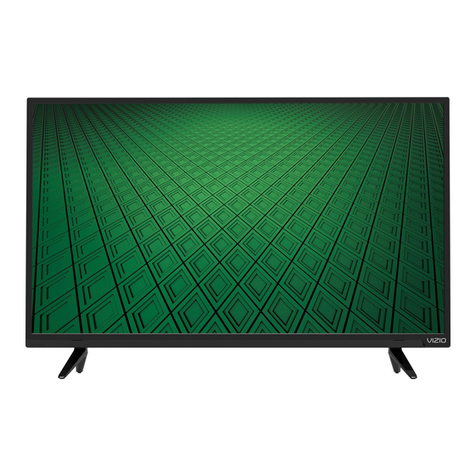
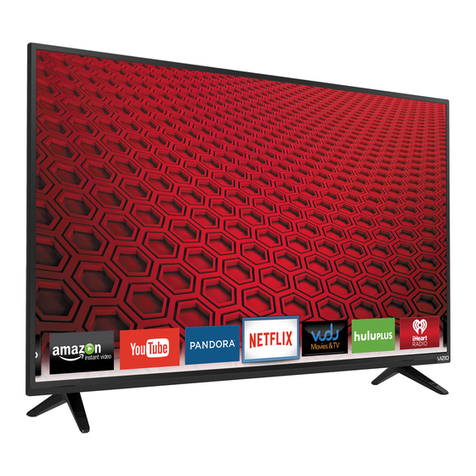
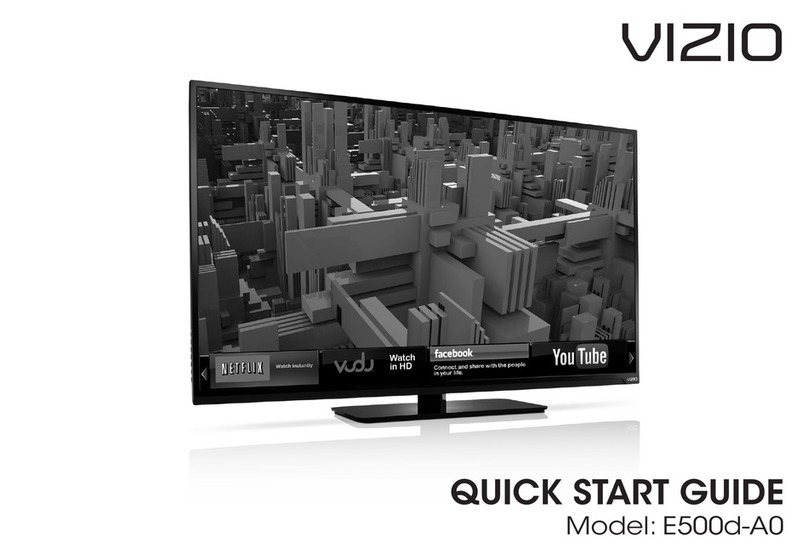
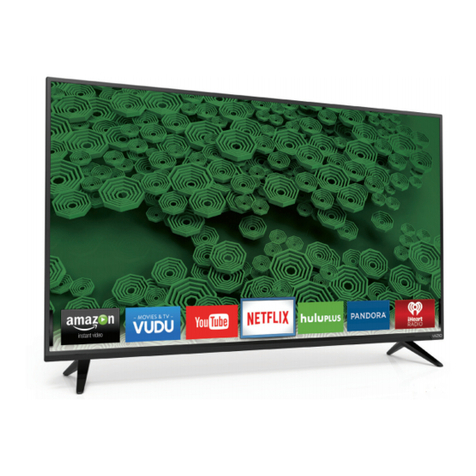
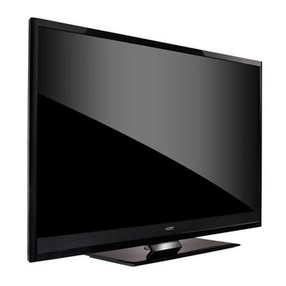
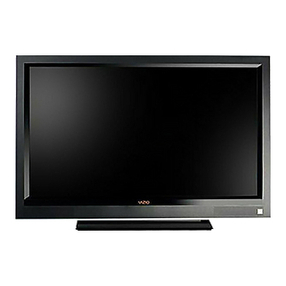
Vizio VO370M - 37" LCD TV User manual

LGE
inc.
lnv.
No.
337-TA-6837
CX—523
vzzto
V0370MN042OE
User
Manna!
Dear
VIZIO
Customer,
Congratulations
on
your
new
Vlzto
VOSYGMNOAQOE
teievision
purchase.
Thank
you
for
your
support.
For
maximum
benefitof
your
set,
piease
read
these
instructions
before
making
any
aofiustments,
and
retain
them
for
future
reference.
We
hope
you
will
experience
many
years
of
enjoyment
from
your
new
V1230
FHDTV
High
Definition
Teievision.
For
assistance,
piease
can
(317)Ls68-84520:
e-mai!
us
at
www.viz§s:.com.
Tn’
purchase
or
inquire
about
accessories
and
instaliation
services
fofyour
V1230
FHDTV,
ptease
visit
cu;
website
at
wvw.*,v§zi0.§9m
or
caii
lei!
free
at
(888)
8494523.
V
Vve
recommend
you
register
your
VlZ!0
FHDTV
either
at
our
website
www.V!Z%0.Qg;
at
fit!
in
your
registration
card
and
mail
it
in.
For
peace
of
maid
and
‘to
protect
your
investment
beyond
the
standard
warranty,
V1210
offers
on-site
extended
warranty
service
péans.
These
plans
give
additions:
caoverageduririg
the
standard
warranty
period.
Vssit
our
website
or
caii
us
to
purchase
a
man.
Vslfite
dawn
ihe,
sefiai
number
located
on
the
back
of
yaur
FHDTV.
"“""‘”"‘
””””
"”"“‘”“
srs@
Trusurmnnd
rm"
Furchase
Date
wzio
is;
wgistarao‘
trademark
of
WZIO,
inc.
afiba
V.
Inc.
'
HDMI
Iago
and
"H5’gf:
Definition
Iduitimeda
intetface”
am
registared
tracternarixs
of
HOW
Licensing
LLC.
Ifianulactursd
under
license
#911:
Guitar
Latmlatoxies.
80312;’
and
the
doubie-D
symbol
aréfradennarits
of
may
Laboratories.
S-f5@.
tnsuunuaaao
IS
a
trademark
of
SR3
Lamina.
Tmsumound
HO
technology
is
incatporamd‘
under
license
from
SR3
Labs.
Inc..?’HE
TRADEIHMRKS
SHOWN
HEREIN
ARE
YHE
PROPERTY
OF
THEIR
RESPECTIVE
OVVNERS:
IMAGES
USED
ARE
FOR
ILLUSTRA
TION
PURPOSES
ONLY.
BRAVO,
W230
AND
THE
3!
LOGQAND
WHERE
WSJON
MEETS
VALUE
fl!i££3~{3THER
V330
TRADEMARKS
ARE
THE
WTELLECTUAL
PROPERTY OF
V3210
INC.
Preoamr
SPECIRCATJONS
ARE
SUBJECT
To
SHANGE
Wm-{Diff
M03305
OR:O8L€GA?'.fON.
©
2:295
V3230
INC.
ALL
RIGHTS
RESER¥£D,
’
vessson
112352009
1
‘
V
www.VtZlO.com
"
’
VIZ68’?
0071054

V1230
VO370MNO42OE
User
Manual
important:
Safety
instrtxcricns
Your
FHDN
is
designed
and
manufactured
to
operate
within
defined
design
limits,
and
misuse
may
result
in
electric
shock
or
fire.
To
prevent
your
FHDTV
from
being
damaged,
the
following
rules
should
be
observed
for
the
installation,
use,
and
maintenance
of
your
FHDTV.
Read
the
foiiowing
safety
instructions
before
operating
your
FHDTV.
Keep
these
instructions
in
a
safe
place
for
future
reference.
-
To
reduce
the
risk
of
electric
shock
or
component
damage,
switch
oft‘
the
power
before
connecting
other
components
to
your
FHDTV.
-
Unpiug
the
power
-cord
before
cieaning
your
FHDTV.
A
damp
math
is
sufficient
for
cieaning
your
FHDTV.
Do
not
use
3
iiquid
or
a
spray
cieaner
for
cieaning
your
FHDTV.
Do
not
use
abrasive
cleaners.
-
Aiways
use
the
accessories
recommended
by
the
manufacturer
to
insure
compatibility.
.
when
moving
your
FHDTV
from
an
area
of
tow
temperature
to
art
area
of
high
temperature,
oondensation
may
form
in
the
tsousing.
wait
before
tuming
on
your
FHDTV
to
avoid
causing
fire,
electric
shock,
or
componentidamage.
o
Useoniy
with
the
can,
stand’,
tripod,
bracket,
or
table
specified
by
manufacturer
or
soid'w'rth
your
FHDTV.
when
a
can
is
used,
use
caution
when
moving
the
cartIFHDTV
combination
to
avoid
injury
from
tip-over.
Do
notpiaoe
youriFHDTV
on
an
unstabis
cart,
stand,
or
table,
if
your
i‘-‘HDTV
farts,
it
can
injure
a
person
and
moss
serious
damage
to
your
FHDTV.
Use
only
a
cart
or
stand
recommended
by
the
,manufacturer
or
sold,
with
your
FHDTV:
0
A
distance
of
at
teas:
3
feet
should
be
maintained
between
your
FHDTV
and
any
heat
source,
such
as
a
mdiator,
heater,
oven,
ampiifier
etc.
“Do
not
install
yum‘
FHDTV
ciose
to
smoke.
Operating,
your
FHDTV
close
to
smoke
or
moisture
may
cause
fire
or
electric
shock.
o
Slots
and
openings
in
the
back
and
bottom
ofthe
cabinet
are
provided
for
ventiiartion.
To
ensure
rsliabie
operation
of
your
FHDTV
and
to
protect
it
fromioverheating.
be
sure
these
openings
are
not
mocked
or
covered.
Do
not
place
your
FHDTV
in
a
bookcase
or
cabinet
uniess
proper
ventilation
is
provided.
7
o
Never
push
any
object
into
the
stats
and
openings
can
your
FHDTV
cabinet.
Do
not
piece
any
objects
on
the
top
of
your
FHDTV.
fioing
so
couid
short
circuit
parts
causing
a
fire
or
electric
shock.
Never
spit!
iiquids
on
your
FHDTV.
V
o
Your
FHDTV
shouid
be
operated
only
from
the
type
ofpower
sourceindicated
on
the
label.
if
you
are
not
sure
of
the
type
of
power
ssppiied
to
your
home,
consuit
your
dealer
or
iooai
power
company.
7
a»
Do
not
apply
pressure
or
throw
objects
at
your
F
HDTV.
This
may
cornpromise
the
integrity
of
the
dismay.
The
manuiaomrefs
warranty
does
not
«cover
user
abuse
or
irnproper
instaliations.
.
The
power
cord
must
be
repiaced
when
using
different
voltage
than
the
voltage
specified.
For
more
information,
contact
your
deater.
V V
o
Your
FHDTV
is
equipped
with
a
three-pmnged
grounded.
ptugta
plug
with
a
third
grounding
pin).
Thisplug
wit!
fit
oniy
into
a
grounded
power
outlet.
This
is
3
safety
feature.
if
your
outiet
does
not
accommodate
the
three-pmnged,
have
an
.e£ectn'c§an
instali
the
correct
outiet.
or
use
an
adapter
to
ground
your
FHDTV
safieiy.
‘Do
not
defeat
the
safety
purpose
of
the
grounded
plug.
7
‘
a
when
connected
to
a
power
outiet,
gaower
is
atways
flowing
into
your
FHDTV.
To
iotatiy
disconnect
power,
unplug
the
power
cont.
7
~
.
0
Theiighstning
flash
with
arrowhead
symboi
within
an
equiiaterai
triangie
is
intended
to
aiert
the
user
to
the
presence
of
on-isotated,
dangerous
voltage
within
the
inskie
of
your
FHDTV
that
may
be
of
V
,
sufficient
magnitude
to
constitute
a
risk
of
electric
shock
to
poisons.
V
o
The
exoiamation
point
within
an
equiiaterat
triangte
is
intended
to
atert
the
user
to
i
the
presence
of
important
operating
and
servicing
instructions.
in
the
iiterature
‘
accompanying
your
FHDTV.
o
Do
not
overload
power
strips
and
extension
cords.
Oyerioading
can
re-suit
in
fire
or
eteciric
shock.
-
LV
M
2
vuww.VtZiO.cem
V1268’?
0071055

VIZKD
VO370MNO42GE
User
Manna!
-
The
was!
snake!
should
be
instafled
near
your
FHDTV
and
easily
accessible.
4»
only
power
of
the
marked
voitage
can
be
used
for
your
FHDTV.
Any
other
voétage
than
the
specified
votiage
may
cause
fire
srefectric
shock
V
o
Do
not
much
the
prewar
cord
during
iightnéng.
To
avoid
eiectric
shock,
avoid
handling
the
power
7
card
dufing
electrical
storms.
V
/
-
Unplug
your
FHDTV
during
a
lightning
storm
or
when
‘:1
wifi
not
be
used
for
Iong
period
of
time.
T
his
wilt
protect
your
FHDTV
from
damage
due
to
power
surges.
-
Do
not
attempt
to
repair
or
servise
your
F-“HDTV
yourseif.
Opening
or
removing
the
back
cover
may
expose
you
to
high
vonages,
electric
shock,
and
other
hazards.
ifrepair
is
required,
contact
your
dealer
and
refer
ail
servicing
to
quaiified
service
personnel.
0
Keep
your
FHDTV
away
from
moisture.
Do
not
expose
your
FHDTV10
rain
or
moisiura.
if
water
penetrates
into
your
FHEDTV,
un
plug
the
power
cord
and
contact
your
deaier.
Continuous
use
in
this
case
may
result
in
fire
or
eiectric
shack.
o
[)9
net
use
your
FHDTV
if
any
abnormality
occurs.
If
any
smoke
or
odor
berxarnes
apparent,
unptug
the
power
cord
and
contact
your
dealer
immediateiy.
Dr)
not
try
to
repasr
yrmr
FHDTV
yourseif.
o
Avoid
using
dropped
or
damaged
appliances.
if
your
FHBTV
is
dropped
and
the
housing.
is
r
damaged,
the
iniema!
companents
may
funaiian
abnormaliy.
Unpiug
the
power
oord
immediateiy
and
contact
your
dealer
for
repair.
Continued
use
of
your
FHDTV
may
cause
fire
oreiectricr
shock.
as
~
Do
not
instau
yeur
FHDTV
in
an
area
with
heavy
dust
or
high
humidityuoperaiing
your
F-‘HDTV
in
environments
with
heavy
dust
or
high
humidity
may
cause
fire
or
electric
shock.
a
Fofiaw
instructions
for
moving
your
FHDTV.
rE'::sure
that
the
power
cam
and
any
ether
cables
are
unptugged
before
moving
your
FHDTV.
;
s
‘when
unpiugging
your
FHDTV,
hotel
the
power
plug,
not
the
card.
Putting’
on
the
power
Card
may
damage
theywires
inside
the
ccrd
and
cause
fire
or
efeciric
shock.
when
your
FHDTV
wit!
net
be
used
for
an
extended
paericd
oi
time,
unplug
the
power
cord.
-
To
reduce
risk
of
electric
shock,
do
not
touch
the
connector
wfih
wet
hands.
L
o
Insert
batteries
in
accordance
with
instructions.
incorrect
potaraies
may
cause
the
batteriesste
teak
which
can
damage
the
remote
centre}:
or
injure
ihe
operatar.
o
if
any
of
the
Fallowing
occurs,
contact
the
deaier:
o
The
power
cord
faiis
or
frays.
o
Liquid
sprays
or
any
obfiect
drops
inta
your
FHDTV.
0
Your
FHDTV
is
expased
to
rain
or
other
moisture.
0
Your
FHDTV
is
cimpped
.or»damaged
in
any
way.
0
The
parfomzance.
cf
your
FHDTV
changes
substantiafiy.
Version
112312009
“
‘
’
3
mww.\flZlO.com
VIZ687
0071
056

V1280
\!O3”:'0MNO420E
User
Manuai
Television
Finterrxa
Connection
Protection
l
Tetevlslczn
Fir1t'enna
Brnundinq
if
an
outside
antennaisaieflite
dish
or
came
system
is
to
be
connected
to
the
TV,
make
sure
that
the
antenna
or
came
system
is
eiectricany
grounded
to
provide
some
protection
against
voitage
sulges
and
static
charges,
Article
810
of
the
National
Eiectricafi
Code,
ANSIINFPSA
'10,
provides
information
with
regard
to
proper
gmunvding
of
the
mast
and
supporting
stmcture,
grounding
of
the
lead-in
wire
to
an
anienna
discharge
unit,
s¥ze
af
the
grounding
conductors,
Iocation
of
antenna
discharge
unit,
ccmneciion
to
grounding
electrodes,
and
requirements
afthe
grounding
eledmde.
IICIEBIIIEAOISIEK
Lightning
Protection
For
added
pmtection
of
the
TV
during
3
fightning
storm
or
when
it
is
Jeff
unattended
or
unused
for
long
pefiods
of
time,
unpiug
1210
TV
from
the
wail
cuflet
and
disconnect
the
antenna
or
cabie
system
*
V
A¥!i2OllGW¢H\RCUVli1'fi'KmI!oIItIOa!
sawuoms
comucxua
asnnnnmsars
Power
Lines
L°”"'°'7“"”
Do
not
tocaie
the
antenna
near
overhead
tight
or
power
circuits,
or
where.
it
could
fafi
info
such
power
lines
or
circuits.
?“"“%-......
ucmmmmwflm
-
vwues:aswt,cao,m:nn
ammussmauuamaamn
Remember,
the
screen
of
the
coaxial
came
is
intended.
to
be
connected
to
earth
if:
the
buiiding
installation.
FCC
Bulletin
fiar
New
TV
Own:-Era
=
L
*
After
February
17,
2909,
a
television
receiver
with
0:35;:
an
analog
broadcast
tuner
will
require
a
converter
box
to
receive
fufl
power
over-the-«air
broadcasts
with
an
antenna
because
of
me
Natic-n‘s
ttiansmon
to
digital
broadcasting.
Anasog-only
Tvsshouicl
continue
to
work
as
before
to
receive
low
power.
Class
A
or
transiator
lalevision
stations
and
with
cable
and
sateiiite
TV
servicemgaming
consoles,
Vcks,
DVD
pfayers,
and
similar
products.
infnrmation
about
the
DTV
transition
is
available
from
.htt;:_s:!£www.DTV.ggv
or
this
manufacturer
at
87?‘
MY
W210
(377-898-4948),
and
from,
£y
or
1-88,3-DTV-2009
for
inforrnatian
about
subsidized
coupons
for
digitawto-analcg
converier
boxes.
Your
FHDW
comes
with
a
buih:-«in
tuner
capajaie
of
pmcessing
ziigfia!
broadcasts,
making
it
easie:
for
you
to
receive
this
type
of
signal
without
the
need
of
an
extra’
converter
box.
www.VIZ!D.com
VIZ687
0071057

.
Arijusting
Basic
FHDTV
Settings:::::.....‘,.......
‘
HN
Pesition
V1210
V0370MlV{>420E
User
Manual
Table
cf’
Contents
Chapter
:1.
Basic:
Controls
and
Cc:nne¢::t'!¢:ns...-....
....................
....
.....
...
..................
..:.n
Frnnt
Pane!
Side
Panel
Controis
Rear
Panel
Connections
Rigiwside
Panel
Connection.
V5230
Remake
Contro!.............................,..
Insertion
of
Batteries
in
the
Remote
Contra!
.
Remote
Contra:
Range
..........
................
..
V3210
Remote
Control
Prec:autions.........,............
Chapter
3
fitarvnectinq
Ecsaisamerxt
.
which
Vftdeo
Connection
Shouid
I
Use’?
Connecting
Your
Cable
or
Satellite
Box
.
Connecting
Coaxiai
(RF)
...................
..
Ccnnecting
Yaur
DVD
Ptayer.
..
.. .. ..
.
Connecting
Your
VCR
or
Video
Camera
Ccmnecting
an
extema!
Receivexwkmp.
.
..
...
Opticat
Output
of
Audio
received
with
HD
Pro
Connecting
a
PC
Preset
PC
Resaiutions
......
..
Rasolutiean
threugh
RG8
Inp
.................................................
..
Chapter
3
Ualnq
wow
FHDTU
the
first
+Hrne-.
Waiching
aT\e'
Pr0gram.............
grams...
DTV
ITV
input
Pvcture
Adjustmerst
Picture
Mode
.........................
..
Advanced
Video
Features
Film
Made
Reset
Piciurgs
Mode
....
,.
QTV
3??
Input
Audio
Adjustment
.
Audio
Mode
......
.,
......................
..
Analog
Audio
Lip
sync
Reset
Audio
Mode....,
07%;‘
1
TV
Tuner
Setup.
Tuner
Mode
..........
..
Auto
Search
Partial
Channel
Search
Skip
Channe!........,....,..
MTS
‘fime
Zone
........
..
Daysight
Saving
..
Chennai
§nfo...........
BTW‘
TV
mput
Setup
Language
Steep
Time-r..
wide
...........
..
input
cc
{ciosecf
Capticn).
DTV
1
TV
input
Parentai
Centroi
System
info
..
V
System
Resat............
HDM3
input
Picture
Adjustment.
HD1503
input
Audie
Adfiustmeni
HUM!
input,
$etup
....................
..
Video
input
Picture
Adjustment.
Video
Input
Audio
Adjustment...
Video
input
Setup
....................
..
Auto
Phase
{for
Component
Version
1:‘23/2009
V
5
www.\flZlO.com
VIZ687
007'!
958
7
chapter
E:
Misczeuanvzcaus
anfiormr
V3230
VG37OM:'VO420E
User
Manual
Video
input
Parentat
PC
3nput,Picture
Adjustnwerttm.
Auto
Adjust,....,...
PC
input
Audio
Adjustment...
PC
Input
Setup
..........................
..
Understanding
Viewing
Features
C1-naptar
5
Matnterzancse
and
Traubieshuobiruq
Mainterxance
Trauhieshooting
Guide
.....
..
Telephone
&
Technical
Suppo
..
......
..59
Compi§an¢e...................‘...............,..........
FCC
(31355
8
Radio
Interference
Statement.
Specifications
............................................................
..
Giossary
-
Stanciard
www.VlZIO.com
VIZ687
0071
059

V1230
VO37i}MNO42GE
User
Manna!
Ggaening
the
Package
Your
FHDTY
and
its
accompanying
accessories
are
carefuuy
packed
in
a
cardboard
carton
the:
has
been
designed
to
protect
it
from
transportation
damage.
Once
you
have.
opaned
the
carton,
check
that
your
FHDW
is
in
germ
condition
and
that
at
of
the
contenis
are
inciudad.
The
glass
surface
can
easily
be
scratched
or
broken,
so
handie
your
FHDTV
gentiy
and
never
piece
you
FHD’W‘with
the
glass
facing
downwards
on
a
surface
without
protective
padding.
‘
IMPORTANT:
Save
the
carton
and
packing
material
for
future
shipping.
Package
Ccarat-er'ri:s
W210
VO3?0MNO420E
Stand
and
thumb
screw
V1210
remote
comm!
VR2
AA
batteries
for
the
removie
control
{2)
Power
cord
This
user
manual
Quick
Setup
Guide
Registration
Card
0000
00430
fiddifionat
c:er‘t'if'iec:
acczessczzries
for
vczur
F?-EDTV
are
sc:i.c:1V
separately:
~
-
W38
mounts
-
High
Definition
cabkrs
.
Exira
er
repiacememremote
vtzzo
aisa
oifexs
instaflazion
services
and
ezdendedwarranty
services
for
yeur
FHDTV.
To
purchase
at
intguire
about
additions!
accessories
and
services
far
your
XRZKD
FHDTV,
visit
our
web
side
at
www.ViZ!O_com
or
calf
us
tall
free
at
888~VlZiOCE
{888—849‘-4623)’
Caution:
no
wat
apply
pressure
or
throw
objactsflat
yam
FHDW,
This
may
compromise
the
integrity
of
the
display.
The
manzfiactumfs
warranty
does
not
cover
user
abuse
or
improper
instaflaticms.
’
version
1/2312009
L
7
T L
ws.w:.VfZ30.com
V
7
W268?
007‘?
060

vszso
VO3?0M!VO420E
user
Manua:
TU
Setup
and
Stand
Hssembly
Note:
We
strongly
recommend
that
two
peapie
perform
the
setup
and
assembly
due
to
the
weight
and
size
of
the
TV.
To
unpack
the
TV
and
stand
base:
1.
Remove
the
remote
control.
batteries,
and
newer
cord
from
the
foam
and
caps,
2.
Remove
the
two
tap
foam
end
caps.
23.
Remave
the
stand
base
under
foam
and
cap.
4.
Remove
the
TV
from
the
boxand
ray
it
face
down
on
a
steam,
flat
surface.
Note:
Make
sure
that
the
susface
is
free
of
debris
to
prevent
the
TV
screen
from
geifing
scratched,
To
attach
the
TV
stand
base:
1.
Pushthe
stand
base
onto
the
stand
neck
{afready
connected
to
TV).
2‘
On
the
bottom
of
the
base,
insen
the
thumb
sciew
and
tighten.
Move
the
TV
into
an
upright
position.
Bottomview
9
.
‘
‘¢’.§‘
‘ziifzq
1‘
'
4}
'1
916*
K,
-—
F.‘
_fi«~»~.‘.~a“«§f..I§i§"4i
‘
J’
’;§a£.‘.,~‘
v
.
s"4.‘.}i
/
2
www.ViZiO.com
V1268’?
0071
06‘!

V1230
V0370MN042OE
User
Mama!
Setting
Up
Your
FHDTU
o
Read
this
user
manuai
carefuily
before
instailing
your
FHDTV.
o
The
power
consumption
of
your
FHDTV
is
about
1
24W
for
mode!
VO370M
and
about
1
SYW
for
model
VC:42GE.
Use
the
inciuded
power
cord,V\men
an
extension
cord
is
required,
use
one
with
the
ooneci
power
raiing.
The
card
must
be
grounded
and
the
grounding
feature
must
not
be
compromised.
Your
FHDTV
shouki
be
instafied
on
a
flat
surface
to
avoid
tipping.
For
proper
ventilatien,
you
must
aiiow
space
between
the
back
cf
your
FHDTV
andrthe
wait
If
you
want
to
moan“:
your
FHDTV
on
the
wail,
see
below
for
additional
information.
Avoid
instaifing
your
FHDTV
in
places
with
high
humidity,
dust,
or
smoke
so
you
do
not
shorten
the
service
fife
of
the
eiearanic
components.
instafi
your
FHDTV
in
a
Ievei,
iandscape
otientation,
with
the
V1210
logo
at
the
bottom
to
prevent
poor
ventilation
and
excessive
component
damage.
~
U
0000
vtzao
offers
professiona
installation
services.
Contact
wzro
for
more
information
on
these
services
at
888~VlZiOCE
(888-849-4623}
or
i".*JIZl().§g_)’m.
'
wall
Mounting
your
FHDTU“
V
Your
FHDTV
can
be
mounted
an
the
wail
for
viewing.
it
,
you
choose
to
mount
your
FHDTV
on
the
wait,
Vfolkzw
the
V
instructions
beeiow.
«
1-.
if
the
base
has
been
attached,
remove
the
base:
‘
a.
Disconnect
me
cabtes
from
your
FHDTV.
I3.
Piaceyaur
FHDTV
face'd0wn=on
a
sofl,
1581
surface
to
prevent
damage
to
the
screen.
0.
Remove
the
thumbscrew
on
the
base,
than
remove
the
base..
2.
Mount
your
FH'DTVon
the
wait
‘
‘
a.
Attach
your
FHDTV
ta
*3
waii
mount
{setd
separatety)
using
the
mauntiing
holes
in
the
back
panel
of
your
FHDTV.
*
b.
Read
the
instmctiens
that
came
with
your
7
specific
wai}
mounito
propedy‘
hang
your
FHDTV.
Version
1/2312009
L L
9
VIZ687
00’?
I
062

the
remote
signal.
V1230
‘sIO3?9MNO42OE
User
Manna}
Chapter
:1.
Basic:
Controls
and
Connections
Front’
Panet
POWER
‘V1210’
L!GHT--
The
VIZIO
name
lights
white
when
powered
on
and
orange
when
powered
off.
REMOTE
CONTROL
SENSOR
-
This
is
the
window
thnough
which
an
of
the
remeie
contra:
signaks
pass
to
the
senses".
Point
the
remete
centre!
directiy
at
this
window
for
the
best
response
ta
Side
Pahet
Controls
POWER
{
Q)
1
——
Switch
the
FHDTV
on
by
pressing
the
button
once.
Press
the
human
again
to
the
FHDTV
off.
MENU
-
This
button
activates
the
on
screen
Dismay
(esp).
at
a
sub-menu
is
active,
pressing
this
batten
win
proceed
to
the
next
tevel.
7
CH
+
I
-
-
Use
these
butions
to
step
up
ordown
the
TV
ctzanneis.
white
the
GSD
is
active,
these
buttons
function
as
up
and
down
contmis
in
the
OS!)
menus.
VOL
-1»
1
-
-
use
these
buttons
to
increase
or
decrease
is
the
speaker
vaiume.
white
the
(1833
is
active.
these
buttons
fumztion
as
tefi
and
righi
comrais
in
the
08:)
menus.
V
MPUT
{ENTER}
-
Repeated
pressing
am‘
this
bufions
sieps
through
the
input
sources
in
the
foiiorwing
sequence:
TV.
AV1iS—VSdeoV.
AV2,
Compcnerm,
Camponentz,
RGB,
HDM3
1.
HDMI
2
and
HUM!
3.
Once
you
have
stepped
ihrough
the
entire
sequence,
you
win
return
to
the
beginning.
If
a
sub»-menu
is
active.
pressing
this
button
xvii!
V
retum
to
the
previous
menu
ievei.
Addétionafly,
when
the
(330
is
active,
{ms
button
confinns
the
menu
function
to
be
adjusied,
Whenine
0813
is
not
pressing
this
button
wfl!
disgxay
the
cusrent
input:
mode.
7
~
J
20
ww~N.VtZ!O.com
V1268’?
09?}
063

VIZIO
VO370MN042GE
User
Manuai
Rear‘
Panei
Connections
‘AUDIO
GUT
—“:E§€é's:s:zf3‘{:»~ii<$r1"
' '_:'
'
I
K
I
T
Plug
anHDMi
de
am
this
po
lconnéci
trsévideo
and
audio
from
a
computer
here.
A
118
{Q
stern:
be
is
needed
:3
connect
ihe
audio
cut
from
the
computer
to
ihe
cannecioi
in
the
rear
,
nfihe
Tvfor
audit)
from
computer.
L
connect
the
pnmasy
sourcafcr
composite
video
devices,
such
as
a
VCR
or
video
game.
Use
the
white
and
red
connectors
to
connect
me
external
audio
'
*¥rom
the
same
source,
than
use
the
S—Vndeo
at
yeilow
connector
to
conneet
the
:
extemai
video
from
the
same
source,
The
S-Video,
if
connected,
will
take
priority
ever
AV
RCA
(yeitow)
Gonneatar.
_
A
.
7
Z
A V
conned
ta
an
anterma
or
339!
me
far
‘rt!
.rLdiV
sttn
in
H
DTWTV
‘
_
.
7
your
area
msn
www.antengaweb.org.
V
‘
V V
,
L
OPTICAL
7
when
a
digital
audio
signai
is
associaied
with
an
input
which
is
$e§eeted
for
—
V
BKSITAL
LAUIXG
viewing,
this
digitai
audio
associaied
wan
digfiai
programming
win
he
avaflabie
J
1
OUT
on
this
SPDH-'
Oatical
connector
for
connection
to
your
home
theatre
system.
7
Games:
the
audio
from
the
FHDTV
to
an
extemai
device,
fiuch
as
a
home
.
theater
system,
external
amplifier
or
stereo.
Speakers
cannot
be
coanected
—
directly
to
here.
7
‘ ‘
Cannes!
a
secondary
source
for
digital
video
such
as
a
D\1i3’mu1iime<$ia
player
9
_
or
set-top
box
For
users
who
want
to
connect
to
a
ova
enabled
device,
use
a
UV!-HE)M§cab!e
and
cennectihe
Analog
Audio
output
1:-fine
device
to
the
L+R
’
'
AUDEO
here.
V1230
Certified
How
and
HDMI.-DV1
cames
are
avaflabie
fer
purchase
from
www.V¥ZlO.c::>m
or
by
caiiing
833-VJZIOCE
{888~849—4623}.
COMPONENT!
‘
Connect
the
saurce
for
componem
video
devices
such
as
3
DVD
Playeror
set
,
f
(YPblCbPrfCr
top
box
here.
From
1933:
to
fight,
use
white
for
Set!
audio
and
red
for
tight
audit:
’
w§th
Audio
UR}
inputs,
green
for
Y,
b§ue
for
Pb
(or
Cb)
and
red
for
Pr(or
Cr).
5
'
ANALOG
,
AUBIO
0131'
Version
1i2312Dfl9
1 1
L
wvsm.VlZ10.com
VIZ687
007}
064

vxzio
vosvomn/04205
User
Manna!
Right“-—S!c1e
Panel.
C*c3nnect'!on
7
:1
T::és:eii:ré%:T:sTT
Connect
the
secondary
source
for
composite‘
video
devices,
such
as
a
VCR
or
video
game.
Use
the
white
and
red
cemiaectors
to
connect
the
extemat
audio
from
the
same
source,'the‘n
use
the
yaliow
connector
to
cnnnect
the
external
video
from
the
same
source.
The
Grange
color
band
on
the
side
of
the
TV
imitates
this
cannectiou.
Note;
The
red
and
whiteaudio
connectors
are
shared
between
AV2
and
COMPONENT
2.
conned:
the
source
for
component
vfide.-0
devices
such
as
—a
DVD
Ptayer‘
or
33‘:
mp
box
here.
From
tap
to
beaom,
£61:
to
right,
use
green
for
Y,
blue
for
Pb
{or
Cb),
red
for
Pr
(or
0:"),
men
connect
white
far
tefi
audio
and
rec!
for
right
audio
inputsunder
the
Grange
band.
The
purple
oeior
band
on
the
Side
mine
TV
indicates
this
connection.
Note:
The
Fed
and
whiie
audio
connectors
are
shared
between
AV2
and
COMPONENTZ.
Conneci
the
third
source
for
digital
video
such
as
a
DVD
muitimediar
1
playeror
set
top
box
through
this
aii
digiiai
connector.
component
2
(YPbi'CbPI'ICr
with
Audio
UR)
service
}
I
Do
not
use.
Fer
service
technician
use
only.
1
2
www.WZiO.corn
VIZ687
007
1
G65

V3210
VO37fiMNO42GE
User
Manual
V1210
Remake
Control
GUIDE
-
This
batten
dispiays
program
information.
POWER
(
Q’
)
—-
Press
this
bunon
to
turn
the
TV
on
from
the
Standby
mode.
Press
i!
again
to
reium
to
the
Standby
mode.
TV
—-
Press
this
button
is
seiect
TV.
7
AV
-
Press
this
button
to
seiect
AV1
and
AV2
(either
Compcsiie
or
$
Video)
input
COMP
—
Press
this
button
to
seieci
the
Component
(YPbPr}
input.’By
pressing
this
button
mpeatedly
you
will
be
switching
from
Component
1
‘to
Component
2
and
vice
versa.
‘ ‘
HUM!
-
Press
this
button
in
select
ihe
HUM!
input.
By
pressing
it
repeatedly
you
win
90
thraugh
the
three
{HUM}
1.
HDMI
2
and
HDMI
3)
inputs
in
sequence.
MENU
—
Use
this
button
for
the
Oan—$creen
‘Display
(OSD)
menu».
when
it
is
used
within
a
menu
selection,
pressing
this
key
wit!
harp
you
to
make
the
seiection
cf
the
feature
to
be
adiusted
afier
it
has
been
highiighted
A
‘V
4
Ir
—These
labeled
buttons
are
used
to
navigate
the
OSD
menu.
Vvhen
navigating
the
OSD
menu,
the
arrows
control
the
direcaon
up
and
down
or
tefi
and
right.
may
wiilaisc
be
used
as
value
settings
when
the
stide
bar
is
shown
on
the
scxeen
and
option
settings
10
turn
a
feature
off
or
an.
MUTE
-
T1355
btifléfl
turns
K38
Sfiflfld
0!!
and
Off.
LAST
-
This
buiion
rscafis
the
previously
viewsad
channei.
if
the
On-
Screen
Display
(OSD)
menu
is
being
used,
this
buflon
iwiii
aiiow
39;:
to
get
back
to
previous
menu
screen
or
out
to
your
program
when
you
press
it
repeaiediy.
VOL
Al?
—
This
taxman
turn
the
voiume
up
or
down.
CH
AI?
-
This
button
change
the
channels
up
ordownj
NUMBER»
BUTTON“
PAD
-
Use
these
buttons
to
setect
a
charms}
or
entsr
a
password.
‘
‘
INPUT
—-
This
button
allaws
the
user
to
sycie
fiarcugh
the
inputs.
Repeatedty
pressing
of
this
button
wili
step
you
thmugh
the
input
sources
in
the
f0.!3ow§ng
sequence:
W,
AV},
AV2!S~\ftDEO,
Component},
Compcmentz.
RGB,
HDMS1,
HDMI2,
and
HDMB.
Once
you
have
stepped
thmugh
the
entire
sequence,
you
wifiietum
to
the
beginning.
-
{DASH}
-—
when
seieciing
a
digital
channei
directty
use
this
button
for
we
separation
of
main
and
sutrchannets.
For
exampie,
channei
28-2
would
be
seiected
by
the
button
sequence
2
8
ENTER
2.
Versisn
1;23:2aa9
13
V
vmrw.V!ZiO.1:om
VIZ687
0071
066

VLZIO
V037OMNO420E.
User
Manual
Insertion
czaf‘
Batteries
in
the
Remczt-e
Central
insert
Mo
AA
batteries
into
me
remote
control.
Make
sure
that
you
match
the
{-1-}
and
g»)
symboss
on
the
batteries
with
the
{+3
and
H
symbols
inside
the
battery
campanment.
Re-attach
the
battery
cover.
Precautionary
Tips
for
inserting
the
Batteries:
Oniy
use
the
spezzified
AA
batteries.
{)0
mt
mix
new
and
aid
batteries.
This
may
result
in
cracking
or
ieakage
that
may
pose
a
fire
risk
or
iead
to
perssnai
injury.
inserting
the
batteries
incorrectiy
may
also
result
in
cracking
or
leakage
that
may
pose
a
fire
risk
or
lead
to
persona:
injuty.
Dispose
ofthe
batteries
in
accordance
with
local
laws
and
reguiations.
Keep
thebatieries
away
from
chiidren
and
pets.
Renate
Cltantrol
Range
Pcim
the
remote
commiat
the
remote
control
sensor
to
transmit
the
czommandsg
Do
not
piece
any
nbstaclas
between
the
remote
cconiroi
and
the
receiver
window.
The
effective
range
of
ihe
remoie
centre!
is
approximately
38
feet
(16
meiers)
from
the
{rant
of
the
receiver
window,
30“
to
theleft
and
right,
20“
up
and
down.
’
wast:
Rernote
Cgontrcat
Pr-eczaut-Liorws
The
remote
contra:
shouid
be
kept
dry
and
away
from
heat
saurces.
Amid
humidity.
7
if
the
TV
responds
erraiicafiy
to
its:
remake
centre:
or
dues
not
respond
at:/an,
check
me
batteries.
§ftheV
batiexies
are
iow
er
exhausted.
replace
them
with
fresh
batteries.
When
not
using
the
remote
centre!
for
a
tongperiod
of
time,
remove
the
batteries.
Do
not
take
the
batteries
apart,
heat
them,
or
throw
them
inio
a
fire.
,
Do
not
subject
the
remote
oontr-3:10
undue
physica!
sitess.
such
asszriking,
ar
dropping
it.
Do
net
attempt
to
clean
me
remote’
comm!
with
a
vu3a,t_i1e*so¥ven1.
Vfifpait
with
a
cfean,
damp
cloth.
LV
L
14
www.V!Zi0.com
VIZ687
007}
067

ViZiO
VO370MNO420E
User
Manual!
Chapter
a
Connecting
Equipment
whlczh
Video
Connection
Shcauld
1
Use’?
The
V1210
FHDTV
has
six
different
ways
to
connect
yourvideo
equipment
from
a
basic
connection
to
the
mos!
advanced
for
digital
displays
V
HDMI
{Hsgh-Deftmtion
Muitimedia
Interface)
—
it
is
the
A
fxrst
and
oniy
indastryaupported,
unr;:ompressed_
a!!~
;
‘Q’
digitat
audioivideo
interface.
HDSW
provides
an
interface
':
bstwaen
any
audioivideo
source,
such
as
.3
set—t9p
box,
,,
iv
DVD
player,
ar
AN
receiver
and
an
audio
and§or
video
_
;
monitar,
such
as
_a
digitai
tetavisiaa
(BT31),
over
a
s':ng}e‘
3
cable.
ow
caaxias
RF.
7
when
used
for
MPEG2
encoded
bx:
_
streams
frat)‘:
ATSC
broadcast
pmgramming.
this
input
2
}
‘takes
advantage
9f
the
High
Definition
centem.
TV
Coaxial
RF.
This
is
{he
connection
for
standard
NTSC
‘W
using
antenna
or
cabie.
'
'3
;_—
RG8
PC
(VGA)
-
Tm:
vidteo_in;3ut
has
separate
(ed,
:
?
green
and
biue
coin!
componenis.
The
signs?
carries
horizontal
and
—verticei
sync
infomtation
on
the
green
‘
'
signai.
This
is
most
sommcmiy
used
for
PC
input.
.
Componen:‘tI2
-
The
widen
signai
is
separated
into
three
-signals,
csne
containing
the
black-anmwhile
information
’
.j
and
the
other
two
containing
the
color
information.
This
enhancenwent
over
S-Video
takes
advarstage
of
the
,
——
superior
picture
provided’
by
pmgressfve
scan
DVD
pagers
and
FHCITV
formats.
'
»
S~Vis:!eo
{fiV13r
The
video
signa!
is
separated
into
two
A’
;
signals,
(me
containing
the
b!ack—and-«whiter
infafmation
.1
‘1
and
the
other
containing
the
color
information.
‘
Separating
the
color
in
this
way
avoids
‘cross
color’
efiects
whens
closeiy
spaced
meek
and
white
fines
are
,
arronecusfy
dismayed
sn
cater.
it
aiso
enables
text
to
be
'
'
dispiayed
more
sharpiy,
;.
:
Composite
{AV1!2)
~
The
compfete
video
signal
is
carried,
through
this
singie
pin
connector.
This
is
the
'
,_
most
commoniy
used
video
connection.
I
Ne
Fort
in
ee
1
1!;
an
H
Version
112312809
7
"15
V
vw.m.ViZ!O.com
VIZ687
0071
068

VSZIO
VO3?0MiV0420E
User
Manual
Corwwectinq
YOU!‘
Cable
or
Satellite
BOX
You
have
four
options
for
oannecting
your
cable
or
satefiite
box
to
your
F-‘HDTV:
HDM1,
Component,
Cemposite,
or
Coax
(RF).
Based
on
your
home
theater
configuration,
you
can
decide
which
option
is
‘the
right
one
for
you.
Refer
to
your
sei-top
box
user
manual
for
more
information
about
the
video
output
requiremems
or
cousufi
your
cabie
or
saieifrle
operator.
Using
HDMI
{Best}
Cabieand
Sateuité
Boxes
that
have
a
HDMI
digitat
imerface
shanks
be
connected
to
the
HUM}
input
cf
ihe
FHDTV
for
optimal
resuits.
Rota:
To
maintain
the
dispiay
quality,
use
3
W230
HDMJ
cable.
Length
is
avaitahle
up
to
18
metets.
See
orcall
'3-888—VlZ!OCE
(1—838~849—4623)
for
details.
1.
Turn
offthe
power
to
the
FHDTV
and‘FHDTV
Set-Top
Box.
conned!
a
HUM:
cabte
to
the
HDNH
output
of
your
FHDTV
Set-Top
Box
and
the
other
end
to
the
HDMI
1
input
(white
cotter
area)
at
the
rear
of
the
FHDW.
3.
Turn
onfthe
power
to
the
?FHD'{V~and
FHDTV
Set-Tap
Box.
2
4.
Sales:
HDM!
1
using
the
INPUT
buxom
an
the
remme
or
side
of
the
FHDTV.
er
directiy
by
Lpressing
tha,HDMi
button
on
the
Remote
Control.
Note:
-
The
How
inpufon
the
LCD
TV
supports
Higwbandwmth
Digital!
Contem
Protection
(HDCP}.
HBCP»enczypts
the
transmission
between
the
vides
source
and
the
digital
display
for
added
security
and
—prt;te1:tian».
o
H
you
are
already
using
the
HDME1.
input
for
another
component,
or
you
do
not
want
10»
use
the
HDMH
input
for
the
Set-Top
Box,
you
can
conneci
the
Sei~TopBox
to
the
HDMI
2
or
HDM
3
connection.
»
—
-
Refer
to
your
FHDTV
Set—Top
Box
user
manuai
far
more
informafiszn
about
the
video
outprui
M
recguinements
ofihe
product
or
consult
your
cable
or
satemte
operator,
W‘¥V$N.ViZ10.C04'3'I
VIZ687
0071069

WZIO
VO37GMNO420E
User
Manual
HDMI
Connections
for
Cable
or
Sateflite
Boxes
with
OW
HDMI
2
a-3
Turn
Off
the
power
20
the
FHDTV
and
FHDTV
Set—To;3
BOX.-
2.
Using
a
HDMQ-DVI
cable,
connect
the
DVI
and
to
your
FHDTV
Set-Top
Box
and
the
HDMI
end
to
the
HDMI
2
inpui
{whfte
coior
area)
at
the
rear
of
ihe
FHDTV.
3.
Using
an
audio
came
(white
and
red
cannectons).
connect
the
came
to
the
audiaouiput
connectors
associated
wm:
tha
DVI
output
an
your
FHDTV,Se1-Top
Box
and
oonneci
the
other
end
to
the
audio
connectors
associated
with
the
HDMS
input
(white
area)
at
the
rear
of
the
FHDTV.
4.
Tum
an
the
power
to
the
FHDTV
and
FHDTV
Set-Top
Box.
7
5.
Select
HDME
2
using
the
INPUT
button
on
the
remote
or
side
of
the
FHDTV,
or
directiy
by
pressing
the
H858!
button
{mine
Remake
Contmi.
Note:
.o
The
HUM}
input
on
the
LCD
TV
supports
High~bandwidth
Digétai
Cantersi
Protection
(HDCP).
HDCP
encryms
the
transmissicn
between
She
video»
source
and
the
digitai
dispfay
for
added
secunly
and
protection.
o
if
you
are
aiready
using
the
HDMI
2
input
far
anoiher
component,
or
yeu
do
not
want
to
use
the
*
HDM1
2
input
for
the
Set-Topgaox,
you
can
connect
ihe
Set-Top
Boxto
the
HDMI
3'
or
HDMI
3
connection.
The
LCD
Tvwiif
recognize
the
DV!
connection
and
obtain
audio
infermsation
from
the
audio
cennectcm
near
HDM!
2
input.
~
L»
Refer
to
your
FHDTV
Set—Top
Box
user
manual
for
move
infomzatiorr
about
the:
video
outpui
requirements
of
the
product
or
oonsutt
yeurcabte
or
sarteiiite
operator.
‘
7
Using
Component’
Video
(Better).
Turn
off
ycsur
FHDTV
and
set-top
box.
Cameo!
the
component
eabies
igreen,
btue,
and
red}
from
your
semen
box
to
the
CGMPONENT
jacks
(mine
back
ofycsur
FHDTV.
Ccnnect
the
audio
cabies
{white
and
red)
from
your
set’-mp
box
‘to
the
adjacent’
COMPONENT
L
and
R
Audio
jacks
on
the
back
of
yam‘
FHDTV.
V
Tum
on
your
EHDTV
and
setdop
box.
Press
COMPQNENT
on
the
remote
centre!
to
ievé
ihe
cement.
You
3150
press
ENPUTA
on
the
remote
central.
.°‘:’*.‘*°!‘°:"
version
1;23;2oo9
M
17
wv.rw.\§!Z§O.com
‘
L
VEZ687
007}
070

V3210
VO37£)MNO420E
User
Mama:
Using
S-Video,
{Better}
S-VIDEO
1
AV’!
Turn
of?
your
FHDTV
and
set—top
box.
Connect
the
SNIDEO
came
from
your
set~top
box
to
the
S—V!DEOjack
on
the
back
of
your
FHDTV.
7
Connect
the
audio
names
(white
and
red)
on
your
set-top
box
to
the
corresponding
L
and
R
AUDIO
jacks
on
the
back
of
your
FHDTV.
Tum
on
your
FHDTV
and
set-top
box.
Press
AV
on
the
remote
comm!
to
View
the
content.
You
can
also
press
WPUT
on
the
remote
control
.°”’.“.°’!~‘~’.“‘
Using
Composite
Video
(Good)
S-VIDEO
I
AV’!
Turn
off
your
FHDTV
and
set—top
box.
Connect
the
video
came
(yeilow)
from
your
set-top
box
to
the
AV
jack
(yellow)
on
the
back
of
your
FHDTV.
=
’
Connect
the
audio
cabies
(white
and
red)
on
your
set-topbox
to
the
correspcmding
L
and
R
~A£iDiO
gacks
on
the
back
otyour
FHDTV.
"Sum
on
your~FHDTV
and
set~tcp
box.
7
Press
AV
an
the
remote
to
View
the
cement.
Yeu
can
also
press
LKNPUT
on
the
remcie
ccnimi.
S-":“«'§°’!‘«‘.“‘
Using
Coaxial
{Antenna}
(Good)
DTV.‘TV
C.«’&B$,.E
3
I\N'£’EN
!’~JA
1.
K
Tum
effthe
power
to
the
FHDTV.
V
72.
Cannes:
the
ooaxiaé
{RF)-connecte:>r
from
your
antéhha
br
digitat
eable
to
the
DTWTV
cA3LEfAN'!ENh3A
cunnecier
at
the
rear
ef
the
FHDTV.
Tum
an
the
power
to
the
FHDTV.
Select
DIV
using
the
NPUT
button
on
the
remote
of
side
of
the
FHDTV,
er
directiy
by
pressing
the
TV
buttcn
an
the
Remcte
Control.
'
V
L L
V
13
www.V!ZlO.coarn
PP’
V3268’?
087}
0'7
1

V§ZiO
VO3?9MNO420E
User
Manual
Cormesfirnc;
Ccaaxiai
[RF]
Using
Your
‘Antenna
or
Digitai
Cable
for
Standam
TV
or
DTV
DTVFTV
CABLE
:‘
I'W‘~3TE?‘§'N.£'n
1.
T
um
eff
the
pawerto
the
FHDTV.
2
Cannes:
the
coaxial
(RF)
connector
from
yogr
antenna
or
came
to
the
DTVITV
CABLEIANTENRA
connector
at
Ihe
rear
of
the
FHDTV
3.
Turn
an
ihe
power
to
the
FHDTV.
4.
Select
TV
using
the
WPUT
button
on
the
remote
or
side
of
the
FHDTV,
or
direcfly
by
pressing
the
TV
button
am
the
Remate
Controi.
Using
the
Antenna
er
Cabieihmugh
Your
VGR
8'¥'V2‘TV
C1’-‘ASLE
.-‘
:3.!-£TENN‘i‘~
'1.
Turn
off
the
power
ta
ihe
F-‘HDTV
and
VCR.
2.
Connect
the
“Output
to
TV“,
‘RF
Out”
er
“Anterma
Out"
connector
on
the
rear
sf
your
VCRIO
the
DTVRV
CABLEIANTENNA
connector
at
the
rear
of
the
FHDTV.
Turn
on
the
power
to
the
FHDTV
and
VCR.
Seiect
TV
using
the
MPUT
button
can
the
remoie
«Br
side
of
the
FH{}TV,
or
directiy
by
pressing
the
TV‘
button
on
the
Remote
Centrot.
P?’
Note:
If
you
have
an
off-air
antenna
or
cabins
TV,
connect
it
to
the
‘Antenna
in”
connector
on
the
rear
of
year
VCR.
Version
uzszzoos
19
www.V§Z§O.'com
V V
VIZ687
00’?
T
072

V1210
V03?0MNO42OE
User
afianuai
tionnectinq
Your
DKID
Player’
You
have
several
options
for
connecting
your
DVD
player
to
your
FHDTV
-
HDML
Component,
S-Video
and
Composite
(AV)
inputs.
Based
on
yourmme
theater
configuration,
you
car:
decide
which
option
is
the
fight
one
for
you.
7
Using
HDMI
{Best}
For
optima!
resuiis,
DVD
players
that
have
a
digiiai
inierface
such
as
HUM;
shouid
be
conneciéd
to
the
HDMI
input
on
your
FHDTV.
.
‘
V
HEW
Ci-_‘--:1
mm
V
0,
HDMI
1
1.
1,
Turn
off
your
FHDTV
and
DVD
piayer.
2.
Connect
a
HDMI
cable
to
the
HDM3
output
of
your
DVD
prayer
and
me
ether
end
to
the
HDMI
4
input
(white
color
area)
at
the
rear
ofthe
FHDTV.
3.
Turn
on:
the
power
10
the
FHDTV
and
your
DVD
piayer.
4.
Setect
HDMI
1
using
the
INPUT
button
on
the
remateor
side
«of
the
FHDTV,
or
directiy
by
pressing
the
HDM:
button
on
the
Remote
Gontrot.
Note:
If
HDMI
1
is
being
used,
connect
to
the
HDMI
2
or
HDMI
3‘;'3qrt
instead.
HEM}
Connections
for
DVD
Players
with
BN1:
E
@
0
HDMI
2
L
L
V
R
AUDK3
~11-
Tum
off
your
F-‘HDTV
and
DVD
player.
2.
Using
a
HDM!-DV!
cable,
connect
the
UV!
and
to
your
DVD
piayer
and
the
HUM!
end
to
{he
HEM!
2
input
at
the
rear
of
the
FHDTV.
3.
Connect
the
audio
cables
{white
and
red}
from
the
DV!
audio
output
iackson
the
DVD?piayer
10
the
adjacent
HOME
2
L
and
R
AUDIO
jacks
on
they
back
ofyour
FHDTV.
Tumon
the
power
to
the
F-HDTV
and
your
DVD
player.
Select
HDMI
2
using
the
NPUT
butter:
on
the
remnie
or
side
of
me
FHDTV,
or
directiy
by
pressing
the
HUM!
button
on
the
Remote
Control
‘
33'?‘
Note:
if
HDMI
2
is
being
used,
connect
to
the
HDMI
1
or
HDM!
2
part
instead.
Note:
To
maintain
the
dispiay
quafity,
use
a
V!ZiO
certified
HDW
cabie.
Length
is
avafiabie
up
to
10
meters.
See
www.VlZiO.c0m
or
cat?
$888-WZIOCE
(1-888-8494623)
far,
details.
2:;
www.V1ZiO.com
VIZ687
0073
073
Other manuals for VO370M - 37" LCD TV
2
This manual suits for next models
1
Other Vizio TV manuals

Vizio
Vizio GV46L FHDTV20A_Samsung User manual

Vizio
Vizio D32hn-D1 User manual

Vizio
Vizio SV420 User manual

Vizio
Vizio VX32L User manual

Vizio
Vizio M43-C1 User manual

Vizio
Vizio VX52LF User manual

Vizio
Vizio VO37L FHDTV20A MT5381 De Base AUOT370HW02 VB User manual

Vizio
Vizio M3D550KD User manual

Vizio
Vizio Quantum M Series User manual

Vizio
Vizio VP423 User manual

Vizio
Vizio D50u-D1 User manual

Vizio
Vizio M470SL User manual

Vizio
Vizio D500i-B1 User manual

Vizio
Vizio M190MVOM User manual

Vizio
Vizio V436-G1 User manual

Vizio
Vizio D50-E1 User manual

Vizio
Vizio E471VLE User manual

Vizio
Vizio M420SV User manual

Vizio
Vizio VF550XVT User manual

Vizio
Vizio V556-G1 User manual