vocalFON DA1422 Specification sheet

Get-Started
DA1422
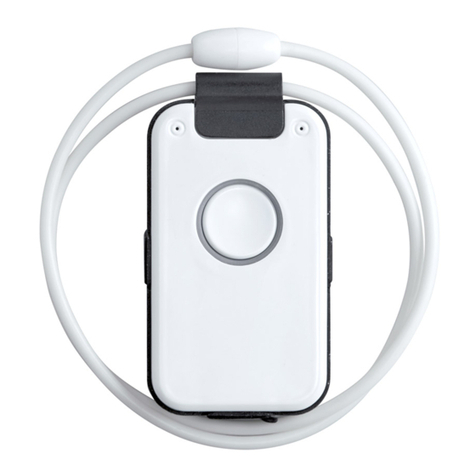
DECT vocalFON
V971
for visually impaired
with clock functionality
OVERVIEW
DA1422 delivers telephone book with 100 entries and time
annoucements via central button.
Telephone Book with 10 Registers and 10 Numbers each
personalized Titles and Names with Voice MMI
select Title and Name within 10 seconds
automatic Call Sequence in case of Smoke Alarm
Reminder Function for Wake-Up, Memos, Time
Voice Assistant in any native language
SET-into-OPERATION step 1
charge device
place charging disk on flat surface (table)
connect charging disc via supplied USB cable
and power plug to 110-230VAC power
place Device for approx. 30 min on charging disc
Pay attention that device is correctly placed (see marking)
Voice Assistant : „Battery is charging“
In case battery is deeply discharged, this message can be
delayed by several seconds
Remark: Note: Device will become warm; this is normal
SET-into-OPERATION step 2
Register to DECT Basisstation
Place Device close to DECT Base Station
Activate „Registration Mode“ of Base Station
Press Call Button of DA1432 : „Registration activated“
Pay attention to further messages of Voice Assistant
Remark : The Device registrates with PIN Code „0000“
In case PIN of Base Station is different you have to registrate
the Device via PC Programm (see CONFIGURATION)
SET-into-OPERATION step 3
check telephone
connection
Call Telephone Home Number with your Mobile Phone
Device must ring. Hook off and check Handsfree Audio
Actual Time must be entered via PC APP
alternatively Actual Time can be set via Remote Control:
make incoming call (Mobile) and enter time via keypad
form : #TIME#mmhh#
hh = hour example 9 o‘clock hh = 09
mm = minute example 45 minutes mm = 45
Positioning Aids for Charge Disk
Please use the included rubber pegs to individually optimize your
placing of the device on the charge disk. Moreover these rubber
pegs prevent the device from accidental shifts.
The use of the rubber pegs is optional They do not have any
functional influence on the charging procedure.
Without prejudice to further possibilities we recommend below
shown positions:

Install PC APP on your Laptop part 1
compatible to WIN PC only
Hint: Close all programs and applictions prior to start installation in order
to avoid that necessary Entry Boxes will be covered
Connect the enclosed USB
stick with your PC and start
SETUP.exe with double click
in register VOCALFON
Please be patient.
This process can take some minutes.
You will get several queries which you please
positively confirm. You will be asked to select
the language of the WIN installer. Make your
choice. Afterwards you have to confirm the
D&A license agreement.
Now the PC APP will be installed.
The USB stick is not necessary anymore.
FUNCTIONAL TESTS
trigger
time announcement
Press Call Button
actual time will be announced
„it is 9:45“
accuracy: +/-2,5 minutes
Outgoing Call method 1
via Call Button
(ex works setup)
wait wait
1 2 3 4
press 2 sec select Register select Name execute Call
1press Call Button till first Register will be announced
2press Call Button repeatedly till wanted Register is announced
wait for announcement „select Name“
3 press Call Button repeatedly till wanted Name is announced
wait for announcement „press Call Button“
4 press Call Button to execute Call
Install PC APP on your Laptop part 2
The installation of the PC APP takes some
minutes. Please be patient.
Finally you have to confirm the completion.
Now you have got a very simple but effective
Configuration Program which you use for
defining all Telephone Numbers and Names of
your choice and settings.
You can open this PC APP by Click on the icon
„vocalFON“ which you can find on Desktop Screen
Open PC APP and connect the device with your PC.
Be sure to use the USB cable of the Charge Disk.
As this USB cable is always used with Charge Disk you
can never loose this cable for future modifications of
the device.
Configure Names and Numbers and operational options.
Please take care to confirm and save all entries with APPLY button (blue
color).The transfer of Audio to your device will take some time
.
Help yourself ?
„Time not available“
Whenever the device is switched off, its internal time gets lost.
You can restore Time again by 2 different methods:
a) by means of PC Program PC APP
b) use an external Call (remote provisioning)
and enter following command which includes actual time
via keypad of external phone
#TIME#hhmm#
hh = hours example 9 o‘clock hh = 09
mm = minutes example 45 minutes mm = 45
enter : #TIME#0945# equal to #8463#0945#
Check Smoke Alarm Detector
Place device on charge disk. This will activate the Smoke Alarm
Detector of the device. Now, press Test Alarm on your Smoke
Detector. Within 2 seconds the device must signalise with Red
Ring LED that it has identified the Smoke Alarm.
Do not worry, the device will not activate the Help Sequence.
Outgoing Call method 2
via Sidekeys
(use PC APP to select method 2 in Register SETTING)
1 2 3
select Register select Name execute Call
1press any sidekey to select Telephone Register
2press other sidekey to select Name
3 press Call Button to execute Call
Other vocalFON Cordless Telephone manuals
