Vogue 361280 Wiring diagram

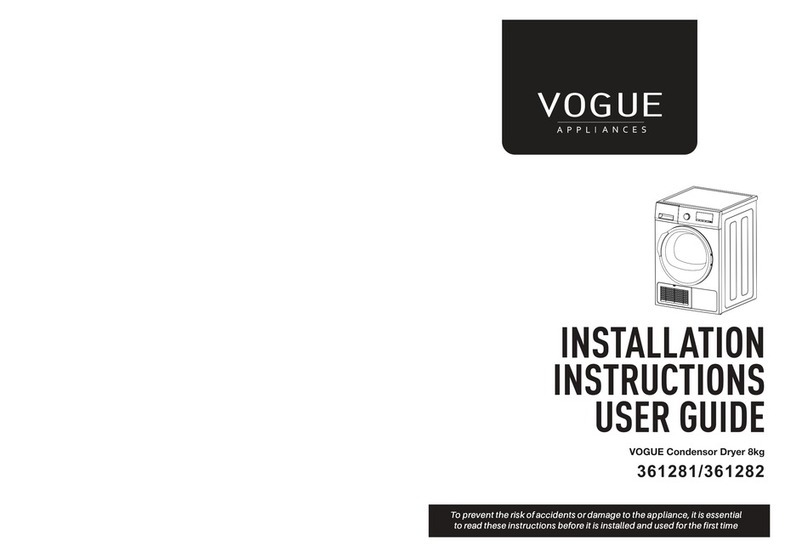
VOGUE Condenser Dryer 8kg
To prevent the risk of accidents or damage to the appliance, it is essential
to read these instructions before it is installed and used for the first time
361280
INSTALLATION
INSTRUCTIONS
USER GUIDE

20
23
5
6
7
12
14
15
18
19
Electric diagram.......................................................24

12
Read and understand thoroughly this safety instructions
before use.The items indicated here are very important safety
precautions,which must be followed.Any failure and losses
caused by ignoring the above mentioned items and cautions
mentioned in the operation and installation instruction are not
covered by our warranty and any liability.
The appliance can be used by children aged from 8 years and above and persons
with reduced physical,sensory or mental capabilities or lack of experience and
knowledge if they have been given supervision or instruction concerning use of the
appliance in a safe way and understand the hazards involved.Children shall not paly
with the appliance.Cleaning and user maintenance shall not be made by children
without supervision.
Children of less than 3 years should be kept away unless continuously supervised.
The rear surface of appliance shall be placed against a wall.
Do not install the appliance close to fire sources or heat sources.
Do not rest any burning candles or cigarettes on the appliance.
Do not install the appliance in places with dampness or suffer from rainfalls,
lest igniting damages or other accidents occur easily due to gathered water
drops on electrical components.
Do not install the dryer in places under direct sunshine, lest the
plastic components and rubber components become aged.
Do not use water shooting at the appliance when cleaning it.
In order to avoid danger of fires caused by excessive drying, do not use the appliance
to dry the following items: Cushions,quilts and the like (these items accumulate heat).
If you have washed your laundry with stain remover, you must execute an extra rinse cycle
before loading your tumble dryer.
Please make sure that no gas lighters or matches have accidentally been left in pockets of
garments to be loaded into appliance.
Items that have been soiled with substances such as cooking oil, acetone, alcohol, petrol, kerosene,
spot removers, turpentine,waxes and wax removers should be washed in hot water with an extra
amount of detergent before being dried in the tumble dryer.
A carpet must not obstruct the openings in the base.
Exhaust air must not be discharged into a flue which is used for exhausting fumes from
appliances burning gas or other fuels.

The lint trap has to be cleaned frequently
Adequate ventilation has to be provided to avoid the back flow of gases into the room from
appliances burning other fuels, including open fires.
Items that have been soiled with substances such as cooking oil, acetone, alcohol, petrol,
kerosene, spot removers, turpentine, waxes and wax removers should be washed in hot water
with an extra amount of detergent before being dried in the tumble dryer.
Remove all objects from pockets such as lighters and matches.
Oil-affected items can ignite spontaneously, especially when exposed to heat sources such
as in a tumble dryer. The items become warm, causing an oxidation reaction in the oil.
Oxidation creates heat. If the heat cannot escape, the items can become hot enough to catch
fire. Piling, tacking or storing oil affected items can prevent heat from escaping and so create
a fire hazard.
If it is unavoidable that fabrics that contain vegetable or cooking oil or have been
contaminated by hair care products be placed in a tumble dryer they should first be washed
in hot water with extra detergent - this will reduce, but not eliminate, the hazard.

5
1
3
4
2
6 7
off
off
1 2 3 4 5 7 8 9 106

The option can be selected in the following programme: “Heavy”, “Strong”,
“ ”.By depressing this button the drying time will be reduced by 10
minutes. The corresponding light illuminates.this option cannot be selected
together with “Delicate Option”.
You can choose different programme base on your different clothes materials.The device
has the function with sensor the moisture in order to automatically adjust the drying time for
optimal drying.This drying system is fit for cottons,synthetics sections and Anti-Bacterial,
silk programme.
After turning on the appliance,the buzzer is off if you do none operation.The
buzzer can be turned on or be turned off during the process.By pressing “Buzzer”
button ,the buzzer will be turned on and the corresponding pilot light comes on.
when the buzzer is on,the signal will sound in the following case:
Open the door during operation.
Take out the condenser during operation.
When the water container is full.
At the end of program after cooling phase.
When the buzzer is on ,if you press the “buzzer” button once more,the buzzer will be switched off.
Depending on the programme,different functions can be combined.These must be selected
after choosing the desired programme and before depressing the Start/Pause button.
e.g.choosing the “Heavy” programme ,”Buzzer” function and “Quick” function can be combined.
When these buttons are pressed,the corresponding pilot lights comes on.When they are pressed
again,the pilot lights go out.
Note:
“ ” is for the “standard cotton programme”.The programme is suitable to dry normal wet
cotton laundry and it is the most efficient programme in terms of energy consumption for drying
wet cotton laundry.
off
off off

24
24
It comes on after each program and also when the water tank is full.which remind you to
empty the water container.Note! Empty the water container after each program to avoid
the alarm when use in next time.
It comes on after each program to remind you to clean the filter.If not clean the filter,the
machine perform well for the next use,but the drying efficiency will be influenced if not
clean the filter for many times.
It can be selected in both cases before and after selecting option programme (Buzzer,Quick,Delicate).
The countdown begins after you have pressed the Start/Pause button and the corresponding light
illuminates.The display shows the remaining time.The remaining time is displayed hour by hour.
If you have selected a delay time by means of the relevant button,the display shows it .The count-
down is displayed hour by hour.Once you press the “Start/Pause” button,the appliance will start the
delayed process.If you want to check the selected programme,press the “Delay Start ” button again.
It shows the duration of the previously selected programme.
If you select other programme becasuse of incorrect operation while the programme is running,the
display shows Ers(error).
These lights indicate the following functions:
“Child Lock” light
This light indicated the appliance is locked.
“Drying” light
This light indicated the appliance is in the drying phase.
“Cooling” light
This light indicates that the appliance is in the cooling phase.At the end of drying,
there is a 10 minutes cooling phase to cool the laundrt.
“End” light
This light is on during the anti-creasing phase after the cooling phase.

The function will be released in the following cases:
Open the door during operation
Take out condenser during operation
Water tank full
You can set again the “Child Lock” function when you restart the machine.
off
off
off

14
recommended loads are not too tightly packed;
Kind Notice:for drying bathrobe and toweling towel,the max load don’t exceed 6kg.
Jeans,work clothes and so on.
Drying thick or multi-layered textiles,
e.g.terry towelling items.For drying individual
items of laundry or for small volumes.
Air Dry
Freshen-up
Silk
Anti-Bacterial
30’,60’,90’
Heavy
Strong
Damp
Iron
Extra
Cupboard
Iron

2.Move three pieces of lock rod,
pull out the condenser
Water container collects all of the water from condenser.Water container need to be emptied
after every drying cycle.If the water container is full, an active programme will break off
the light will comes on and the buzzer sounds.In order to continue the automatically.
programme,the water container must first be emptied.
1.Pull out water container
3.Pull the water container in dryer 4.Press the Start/Pause button
Water container emptied

Use Process
Humidty sensor
In the movement process,this device is used for induction clothing humidity,it means that it must
be carried on cleaning.Major cause of clean is must scour out the calcium oxide boiler which on
the sensor surface up.Clean the sensor in the tumbler (See picture).

change drainpipe
Pull out the water pipe by means of the arrow direction ,Then install the drainpipe.
Such as the pilers can be used if it is difficult to do.
drainpipe
manual
Quantity
This appliance must be earthed.In case of failure or damage,earth can provide a minimum
resistance to reduce the possibility of electric shock.The power cord has grounding wire with
device and power cord with plug.Plug must be inserted into a properly installed and grounded
socket(in accordance with all local rules and standards).
A separate earth is required by some local rules.In that case,you need buy grounding wire,
clips and screws.
Caution!
Before use the machine,the packaging foam must be removed from the drum.
1.Open the loading door.
2.Pull off adhesive strips from inside machine on top of drum.
3.Remove the two packaging foam from the machine.
1.Adjust the level to avoid vibration and noise.
Machine must be placed in a clean place,no water,ice and combustible materials there.
To keep vibration and noise to a minimum when the dryer is in use,it should be placed on a
firm,level surface.
2.If the tumble dryer is not completely leveled,need to adjust the front feet up:to lower the
dryer by turning anti-clockwise and to ascend it by turning clockwise till the appliance will not
shake.
Removing transport safety packaging foam
Water discharge
Procedure
Earth note
2150
40.5
595X630X850
220-240/50
Power(left-on mode)(W)
Power(off mode)(W)
Energy consuption at full load(kWh)
Programme time at full load(min)
0.36
0
6.61
230
two packaging foam
DC-80S1U

21
Appendix
Environment concerns
The hot air emitted by the tumble dryer can reach temperature of up to 60°C.The appliance
must therefore not be installed on floors which are not resistant to high temperatures.
Do not put stacks of blanket or a rope on the floor,
which could generrate some heat and affect the
machine running.
When press on the edge,the machine should not shake up and down.(please check two
direction) when press on the top frame (across the corner),the dryer shakes,need to
re-adjust the adjustable feet.
Check across the corner
The symbol mean :caution,risk of fire
Oil-affected items can ignite spontaneously,especially when exposed to heat sources such as in
a tumble dryer.The items become warm,causing a oxidation reaction in the oil.Oxidation creates
heat.If the heat cannot escape,the items can become hot enough to catch fire. Piling, stacking
or storing oilaffected items can prevent heat from escaping and so create a fire hazard.If it is
unavoidable that fabrics that contain vegetable or cooking oil or have been contaminated by hair
care products be placed in a tumble dryer they should first be washed in hot water with extra
detergent-this will reduce,but not eliminate the hazard.

23
Marking explanation
CE marking
VVolt ~
W Hz
Watt Hertz
Alternating current
risk of fire
Electric diagram
Appendix
Electric diagram
24
To save energy and to help protect the environment,we recommend that you follow these hints:
Try to load the maximum capacity of the machine as small loads are uneconomical.
Do not over-dry laundry,this avoids creasing and saves energy.
Select the drying programme according to the type of laundry and the required degree of dryness.
Clean the filters regularly to avoid excessive drying times and high electricity consumption.
Ventilate the room well.
Table of contents
Other Vogue Dryer manuals
Popular Dryer manuals by other brands

Siemens
Siemens WT46W567GB Operating and installation instructions

GE
GE DMCD330EH Dimensions and installation information

Cissell
Cissell 28ES30 Service manual

Bosch
Bosch WTG8640SEG Installation and operating instructions

Frigidaire
Frigidaire FEQ221CAS2 operating instructions

Ram Air
Ram Air TG-4H Assembly instructions