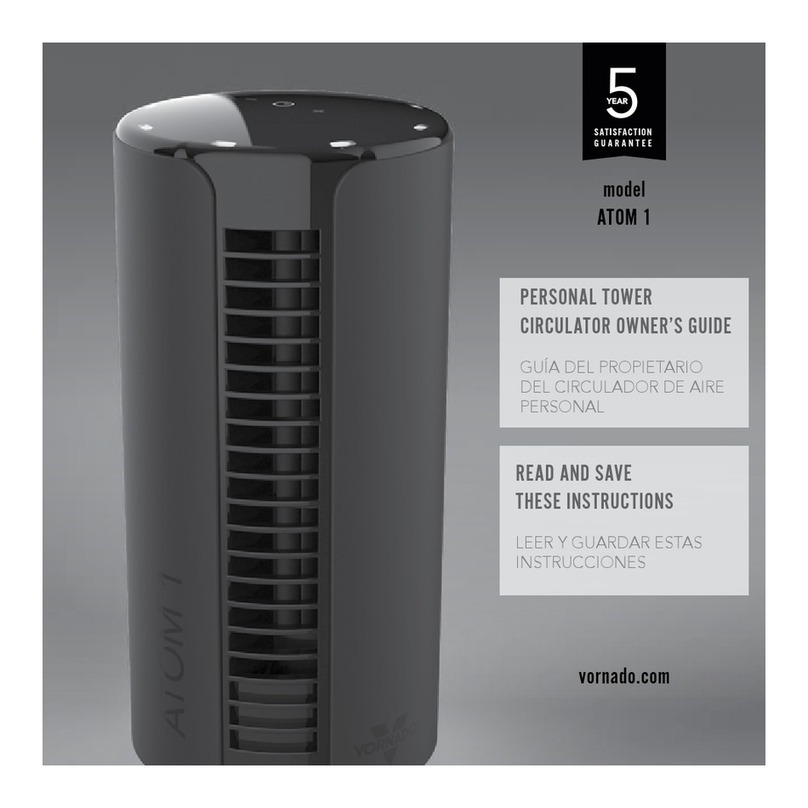
Vornado 173 User manual

READ AND SAVE THESE INSTRUCTIONS
Tower Circulator Owner’s Guide
LEER Y GUARDAR ESTAS INSTRUCCIONES
Guía Del Propietario Del Ventilado Torre
LISEZ ET CONSERVEZ CES INSTRUCTIONS
Mode D’emploi Du Ventilateur Tour Pour Toute La Piéce
www.vornado.com

2English
Designed, engineered and supported in Andover, Kansas.
Pensado, diseñado y respaldado en Andover, Kansas.
Conception, mise au point et soutien technique effectués à Andover, au Kansa
Questions or comments?
¿Prequntas o comentarios?
Questions ou commentaires?
www.vornado.com
800.234.0604

3
English
Español p. 13
Français p. 23
Important Instructions ........................................................................ 4
Vornado V-Flow™ Circulation............................................................. 6
Features and Benefits ......................................................................... 7
Base Assembly Instructions ................................................................ 7
How To Use ......................................................................................... 8
Controls............................................................................................... 9
Operating Tips .................................................................................. 10
Cleaning and Storage ....................................................................... 10
Troubleshooting ............................................................................... 11
Warranty............................................................................................ 12
Contents

4English
This appliance has a polarized plug. (One blade is wider than the other.)
To reduce the risk of electrical shock, this plug is intended to fit in a
polarized outlet only one way. If the plug does not fit fully in the outlet,
reverse the plug. If it still does not fit, contact a qualified electrician. Do
not attempt to defeat this safety feature.
WARNING – To reduce the risk of fire or electrical shock, do not use this
product with any solid state speed control device. To reduce the risk of
fire or electric shock and injury to persons, do not use in a window.
This product employs overload protection (fuse). A blown fuse indicates
an overload or short-circuit situation. If the fuse blows, unplug the product
from the outlet. Replace the fuse as per the user servicing instructions
(follow product marking for proper fuse rating) and check the product.
If the replacement fuse blows, a short-circuit may be present and the
product should be discarded or returned to an authorized service facility
for examination and/or repair.
Do unplug your Tower Circulator before cleaning.
Do clean your Vornado Tower Circulator regularly. Refer to the
CLEANING instructions provided. Never clean the air circulator in any
manner other than as instructed in this manual.
Do Not use gasoline, thinners, solvents, ammonia or other chemicals
for cleaning.
Do Not immerse this product in water or allow water to drip into the
motor housing.
Do Not use near furnaces, fireplaces, stoves or other high-temperature
heat sources.
Do Not position this product too close to draperies because they may
be drawn into the rear grill, cutting off airflow.
Do Not use this product outdoors.
Do Not use this product on wet surfaces.
Do Not use this product in a bathtub or shower.
Do Not use this product if it has a damaged cord or plug. Discard fan or
return to an authorized service facility for examination and/or repair.
Do Not carry this product by the cord, or use the cord as a handle.
Do Not attempt to repair or replace parts.
Do Not run cord under carpeting. Do Not cover cord with throw rugs,
runners, or similar coverings. Do not route cord under furniture or
appliances. Arrange cord away from traffic area and where it will not be
tripped over.
Do Not operate the Tower Circulator on an elevated surface, such as a
shelf or desktop, use only while placed on the floor.
Do use common sense when using this product and/or any electrical
appliance.
User Servicing Instructions
Grasp plug and remove from the receptacle or other outlet device. Do
not unplug by pulling on cord. Open fuse cover (A.) by sliding access
cover on top of attachment plug towards blades. Remove fuse (B.)
carefully by gently prying out the ends of the fuse from the receptacle.
Risk of fire. Replace fuse only with 2.5 Amp, 125 Volt fuse. Contact
Vornado customer service for replacement fuse. Phone: 1-800-234-0604,
email: [email protected]
Install replacement fuse (C.) by first placing the end of the fuse into the
fuse receptacle which is opposite of the blades of the plug, then carefully
push in the other end. Only push against the metal end of the fuse, not
IMPORTANT INSTRUCTIONS
READ ALL INSTRUCTIONS BEFORE USING THIS TOWER.
5
English
the glass center portion. Close the fuse access cover (D.) by sliding the
cover back into the plug until it is completely closed, latches and is flush
with the face of the plug. Risk of fire. Do not replace attachment plug.
Contains a safety device (fuse, AFCI, LCDI) that should not be removed.
Discard product if the attachment plug is damaged.
This unit requires one (1) lithium coin cell battery (CR2032), 3 Volt
(included). DO NOT DISPOSE OF BATTERIES IN FIRE. BATTERIES MAY
EXPLODE OR LEAK.
WARNING: Keep away from children. If swallowed call (800) 222-1222 or
(202)625-3333, in Canada (416) 813-5900.
NOTE: This equipment has been tested and found to comply with
the limits for Class B digital device, pursuant to part 15 of the FCC
Rules. These limits are designed to provide reasonable protection
against harmful interference in a residential installation. This equipment
generates, uses and can radiate radio frequency energy and, if not
installed and used in accordance with the instructions, may cause harmful
interference to radio or television reception, which can be determined by
turning the equipment off and on, the user is encouraged to try to correct
the interference by one or more of the following measures: SAVE THESE INSTRUCTIONS
A. B. C. D.
IMPORTANT INSTRUCTIONS
READ ALL INSTRUCTIONS BEFORE USING THIS TOWER.
Reorient or relocate the receiving antenna.
Increase the separation between the equipment and the receiver.
Connect the equipment into an outlet on a circuit different from that to
which the receiver is connected.
Consult the dealer or an experienced radio/TV technician for help.
This device complies with part 15 of the FCC Rules. Operation is subject
to the following two conditions: (1) This device may not cause harmful
interference, and (2) his device must accept any interference received,
including interference that may cause undesired operation.
This Class B digital apparatus complies with Canadian ICES-003. Cet
appareil numérique de la classe B est conforme à la norme NMB-003 du
Canada.

6English
Vornado V-Flow™Circulation
Typical Tower Fan
Typical tower fans oscillate due
to limited range of air movement.
You feel the airflow for only
seconds at a time.
Trust.
It is said that trust isn’t given, but earned. For decades Vornado has
been earning the trust of our customers by offering them only the
best. Vornado provides the highest level of performance, coupled
with the highest level of support available. Complete satisfaction
with no exceptions – this is Vornado’s promise to you. If you are
not satisfied for any reason, please contact us. Knowledgeable
representatives are available at 1-800-234-0604 from 7:00 AM to 6:00
PM CST. A wealth of additional support is also available online at
www.vornado.com. On behalf of myself and the entire staff at our
Andover, Kansas headquarters – thank you for selecting Vornado.
Sincerely,
Bill Phillips
CEO, Vornado Air
Find our complete product line at www.vornado.com
N
O
O
S
C
I
L
L
A
T
I
O
N
N
E
E
D
E
D
With V-Flow™ Circulation
V-Flow™ Circulation is a wide
span of constant airflow that
allows a Vornado to provide true
whole room circulation.
Maximize your cooling and heating efficiency.

7
English
Benefit
With push-button controls and multiple speeds,
any circulation need will be met.
Timer is easily set to turn off the unit in 1, 2, 4,
or 8 hours. Selected timer setting light will be
illuminated.
Solid base design eliminates the typical wobble
of common tower fans.
Remote control adds convenience, and stores
easily atop the fan using a magnetic cradle.
Saves energy by maximizing the performance
of cooling systems. When you use a Vornado
Tower Circulator, you will not have to set your
summertime thermostat as low.
Features and Benefits
Tools Needed:
Phillips head screwdriver
Base Assembly Instructions
1. Assemble the two base halves together. Position the base
half with the alignment pin, over the other base half with the
alignment sockets. Press the two halves together until flush.
(See Figure A.)
2. Assemble the base to the tower bottom. With the Tower on
its side, align the 4 base sockets onto the Tower bottom pins.
Note; one of the 4 pins is “D” shaped to allow it to fit only
one way. With the base in position, secure the base bottom
to the tower with the 4 Phillip screws provided. Tighten the
screws securely but do not over tighten. (See Figure B)
Figure A Figure B

8English
Positioning Your Circulator
1. Position your Tower Circulator so the airstream has an unobstructed
path from one side of the room to the other, or position the
airstream to blow directly at you for direct cooling.
2. Set to a medium speed and allow a few minutes for an airflow
pattern to be established. (Different airflow patterns can be
established by changing the location, and speed of the Tower
Circulator.)
3. Adjust the speed accordingly until a desired comfort level is
achieved. You will quickly determine the precise amount of
circulation required to maintain your personal comfort in a given
room for the prevailing temperature and humidity conditions. Once
you discover the added comfort of air circulation, you will use your
Vornado Tower Circulator season after season.
How To Use
Placement near a wall or corner
Please position at least 6” away
from walls or other large surfaces.
Doing so will ensure your Tower
Circulator has adequate room
to intake air, providing optimum
performance. (See Figure A)
Directing the airflow
Unlike any other tower
fan, this product creates a
wide span of airflow called
V-Flow™ Circulation. The
Vornado logo indicates
the center point of the
V-Flow™ airstream, and
can be used as a reference
point for positioning the
product in the room. (See
Figure B)
6”
6”
Figure A
Figure B

9
English
Power (A) The unit functions ON and OFF by pressing the
POWER button. Lights on the unit’s control panel indicate the
power is ON.
Fan Speed (B) The fan speed can be adjusted by pressing the
SPEED button. Press the button to switch between the unit’s
speed settings. The turbo (highest) setting is for maximum air
circulation (available on 154 and 184 only). Lights on the unit’s
control panel indicate the selected speed setting.
Timer (C) The unit has an automatic timer to turn the unit OFF
at intervals of 1, 2, 4 or 8 hours. To set the timer, turn the unit
on and select desired speed. Press the timer button until the
desired run time light is illuminated. The unit will continue to
run until that amount of time has expired.
Models 184 and 154
feature 4 speed settings
Models 173, 153 and 143
feature 3 speed settings
Controls
Remote Control This unit comes with a remote control. The
remote control functions are the same as the control panel on
the unit. The remote requires a line-of-sight path to allow for
the signal to be received by the unit. Position the unit so the
receiver lens (located above the Vornado logo) is visible from
the remote control. The remote control can be stored with
the Tower Circulator using the magnetic bowl-shaped cradle
located on the top of the product.
Remote Control Battery The remote control comes with a 3
Volt lithium coin cell battery (CR2032). To install, remove the
battery cover on the bottom of the remote control. Remove any
plastic protection from the battery and place it in the remote
with the + side facing out. Then reposition the cover onto the
bottom of the remote. If your remote does not work, please try
replacing with a new 3 Volt CR2032 battery.
1 4
3
2
A
B
C

10 English
How to Clean
Your Tower Circulator has no user
serviceable parts. Do not disassemble
the unit. This will void your warranty. If
service is required, return your circulator
to Vornado (see WARRANTY for
instructions on page 12).
The motor is permanently lubricated
and requires no oiling.
Because your Tower Circulator moves a substantial amount of air, it
will need regular cleaning. To clean follow these simple instructions:
1. Unplug the unit.
Note: Do not use gasoline, thinners, solvents or other
chemicals for cleaning.
2. Use the brush attachment on your household vacuum
cleaner to vacuum any accumulated dust off the Front
Angled Outlet Grill and Side Inlet Grill. Wipe down the
entire surface with a soft cloth.
Storage
It is recommended to store your Tower Circulator by following these
instructions:
1. Unplug power cord and bundle loosely.
2. Thoroughly clean your Tower Circulator (see instructions above).
3. Cover, or place back in retail carton if available. This will prevent
the unit from accumulating dust overtime.
4. Store unit in a cool and dry location.
Getting the Most From Your Circulator
Thank you for your purchase. It’s important for you to know that this
product functions very differently than typical tower fans you may
have used in the past. Here are a few things to keep in mind:
Expect Powerful Circulation
Your Tower Circulator is designed to move considerably more air than
a traditional tower fan. Consider the following as you adjust product
settings.
Operating Tips
Ultra-high volume airflow. Increased sound lev-
els may be perceptible due to airflow volume
and velocity.
High volume airflow. Rapidly moves air across
the room for efficient cooling. Increased sound
levels may be perceptible due to airflow volume
and velocity.
Superior circulation power compared to tradi-
tional tower fans on their high setting. May be
preferred for day-to-day use.
Near-silent operation while offering steady cir-
culation.
Turbo Setting
(184 and 154 only)
High Setting
Middle Setting(s)
Low Setting
Cleaning and Storage
View cleaning tutorial
on your mobile device.

11
English
Troubleshooting
Unit is not plugged in. Plug Power Cord into electrical outlet.
Unit is damaged or in need of repair. Cease usage and unplug. Contact Consumer Service for assistance.
Fuse needs to be replaced. See IMPORTANT INSTRUCTIONS for how to replace the fuse or contact Consumer Service.
Ensure unit is set to highest setting for maximum air circulation.
Allow the unit to fully circulate the air throughout the room, this may take several minutes.
Ensure all air inlets and outlet grill are unobstructed.
The battery is packaged separately and may not be installed. Refer to CONTROLS - Remote Control Battery on page 9
for instructions.
The battery is dead. Replace with new 3 volt CR2032 battery. Refer to CONTROLS - Remote Control Battery on page 9
for instructions.
The remote requires a line-of-sight path to allow for the signal to be received by the unit. Position the unit so the
receiver lens (located above the Vornado logo) is visible from the remote control.
Unit fails to
power on.
Unit is not pro-
ducing sufficient
amount of air.
Remote Control
is not working.
Problem Possible Cause and Solution

12 English
Tower Circulator • 5 Year Limited Warranty
Vornado Air LLC (“Vornado”) warrants to the original consumer or purchaser this
Vornado®Tower Circulator (“Product”) is free from defects in material or workmanship
for a period of five (5) years from the date of purchase, depending on model. If any such
defect is discovered within the warranty period, Vornado, at its discretion, will repair or
replace the Product at no cost. Repairs not covered by the warranty or outside the warranty
period will require a fee to cover the cost of materials, labor, handling and shipping.
This warranty does not apply to defects resulting from abuse of the Product, modification,
alteration, repair or service of the Product by anyone other than Vornado, mishandling,
improper maintenance, commercial use of the Product, damages which occur in shipment
or are attributed to acts of God.
REPAIR OR REPLACEMENT AS PROVIDED UNDER THIS WARRANTY IS THE EXCLUSIVE
REMEDY OF THE CONSUMER. VORNADO SHALL NOT BE LIABLE FOR ANY INCIDEN-
TAL OR CONSEQUENTIAL DAMAGES FOR BREACH OF ANY EXPRESS OR IMPLIED
WARRANTY ON THIS PRODUCT. EXCEPT TO THE EXTENT PROHIBITED BY APPLICABLE
LAW, ANY IMPLIED WARRANTY OF MERCHANTABILITY OR FITNESS FOR A PARTICULAR
PURPOSE ON THIS PRODUCT IS LIMITED IN DURATION TO THE DURATION OF THIS
WARRANTY.
Some states do not allow the exclusion or limitation of incidental or consequential dam-
ages, or allow limitations on how long an implied warranty lasts, so the above limitations or
exclusions may not apply to you. This warranty gives you specific legal rights, and you may
have other rights that vary from state to state.
For warranty or repair service, call 1-800-234-0604 or email
or include your Product’s model number and serial number, as well as your name, address,
city, state, zip code and phone number when contacting Vornado for warranty service.
After receiving the RA form, ship your Product to:
Vornado Air LLC
Attn: Warranty & Repair
415 East 13th Street
Andover, KS 67002
For your convenience, please have your model number and serial number when contact-
ing Vornado with service inquiries. To assure proper handling, packages must be clearly
marked with the RA number. Packages not clearly marked with the RA number may be
refused at the receiving dock.
Please allow 1-2 weeks for repair and return of your Product after the Product is received.
For your records: Staple or attach your original sales receipt to this Owner’s Guide. Please
also write your products’s serial number below (located on product specs decal).
Serial No. ______________________________________
Product registration available online at www.vornado.com
© 2012 Vornado Air LLC Andover, KS 67002
Patents Pending. Specifications subject to change without notice.
Vornado®is a trademark owned by Vornado Air LLC.
Designed, engineered and supported in Andover, KS.
Manufactured in China.

13
Español
Instrucciones Importantes ................................................................ 14
Circulacion V-Flow™Vornado .......................................................... 16
Características y Beneficios .............................................................. 17
Instrucciones De Montaje Base ........................................................ 17
Cómo Usar ........................................................................................ 18
Controles........................................................................................... 19
Consejos De Operación.................................................................... 20
Limpieza Y Almacenamiento............................................................. 20
Resolución De Problemas ................................................................. 21
Garantía............................................................................................. 22
Contenido

14 Español
Este artefacto posee un enchufe polarizado. (Una pata es más ancha que
la otra.) Para reducir el riesgo de descarga eléctrica, esta clavija tiene la
intención de entrar en una toma de corriente polarizada solamente de
una manera. Si la clavija no entra totalmente en la toma con corriente,
ponga la clavija del otro lado. Si todavía no entra, comuníquese con
un electricista calificado. No intente derrotar esta característica de
seguridad.
ADVERTENCIA: Para reducir el riesgo de incendio o electrócucion,
absténgase de usar este ventilador con un dispositivo de control de
velocidad de estado solidó. Para minimizar el riesgo de incendio,
electrocución y lesiones personales, absténgase de usar este ventilador
en una ventana.
Este producto posee protección contra sobrecargas (fusible). Un fusible
quemado indica que se ha producido una sobrecarga o un cortocircuito.
Si el fusible se quema, desconecte el producto del tomacorriente.
Reemplace el fusible de acuerdo a las instrucciones de reparación para
el usuario (tenga en cuenta las indicaciones del producto para obtener
información sobre el valor correspondiente del fusible) y verifique el
producto. Si el fusible de repuesto se quema, es posible que ocurra un
cortocircuito. En ese caso, el producto debe desecharse o ser devuelto
a un representante de servicio autorizado para que examine o repare el
producto.
Desconecte su circulado antes de limpiar.
Limpie su Circulador de Aire Vornado con regularidad. Consulte las
instrucciones de LIMPIEZA que se proporcionan. Nunca limpie el
circulador de aire de ninguna otra manera que la que se instruye en
este manual.
NO use gasolina, solventes, amoníacos u otros químicos para limpiar.
NO sumerja este producto en agua o permita que gotee agua en la
caja del motor.
NO lo use cerca de calderas, chimeneas, hornos u otras fuentes de
calor de alta temperatura.
NO coloque este producto demasiado cerca de cortinas porque éstas
pueden ser arrastradas hacia la rejilla posterior, cortando el flujo de
aire.
NO use este producto al aire libre.
NO use este producto sobre superficies húmedas.
NO use este producto en una tina de baño o regadera.
NO use este producto si tiene un cable o clavija dañados.
NO jale este producto por el cable, o use el cable como asa.
NO intente reparar o reemplazar partes.
NO coloque el cable debajo de una alfombra. No cubra el cable con
alfombras, tapetes u otros cobertores similares. No pase el cable por
debajo de muebles o electrodomésticos. Coloque el cable de manera
que quede alejado de zonas transitadas o donde pueda ocasionar
tropiezos.
NO use el circulador Tower sobre una superficie elevada, tal como una
repisa o un escritorio. Úselo únicamente sobre el piso.
Use el sentido común cuando use este producto y/o cualquier aparato
eléctrico.
Instrucciones de reparación
Tome el enchufe y quítelo del receptáculo u otro aparato de conexión.
No lo desenchufe tirando del cable. Abra la cubierta del fusible (A. )
deslizando la tapa en la parte superior del enchufe hacia el lado de las
patas. Remueva el fusible cuidadosamente (B.) haciendo una leve palanca
con los extremos del fusible para quitarlo del receptáculo.
INSTRUCCIONES IMPORTANTES
LEA TODAS LAS INSTRUCCIONES ANTES DE USAR ESTE TORRE.

15
Español
Riesgo de incendio. Reemplace el fusible únicamente con un fusible de
2.5 Amp, 125 Voltios. Comuníquese con el servicio de atención al cliente
de Vornado para obtener un fusible de repuesto. Teléfono: 1-800-234-
Para instalar el fusible de repuesto (C.), coloque primero el extremo del
fusible en el receptáculo que está frente a las patas del enchufe y luego
presione el otro extremo hacia adentro. Presione solamente el extremo
metálico del fusible, no la parte de vidrio central. Coloque la tapa de
acceso al fusible (D.) deslizando la cubierta sobre el enchufe hasta que
esté completamente cerrada, trabada y al mismo nivel que la cara del
enchufe. Riesgo de incendio. No reemplace el enchufe. Contiene un
dispositivo de seguridad (fusible, AFCI, LCDI) que no debe quitarse.
Deseche el producto si el enchufe está dañado.
Esta unidad lleva una (1) batería plana de litio (CR2032) de 3 voltios
(incluida). NO ARROJE LAS BATERÍAS EN EL FUEGO. LAS BATERÍAS
PUEDEN EXPLOTAR O FILTRARSE.
ADVERTENCIA: Mantenga lejos del alcance de los niños. En caso de
ingesta, llame al (800)222-1222 o (202)625-3333, en Canadá (416)813-5900.
GUARDE ESTAS INSTRUCCIONES
A. B. C. D.
INSTRUCCIONES IMPORTANTES
LEA TODAS LAS INSTRUCCIONES ANTES DE USAR ESTE TORRE.
NOTA: Este equipo ha sido evaluado y se determinó que cumple con los
límites del dispositivo digital Clase B en virtud de la parte 15 de las Reglas
FCC. Estos límites están diseñados para proporcionar una protección
razonable contra la interferencia nociva en una instalación residencial.
Este equipo genera, utiliza y puede irradiar energía de radiofrecuencia
y, si no se instala y utiliza de acuerdo con las instrucciones, puede causar
interferencia nociva en la recepción de radio o televisión, lo que puede
determinarse por el encendido y apagado del equipo. Se aconseja al
usuario que intente corregir la interferencia de la siguiente forma:
Reoriente o reubique la antena de recepción.
Aumente la distancia entre el equipo y el receptor.
Conecte el equipo en el tomacorriente de un circuito diferente al cual
está conectado el receptor.
Consulte al distribuidor o un técnico experimentado en radio/TV para
recibir ayuda.
Este dispositivo cumple con la parte 15 de las Reglas FCC. El
funcionamiento se encuentra sujeto a las dos condiciones siguientes:
(1) Este dispositivo puede no causar interferencia nociva, y (2) este
dispositivo debe aceptar toda interferencia recibida, incluida la
interferencia que puede causar un funcionamiento indeseado.
Este aparato digital Clase B cumple con la norma canadiense ICES-003.
Cet appareil numérique de la classe B est conforme à la norme NMB-003
du Canada.

16 Español
Confianza.
Se dice que la confianza no se regala, sino que se gana. Durante
décadas Vornado se ha ganado la confianza de nuestros clientes
ofreciéndoles sólo lo mejor. Vornado brinda el mayor nivel de
rendimiento combinado con el mayor nivel de soporte disponible.
Satisfacción total sin excepciones; esta es la promesa que le realiza
Vornado. Si usted no está satisfecho por algún motivo, por favor
contáctenos. En el 1-800-234-0604 de 7:00 AM a 6:00 PM CST
encontrará representantes expertos. En www.vornado.com también
encontrará abundante soporte adicional disponible. En nombre
mío y de todo el personal de nuestra sede de Andover, Kansas le
agradecemos por elegir Vornado.
Cordialmente,
Bill Phillips
CEO, Vornado Air
Encuentre nuestra línea de productos completa en www.vornado.com
Circulacion V-Flow™
Vornado
Los Típicos Ventilador
Los típicos ventiladores torre
oscilan debido a la cantidad
limitada de circulación de aire. El
flujo de aire se siente solamente
durante algunos segundos.
N
O
O
S
C
I
L
L
A
T
I
O
N
N
E
E
D
E
D
Circulación V-Flow™
La Circulación V-Flow™ genera
un gran flujo de aire de manera
constante, lo que permite que
Vornado brinde una verdadera
circulación en todo el ambiente.
Maximice su eficacia de calefacción y refrigeración.

17
Español
Características y Beneficios
Beneficio
Con múltiples velocidades, cualquier necesidad
es circulación será cubierta.
El temporizador se ajusta fácilmente para que el
ventilador Tower se apague en 1, 2, 4 u 8 horas.
El diseño sólido de la base elimina el tambaleo
típico de los ventiladores torre comunes.
El control remoto suma comodidad y se puede
guardar fácilmente encima del ventilador
mediante un soporte magnético.
Maximice su eficacia de refrigeración. Ahorra
energía durante todo el año.
Herramientas necesarias:
Destornillador Phillips
1. Ensamble las dos partes de la base. Coloque la parte de
la base que posee la clavija de alineamiento sobre la otra
parte de la base que posee el casquillo de alineamiento.
Presione las dos partes hasta que se nivelen. (Ver figura A.)
2. Ensamble la base con la parte inferior de la torre. Coloque
la torre sobre la base y alinee los 4 casquillos de la base
con las clavijas de la parte inferior de la torre. Nota: una
de las 4 clavijas tiene forma de “D” para que se encastre
de una única forma. Con la base ya colocada, sujete la
parte inferior de la base a la torre con los 4 tornillos Phillips
proporcionados. Ajuste bien los tornillos, pero no los ajuste
demasiado. (Ver figura B.)
Figura A Figura B
Instrucciones De Montaje Base

18 Español
Ubicación Del Circulador De Aire
1. Coloque el circulador de aire Tower de formal tal que la corriente de aire
realice un recorrido sin obstáculos desde un lado del ambiente hacia el
otro, o coloque la corriente de aire directamente hacia usted para lograr
un enfriamiento directo.
2. Fije la velocidad en posición media y déjela durante algunos minutos
para que se cree un patrón de flujo de aire. (Los diferentes patrones de
flujo de aire se pueden crear cambi-ando la ubicación y la velocidad del
circulador de aire.)
3. Ajuste la velocidad de acuerdo a eso hasta que se logre un nivel de
comodidad deseado. Usted determinará rápidamente la cantidad
precisa de circulación requerida para mantener su comodidad personal
en un cuarto grado para las condiciones de temperatura y humedad
prevalecientes. Una vez que descubra la comodidad agregada de la
circulación de aire e, usted usará su Circulador de Aire Vornado estación
tras estación.
Cómo Usar
Ubicación cerca de una pared o
esquina
Coloque el producto alejado 6
pulgadas como mínimo de pare-
des u otras superficies amplias.
Esto garantizará que el circulador
de aire de torre tenga espacio su-
ficiente para la entrada de aire, lo
que optimizará el funcionamiento.
(Ver Figura A.)
Dirección del flujo de aire
A diferencia de otros ven-
tiladores de torre, este
producto crea un amplio
espacio de flujo de aire
llamado Circulación V-
Flow™. El logotipo de
Vornado indica el punto
central de la corriente de
aire V-Flow™ y se puede
utilizar como un punto de
referencia para ubicar el
producto en una habit-
ación. (Ver Figura B.)
6”
6”
Figura A
Figura B

19
Español
Controles
ENERGÍA (A) Al presionar el botón POWER (energía), la unidad se
enciende (ON) y se apaga (OFF). La luz encendida en el panel de
control de la unidad indica que la unidad está encendida.
VELOCIDAD DEL VENTILADOR (B) La velocidad del ventilador se
puede ajustar con el botón SPEED (velocidad). Presione el botón para
cambiar las opciones de velocidad de la unidad. La función turbo (la
más alta) es para una máxima circulación de aire (disponible solo en
154 y 184). La luz encendida en el panel de control de la unidad indica
la opción de velocidad seleccionada.
TEMPORIZADOR (C) La unidad posee un temporizador automático
para apagar la unidad en intervalos de 1, 2, 4 u 8 horas. Para
configurar el temporizador, encienda la unidad en la velocidad
deseada, presione el botón TIMER (temporizador) hasta que se
encienda la hora deseada. La unidad seguirá funcionando hasta que
transcurra dicho periodo de tiempo.
CONTROL REMOTO Esta unidad viene con un control remoto. Las
funciones del control remoto son las mismas funciones que posee el
panel de control de la unidad. El control remoto necesita una línea de
visión para permitir que la unidad reciba la señal. Coloque la unidad
de forma tal que el lente receptor pueda verse desde el control
remoto. Para guardar el control remoto con la unidad, colóquelo
sobre la unidad.
BATERÍA DEL CONTROL REMOTO El control remoto viene con una
batería plana de litio de 3 voltios (CR2032). Para colocar la batería,
quite la tapa de la batería de la parte inferior del control remoto.
Quite el protector plástico de la batería y colóquela en el control
remoto con el lado + hacia fuera. Luego, coloque nuevamente la tapa
en la parte inferior del control remoto. Si el control remoto deja de
funcionar, coloque una nueva batería CR2032 de 3 voltios.
El modelo 184 y 154
característica 4 ajustes de
la velocidad.
El modelo 173, 153 y 143
característica 3 ajustes de
la velocidad.
1 4
3
2
ENERGÍA
VELOCIDAD DEL
VENTILADOR
TEMPORIZADOR
CONTROL REMOTO
A
B
C
This manual suits for next models
5
Table of contents
Languages:
Other Vornado Fan manuals

Vornado
Vornado Zippi User manual

Vornado
Vornado 693DC User manual

Vornado
Vornado PIVOT 3U User manual

Vornado
Vornado 5303DC User manual

Vornado
Vornado VFAN ALCHEMY User manual

Vornado
Vornado EXPAND4 User manual

Vornado
Vornado OSCR37 User manual

Vornado
Vornado 723 User manual

Vornado
Vornado VFANJR User manual

Vornado
Vornado PIVOT User manual

Vornado
Vornado PIVOTC User manual

Vornado
Vornado 693DC User manual

Vornado
Vornado 143 User manual

Vornado
Vornado Zippi User manual

Vornado
Vornado PIVOTC User manual

Vornado
Vornado VFAN User manual

Vornado
Vornado 660 AE User manual

Vornado
Vornado Breesi LS User manual

Vornado
Vornado 133DC User manual

Vornado
Vornado 133 User manual